

DIY Carpet Cleaning Solution: Are you tired of staring at stubborn stains on your beloved carpets? Do you cringe every time someone spills something, knowing the expensive cleaning bill that awaits? Well, fret no more! I’m about to share a game-changing secret that will not only save you money but also give you the satisfaction of creating a sparkling clean home with your own two hands.
For centuries, people have sought effective and affordable ways to maintain their homes. From ancient civilizations using natural remedies to clean rugs to modern-day innovations, the quest for a perfect cleaning solution has been a constant. Today, with growing awareness of harsh chemicals and their impact on our health and the environment, the desire for natural, DIY alternatives is stronger than ever. That’s where this DIY carpet cleaning solution comes in!
Let’s face it, professional carpet cleaning can be a significant expense, and store-bought cleaners often contain ingredients we’d rather avoid. This DIY trick is a lifesaver because it empowers you to tackle those unsightly stains with ingredients you likely already have in your pantry. Imagine the peace of mind knowing exactly what’s going onto your carpets, especially if you have kids or pets. Plus, it’s incredibly satisfying to see those stains disappear thanks to your own clever concoction. So, are you ready to ditch the expensive cleaners and embrace a natural, effective, and budget-friendly way to keep your carpets looking their best? Let’s get started!
DIY Carpet Cleaning Solution: Save Money and Freshen Up Your Home!
Hey everyone! Are you tired of shelling out big bucks for professional carpet cleaning or those expensive store-bought solutions? I know I was! That’s why I started experimenting with making my own carpet cleaner, and let me tell you, the results have been amazing. Not only is it incredibly cost-effective, but it’s also much gentler on your carpets and the environment. Plus, you know exactly what’s going into it – no harsh chemicals or mystery ingredients!
This guide will walk you through creating a powerful and effective DIY carpet cleaning solution using ingredients you probably already have in your pantry. Let’s get started!
Gathering Your Supplies
Before we dive into the mixing process, let’s make sure we have everything we need. This will make the whole process smoother and more efficient.
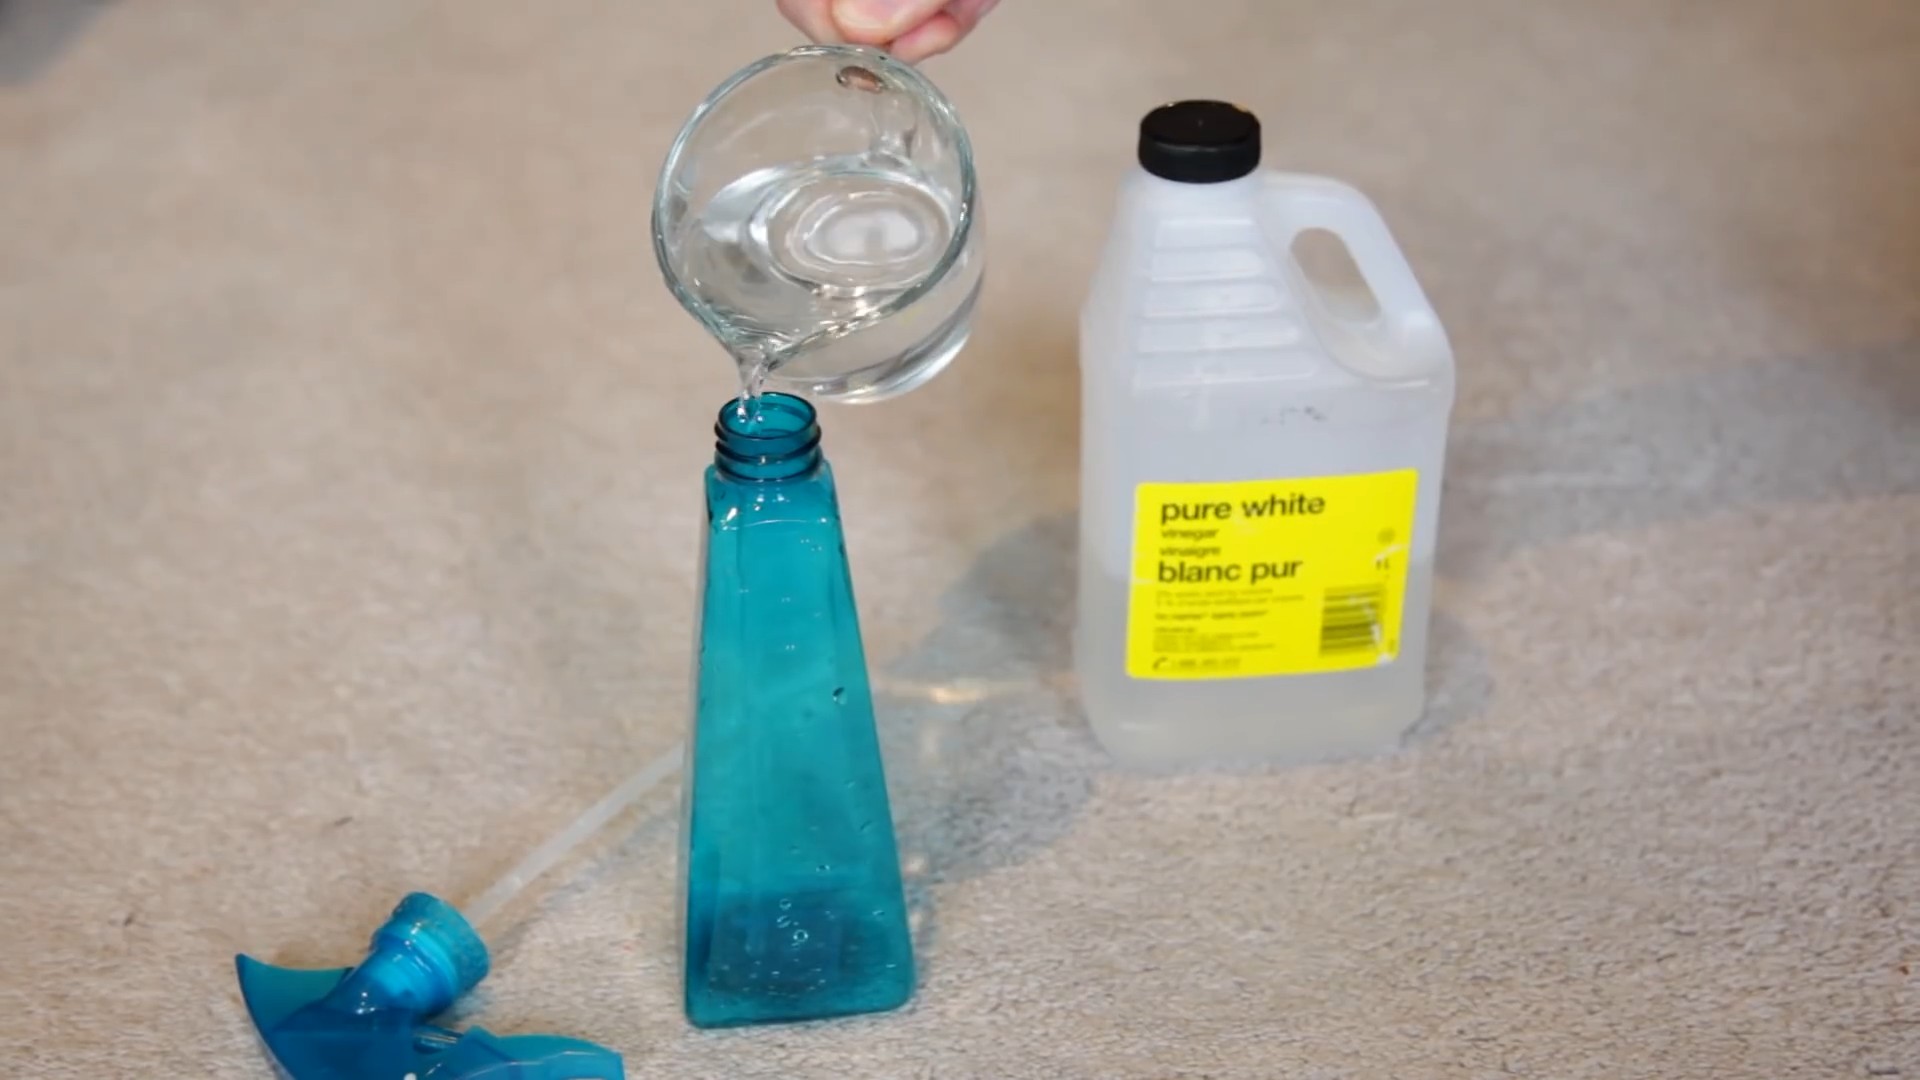
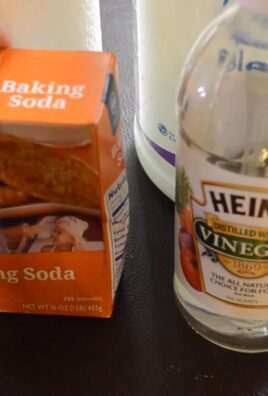
* **White Vinegar:** This is our main cleaning agent. Vinegar is a natural disinfectant and deodorizer, and it helps to break down dirt and grime.
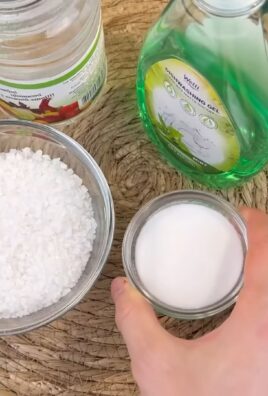
* **Baking Soda:** Baking soda is a fantastic deodorizer and helps to lift stains. It also adds a bit of scrubbing power to the solution.
* **Dish Soap (Clear, Mild):** A small amount of dish soap helps to emulsify the dirt and grease, making it easier to remove. Make sure to use a clear, mild dish soap to avoid any unwanted dyes or harsh chemicals that could damage your carpet.
* **Essential Oils (Optional):** If you want to add a pleasant scent to your carpet, essential oils are a great option. Lavender, lemon, and tea tree oil are all good choices.
* **Warm Water:** Warm water helps to dissolve the ingredients and activate their cleaning power.
* **Spray Bottle or Carpet Cleaning Machine Reservoir:** Depending on how you plan to use the solution, you’ll need either a spray bottle for spot cleaning or the reservoir of your carpet cleaning machine.
* **Measuring Cups and Spoons:** Accurate measurements are important for creating an effective cleaning solution.
* **Clean Cloths or Sponges:** For spot cleaning, you’ll need clean cloths or sponges to apply the solution and blot up the dirt.
* **Vacuum Cleaner:** Vacuuming before and after cleaning is essential for removing loose dirt and debris.
Mixing the Magic: The DIY Carpet Cleaning Solution Recipe
Okay, now for the fun part! Here’s the recipe I’ve perfected over time. It’s simple, effective, and smells great (if you choose to add essential oils, of course!).
1. **Prepare Your Container:** Choose the appropriate container based on your cleaning method. If you’re using a spray bottle for spot cleaning, grab that. If you’re using a carpet cleaning machine, get its reservoir ready.
2. **Combine the Ingredients:** This is where the magic happens! Here’s the basic recipe:
* **For Spot Cleaning (Spray Bottle):**
* 1/2 cup white vinegar
* 1 tablespoon baking soda
* 1 teaspoon clear, mild dish soap
* 2 cups warm water
* 5-10 drops of your favorite essential oil (optional)
* **For Carpet Cleaning Machine:**
* 1 cup white vinegar
* 2 tablespoons baking soda
* 2 teaspoons clear, mild dish soap
* 1 gallon warm water
* 15-20 drops of your favorite essential oil (optional)
3. **Mix Thoroughly:** Gently stir the ingredients together until the baking soda is completely dissolved. Be careful, as the baking soda and vinegar will react and create some fizzing. Don’t worry, that’s normal!
4. **Transfer to Your Container:** Carefully pour the mixture into your spray bottle or carpet cleaning machine reservoir.
Putting Your DIY Solution to Work: Cleaning Your Carpets
Now that you have your amazing DIY carpet cleaning solution, it’s time to put it to work! Here’s how to use it effectively:
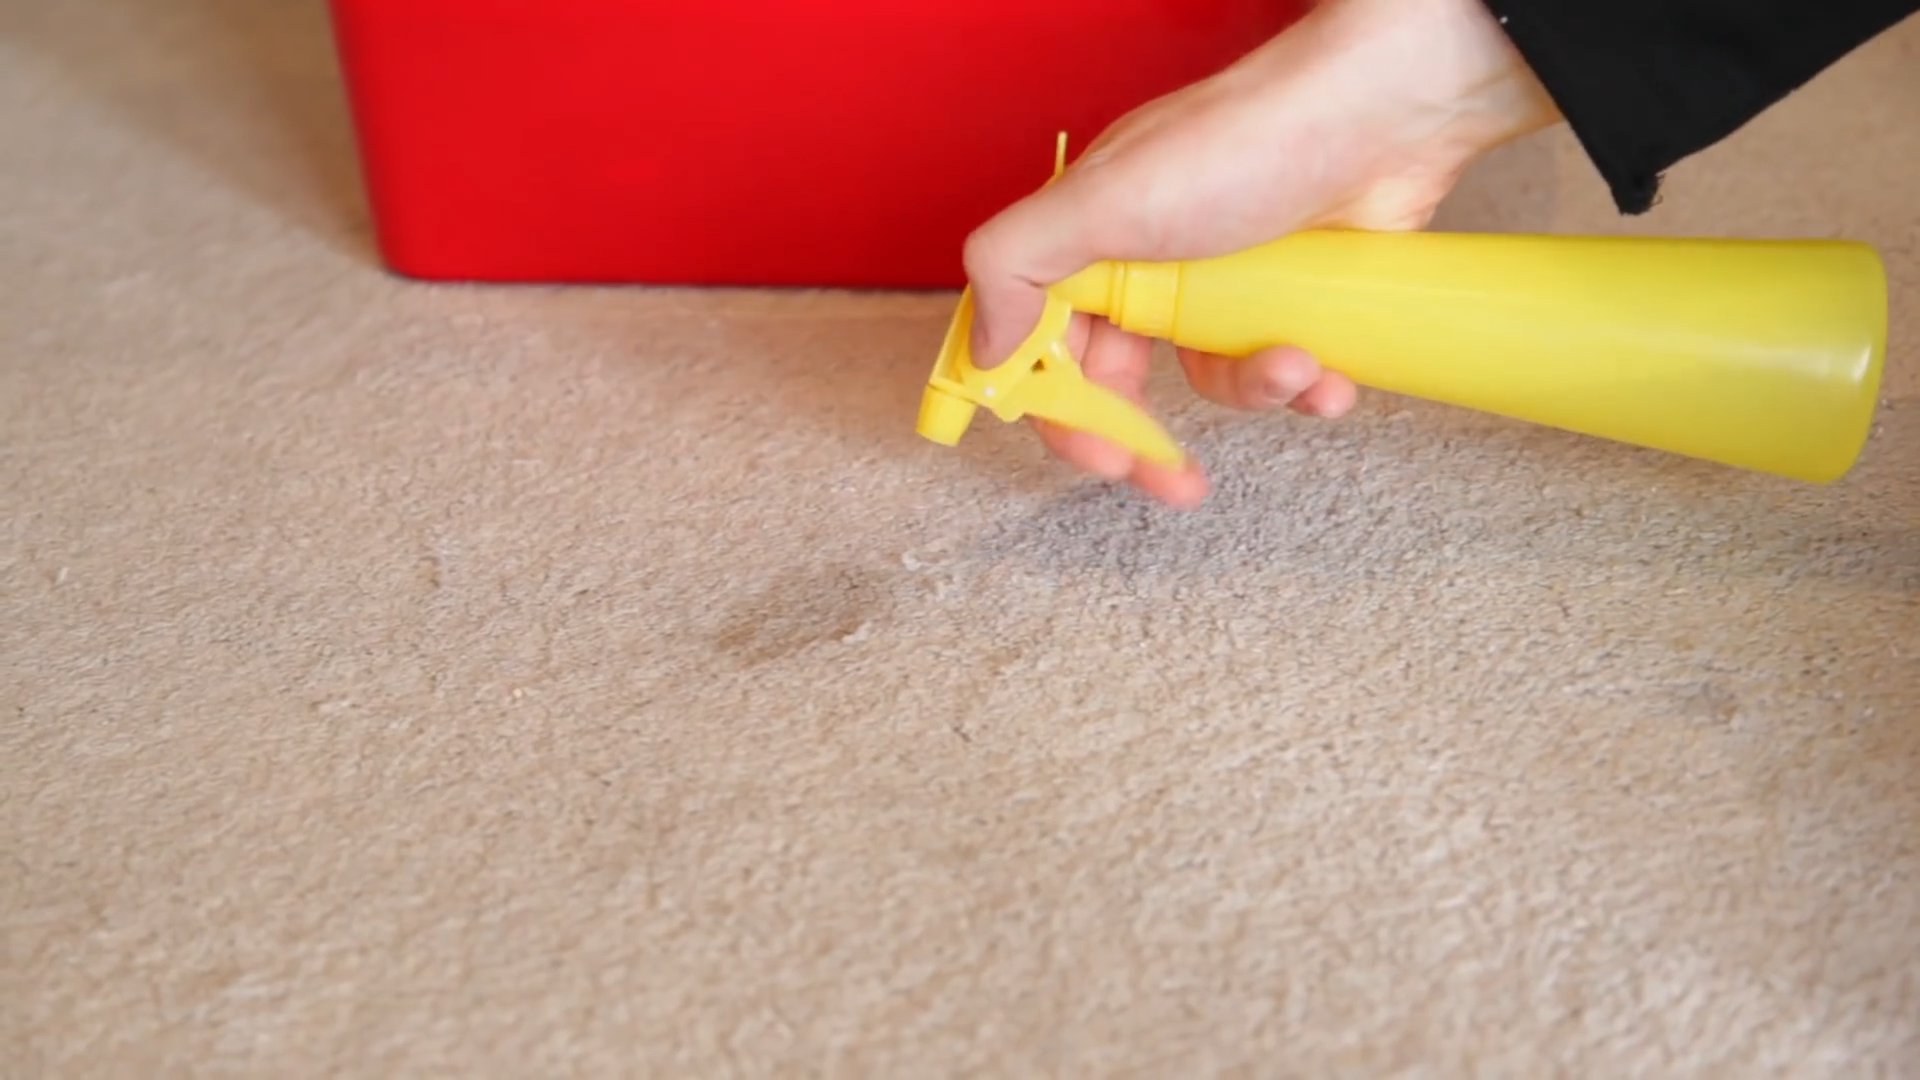
Spot Cleaning
1. **Vacuum the Area:** Before you start, thoroughly vacuum the area you want to clean to remove any loose dirt and debris.
2. **Test in an Inconspicuous Area:** Always test your cleaning solution in a hidden area of your carpet first to make sure it doesn’t cause any discoloration or damage. Apply a small amount of the solution, let it sit for a few minutes, and then blot it up with a clean cloth. Check the area for any adverse reactions.
3. **Apply the Solution:** Spray the cleaning solution directly onto the stain, making sure to saturate the area.
4. **Let it Sit:** Allow the solution to sit on the stain for 5-10 minutes to allow it to penetrate and break down the dirt.
5. **Blot, Don’t Rub:** Using a clean cloth or sponge, gently blot the stain from the outside in. Avoid rubbing, as this can spread the stain and damage the carpet fibers.
6. **Rinse (Optional):** If you want to rinse the area, you can use a clean cloth dampened with plain water to blot up any remaining residue.
7. **Dry the Area:** Place a clean, dry towel over the cleaned area and press down to absorb any excess moisture. You can also use a fan to speed up the drying process.
8. **Vacuum Again:** Once the area is completely dry, vacuum it again to fluff up the carpet fibers.
Carpet Cleaning Machine
1. **Prepare Your Carpet:** Before you start, move any furniture out of the room and vacuum the entire carpet thoroughly.
2. **Fill the Reservoir:** Fill the carpet cleaning machine reservoir with your DIY cleaning solution.
3. **Test in an Inconspicuous Area:** As with spot cleaning, always test the solution in a hidden area of your carpet first.
4. **Clean Your Carpet:** Follow the instructions for your specific carpet cleaning machine. Generally, you’ll want to make slow, overlapping passes over the carpet, allowing the machine to spray the solution and extract the dirty water.
5. **Empty and Refill:** Empty the dirty water tank as needed and refill the clean water tank with more cleaning solution.
6. **Rinse (Optional):** Some carpet cleaning machines have a rinse setting. If yours does, you can use it to rinse the carpet with plain water after cleaning. This will help to remove any remaining residue.
7. **Dry the Carpet:** Open windows and doors to ventilate the room and speed up the drying process. You can also use fans to circulate the air. Avoid walking on the carpet until it is completely dry.
8. **Vacuum Again:** Once the carpet is completely dry, vacuum it again to fluff up the fibers and remove any remaining dirt or debris.
Important Considerations and Tips
* Always test in an inconspicuous area first! I can’t stress this enough. Different carpets react differently to cleaning solutions.
* Don’t over-saturate your carpet. Too much moisture can lead to mold and mildew growth.
* Use a clear, mild dish soap. Avoid dish soaps with dyes or strong fragrances, as these can damage your carpet.
* Adjust the recipe to your needs. If you have particularly stubborn stains, you may need to increase the amount of vinegar or baking soda in the solution.
* Essential oils are optional, but they can add a pleasant scent. Lavender, lemon, and tea tree oil are all good choices.
* Vacuum regularly to prevent dirt from building up in your carpet.
* Consider a dehumidifier. If you live in a humid climate, using a dehumidifier after cleaning your carpets can help them dry faster and prevent mold growth.
* For pet stains, consider adding a small amount of enzymatic cleaner to your DIY solution. Enzymatic cleaners help to break down the proteins in pet urine and feces, which can help to eliminate odors. You can find these at most pet stores.
* Be patient! Some stains may require multiple treatments to remove completely.
* If you’re unsure about cleaning a particular type of carpet, consult a professional carpet cleaner.
Troubleshooting Common Carpet Cleaning Problems
Even with the best DIY solution, you might encounter some common carpet cleaning problems. Here’s how to tackle them:
* Lingering Odors: If you’re still smelling odors after cleaning, try sprinkling baking soda over the carpet, letting it sit for several hours (or even overnight), and then vacuuming it up. You can also try using an enzymatic cleaner specifically designed for odor removal.
* Sticky Residue: If your carpet feels sticky after cleaning, it’s likely due to soap residue. Rinse the area thoroughly with plain water and blot it dry.
* Stain Won’t Come Out: Some stains are just stubborn! For particularly difficult stains, you may need to try a stronger cleaning solution or consult a professional carpet cleaner.
* Carpet Discoloration: If you notice any discoloration after cleaning, stop immediately and consult a professional carpet cleaner.
I hope this guide helps you create your own amazing DIY carpet cleaning solution and keep your carpets looking fresh and clean! Happy cleaning!
Conclusion
So, there you have it! A simple, effective, and budget-friendly way to create your own DIY carpet cleaning solution. We’ve walked you through the process, highlighting the benefits of ditching harsh chemicals for a natural, homemade alternative. From saving money to protecting your family and pets from potentially harmful ingredients, the advantages are clear.
But why is this DIY trick a must-try? Because it empowers you to take control of your cleaning routine. You know exactly what’s going into your solution, and you can customize it to suit your specific needs. Got a stubborn stain? Add a little extra baking soda. Prefer a different scent? Swap out the essential oil for your favorite fragrance. This isn’t just about cleaning; it’s about creating a healthier and more personalized home environment.
Beyond the basic recipe, there’s room for experimentation. For a deeper clean, consider adding a tablespoon of borax to the mix. Borax acts as a natural disinfectant and helps to lift tough stains. If you’re dealing with pet odors, a few drops of enzymatic cleaner can work wonders. Remember to always test any new variation on a small, inconspicuous area of your carpet first to ensure it doesn’t cause discoloration.
Another variation involves using white vinegar instead of distilled vinegar. While both work well, white vinegar has a slightly stronger scent, so you might want to add a few extra drops of essential oil to mask the smell. Apple cider vinegar is another option, though it’s generally more expensive and doesn’t offer significant advantages over white or distilled vinegar for cleaning purposes.
The beauty of this DIY approach is its adaptability. You can adjust the ingredients and ratios to find the perfect formula for your carpets and your preferences. Don’t be afraid to experiment and discover what works best for you.
We’re confident that once you try this DIY carpet cleaning solution, you’ll be amazed by the results. Your carpets will be cleaner, fresher, and free from harmful chemicals. Plus, you’ll have the satisfaction of knowing that you’re doing something good for your home, your family, and the environment.
So, what are you waiting for? Gather your ingredients, mix up a batch, and give your carpets the TLC they deserve. We encourage you to try this simple yet effective method and share your experiences with us. Let us know what variations you tried, what scents you loved, and how it worked on your toughest stains. Your feedback will help other readers discover the magic of homemade carpet cleaning! Share your before and after photos, your tips and tricks, and any modifications you made to the recipe. Let’s build a community of DIY cleaning enthusiasts! We can’t wait to hear your success stories!
Frequently Asked Questions (FAQ)
1. Is this DIY carpet cleaning solution safe for all types of carpets?
While this DIY carpet cleaning solution is generally safe for most carpets, it’s always best to test it on a small, inconspicuous area first. This is especially important for delicate or antique carpets, as well as those made from natural fibers like wool or silk. Look for any signs of discoloration, shrinkage, or damage before applying the solution to the entire carpet. If you’re unsure about your carpet type, consult with a professional carpet cleaner.
2. Can I use this solution in a carpet cleaning machine?
Yes, you can use this DIY carpet cleaning solution in most carpet cleaning machines. However, it’s crucial to check your machine’s manual to ensure that it’s compatible with homemade solutions. Some machines may have specific requirements or restrictions. When using the solution in a machine, dilute it slightly more than you would for spot cleaning to prevent clogging. A good starting point is to use half the recommended amount of solution and fill the rest of the tank with water.
3. How often should I clean my carpets with this solution?
The frequency of carpet cleaning depends on several factors, including foot traffic, the presence of pets, and the overall cleanliness of your home. As a general guideline, aim to clean your carpets every 6-12 months. However, if you have pets or children, or if your carpets experience heavy traffic, you may need to clean them more frequently, perhaps every 3-6 months. Spot cleaning should be done as needed to address spills and stains promptly.
4. What essential oils are best for carpet cleaning?
Many essential oils have antibacterial, antifungal, and deodorizing properties that make them ideal for carpet cleaning. Some popular choices include:
* Lavender: Provides a calming and relaxing scent.
* Tea Tree: Has strong antibacterial and antifungal properties.
* Lemon: Offers a fresh and citrusy scent and helps to cut through grease.
* Eucalyptus: Has a refreshing and invigorating scent and can help to kill dust mites.
* Peppermint: Provides a cooling and refreshing scent and can help to deter pests.
When choosing essential oils, be sure to use high-quality, pure oils. Avoid synthetic fragrances, as they may contain harmful chemicals. Also, be mindful of pets, as some essential oils can be toxic to animals. Always research the safety of essential oils before using them around pets.
5. How do I remove stubborn stains with this DIY solution?
For stubborn stains, pre-treat the area with a paste made from baking soda and water. Apply the paste to the stain, let it sit for 30 minutes, and then vacuum it up. Next, apply the DIY carpet cleaning solution directly to the stain and gently blot it with a clean cloth. Avoid rubbing, as this can spread the stain. Repeat the blotting process until the stain is removed. For particularly tough stains, you may need to use a specialized stain remover in addition to the DIY solution.
6. How long does it take for the carpet to dry after cleaning?
The drying time depends on several factors, including the humidity level, the amount of solution used, and the ventilation in the room. Generally, it takes anywhere from 2-6 hours for the carpet to dry completely. To speed up the drying process, open windows and doors to improve ventilation. You can also use fans to circulate air and absorb moisture. Avoid walking on the carpet until it’s completely dry to prevent tracking dirt and creating new stains.
7. Can I use this solution on upholstery?
Yes, you can use this DIY carpet cleaning solution on upholstery, but it’s even more important to test it on a hidden area first. Upholstery fabrics can be more delicate than carpets, so it’s crucial to ensure that the solution doesn’t cause any damage or discoloration. When cleaning upholstery, use a spray bottle to apply the solution sparingly and blot gently with a clean cloth. Avoid saturating the fabric, as this can lead to mildew growth.
8. What if the solution leaves a residue on my carpet?
If the solution leaves a residue on your carpet, it’s likely due to using too much solution or not rinsing thoroughly enough. To remove the residue, simply rinse the carpet with clean water. You can use a spray bottle or a carpet cleaning machine with only water in the tank. Blot the carpet with a clean cloth to remove excess water and allow it to dry completely.
9. How do I store the leftover DIY carpet cleaning solution?
Store any leftover DIY carpet cleaning solution in an airtight container in a cool, dark place. The solution should be good for several weeks. However, it’s best to use it within a month for optimal effectiveness. Be sure to label the container clearly to avoid confusion.
10. Is baking soda harmful to vacuum cleaners?
Baking soda is generally safe for vacuum cleaners, but it’s important to use it in moderation. Excessive amounts of baking soda can clog the filter and reduce the vacuum’s suction power. To prevent this, vacuum slowly and thoroughly, and empty the dustbin or bag frequently. If you notice a decrease in suction, clean or replace the filter according to the manufacturer’s instructions.
Leave a Comment