

Grow Chilies From Seeds and ignite your culinary adventures! Have you ever dreamt of adding a fiery kick to your dishes with chilies you’ve nurtured from tiny seeds? It’s more achievable than you think, and this DIY guide will show you how. For centuries, chilies have been more than just a spice; they’ve been a symbol of passion, a staple in diverse cuisines, and even used for medicinal purposes. From the ancient Aztecs to modern-day foodies, the allure of the chili pepper remains strong.
But why should you bother growing your own? Well, imagine the satisfaction of harvesting vibrant, flavorful chilies that you personally cultivated. Plus, you’ll have complete control over the growing process, ensuring they’re organic and free from harmful chemicals. In this article, I’ll share my tried-and-true methods for successfully grow chilies from seeds, even if you don’t have a green thumb. We’ll cover everything from seed selection and germination to transplanting and ongoing care. Get ready to embark on a rewarding journey that will spice up your life, one chili pepper at a time!
Growing Chilies From Seeds: A Spicy DIY Adventure!
Hey there, fellow chili enthusiasts! Ready to embark on a fiery journey and grow your own chili peppers from scratch? I’m so excited to share my tried-and-true method for starting chili seeds indoors, ensuring a bountiful harvest of spicy goodness. Trust me, there’s nothing quite like the satisfaction of cooking with chilies you’ve nurtured from tiny seeds. Let’s get started!
What You’ll Need: Your Chili-Growing Arsenal
Before we dive in, let’s gather our supplies. Having everything ready beforehand will make the process smooth and enjoyable.
* Chili Seeds: Obviously! Choose your favorite varieties. I recommend starting with a mix of mild and hot peppers to cater to different tastes. Look for reputable seed suppliers to ensure good germination rates.
* Seed Starting Trays or Small Pots: These will be your chili seedlings’ first homes. I prefer seed starting trays with a humidity dome for better moisture control.
* Seed Starting Mix: This is crucial! Don’t use regular garden soil, as it’s too heavy and can harbor diseases. A light, well-draining seed starting mix is essential for healthy seedling development.
* Heat Mat (Optional but Recommended): Chili seeds germinate best in warm temperatures (around 80-85°F or 27-29°C). A heat mat will significantly improve your germination success, especially if you live in a cooler climate.
* Grow Lights (Optional but Recommended): Once your seedlings emerge, they’ll need plenty of light to prevent them from becoming leggy and weak. Grow lights provide consistent and adequate light, especially during the shorter days of winter.
* Spray Bottle: For gently watering your seeds and seedlings.
* Small Labels and a Permanent Marker: To keep track of your different chili varieties. Trust me, you’ll thank yourself later!
* Small Spoon or Trowel: For handling the seed starting mix.
* Thermometer: To monitor the temperature of your seed starting area.
* Well-ventilated area: To prevent fungal diseases.
Phase 1: Sowing the Seeds of Fire
This is where the magic begins! We’ll prepare our seed starting trays and sow those tiny seeds that hold so much potential.
1. Prepare the Seed Starting Trays: Fill your seed starting trays or small pots with the seed starting mix. Gently press down the mix to eliminate air pockets, but don’t compact it too much. You want it to be light and airy.
2. Moisten the Seed Starting Mix: Use your spray bottle to thoroughly moisten the seed starting mix. It should be damp but not soggy. You can also pre-moisten the mix in a bucket before filling the trays.
3. Sow the Seeds: Now for the fun part! Place 2-3 chili seeds in each cell or pot. This increases your chances of at least one seed germinating. Space the seeds evenly within the cell.
4. Cover the Seeds: Lightly cover the seeds with a thin layer of seed starting mix (about 1/4 inch or 0.5 cm).
5. Gently Water Again: Use your spray bottle to gently water the surface of the soil, ensuring the seeds are well-moistened.
6. Label Your Trays: This is super important! Use your labels and permanent marker to clearly identify each chili variety. I like to include the date of sowing as well.
7. Create a Humid Environment: Place the seed starting trays in a humidity dome or cover them with plastic wrap. This will help retain moisture and create a warm, humid environment that’s ideal for germination.
8. Provide Bottom Heat (Optional but Recommended): Place the seed starting trays on a heat mat. Set the heat mat to the recommended temperature for chili seed germination (around 80-85°F or 27-29°C).
9. Find a Warm Location: Even with a heat mat, it’s best to place your seed starting trays in a warm location, away from drafts.
Phase 2: Nurturing the Seedlings: From Sprout to Strength
Once your chili seeds germinate, it’s time to provide them with the care they need to grow into strong, healthy seedlings.
1. Monitor Germination: Check your seed starting trays daily for signs of germination. Chili seeds can take anywhere from 7 to 21 days (or even longer for some varieties) to germinate, so be patient!
2. Remove the Humidity Dome: Once the first seedlings emerge, remove the humidity dome or plastic wrap. This will prevent fungal diseases.
3. Provide Adequate Light: As soon as the seedlings emerge, they need plenty of light. If you’re using grow lights, position them a few inches above the seedlings. Adjust the height as the seedlings grow. If you’re relying on natural light, place the seedlings in a south-facing window that receives at least 6 hours of direct sunlight per day.
4. Water Carefully: Water your seedlings when the top inch of soil feels dry to the touch. Use a spray bottle or a watering can with a gentle rose to avoid disturbing the seedlings. Be careful not to overwater, as this can lead to root rot.
5. Thin the Seedlings: Once the seedlings have developed their first true leaves (the second set of leaves after the initial seed leaves), it’s time to thin them. Choose the strongest seedling in each cell or pot and carefully snip off the others at soil level. Don’t pull them out, as this can damage the roots of the remaining seedling.
6. Fertilize (Optional): After a couple of weeks, you can start feeding your seedlings with a diluted liquid fertilizer specifically formulated for seedlings. Follow the instructions on the fertilizer label. I usually start with half the recommended strength.
7. Provide Good Air Circulation: Ensure good air circulation around your seedlings to prevent fungal diseases. A small fan can help.
8. Monitor for Pests and Diseases: Keep an eye out for any signs of pests or diseases. Common pests include aphids and spider mites. Common diseases include damping-off and powdery mildew. Treat any problems promptly with appropriate organic solutions.
Phase 3: Hardening Off: Preparing for the Great Outdoors
Before transplanting your chili seedlings outdoors, it’s crucial to harden them off. This process gradually acclimates them to the outdoor environment, preventing shock and ensuring their survival.
1. Start Gradually: Begin by placing your seedlings outdoors in a sheltered location for just an hour or two on the first day. Choose a day that’s warm and cloudy, with no strong winds.
2. Increase Exposure Time: Gradually increase the amount of time your seedlings spend outdoors each day, adding an hour or two each time.
3. Increase Sun Exposure: Gradually increase the amount of direct sunlight your seedlings receive each day.
4. Monitor the Weather: Pay close attention to the weather forecast. If there’s a risk of frost or extreme temperatures, bring your seedlings back indoors.
5. Protect from Wind: Protect your seedlings from strong winds, which can damage their delicate leaves.
6. Water Regularly: Water your seedlings regularly during the hardening-off process, as they will dry out more quickly outdoors.
7. After a Week or Two: After a week or two of hardening off, your seedlings should be ready to be transplanted into their final growing location. They should be able to tolerate full sun and moderate wind.
Phase 4: Transplanting and Beyond: From Seedling to Spicy Harvest
Finally, the moment we’ve been waiting for! It’s time to transplant your hardened-off chili seedlings into their final growing location, whether it’s in the garden or in containers.
1. Choose the Right Location: Chili peppers need at least 6-8 hours of direct sunlight per day. Choose a location that receives plenty of sun and has well-draining soil.
2. Prepare the Soil: Amend the soil with compost or other organic matter to improve drainage and fertility.
3. Dig a Hole: Dig a hole that’s slightly larger than the root ball of your seedling.
4. Gently Remove the Seedling: Carefully remove the seedling from its pot or cell, being careful not to damage the roots.
5. Place the Seedling in the Hole: Place the seedling in the hole, ensuring that the top of the root ball is level with the surrounding soil.
6. Fill the Hole: Fill the hole with soil and gently firm it around the seedling.
7. Water Thoroughly: Water the seedling thoroughly after transplanting.
8. Mulch (Optional): Apply a layer of mulch around the seedling to help retain moisture and suppress weeds.
9. Provide Support (Optional): Some chili varieties, especially those with heavy fruit, may need support. Use stakes or cages to prevent the plants from
Conclusion
So, there you have it! Growing chilies from seeds might seem daunting at first, but with a little patience and the right approach, you can cultivate your own fiery harvest right at home. This DIY method not only saves you money compared to buying seedlings, but it also gives you complete control over the varieties you grow. Imagine the satisfaction of harvesting chilies you nurtured from tiny seeds, knowing exactly where they came from and how they were grown.
This isn’t just about saving a few dollars; it’s about connecting with your food, understanding the growing process, and enjoying the unparalleled flavor of homegrown chilies. Plus, you’ll have a constant supply of fresh chilies to spice up your meals, create your own hot sauces, or even share with friends and family.
Why is this DIY trick a must-try? Because it empowers you to become a chili-growing expert, offering a rewarding and flavorful experience from seed to table. It’s a sustainable way to add zest to your life and a fantastic hobby that can be enjoyed year after year.
Looking for variations? Consider experimenting with different types of chili seeds. From the mild poblano to the scorching ghost pepper, the world of chilies is vast and exciting. You can also adjust the growing conditions to influence the heat level of your chilies. For example, stressing the plants slightly by withholding water can sometimes result in hotter peppers. Another fun variation is to try growing your chilies in different types of containers or even using hydroponic systems for a faster and more efficient harvest. You can also try companion planting with herbs like basil or rosemary, which are said to deter pests and improve the flavor of your chilies.
We’ve covered the basics of how to grow chilies from seeds, but the real magic happens when you get your hands dirty and start experimenting. Don’t be afraid to try different techniques, adjust the growing conditions, and find what works best for you. Every gardener has their own unique approach, and the journey of discovery is part of the fun.
Now it’s your turn! We wholeheartedly encourage you to try this DIY trick and experience the joy of growing your own chilies. Whether you’re a seasoned gardener or a complete beginner, this is a project that anyone can tackle.
Once you’ve embarked on your chili-growing adventure, we’d love to hear about your experience. Share your tips, tricks, and successes (and even your failures!) in the comments below. Let’s create a community of chili enthusiasts who can learn from each other and celebrate the joys of homegrown heat. Don’t forget to share photos of your chili plants and harvests – we can’t wait to see what you create! So go ahead, grab some seeds, and get growing! Your taste buds will thank you.
Frequently Asked Questions (FAQ)
What is the best time of year to start growing chilies from seeds?
The best time to start growing chilies from seeds depends on your climate. In general, you should start your seeds indoors 6-8 weeks before the last expected frost. This allows the seedlings to develop a strong root system before being transplanted outdoors. If you live in a warmer climate with a longer growing season, you can start your seeds directly outdoors after the last frost has passed. However, starting indoors provides a head start and protects the seedlings from harsh weather conditions.
What type of soil is best for growing chilies from seeds?
Chilies thrive in well-draining, fertile soil with a slightly acidic pH (around 6.0-6.8). A good starting mix is a combination of potting soil, compost, and perlite or vermiculite. The potting soil provides a base, the compost adds nutrients, and the perlite or vermiculite improves drainage and aeration. Avoid using garden soil, as it can be too heavy and may contain pests or diseases. When transplanting, amend the soil with more compost to provide a nutrient boost.
How often should I water my chili seedlings?
Chili seedlings need consistent moisture but should not be waterlogged. Water them when the top inch of soil feels dry to the touch. Avoid overwatering, as this can lead to root rot. Use a gentle watering can or spray bottle to avoid disturbing the delicate seedlings. As the plants grow larger, they will require more water, especially during hot weather. Monitor the soil moisture regularly and adjust your watering schedule accordingly.
How much sunlight do chili plants need?
Chili plants need at least 6-8 hours of direct sunlight per day to thrive. If you are growing your seedlings indoors, place them near a sunny window or use grow lights. When transplanting outdoors, choose a location that receives plenty of sunlight throughout the day. Insufficient sunlight can result in leggy plants with poor fruit production.
What are some common pests and diseases that affect chili plants?
Common pests that affect chili plants include aphids, spider mites, whiteflies, and thrips. These pests can suck the sap from the leaves, causing them to become yellow and distorted. Diseases that can affect chili plants include fungal diseases like powdery mildew and blossom end rot. To prevent pests and diseases, keep your plants healthy by providing them with proper watering, sunlight, and nutrients. Inspect your plants regularly for signs of infestation or disease and take action promptly. Organic pest control methods, such as neem oil or insecticidal soap, can be effective in controlling pests. Proper ventilation and avoiding overwatering can help prevent fungal diseases.
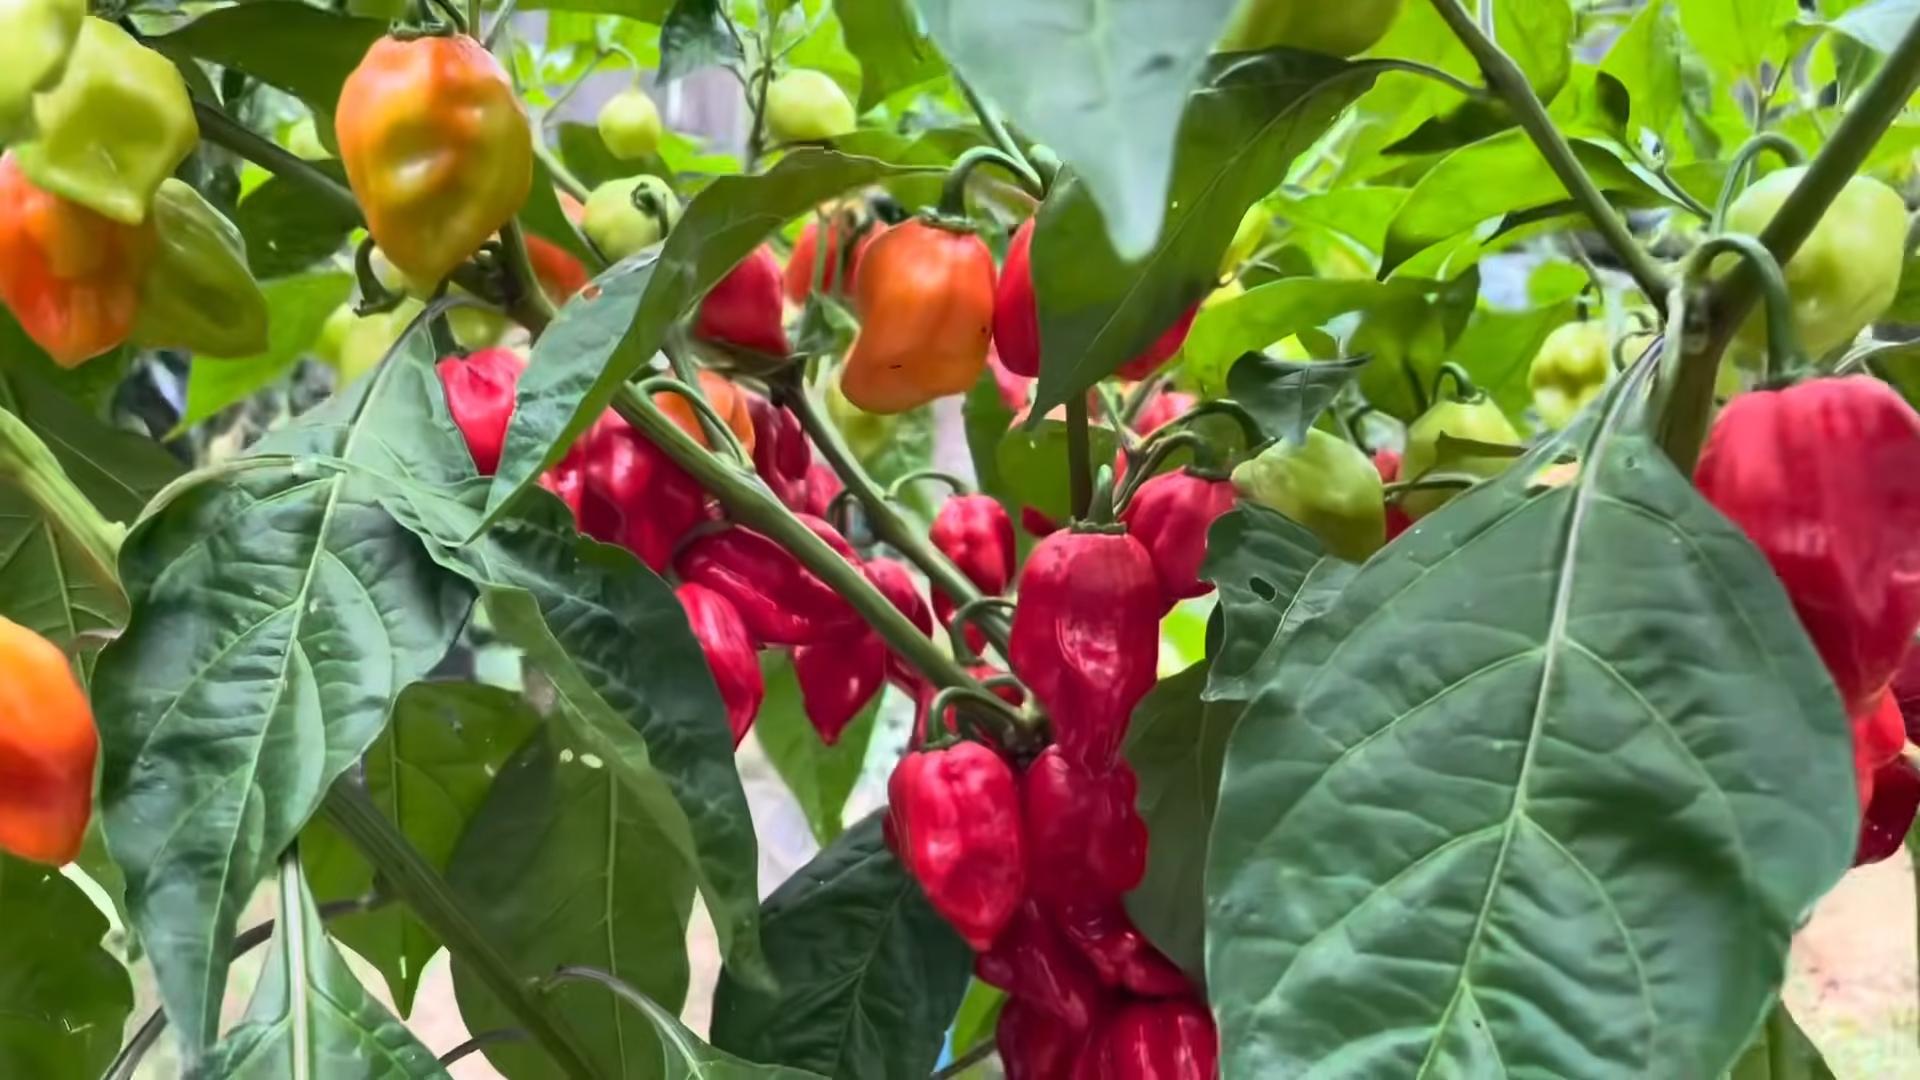
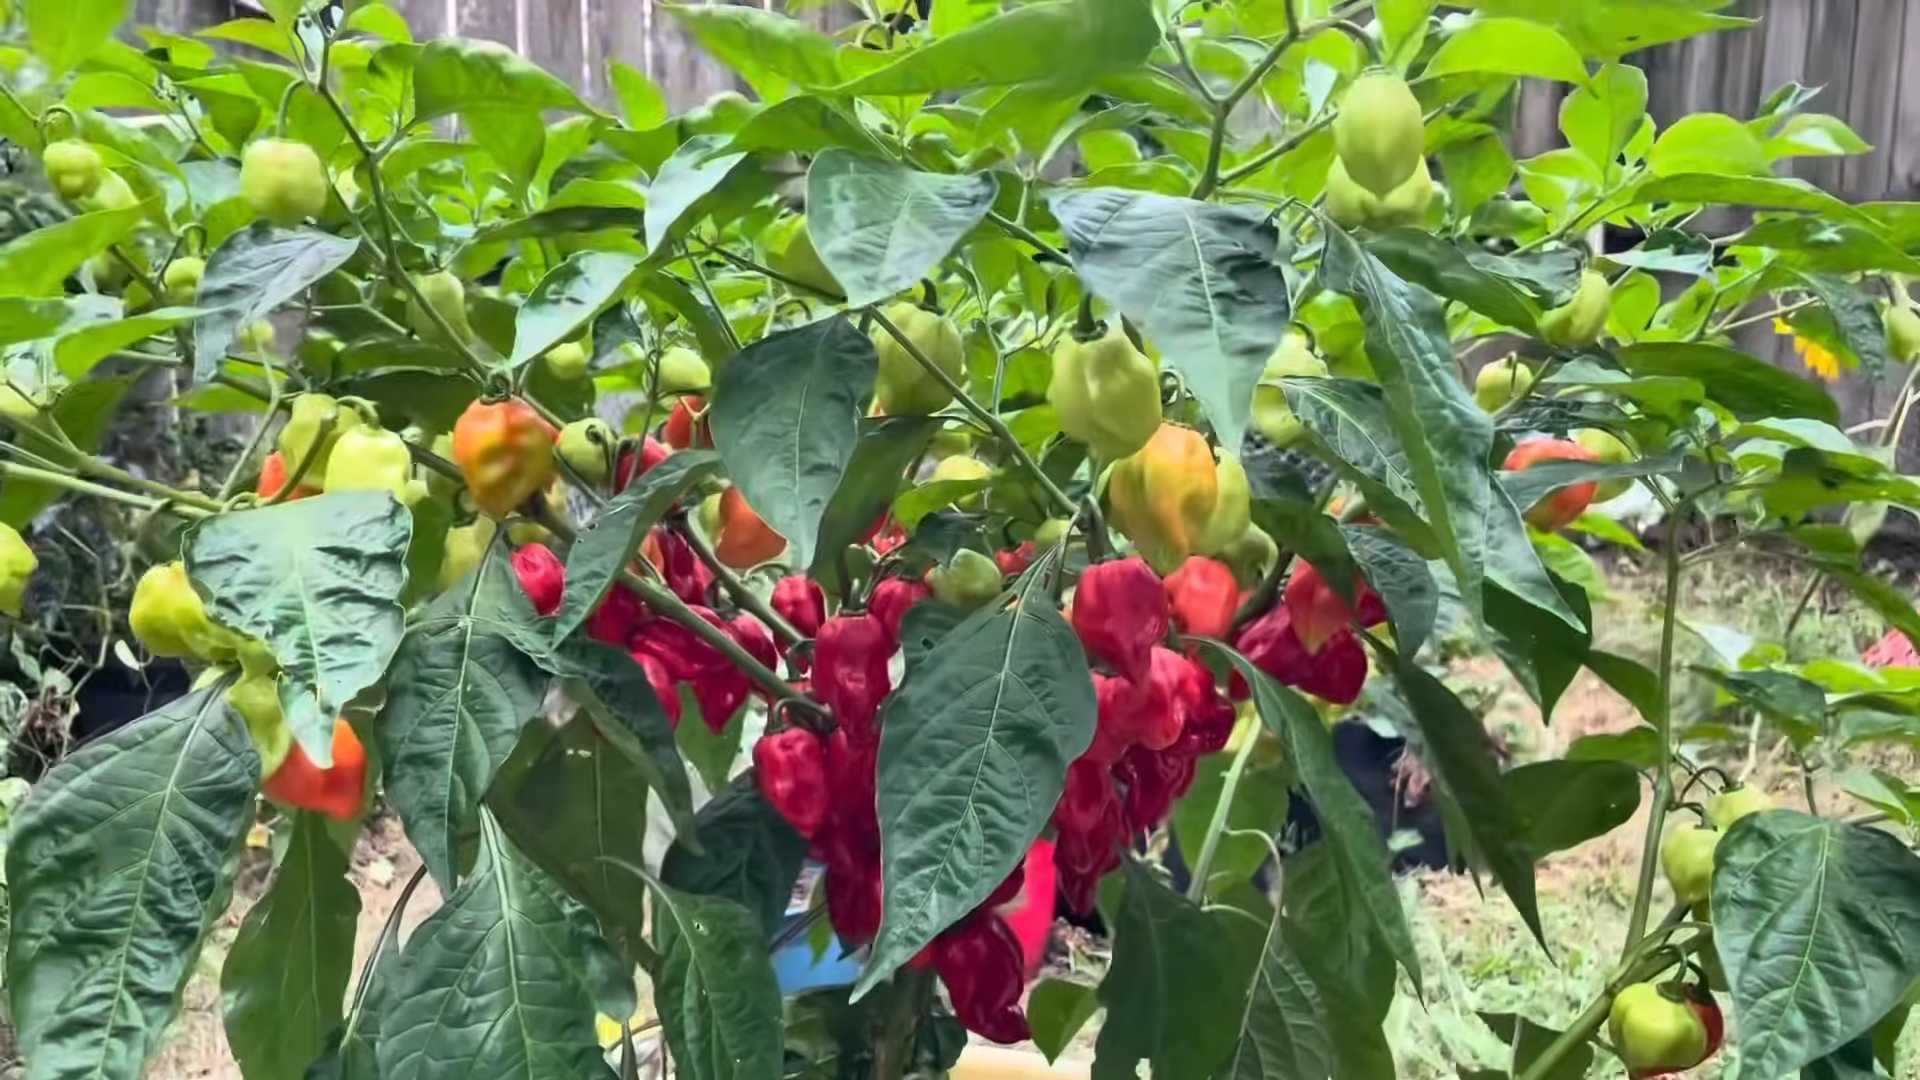
How do I know when my chilies are ripe?
The color of the chili is the most obvious indicator of ripeness. Most chilies start green and then change to red, yellow, orange, or brown, depending on the variety. However, some chilies are ripe when they are still green. Check the seed packet or plant tag for information on the expected color of ripe chilies. Another way to tell if a chili is ripe is to gently squeeze it. A ripe chili will be firm but slightly yielding. You can also taste a small piece of the chili to check for its flavor and heat level.
Can I grow chilies in containers?
Yes, chilies can be successfully grown in containers. Choose a container that is at least 12 inches in diameter and has drainage holes. Use a well-draining potting mix and provide the plants with plenty of sunlight and water. Container-grown chilies may require more frequent watering and fertilization than those grown in the ground. Consider using a slow-release fertilizer or liquid fertilizer to provide the plants with the nutrients they need.
How can I increase the heat level of my chilies?
Several factors can influence the heat level of chilies. Stressing the plants slightly by withholding water can sometimes result in hotter peppers. However, avoid stressing the plants too much, as this can reduce fruit production. The amount of sunlight the plants receive can also affect the heat level. More sunlight generally results in hotter peppers. The variety of chili is the most important factor in determining its heat level. Choose varieties known for their high heat levels if you want to grow extremely hot chilies.
How do I save seeds from my chili plants?
To save seeds from your chili plants, allow the chilies to fully ripen on the plant. Once they are ripe, carefully remove the seeds from the chilies and spread them out on a paper towel to dry. Allow the seeds to dry completely for several days, or even a week, before storing them in an airtight container in a cool, dark, and dry place. Label the container with the variety of chili and the date the seeds were collected. Properly stored chili seeds can remain viable for several years.
What are some creative ways to use my homegrown chilies?
The possibilities are endless! You can use your homegrown chilies to make hot sauce, chili oil, chili powder, or dried chili flakes. You can also add them to salsas, stews, soups, and stir-fries. Fresh chilies can be pickled or fermented for a longer shelf life. Consider gifting your homemade chili products to friends and family. Experiment with different recipes and flavor combinations to create your own unique chili creations. Growing chilies from seeds opens up a world of culinary possibilities!
Leave a Comment