

Growing Carrots Easy Planting – ever dreamt of pulling vibrant, crunchy carrots straight from your own backyard? I know I have! There’s something incredibly satisfying about nurturing a tiny seed into a delicious, homegrown treat. For centuries, carrots have been a staple in diets worldwide, with evidence suggesting their cultivation dates back to ancient Persia. These weren’t the bright orange beauties we know today, but their journey through history has led to the diverse and delicious varieties we enjoy now.
But let’s be honest, sometimes getting those perfect carrots can feel like a challenge. That’s where this DIY guide comes in! I’m going to share some simple, yet effective tricks and hacks that will make growing carrots easy planting for you, even if you’re a complete beginner. Forget about misshapen roots and disappointing harvests. I’ll walk you through everything from choosing the right soil to protecting your precious plants from pests.
Why do you need these tricks? Because everyone deserves the joy of biting into a sweet, juicy carrot they grew themselves! Plus, homegrown carrots are often more flavorful and nutritious than store-bought ones. So, let’s ditch the gardening guesswork and get ready to harvest a bounty of beautiful carrots. Get ready to get your hands dirty and discover the secrets to successful carrot cultivation!

Growing Carrots: A Beginner-Friendly Guide to Sweet Success
Okay, so you want to grow carrots? Awesome! I’m here to tell you, it’s totally doable, even if you think you have a black thumb. Carrots are surprisingly rewarding to grow, and nothing beats the taste of a freshly harvested, homegrown carrot. This guide will walk you through everything you need to know, from choosing the right spot to dealing with pesky pests. Let’s get digging!
Choosing the Right Carrot Variety
First things first, let’s talk carrots! There are tons of different varieties, and picking the right one for your space and climate is key. Here’s a quick rundown:
* Nantes: These are classic, cylindrical carrots, known for their sweet flavor and smooth skin. They’re a great all-around choice and mature relatively quickly.
* Danvers: These are the classic, tapered carrots you often see in the grocery store. They’re a bit longer than Nantes and store well.
* Chantenay: These are shorter, thicker carrots, perfect for heavier or rockier soils. They’re also known for their good flavor.
* Round/Parisian: If you have very shallow soil or are growing in containers, these are your best bet. They’re small, round, and cute as a button!
* Heirloom Varieties: Don’t be afraid to experiment! There are tons of colorful heirloom carrots like ‘Purple Haze’ or ‘Yellowstone’ that add a fun twist to your garden.
Consider your soil type, growing season length, and personal preferences when making your choice. I personally love Nantes for their sweetness and ease of growth.
Preparing Your Carrot Patch: Soil is Key!
Carrots are notoriously picky about their soil. They need loose, well-drained soil to grow long and straight. Rocky or compacted soil will result in forked, stunted carrots, and nobody wants that!
* Soil Testing: Ideally, you should test your soil’s pH and nutrient levels. Carrots prefer a slightly acidic pH (around 6.0-6.8). You can buy a soil testing kit at most garden centers or send a sample to your local agricultural extension office.
* Loosening the Soil: This is the most important step! Use a garden fork or tiller to loosen the soil to a depth of at least 12 inches, preferably even deeper for longer varieties.
* Removing Rocks and Debris: Pick out any rocks, stones, or other debris that could impede root growth. Even small pebbles can cause carrots to split or fork.
* Adding Organic Matter: Amend the soil with plenty of compost or well-rotted manure. This will improve drainage, add nutrients, and help retain moisture. I usually add a generous layer of compost and work it in thoroughly.
* Creating Raised Beds (Optional): If you have heavy clay soil, consider growing carrots in raised beds. This will improve drainage and make it easier to control the soil quality.
Planting Carrot Seeds: Patience is a Virtue
Carrot seeds are tiny, which can make them a bit tricky to handle. But don’t worry, I’ve got some tips to help you succeed.
1. Timing is Everything: Carrots are a cool-season crop, so plant them in early spring or late summer for a fall harvest. Check your local frost dates to determine the best planting time for your area. I usually aim to plant about 2-3 weeks before the last expected frost in spring. For a fall harvest, plant about 10-12 weeks before the first expected frost.
2. Creating Furrows: Use a hoe or trowel to create shallow furrows in the soil, about 1/4 to 1/2 inch deep. Space the furrows about 2-3 inches apart.
3. Sowing the Seeds: This is where patience comes in! Carrot seeds are small and tend to clump together. Try to sow them as thinly as possible to avoid overcrowding. You can use a seed dispenser or simply pinch the seeds between your fingers and sprinkle them along the furrows.
4. Covering the Seeds: Gently cover the seeds with a thin layer of soil or fine compost.
5. Watering Gently: Water the area gently with a watering can or hose with a gentle spray nozzle. Avoid washing away the seeds.
6. Marking the Rows: Label your rows so you know where you planted your carrots. This will help you avoid accidentally weeding them out later.
7. Keep the Soil Moist: Carrot seeds need consistent moisture to germinate. Keep the soil moist but not soggy until the seedlings emerge, which can take 1-3 weeks. I often cover the rows with burlap or shade cloth to help retain moisture.
Thinning Carrot Seedlings: Crucial for Success
This is probably the most important step for growing good carrots, and it’s the one that people often skip! If you don’t thin your carrot seedlings, they’ll compete for space and nutrients, resulting in small, stunted carrots.
1. When to Thin: Thin the seedlings when they are about 1-2 inches tall.
2. How to Thin: Gently pull out the weaker seedlings, leaving the strongest ones spaced about 1-2 inches apart. For larger varieties, you may need to thin them to 3-4 inches apart.
3. Be Gentle: Be careful not to disturb the roots of the remaining seedlings. Hold the base of the seedling you’re removing and gently pull it out.
4. Water After Thinning: Water the area after thinning to help settle the soil around the remaining seedlings.
5. Second Thinning (Optional): If your carrots are still crowded after the first thinning, you can thin them again a few weeks later.
Caring for Your Carrots: Watering, Weeding, and Feeding
Once your carrots are established, they’ll need regular care to thrive.
* Watering: Carrots need consistent moisture, especially during hot, dry weather. Water deeply and regularly, aiming for about 1 inch of water per week. Avoid overhead watering, which can promote fungal diseases. Drip irrigation is ideal.
* Weeding: Keep the area around your carrots free of weeds. Weeds compete for water and nutrients and can also attract pests. Hand-pull weeds carefully to avoid disturbing the carrot roots.
* Fertilizing: Carrots are not heavy feeders, but they will benefit from a light feeding of fertilizer. Use a balanced fertilizer or one that is higher in phosphorus and potassium. Avoid fertilizers that are high in nitrogen, as this can promote leafy growth at the expense of root development. I like to use a liquid seaweed fertilizer diluted according to the package directions.
* Mulching: Apply a layer of mulch around your carrots to help retain moisture, suppress weeds, and regulate soil temperature. Straw, hay, or shredded leaves are good choices.
Dealing with Pests and Diseases: Prevention is Key
Carrots are relatively pest-resistant, but they can be susceptible to certain problems.
* Carrot Rust Flies: These are the most common carrot pest. The larvae tunnel into the roots, causing damage and making them unmarketable. Cover your carrots with row covers to prevent the flies from laying their eggs. You can also use sticky traps to catch the adults.
* Nematodes: These microscopic worms can damage carrot roots. Improve soil health by adding organic matter and practicing crop rotation.
* Aphids: These small, sap-sucking insects can weaken plants. Spray them with a strong stream of water or use insecticidal soap.
* Leaf Blight: This fungal disease can cause spots on the leaves. Improve air circulation by spacing plants properly and avoid overhead watering.
* Aster Yellows: This disease is spread by leafhoppers and can cause hairy roots and stunted growth. Control leafhoppers and remove infected plants.
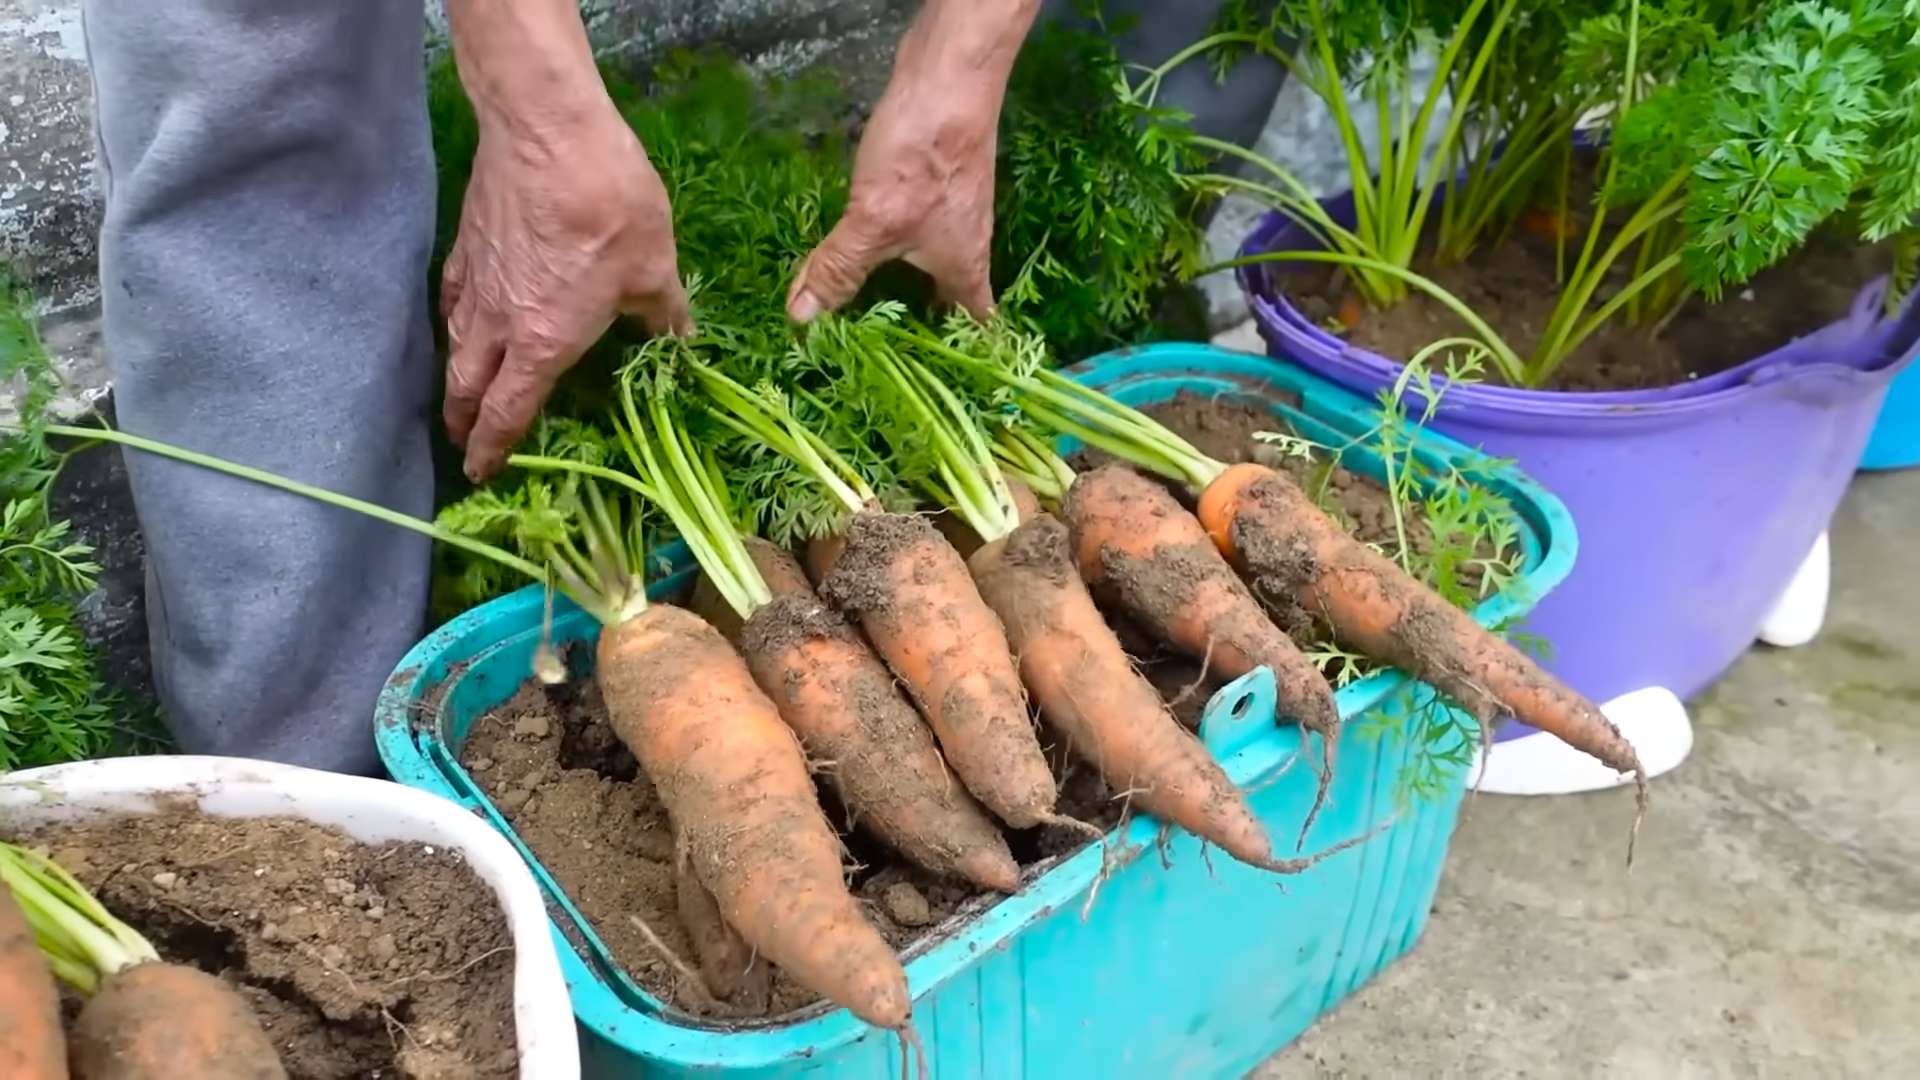
Harvesting Your Carrots: The Sweet Reward
The moment you’ve been waiting for! Harvesting your carrots is the most rewarding part of the process.
1. When to Harvest: Carrots are typically ready to harvest 60-80 days after planting, depending on the variety. Check the seed packet for specific maturity dates. You can also gauge ripeness by gently pulling back the soil around the top of the carrot to check its size.
2. How to Harvest: Loosen the soil around the carrots with a garden fork or trowel. Gently pull the carrots out of the ground, twisting them slightly as you pull. If the soil is dry, water the area before harvesting to make it easier to pull the carrots.
3. Storing Your Carrots: Remove the tops and gently brush off any excess soil. Store carrots in a cool, dark, and humid place, such as a refrigerator or root cellar. You can also store them in a container filled with moist sand or sawdust.
4. Enjoy! Now it’s time to enjoy the fruits (or rather, vegetables) of your labor! Eat them raw, roast them, juice them, or use
Conclusion
So, there you have it! Growing carrots doesn’t have to be a daunting task reserved for seasoned gardeners. With a little preparation, the right techniques, and a dash of patience, you can cultivate your own vibrant, sweet, and satisfying carrot harvest right in your backyard or even in containers on your balcony. This easy planting method, focusing on soil preparation, proper spacing, and consistent watering, unlocks the secret to success.
Why is this DIY trick a must-try? Because it empowers you to take control of your food source, enjoy the unparalleled flavor of freshly harvested carrots, and save money in the long run. Store-bought carrots simply can’t compare to the crispness and sweetness of those you’ve nurtured yourself. Plus, knowing exactly where your food comes from and how it was grown provides immense satisfaction.
But the beauty of gardening lies in its adaptability. Feel free to experiment with different carrot varieties. Consider Nantes for their cylindrical shape and sweet flavor, or Chantenay for their shorter, sturdier form, perfect for heavier soils. Rainbow carrots, with their vibrant hues of purple, yellow, and orange, add a playful touch to your garden and your plate.
For those with limited space, container gardening is an excellent option. Choose a deep container (at least 12 inches) and use a well-draining potting mix. Dwarf carrot varieties are particularly well-suited for containers. You can even try interplanting carrots with other compatible vegetables like radishes or lettuce to maximize your space.
Don’t be afraid to get your hands dirty and embrace the learning process. Gardening is a journey, and every season brings new opportunities to refine your skills and discover new techniques. This easy planting method is a fantastic starting point, but the possibilities are endless.
We wholeheartedly encourage you to try this DIY trick for growing carrots. Witness the magic of transforming tiny seeds into delicious, nutritious vegetables. And most importantly, share your experience with us! We’d love to hear about your successes, challenges, and any variations you’ve tried. Post photos of your carrot harvest, share your tips and tricks, and let’s create a community of thriving carrot growers. Happy gardening!
Frequently Asked Questions (FAQ)
1. What is the best time of year to plant carrots?
The best time to plant carrots depends on your climate. In general, carrots are a cool-season crop, meaning they thrive in temperatures between 60°F and 70°F (15°C and 21°C). For most regions, this means planting in early spring or late summer/early fall.
* **Spring Planting:** Plant carrot seeds 2-3 weeks before the last expected frost. This allows the carrots to mature before the heat of summer arrives.
* **Fall Planting:** Plant carrot seeds 10-12 weeks before the first expected frost. This gives the carrots ample time to mature before the ground freezes.
If you live in a region with mild winters, you may be able to plant carrots throughout the winter. Check your local gardening resources for specific planting dates in your area.
2. What kind of soil is best for growing carrots?
Carrots need loose, well-drained soil to grow properly. Rocky or compacted soil can cause the roots to become stunted, forked, or misshapen. The ideal soil for carrots is sandy loam, which is a mixture of sand, silt, and clay.
Before planting, amend your soil with plenty of compost or other organic matter. This will improve drainage, aeration, and fertility. Remove any rocks, stones, or debris that could impede root growth. A pH level between 6.0 and 6.8 is ideal for carrot growth.
3. How far apart should I plant carrot seeds?
Proper spacing is crucial for growing healthy carrots. Overcrowding can lead to stunted growth and smaller carrots.
* **Row Spacing:** Space rows of carrots 12-18 inches apart.
* **Seed Spacing:** Sow seeds about 1/4 inch deep and 1/2 inch apart. Once the seedlings emerge, thin them to 2-3 inches apart. This will give the carrots enough room to develop.
Thinning is an important step that many gardeners overlook. Don’t be afraid to pull out extra seedlings to ensure that the remaining carrots have enough space to thrive.
4. How often should I water carrots?
Carrots need consistent moisture to grow properly. Water deeply and regularly, especially during dry periods. Aim to keep the soil consistently moist but not waterlogged.
* **Watering Frequency:** Water carrots 1-2 times per week, depending on the weather and soil conditions.
* **Watering Depth:** Water deeply enough to moisten the soil to a depth of at least 6 inches.
Using a soaker hose or drip irrigation system can help to deliver water directly to the roots and prevent water loss through evaporation. Mulching around the plants can also help to retain moisture in the soil.
5. What are some common pests and diseases that affect carrots?
Carrots are susceptible to a few common pests and diseases, including:
* **Carrot Rust Fly:** This pest lays its eggs near the base of carrot plants, and the larvae burrow into the roots, causing damage.
* **Aphids:** These small insects suck sap from the leaves, weakening the plants.
* **Nematodes:** These microscopic worms can damage the roots, causing stunted growth.
* **Leaf Blight:** This fungal disease causes brown spots on the leaves.
To prevent pests and diseases, practice good garden hygiene. Remove any diseased plants promptly, and keep the area around your carrots free of weeds and debris. You can also use organic pest control methods, such as insecticidal soap or neem oil, to control pests. Crop rotation can also help to prevent soilborne diseases.
6. How do I know when my carrots are ready to harvest?
Carrots are typically ready to harvest 60-80 days after planting, depending on the variety. The size of the carrot is a good indicator of maturity. Check the seed packet for the expected size of your chosen variety.
To harvest carrots, gently loosen the soil around the base of the plant with a garden fork or trowel. Then, grasp the carrot by the greens and pull it straight up out of the ground. If the soil is dry, you may need to water it beforehand to make it easier to pull the carrots.
7. Can I grow carrots in containers?
Yes, you can absolutely grow carrots in containers! This is a great option for gardeners with limited space.
* **Container Size:** Choose a container that is at least 12 inches deep and wide.
* **Potting Mix:** Use a well-draining potting mix.
* **Carrot Variety:** Select a shorter, more compact carrot variety, such as Nantes or Thumbelina.
Follow the same planting and care instructions as for growing carrots in the ground. Be sure to water the containers regularly, as they tend to dry out more quickly than garden beds.
8. Why are my carrots forked or misshapen?
Forked or misshapen carrots are often caused by compacted soil or the presence of rocks or stones in the soil. When the carrot root encounters an obstacle, it will split or grow around it, resulting in an irregular shape.
To prevent this, make sure to prepare your soil thoroughly before planting. Remove any rocks, stones, or debris, and amend the soil with plenty of compost or other organic matter to improve drainage and aeration.
9. Can I eat the carrot greens?
Yes, carrot greens are edible and nutritious! They have a slightly bitter taste, similar to parsley. You can use them in salads, soups, stews, or as a garnish.
Be sure to wash the greens thoroughly before eating them. You can also blanch them briefly in boiling water to reduce the bitterness.
10. How do I store carrots after harvesting?
To store carrots, remove the greens and brush off any excess soil. Store the carrots in a cool, dark, and humid place, such as a refrigerator or root cellar.
You can store carrots in a plastic bag or container in the refrigerator for several weeks. To store them for longer periods, you can pack them in damp sand or sawdust in a root cellar.

Leave a Comment