

Grow Birds Eye Chili, and unlock a world of fiery flavor right in your own backyard! Have you ever dreamt of adding a zesty kick to your meals with chilies you’ve nurtured from tiny seedlings? Well, dream no more! This DIY guide is your passport to cultivating these potent little peppers, even if you’re a complete beginner.
Chili peppers, including the Birds Eye variety, boast a rich history, tracing back thousands of years to South America. They weren’t just a culinary delight; they held cultural significance, used in medicine and rituals. Today, their popularity has exploded globally, and for good reason! They add depth and excitement to dishes, and growing them yourself is incredibly rewarding.
Why should you embark on this chili-growing adventure? Because store-bought chilies simply can’t compare to the vibrant freshness and intense heat of homegrown ones. Plus, knowing exactly where your food comes from is a fantastic feeling. I’m going to show you some simple, effective tricks and hacks that will help you grow Birds Eye Chili successfully, regardless of your gardening experience. From seed to harvest, I’ll guide you through every step, ensuring you have a thriving chili patch that will spice up your life!
Growing Birds Eye Chili: A Fiery DIY Guide
Okay, chili lovers, buckle up! I’m going to walk you through everything you need to know to grow your own Birds Eye chili peppers. These little guys pack a serious punch, and there’s nothing quite like the satisfaction of harvesting your own homegrown heat. I’ve learned a few tricks along the way, and I’m excited to share them with you.
Choosing Your Seeds and Starting Indoors
Starting your Birds Eye chili seeds indoors is crucial, especially if you live in a region with shorter growing seasons. This gives them a head start and ensures you’ll have a bountiful harvest.
* Seed Selection: Opt for high-quality seeds from a reputable source. Look for seeds specifically labeled “Birds Eye Chili” or “Thai Chili.” I’ve had good luck with seeds from online retailers specializing in chili peppers.
* Timing is Key: Start your seeds indoors about 6-8 weeks before the last expected frost. This will give the seedlings enough time to develop before transplanting them outdoors.
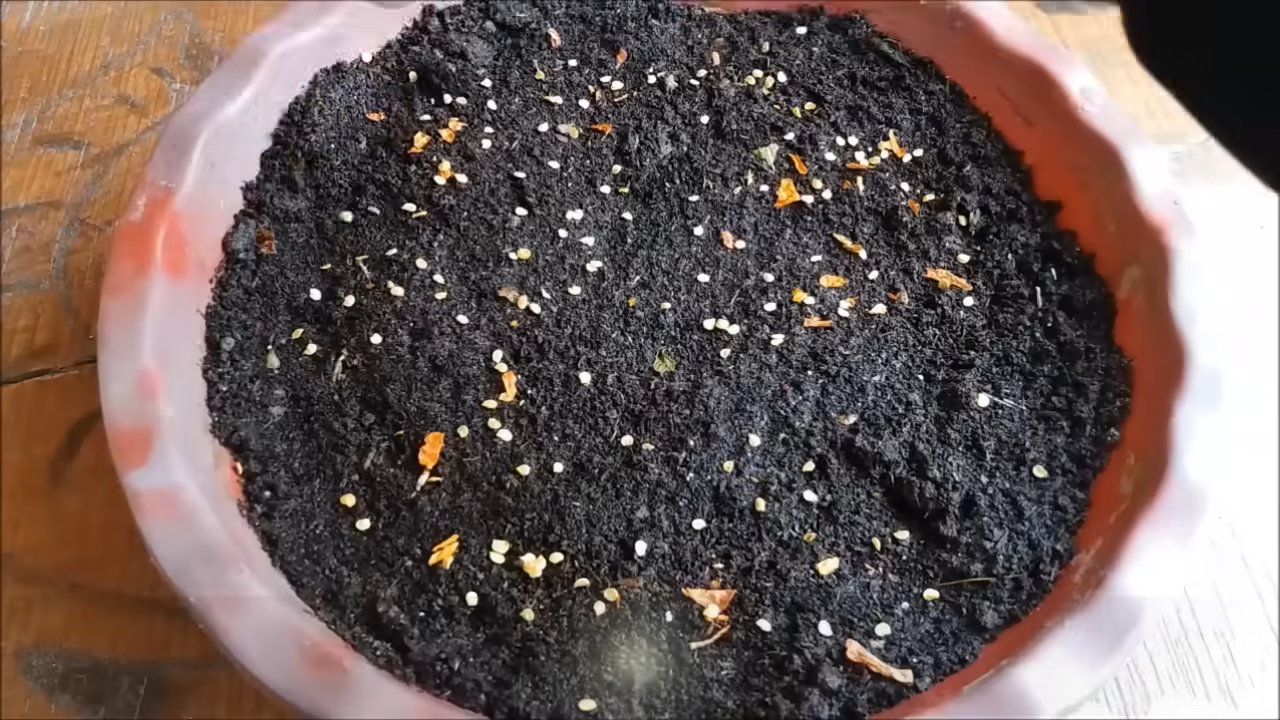
* Seed Starting Mix: Use a seed starting mix, not regular potting soil. Seed starting mix is lighter and provides better drainage, which is essential for germination.
* Containers: You can use seed starting trays, peat pots, or even recycled egg cartons. Just make sure your chosen container has drainage holes.
Step-by-Step Instructions:
1. Prepare Your Containers: Fill your chosen containers with seed starting mix, leaving about half an inch of space at the top. Gently tap the containers to settle the mix.
2. Sow the Seeds: Place 2-3 seeds in each container, about ¼ inch deep. This increases your chances of at least one seed germinating in each spot.
3. Cover and Water: Lightly cover the seeds with seed starting mix and gently water them using a spray bottle. You want to moisten the soil without disturbing the seeds.
4. Create a Humid Environment: Cover the containers with a clear plastic dome or plastic wrap to create a humid environment. This helps with germination.
5. Provide Warmth: Place the containers in a warm location, ideally between 75-85°F (24-29°C). A heat mat designed for seed starting can be very helpful.
6. Monitor and Water: Check the containers daily and water as needed to keep the soil consistently moist but not soggy. Remove the plastic dome or wrap once the seeds start to germinate.
7. Provide Light: Once the seedlings emerge, provide them with plenty of light. A sunny windowsill might work, but a grow light is ideal for ensuring strong, healthy growth. I use a simple LED grow light and it works wonders.
8. Thin the Seedlings: Once the seedlings have their first true leaves (the second set of leaves that appear after the initial seed leaves), thin them out, leaving only the strongest seedling in each container. Simply snip off the weaker seedlings at the soil line.
Transplanting Your Seedlings Outdoors
Once the danger of frost has passed and the soil has warmed up, it’s time to transplant your Birds Eye chili seedlings outdoors. This is a crucial step, so take your time and do it carefully.
* Choosing the Right Location: Birds Eye chili peppers need plenty of sunshine, so choose a location that receives at least 6-8 hours of direct sunlight per day.
* Soil Preparation: The soil should be well-draining and rich in organic matter. Amend the soil with compost or well-rotted manure before planting. I like to add a little bone meal to the planting hole for extra phosphorus, which promotes strong root development.
* Hardening Off: Before transplanting, you need to harden off your seedlings. This means gradually exposing them to outdoor conditions over a period of 7-10 days. Start by placing them outside for a few hours each day, gradually increasing the amount of time they spend outdoors. This helps them acclimate to the sun, wind, and temperature changes.
Step-by-Step Instructions:
1. Dig the Holes: Dig holes that are slightly larger than the root balls of your seedlings. Space the holes about 18-24 inches apart.
2. Remove the Seedlings: Gently remove the seedlings from their containers. If they are in peat pots, you can plant the entire pot directly into the ground. If they are in plastic containers, gently loosen the root ball and carefully remove the seedling.
3. Plant the Seedlings: Place the seedlings in the holes and backfill with soil. Gently firm the soil around the base of the plants.
4. Water Thoroughly: Water the seedlings thoroughly after planting. This helps to settle the soil and encourages root growth.
5. Mulch: Apply a layer of mulch around the base of the plants. Mulch helps to retain moisture, suppress weeds, and regulate soil temperature. I like to use straw or wood chips.
6. Provide Support (Optional): As the plants grow, they may need support, especially if they are heavily laden with peppers. You can use stakes or tomato cages to provide support.
Caring for Your Birds Eye Chili Plants
Once your Birds Eye chili plants are established, it’s important to provide them with proper care to ensure a healthy and productive harvest.
* Watering: Water your plants regularly, especially during hot, dry weather. Chili peppers need consistent moisture, but avoid overwatering, which can lead to root rot. I usually water deeply once or twice a week, depending on the weather.
* Fertilizing: Fertilize your plants every 2-3 weeks with a balanced fertilizer. Look for a fertilizer that is specifically formulated for vegetables or peppers. I like to use a liquid fertilizer that I can apply with a watering can.
* Pest Control: Keep an eye out for pests such as aphids, spider mites, and whiteflies. If you notice any pests, treat them promptly with an insecticidal soap or neem oil. I prefer to use organic pest control methods whenever possible.
* Pruning: Pruning is not essential for Birds Eye chili peppers, but it can help to improve air circulation and encourage bushier growth. You can prune off any dead or yellowing leaves, as well as any suckers that grow from the base of the plant.
Step-by-Step Instructions:
1. Regular Watering: Check the soil moisture regularly. If the top inch of soil feels dry, it’s time to water. Water deeply, allowing the water to soak into the soil.
2. Fertilizing Schedule: Follow the instructions on your chosen fertilizer for application rates and frequency. I usually dilute the fertilizer to half strength to avoid burning the plants.
3. Pest Monitoring: Inspect your plants regularly for signs of pests. Look for small insects on the leaves, stems, and flowers.
4. Pest Treatment: If you find any pests, treat them promptly with an appropriate insecticide. Follow the instructions on the insecticide label carefully.
5. Pruning (If Needed): Use clean, sharp pruning shears to remove any dead or yellowing leaves, as well as any suckers.
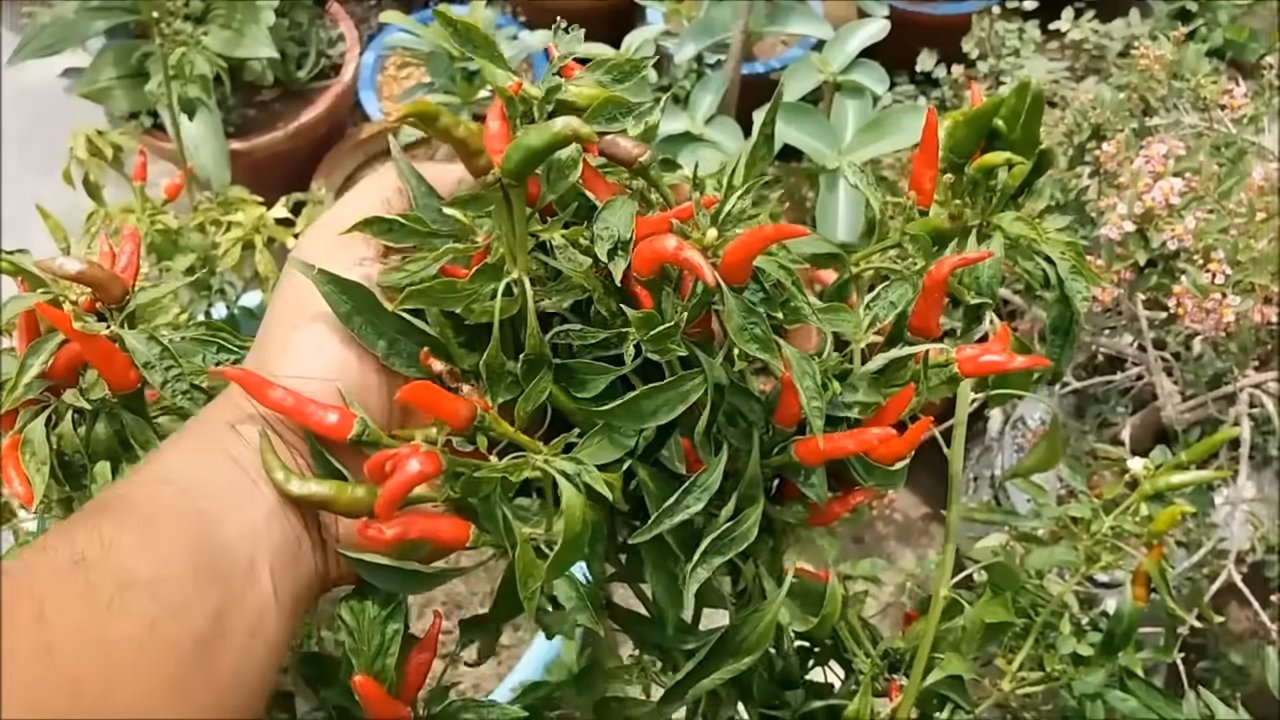
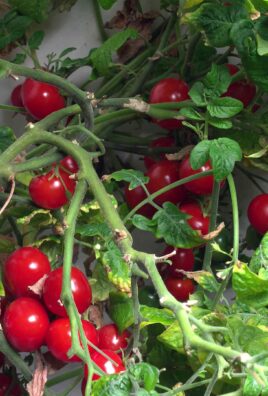
Harvesting Your Birds Eye Chili Peppers
The moment you’ve been waiting for! Harvesting your own Birds Eye chili peppers is incredibly rewarding.
* When to Harvest: Birds Eye chili peppers are typically ready to harvest about 80-90 days after transplanting. The peppers will turn from green to red when they are ripe.
* How to Harvest: Use sharp scissors or pruning shears to cut the peppers from the plant. Be careful not to damage the plant.
* Handling with Care: Wear gloves when handling Birds Eye chili peppers, as they can be very hot. Avoid touching your eyes or face after handling the peppers.
Step-by-Step Instructions:
1. Check for Ripeness: Look for peppers that are fully red and firm.
2. Cut the Peppers: Use sharp scissors or pruning shears to cut the peppers from the plant, leaving a small stem attached.
3. Handle with Gloves: Wear gloves to protect your hands from the chili’s heat.
4. Wash and Dry: Wash the peppers thoroughly and dry them with a clean towel.
Preserving Your Harvest
If you have a bumper crop of Birds Eye chili peppers, you’ll want to preserve them so you can enjoy them throughout the year.
* Drying: Drying is a simple and effective way to preserve chili peppers. You can dry them in a dehydrator, in the oven, or by air drying.
* Pickling: Pickling is another popular way to preserve chili peppers. You can pickle them in vinegar, brine, or oil.
* Freezing: Freezing is a quick and easy way to preserve chili peppers. Simply wash and dry the peppers, then place them in a freezer bag or container.
* Making Chili Oil: Infuse oil with the flavor and heat of your chilies. This is
Conclusion
So, there you have it! Growing your own Birds Eye Chili plants is not just a rewarding gardening experience; it’s a gateway to unlocking a world of culinary possibilities right in your backyard. Forget those bland, store-bought chilies that lack the fiery punch you crave. With a little patience and the simple steps outlined, you can cultivate a thriving chili patch bursting with vibrant, intensely flavored peppers.
Why is this DIY trick a must-try? Because it puts you in complete control. You choose the quality of your soil, the amount of sunlight your plants receive, and whether you want to grow organically. This translates to chilies that are fresher, more flavorful, and packed with that signature Birds Eye heat. Plus, there’s an undeniable satisfaction in harvesting something you’ve nurtured from seed to fruition.
But the fun doesn’t stop there! Feel free to experiment with different variations. Try growing your Birds Eye Chilies in containers on your balcony or patio if you’re short on space. Consider companion planting with herbs like basil or oregano, which can help deter pests and enhance the flavor of your chilies. You can even explore different cultivars of Birds Eye Chili, each with its own unique characteristics and heat levels. For example, some varieties are slightly sweeter, while others are even more scorching hot.
And once you’ve harvested your bounty, the real adventure begins. Use your homegrown Birds Eye Chilies to spice up your favorite dishes, create fiery sauces, or even infuse oils for a flavorful kick. Imagine the compliments you’ll receive when you tell your friends and family that the secret ingredient is homegrown!
We wholeheartedly encourage you to give this DIY trick a try. It’s easier than you might think, and the rewards are well worth the effort. Don’t be afraid to get your hands dirty and embrace the joy of growing your own food.
More importantly, we want to hear about your experiences! Share your tips, tricks, and triumphs in the comments below. Let us know what worked for you, what challenges you faced, and what delicious creations you’ve made with your homegrown Birds Eye Chilies. Your insights can help other aspiring chili growers on their journey. Let’s build a community of passionate chili enthusiasts who are dedicated to growing the best, most flavorful peppers possible. So, grab your seeds, prepare your soil, and get ready to experience the fiery satisfaction of growing your own Birds Eye Chili!
Frequently Asked Questions (FAQ)
What is the best time of year to start growing Birds Eye Chili?
The best time to start growing Birds Eye Chili depends on your climate. In warmer climates with mild winters, you can start seeds indoors as early as late winter (February/March). In cooler climates with shorter growing seasons, start seeds indoors 6-8 weeks before the last expected frost. This usually falls around March/April. The goal is to have seedlings ready to transplant outdoors once the weather has warmed up and the risk of frost has passed. Remember that Birds Eye Chilies thrive in warm temperatures, so avoid planting them outdoors too early.
How much sunlight do Birds Eye Chili plants need?
Birds Eye Chili plants are sun-loving plants and require at least 6-8 hours of direct sunlight per day to thrive. Choose a location in your garden that receives plenty of sunlight throughout the day. If you’re growing them in containers, make sure to place them in a sunny spot on your balcony or patio. Insufficient sunlight can lead to leggy growth, reduced flowering, and smaller, less flavorful chilies. If you live in an area with limited sunlight, consider using grow lights to supplement their light exposure.
What type of soil is best for growing Birds Eye Chili?
Birds Eye Chili plants prefer well-draining, fertile soil that is rich in organic matter. A slightly acidic to neutral pH (around 6.0-7.0) is ideal. You can improve the soil quality by amending it with compost, aged manure, or other organic materials. Avoid heavy clay soils that retain too much water, as this can lead to root rot. If you’re growing in containers, use a high-quality potting mix specifically formulated for vegetables or peppers.
How often should I water my Birds Eye Chili plants?
Water your Birds Eye Chili plants regularly, especially during hot, dry weather. The soil should be kept consistently moist but not waterlogged. Water deeply whenever the top inch of soil feels dry to the touch. Avoid overwatering, as this can lead to root rot and other fungal diseases. During the flowering and fruiting stages, increase watering slightly to support the plant’s increased needs. Using a moisture meter can help you determine the moisture level of the soil and avoid over or under watering.
How often should I fertilize my Birds Eye Chili plants?
Fertilize your Birds Eye Chili plants regularly throughout the growing season to provide them with the nutrients they need to thrive. Use a balanced fertilizer (e.g., 10-10-10) or a fertilizer specifically formulated for peppers or tomatoes. Apply the fertilizer according to the package instructions. During the flowering and fruiting stages, you can switch to a fertilizer that is higher in phosphorus and potassium to promote flower and fruit development. Avoid over-fertilizing, as this can lead to excessive foliage growth and reduced fruit production.
What are some common pests and diseases that affect Birds Eye Chili plants?
Birds Eye Chili plants can be susceptible to various pests and diseases, including aphids, spider mites, whiteflies, chili thrips, blossom-end rot, and fungal diseases. Regularly inspect your plants for signs of pests or diseases. If you detect any problems, take action immediately to prevent them from spreading. You can use organic pest control methods, such as insecticidal soap or neem oil, to control pests. To prevent fungal diseases, ensure good air circulation around your plants and avoid overwatering. Blossom-end rot is caused by a calcium deficiency, so make sure your soil is rich in calcium or supplement with a calcium-rich fertilizer.
How long does it take for Birds Eye Chili plants to produce fruit?
Birds Eye Chili plants typically take 60-90 days from transplanting to produce mature fruit. The exact time will depend on the variety, growing conditions, and climate. Once the chilies start to ripen, they will turn from green to red. You can harvest them when they are fully red and firm to the touch.
How do I harvest Birds Eye Chilies?
Harvest Birds Eye Chilies when they are fully ripe and have reached their mature color (usually red). Use pruning shears or scissors to cut the chilies from the plant, leaving a small stem attached. Be careful not to damage the plant when harvesting. Wear gloves when handling chilies, especially if you have sensitive skin, as the capsaicin (the compound that makes them hot) can cause irritation.
How do I store Birds Eye Chilies?
There are several ways to store Birds Eye Chilies. You can dry them, freeze them, pickle them, or make chili oil or sauce. To dry them, string them together and hang them in a well-ventilated area until they are completely dry. You can also dry them in a dehydrator. To freeze them, simply place them in a freezer bag and store them in the freezer. Pickled chilies can be stored in the refrigerator for several months. Chili oil and sauce can be stored in the refrigerator for several weeks.
Can I grow Birds Eye Chili indoors?
Yes, you can grow Birds Eye Chili indoors, but you will need to provide them with adequate light and warmth. Place them in a sunny window that receives at least 6-8 hours of direct sunlight per day. If you don’t have enough natural light, you can use grow lights to supplement their light exposure. Make sure to use a well-draining potting mix and water them regularly. You may also need to hand-pollinate the flowers to ensure fruit production.
Leave a Comment