

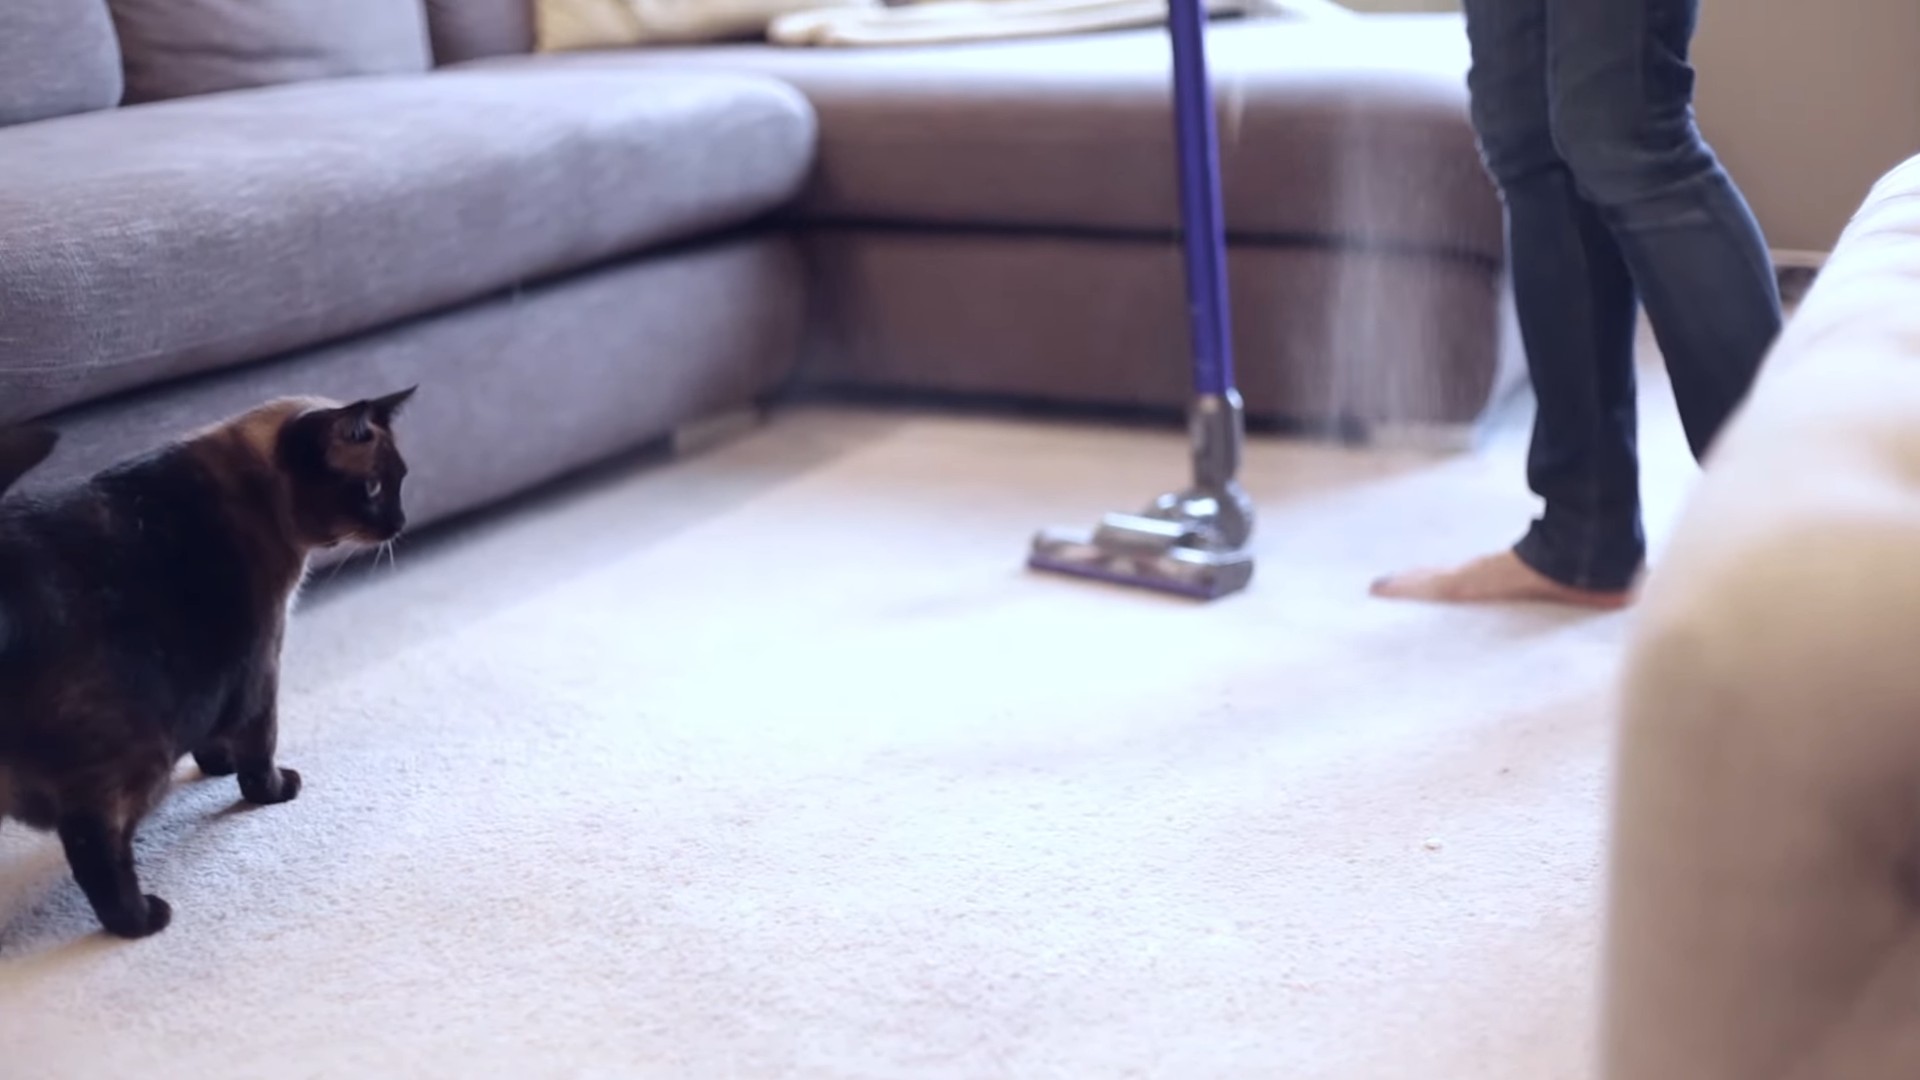
Pet hair removal tips – are you tired of battling a never-ending blizzard of fur in your home? I know I am! As a pet lover, I adore my furry friends, but the constant shedding can be a real headache. It feels like no matter how much I vacuum, sweep, or lint-roll, the pet hair just keeps coming back. It’s a common struggle, and you’re definitely not alone.
For centuries, humans have shared their homes with animals, and with that companionship comes the inevitable shedding. While our ancestors might have relied on simpler methods like shaking out rugs or using natural fibers to trap hair, we now have a plethora of tools and techniques at our disposal. But with so many options, it can be overwhelming to find what truly works.
That’s why I’ve compiled this ultimate guide to pet hair removal tips and DIY hacks. I’m going to share my tried-and-true methods, along with some clever DIY solutions that will help you reclaim your home from the furry invasion. From furniture to clothing to those hard-to-reach corners, we’ll tackle every surface and leave your home looking and feeling fresh. Get ready to say goodbye to the constant shedding stress and hello to a cleaner, happier home for both you and your beloved pets!
DIY Pet Hair Removal: Conquer the Fur!
Okay, fellow pet lovers, let’s face it: the struggle is real. We adore our furry companions, but sometimes it feels like we’re living in a giant, shedding beast. Pet hair gets *everywhere*. But don’t despair! I’ve compiled a comprehensive guide to help you win the war against pet hair, using simple DIY methods and readily available supplies. Get ready to reclaim your home!
Understanding the Enemy: Why is Pet Hair So Persistent?
Before we dive into the solutions, let’s understand why pet hair is so darn tenacious. Pet hair, especially from breeds with undercoats, often has a barbed structure. This makes it cling to fabrics like Velcro. Static electricity also plays a role, causing hair to stick to surfaces and attract more hair. Knowing this helps us choose the right tools and techniques.
The Arsenal: Essential Supplies for Pet Hair Removal
Here’s a list of items you’ll want to have on hand. Don’t worry, you probably already have most of these!
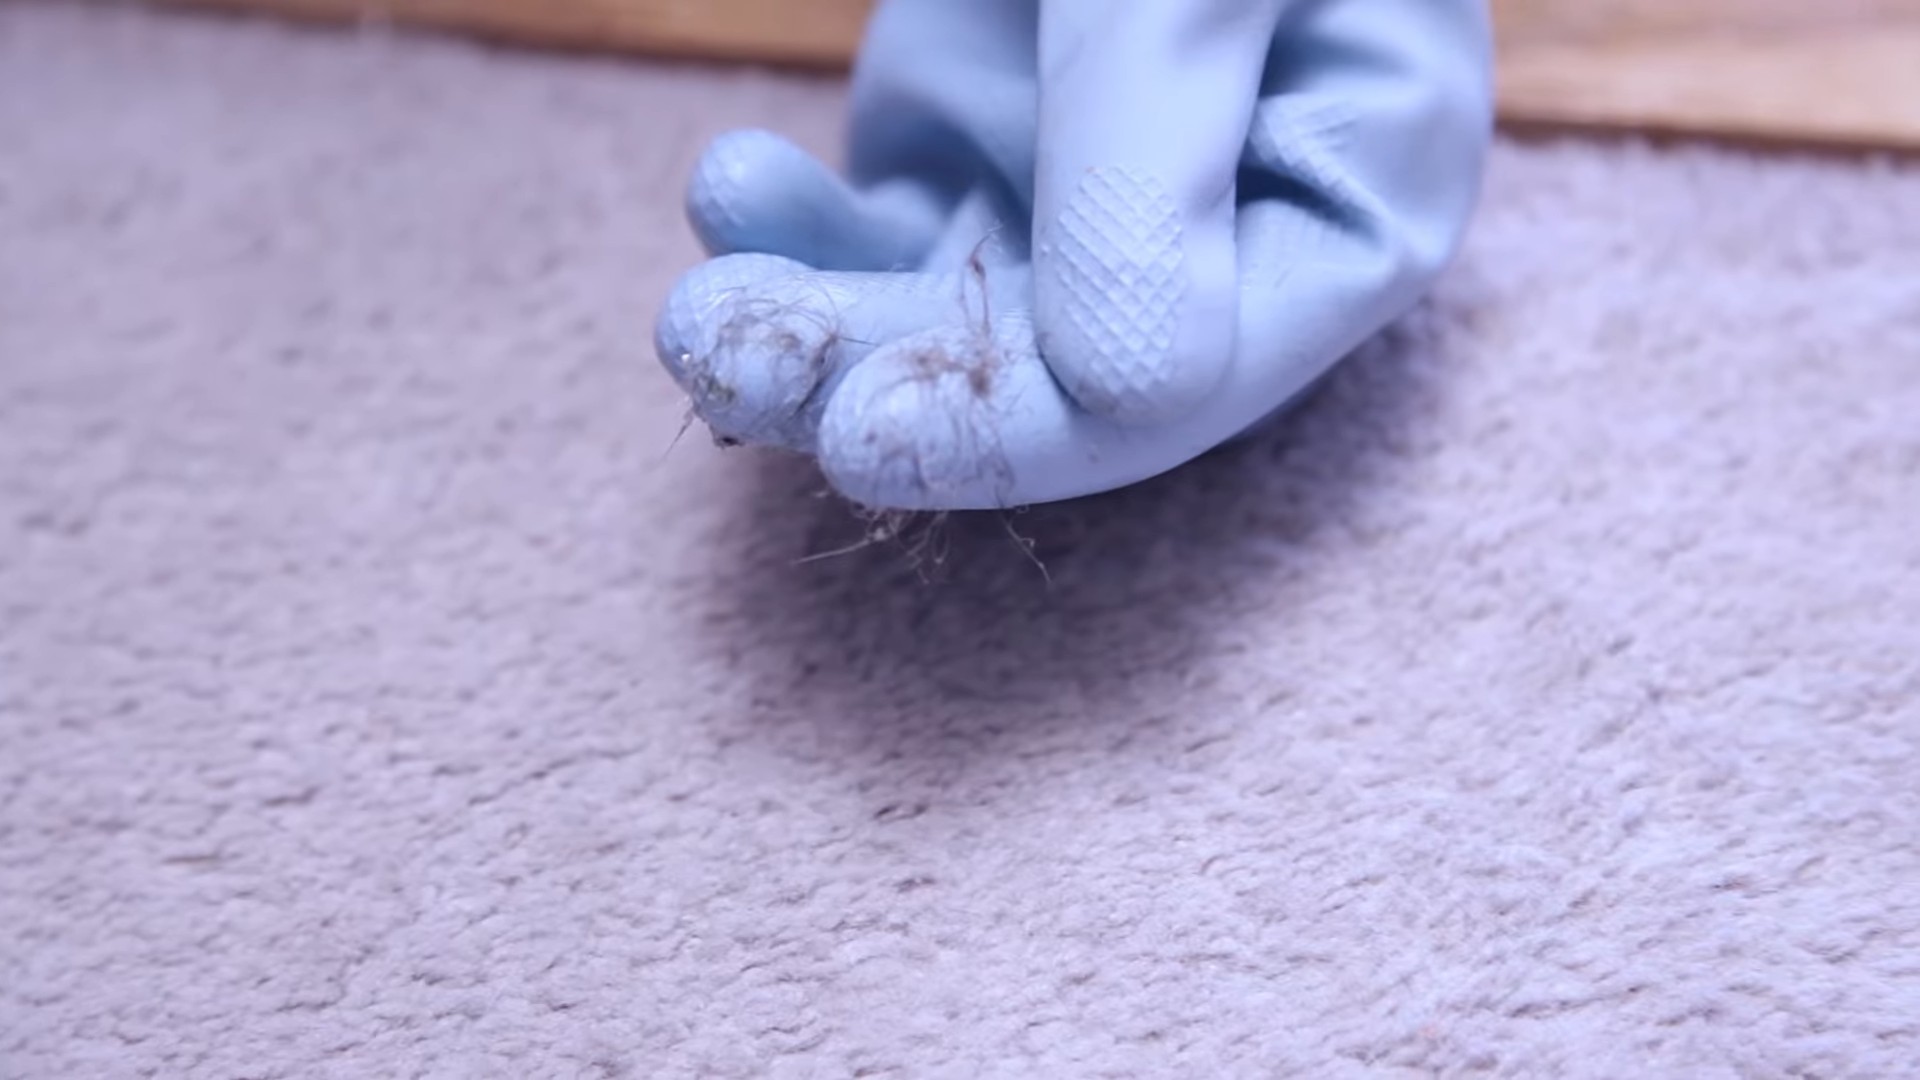
* **Rubber Gloves:** The humble rubber glove is a surprisingly effective pet hair magnet.
* **Microfiber Cloths:** These are fantastic for dusting and wiping down surfaces.
* **Spray Bottle:** For creating cleaning solutions.
* **White Vinegar:** A natural cleaner and deodorizer.
* **Baking Soda:** Absorbs odors and helps loosen hair.
* **Dish Soap:** Cuts through grease and grime, helping to release hair.
* **Fabric Softener:** Reduces static cling, preventing hair from sticking in the first place.
* **Vacuum Cleaner with Attachments:** A must-have for carpets and upholstery. Look for one with a motorized brush head.
* **Lint Roller:** A classic for quick touch-ups on clothing and furniture.
* **Squeegee:** Surprisingly effective on carpets and upholstery.
* **Pumice Stone:** For removing stubborn hair from carpets (use with caution!).
* **Pet Grooming Brush:** Prevention is key! Regular grooming reduces shedding.
Phase 1: Preemptive Strikes – Reducing Shedding at the Source
The best way to deal with pet hair is to minimize shedding in the first place. Regular grooming is absolutely crucial.
1. **Brush Your Pet Regularly:** This seems obvious, but consistency is key. Aim to brush your dog or cat several times a week, or even daily during shedding season. Use a brush appropriate for your pet’s coat type. For example, a slicker brush works well for removing loose undercoat, while a bristle brush is good for smoothing the outer coat. I personally love the Furminator for my shedding machine (I mean, my beloved dog!).
2. **Bathe Your Pet:** Bathing helps to loosen dead hair and skin cells. Don’t over-bathe, as this can dry out their skin. Once a month is usually sufficient, unless your pet gets particularly dirty. Use a pet-specific shampoo and conditioner.
3. **Consider Diet:** A healthy diet can contribute to a healthier coat and less shedding. Talk to your vet about the best food for your pet. Omega-3 fatty acid supplements can also help improve coat health.
4. Create a Designated “Pet Zone”: If possible, try to confine your pet to certain areas of the house. This will help contain the shedding. Cover furniture in these areas with washable blankets or throws.
Phase 2: Attacking the Hair – Removing Pet Hair from Different Surfaces
Now, let’s get down to the nitty-gritty of removing pet hair from various surfaces.
Removing Pet Hair from Furniture
1. **Rubber Glove Method:** Put on a pair of rubber gloves (the kind you use for washing dishes). Dampen the gloves slightly. Run your hands over the furniture, using a sweeping motion. The hair will cling to the gloves. Rinse the gloves with water to remove the hair, and repeat as needed. This works wonders on upholstery!
2. **Fabric Softener Spray:** Mix 1 part fabric softener with 2 parts water in a spray bottle. Lightly mist the furniture with the solution. Let it sit for a few minutes, then wipe down with a clean microfiber cloth. This will loosen the hair and reduce static cling.
3. **Vacuum with Upholstery Attachment:** Use the upholstery attachment on your vacuum cleaner to thoroughly vacuum the furniture. Pay special attention to crevices and seams where hair tends to accumulate.
4. **Lint Roller:** For quick touch-ups, a lint roller is your best friend. Keep one handy for removing stray hairs from clothing and furniture.
5. **Duct Tape (Use with Caution!):** Wrap duct tape around your hand, sticky side out. Gently press the tape onto the furniture and lift. This can be very effective, but be careful not to damage delicate fabrics. Test in an inconspicuous area first.
Removing Pet Hair from Carpets and Rugs
1. **Vacuum Thoroughly:** Vacuum your carpets and rugs regularly, at least once a week, or more often if you have a heavy shedder. Use a vacuum cleaner with a motorized brush head, as this will help to agitate the fibers and loosen the hair.
2. **Squeegee Method:** This is a surprisingly effective trick! Run a squeegee across the carpet, applying firm pressure. The rubber blade will grab the hair and pull it up. You’ll be amazed at how much hair you collect!
3. **Pumice Stone (Use with Extreme Caution!):** This is for *really* stubborn hair. Lightly dampen a pumice stone and gently rub it over the carpet in a circular motion. Be extremely careful not to damage the carpet fibers. Test in an inconspicuous area first. I only recommend this as a last resort.
4. **Baking Soda:** Sprinkle baking soda over the carpet and let it sit for at least 30 minutes, or even overnight. This will help to absorb odors and loosen the hair. Then, vacuum thoroughly.
5. **Vinegar and Water Solution:** Mix equal parts white vinegar and water in a spray bottle. Lightly mist the carpet with the solution. Let it sit for a few minutes, then blot with a clean cloth. This will help to loosen the hair and remove odors.
Removing Pet Hair from Clothing
1. **Lint Roller:** The classic solution! Keep a lint roller in your closet, your car, and your purse for quick touch-ups.
2. **Dryer Sheets:** Toss your clothes in the dryer with a dryer sheet for a few minutes. The dryer sheet will help to loosen the hair and reduce static cling. Clean the lint trap afterwards!
3. **Rubber Gloves:** Dampen a rubber glove and run it over your clothing. The hair will cling to the glove.
4. **Wash Clothes Inside Out:** This helps to prevent hair from clinging to the outside of your clothes.
5. **Add Vinegar to the Wash:** Add 1/2 cup of white vinegar to your washing machine during the rinse cycle. This will help to loosen the hair and reduce static cling.
6. Dedicated Pet Hair Washing Machine: Okay, this is a bit extreme, but if you have a *really* heavy shedder, you might consider having a separate washing machine just for pet bedding and heavily soiled items.
Removing Pet Hair from Hard Surfaces (Floors, Countertops, etc.)
1. **Microfiber Cloths:** Use a damp microfiber cloth to wipe down hard surfaces. The microfiber will trap the hair and prevent it from scattering.
2. **Vacuum with Hard Floor Attachment:** Use the hard floor attachment on your vacuum cleaner to vacuum hard surfaces.
3. **Dust Mop:** A dust mop is great for quickly removing hair from hard floors.
4. **Swiffer:** A Swiffer with a dry sweeping cloth is another good option for hard floors.
Phase 3: Maintaining a Hair-Free Home – Prevention and Regular Cleaning
Consistency is key to keeping pet hair under control.
1. **Regular Cleaning Schedule:** Establish a regular cleaning schedule and stick to it. Vacuum at least once a week, and more often if you have a heavy shedder. Dust and wipe down surfaces regularly.
2. **Wash Pet Bedding Frequently:** Wash your pet’s bedding at least once a week to remove accumulated hair and dander.
3. **Air Purifier:** An air purifier with a HEPA filter can help to remove pet dander and hair from the air.
4. **Train Your Pet (If Possible):** Some pets can be trained to stay off furniture or out of certain areas of the house. This can help to reduce shedding in those areas.
5. Consider Professional Cleaning: If you’re struggling to keep up with the pet hair, consider hiring a professional cleaning service to do a deep clean.
Extra Tips and Tricks
* Static Electricity: Static electricity makes pet hair cling to everything. Use a humidifier to increase the humidity in your home, which will help to reduce static cling.
* Essential Oils: Some essential oils, such as lavender and cedarwood, are said to repel pet hair. Add a few drops to your cleaning solutions or diffuse them in your home. (Always check if the essential oils are safe for
Conclusion
Tired of battling pet hair that seems to cling to every surface in your home? You’re not alone! Millions of pet owners face this daily struggle. But what if I told you there’s a simple, cost-effective, and surprisingly efficient solution right in your laundry room? This DIY pet hair removal trick, using readily available items, is a game-changer for anyone sharing their life with furry companions. It’s not just about removing the visible hair; it’s about reclaiming your furniture, your clothes, and your sanity!
Why is this DIY method a must-try? Because it works! Unlike expensive lint rollers that quickly lose their stickiness or vacuum attachments that struggle with embedded hair, this trick utilizes the power of your dryer and a few common household items to gently lift and separate pet hair from fabrics. It’s gentle enough for delicate items yet powerful enough to tackle even the most stubborn clumps of fur. Plus, it’s eco-friendly, reducing your reliance on disposable cleaning products.
But the best part? It’s incredibly versatile. While the core method remains the same, you can easily adapt it to suit your specific needs and preferences. For example, if you’re dealing with particularly clingy hair, try adding a dryer sheet infused with static cling reduction properties to the cycle. This will further help to loosen and trap the hair. Alternatively, for larger items like blankets or comforters, consider using two or three dryer balls for increased agitation and hair removal.
Don’t limit yourself to just clothes and bedding! This DIY trick also works wonders on curtains, throw pillows, and even car upholstery. Just remember to always check the care label of the item before placing it in the dryer to ensure it’s safe to do so. For delicate fabrics, use a low heat setting or an air-only cycle to prevent damage.
We’ve found that using a slightly damp microfiber cloth in the dryer can also enhance the hair-grabbing effect. The moisture helps to attract and trap the loose hair, making it even easier to remove. Experiment with different combinations of dryer balls, dryer sheets, and damp cloths to find what works best for your specific type of pet hair and fabrics.
Ready to say goodbye to endless lint rolling and hello to a fur-free home? Give this DIY pet hair removal trick a try! We’re confident that you’ll be amazed by the results. And once you’ve experienced the magic, we want to hear all about it! Share your before-and-after photos, your tips and tricks, and your overall experience in the comments below. Let’s create a community of pet owners who are winning the battle against pet hair, one dryer cycle at a time. Your insights could help other pet parents discover this life-changing solution and finally achieve a cleaner, more comfortable home. Don’t delay, try this amazing **pet hair removal** hack today!
Frequently Asked Questions (FAQ)
Q: What exactly do I need for this DIY pet hair removal trick?
A: The basic supplies are incredibly simple: your clothes dryer, dryer balls (wool or plastic), and optionally, dryer sheets or a slightly damp microfiber cloth. The dryer balls help to agitate the fabrics and loosen the pet hair, while the dryer sheets (if used) help to reduce static cling, making it easier for the hair to be removed. The damp microfiber cloth can further enhance the hair-grabbing effect.
Q: How does this DIY method actually work to remove pet hair?
A: The combination of heat, tumbling action, and static reduction (from the dryer sheets or dryer balls) works to loosen the pet hair from the fabric fibers. As the clothes tumble, the dryer balls gently beat against the fabric, dislodging the hair. The static reduction then helps to prevent the hair from clinging back to the fabric, allowing it to be collected in the dryer’s lint trap.
Q: Is this DIY trick safe for all types of fabrics?
A: It’s generally safe for most fabrics, but it’s always crucial to check the care label of the item before placing it in the dryer. Delicate fabrics like silk or lace should be avoided, as the heat and tumbling action could damage them. For more delicate items that are dryer-safe, use a low heat setting or an air-only cycle.
Q: How often should I use this DIY method to remove pet hair?
A: The frequency depends on how much your pet sheds and how often you wash your clothes and bedding. For heavy shedders, you might want to use this trick every time you dry your laundry. For lighter shedders, once or twice a week might be sufficient. Regularly cleaning your lint trap is also essential for optimal performance.
Q: What if I don’t have dryer balls? Can I still use this trick?
A: Yes, you can still use the trick without dryer balls, but the results might not be as dramatic. Dryer balls significantly enhance the hair removal process by providing extra agitation. If you don’t have dryer balls, you can try using clean tennis balls as a substitute, but be aware that they might make more noise.
Q: My dryer doesn’t have a low heat setting. Can I still use this method?
A: If your dryer doesn’t have a low heat setting, you can try using an air-only cycle. This will still provide the tumbling action needed to loosen the pet hair, but without the risk of damaging delicate fabrics. You might need to run the cycle for a longer period to achieve the desired results.
Q: How do I clean the lint trap after using this method?
A: Cleaning the lint trap is crucial for maintaining your dryer’s efficiency and preventing fire hazards. After each cycle, remove the lint trap and pull out the accumulated lint and pet hair. You can also use a vacuum cleaner with a hose attachment to remove any remaining debris.
Q: I’ve tried this trick, but I’m still finding pet hair on my clothes. What am I doing wrong?
A: There could be several reasons why you’re still finding pet hair. First, make sure you’re using enough dryer balls or dryer sheets. Second, check the care label of your clothes to ensure they’re dryer-safe and that you’re using the appropriate heat setting. Third, clean your lint trap regularly. Finally, consider pre-treating heavily soiled items with a pet hair removal brush or vacuum attachment before washing and drying them.
Q: Can this DIY trick be used on furniture upholstery?
A: While this trick is primarily designed for clothes and bedding, it can also be adapted for furniture upholstery. However, you’ll need to use a handheld fabric steamer or a slightly damp cloth to loosen the pet hair, then vacuum it up with a strong upholstery attachment. You can also try using a rubber glove or a pet hair removal brush to manually remove the hair before vacuuming.
Q: Are there any specific types of dryer sheets that work best for pet hair removal?
A: Dryer sheets that are specifically designed to reduce static cling tend to work best for pet hair removal. Look for dryer sheets that contain ingredients like cationic surfactants, which help to neutralize static electricity. You can also try using dryer sheets that are infused with pet-friendly fragrances to help mask any lingering pet odors.
Q: Can I use essential oils on the dryer balls to add a pleasant scent to my laundry?
A: While adding a few drops of essential oil to your wool dryer balls can impart a pleasant scent to your laundry, it’s important to use caution. Some essential oils can be flammable, so it’s best to use them sparingly and allow the dryer balls to dry completely before placing them in the dryer. Also, be mindful of any potential sensitivities or allergies that you or your pets may have to certain essential oils. Lavender, chamomile, and cedarwood are generally considered safe and pet-friendly options.
Q: What if my pet’s hair is really matted into the fabric?
A: For heavily matted pet hair, you might need to pre-treat the fabric before washing and drying it. Use a stiff brush or a pet hair removal tool to loosen the matted hair as much as possible. You can also try soaking the fabric in a solution of water and fabric softener before washing it. This will help to loosen the hair and make it easier to remove in the dryer.
Q: Does this method work for all types of pet hair, regardless of breed?
A: This method generally works well for most types of pet hair, but the effectiveness may vary depending on the breed and the type of hair. For example, long, fine hair may be more difficult to remove than short, coarse hair. Experiment with different combinations of dryer balls, dryer sheets, and damp cloths to find what works best for your specific type of pet hair.
Leave a Comment