

Grow Watermelon at Home – sounds like a summer dream, right? Imagine biting into a juicy, sweet watermelon that you nurtured from seed to fruit, right in your own backyard! It’s more achievable than you might think, and this DIY guide is your ticket to making that dream a reality.
Watermelons have a rich history, dating back thousands of years to Africa. They were even found in King Tut’s tomb! Over time, they’ve spread across the globe, becoming a symbol of summer picnics and refreshing treats. But you don’t need a sprawling farm to enjoy this delicious fruit.
Many people shy away from growing watermelons, thinking they require vast amounts of space and expert gardening skills. But that’s simply not true! With a few clever tricks and DIY hacks, you can successfully grow watermelon at home, even in a small garden or balcony. I’m going to show you how to overcome common challenges like limited space, pest control, and ensuring proper pollination. This guide will empower you to cultivate your own sweet slice of summer, proving that anyone can enjoy the satisfaction of harvesting their own homegrown watermelon. So, let’s get started and unlock the secrets to growing these delightful fruits in your very own space!
Growing Watermelons: A Beginner’s Guide to Sweet Success!
Hey there, fellow gardening enthusiasts! Ever dreamed of biting into a juicy, homegrown watermelon on a hot summer day? Well, dream no more! Growing your own watermelons is totally achievable, even if you’re a beginner like I once was. It takes a little planning and effort, but trust me, the reward is absolutely worth it. I’m going to walk you through everything you need to know to cultivate your own watermelon patch.
Choosing Your Watermelon Variety
Before we get our hands dirty, let’s talk about watermelon varieties. There are tons of options, each with its own unique characteristics. Consider your space, climate, and personal preferences when making your choice.
* **Space Savers:** If you’re short on space, look for bush or dwarf varieties like ‘Bush Sugar Baby’ or ‘Golden Midget’. These are perfect for smaller gardens or even containers.
* **Classic Favorites:** For that traditional watermelon flavor and size, ‘Crimson Sweet’ and ‘Charleston Gray’ are reliable choices.
* **Unique Colors:** Want something a little different? Try ‘Yellow Doll’ for a yellow-fleshed watermelon or ‘Black Diamond’ for a dark green rind.
* **Seedless Wonders:** If you prefer seedless watermelons, ‘Triploid’ varieties are the way to go. Just remember they need a seeded variety nearby for pollination.
Preparing Your Watermelon Patch
Watermelons are sun-loving, nutrient-hungry plants. Giving them the right start is crucial for a bountiful harvest.
* **Sunlight:** Watermelons need at least 6-8 hours of direct sunlight per day. Choose a location in your garden that gets plenty of sunshine.
* **Soil:** Well-drained, sandy loam soil is ideal. Watermelons don’t like soggy feet! Amend heavy clay soil with compost and other organic matter to improve drainage.
* **Nutrients:** Watermelons are heavy feeders. Before planting, amend your soil with plenty of compost, aged manure, or a balanced fertilizer.
* **Spacing:** Give your watermelon plants plenty of room to spread. Depending on the variety, space plants 2-5 feet apart. For vining varieties, allow even more space between rows.
Starting Your Watermelon Seeds
You can either start your watermelon seeds indoors or direct sow them in your garden. Starting indoors gives you a head start, especially in cooler climates.
* **Starting Indoors:**
* **Timing:** Start seeds 4-6 weeks before the last expected frost.
* **Containers:** Use peat pots or biodegradable containers to avoid disturbing the roots when transplanting.
* **Soil:** Use a seed-starting mix.
* **Planting:** Sow seeds about 1 inch deep.
* **Warmth:** Watermelon seeds need warmth to germinate. Use a heat mat or place the containers in a warm location.
* **Light:** Once the seedlings emerge, provide them with plenty of light. A grow light is ideal, but a sunny window can also work.
* **Hardening Off:** Before transplanting, gradually acclimate the seedlings to outdoor conditions by exposing them to increasing amounts of sunlight and wind over a week or two.
* **Direct Sowing:**
* **Timing:** Sow seeds directly in the garden after the last frost when the soil temperature is consistently above 70°F (21°C).
* **Planting:** Sow seeds about 1 inch deep in hills or rows.
* **Watering:** Keep the soil consistently moist until the seedlings emerge.
Transplanting Your Watermelon Seedlings
If you started your seeds indoors, it’s time to transplant them into your garden.
1. **Choose a Cloudy Day:** Transplanting on a cloudy day minimizes stress on the seedlings.
2. **Prepare the Planting Hole:** Dig a hole slightly larger than the root ball of the seedling.
3. **Carefully Remove the Seedling:** Gently remove the seedling from its container, being careful not to damage the roots. If you used a peat pot, you can plant the entire pot.
4. **Plant the Seedling:** Place the seedling in the hole and backfill with soil.
5. **Water Thoroughly:** Water the seedling thoroughly to help it settle in.
6. **Mulch:** Apply a layer of mulch around the plant to help retain moisture and suppress weeds. I like to use straw or shredded leaves.
Caring for Your Watermelon Plants
Once your watermelon plants are established, it’s important to provide them with the care they need to thrive.
* **Watering:** Watermelons need consistent moisture, especially during fruit development. Water deeply and regularly, especially during dry spells. Avoid overhead watering, which can promote fungal diseases. Drip irrigation is ideal.
* **Fertilizing:** Side-dress your watermelon plants with a balanced fertilizer every few weeks. You can also use compost tea or fish emulsion.
* **Weeding:** Keep your watermelon patch free of weeds, which can compete with the plants for nutrients and water.
* **Pruning:** While not essential, pruning can improve air circulation and fruit production. Remove any suckers (small shoots that grow from the base of the plant) and any yellowing or diseased leaves.
* **Pollination:** Watermelons need to be pollinated in order to produce fruit. Bees are the primary pollinators. If you’re not seeing a lot of bee activity, you can hand-pollinate the flowers. To do this, use a small paintbrush to transfer pollen from the male flowers (which have a long, thin stem) to the female flowers (which have a small fruit at the base).
* **Protecting from Pests and Diseases:** Watermelons can be susceptible to various pests and diseases, including squash bugs, aphids, and powdery mildew. Inspect your plants regularly and take action if you notice any problems. Insecticidal soap and neem oil can be effective against many pests. For fungal diseases, use a fungicide or try to improve air circulation around the plants.
Supporting Your Watermelons
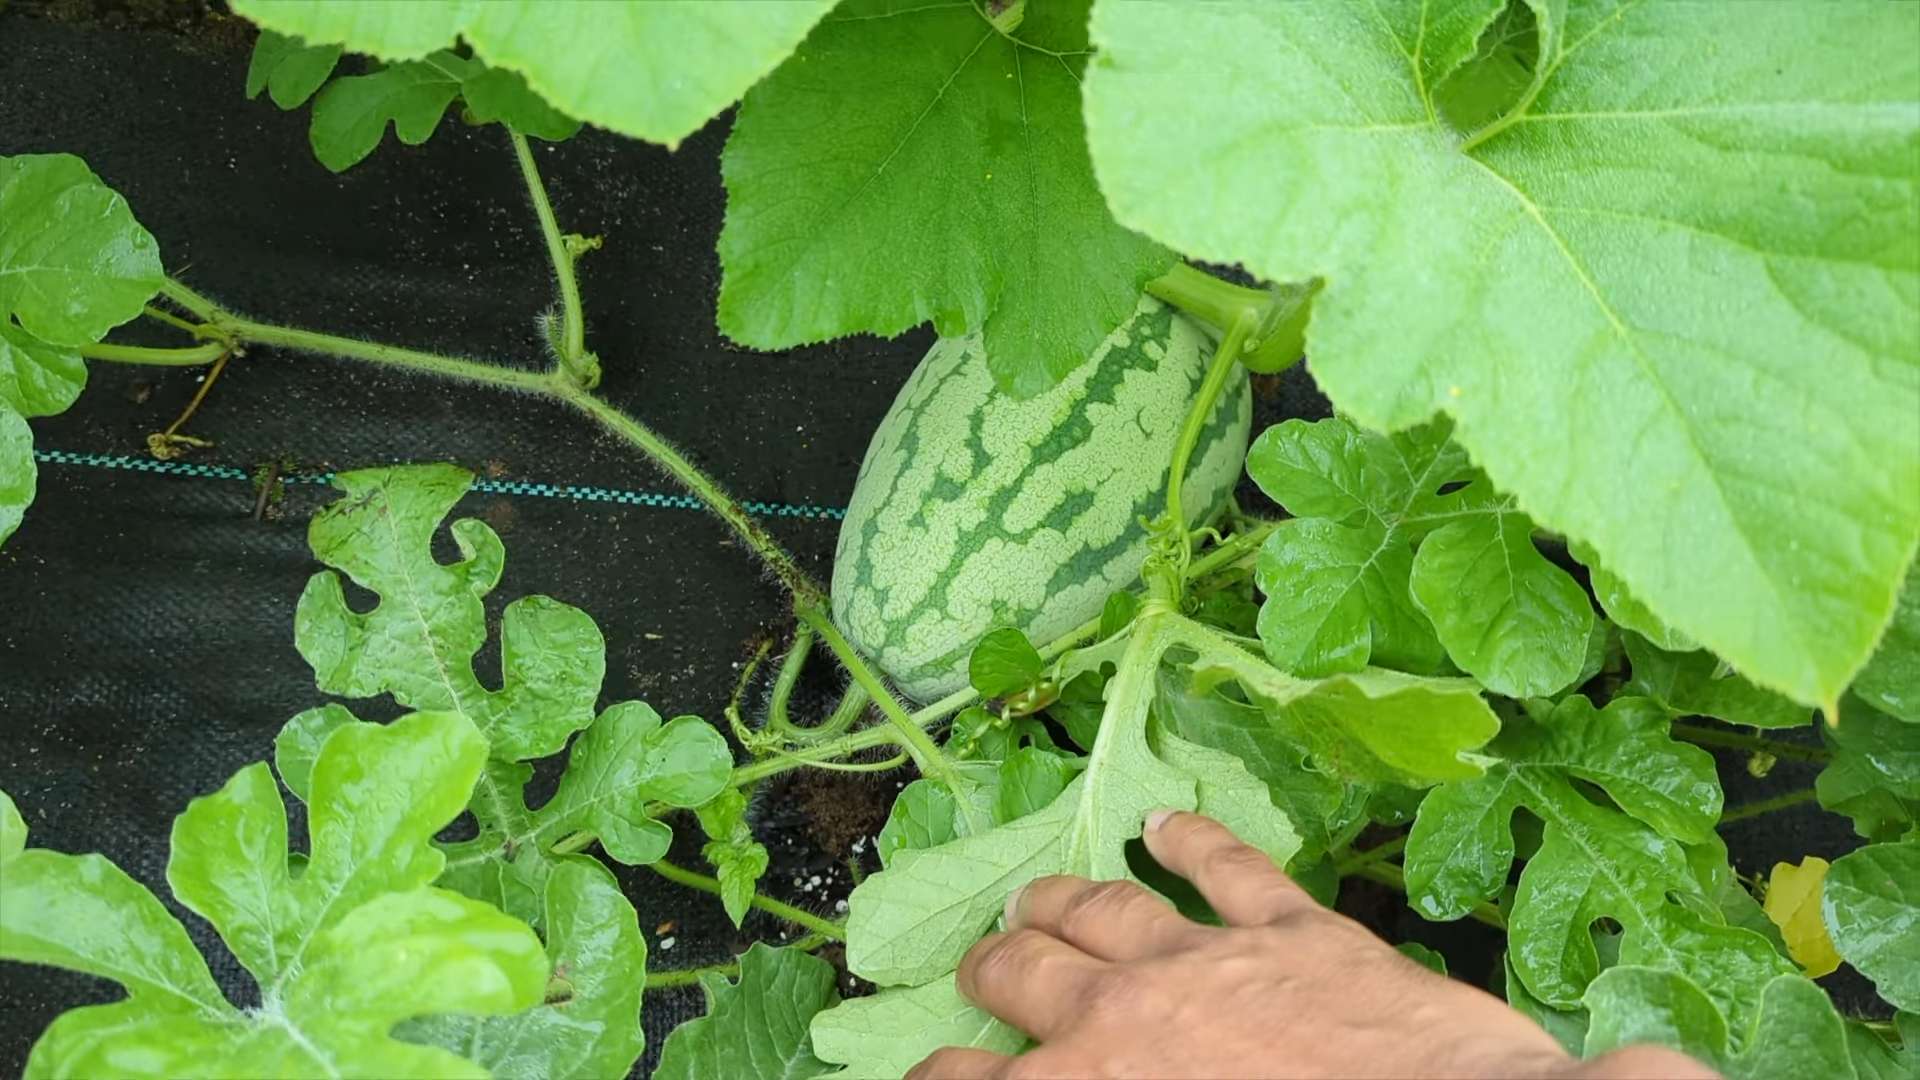
As your watermelons grow, they may need some support to prevent them from rotting on the ground.
* **Elevate the Fruits:** Place a piece of cardboard, wood, or straw under each watermelon to keep it off the soil. This will help prevent rot and encourage even ripening.
* **Use a Sling:** For larger watermelons, you can use a sling made from pantyhose or netting to support the fruit. Tie the sling to a trellis or stake.
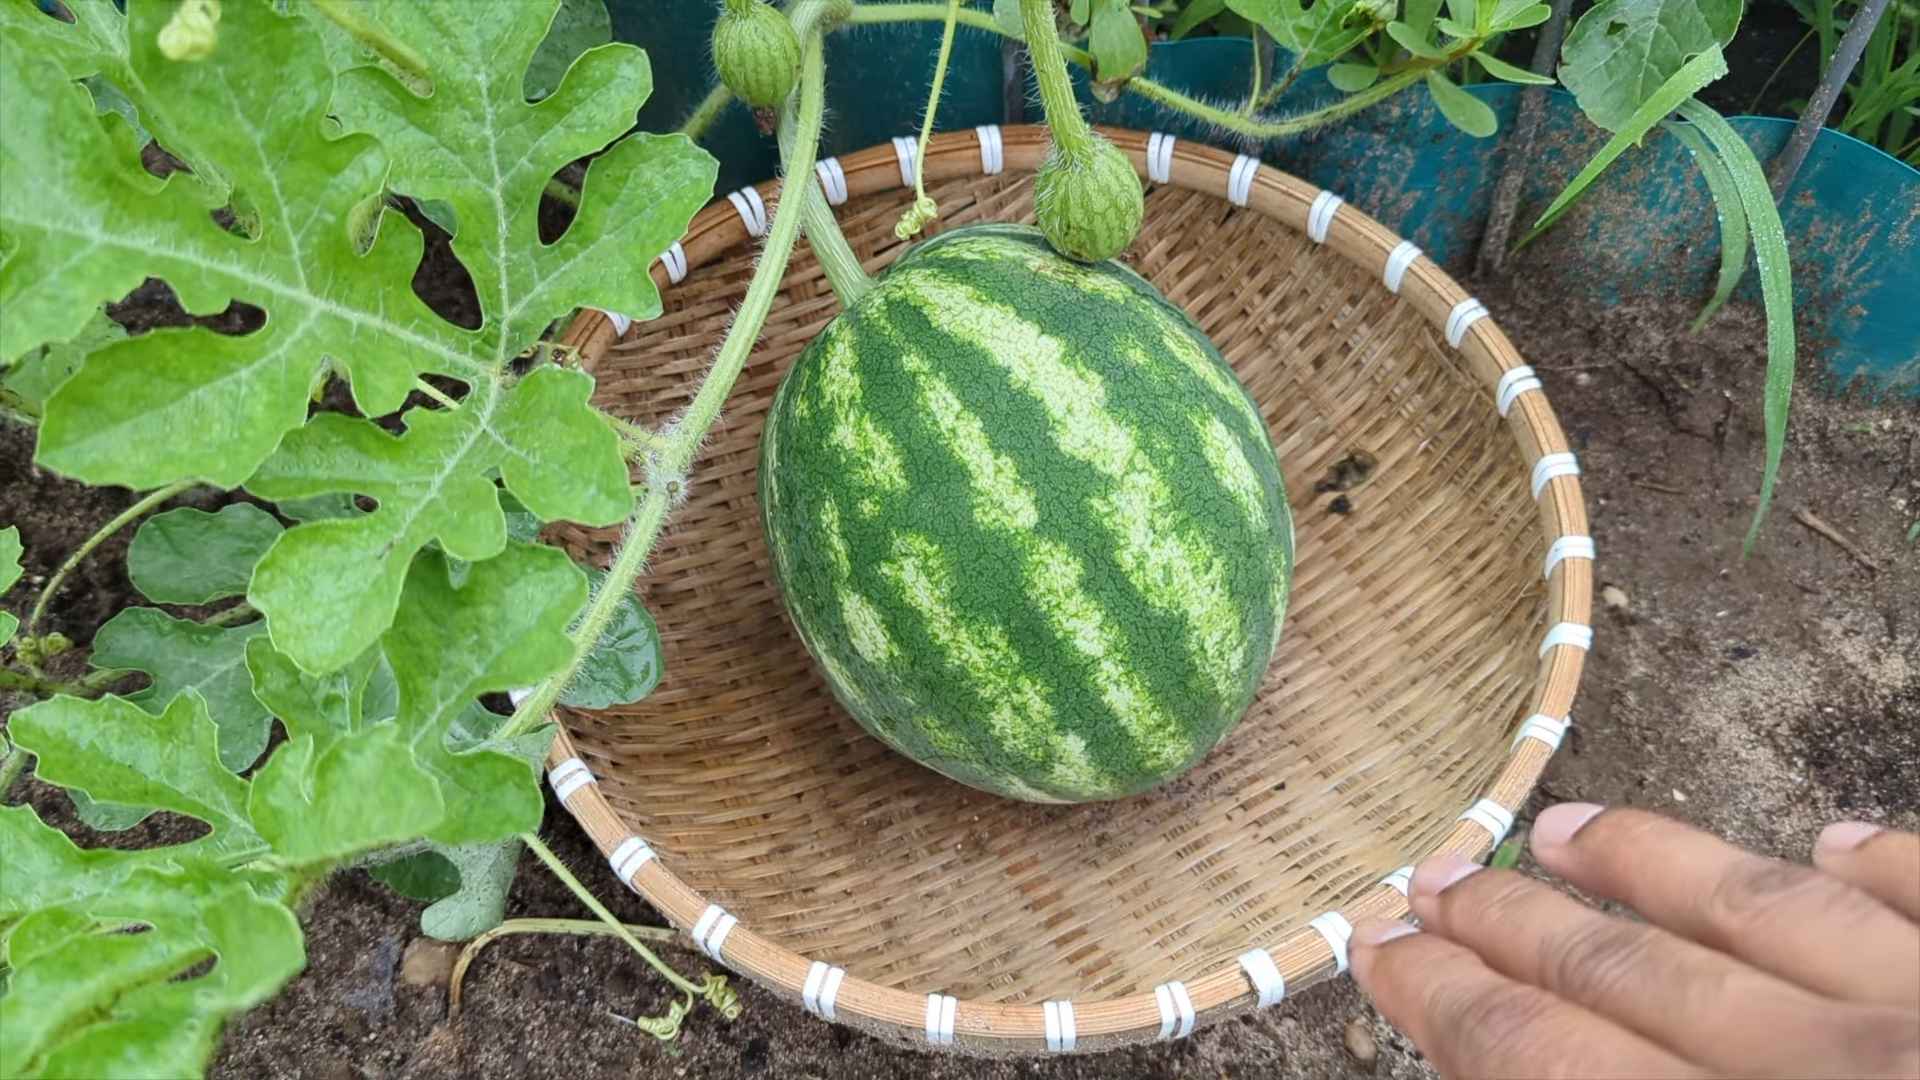
Harvesting Your Watermelons
Knowing when to harvest your watermelons can be tricky, but here are a few signs to look for:
1. **The Tendril:** The tendril closest to the fruit should be brown and dry.
2. **The Ground Spot:** The spot where the watermelon rests on the ground should be yellow or cream-colored.
3. **The Thump Test:** Give the watermelon a gentle thump. A ripe watermelon will sound hollow.
4. **Days to Maturity:** Check the seed packet or plant tag for the days to maturity. This is a good guideline, but it’s not always accurate.
Once you’re confident that your watermelon is ripe, use a sharp knife to cut it from the vine, leaving a few inches of stem attached.
Enjoying Your Homegrown Watermelon
Congratulations! You’ve successfully grown your own watermelon. Now it’s time to enjoy the fruits (literally!) of your labor.
* **Chill:** Chill your watermelon in the refrigerator for a few hours before serving.
* **Cut and Serve:** Cut the watermelon into wedges or cubes and enjoy!
* **Get Creative:** Use your watermelon in salads, smoothies, or even grilled!
Troubleshooting Common Watermelon Problems
Even with the best care, you may encounter some problems when growing watermelons. Here are a few common issues and how to address them:
* **Poor Fruit Set:** This can be caused by lack of pollination, cool temperatures, or nutrient deficiencies. Hand-pollinate the flowers, provide adequate warmth, and fertilize regularly.
* **Blossom End Rot:** This is caused by calcium deficiency. Amend your soil with calcium before planting and water regularly.
* **Cracked Watermelons:** This can be caused by inconsistent watering. Water deeply and regularly, especially during dry spells.
* **Pests and Diseases:** As mentioned earlier, inspect your plants regularly and take action if you notice any problems.
Growing watermelons can be a rewarding experience. With a little planning and effort, you can enjoy the taste of homegrown sweetness all summer long. Happy gardening!
Conclusion
So, there you have it! Growing watermelons at home might seem daunting at first, but with a little patience, the right techniques, and our simple guide, you’ll be sinking your teeth into a juicy, homegrown watermelon before you know it. This isn’t just about saving money at the grocery store; it’s about experiencing the satisfaction of nurturing a plant from seed to fruit, connecting with nature, and enjoying the unparalleled flavor of a watermelon ripened under your own care.
Why is this DIY watermelon growing trick a must-try? Because it empowers you to control the entire process, from soil quality to watering schedule, ensuring you get the sweetest, most flavorful watermelons possible. Store-bought watermelons often lack the intense sweetness and vibrant color of homegrown varieties, simply because they’re harvested before they’re fully ripe to facilitate shipping and storage. When you grow watermelon at home, you pick it at its peak, guaranteeing an explosion of flavor with every bite.
But the fun doesn’t stop there! Feel free to experiment with different watermelon varieties. Consider trying smaller, personal-sized watermelons like Sugar Baby or Yellow Doll if you have limited space. Or, if you’re feeling adventurous, explore heirloom varieties like Moon and Stars for a truly unique and visually stunning fruit. You can also experiment with companion planting. Marigolds, for example, can help deter pests, while basil can improve the overall health of your watermelon plants.
Don’t be afraid to get your hands dirty and learn along the way. Gardening is a journey, and even experienced gardeners encounter challenges. The key is to observe your plants, adapt your techniques as needed, and celebrate your successes, no matter how small.
We’re confident that with our guide, you’ll be well on your way to enjoying a bountiful watermelon harvest. So, grab your seeds, prepare your soil, and get ready to embark on this rewarding gardening adventure.
We can’t wait to hear about your experiences! Share your watermelon growing journey with us in the comments below. Tell us about your successes, your challenges, and any tips or tricks you’ve discovered along the way. Let’s create a community of watermelon enthusiasts and inspire others to experience the joy of growing their own food. Happy gardening!
Frequently Asked Questions (FAQ)
Q: How much space do I really need to grow watermelons?
A: Watermelons are sprawling plants, so space is definitely a consideration. Ideally, you’ll want at least 6-8 feet between plants. However, if you’re limited on space, you can try growing smaller varieties like Sugar Baby, which require less room. Vertical gardening techniques, such as training the vines up a trellis, can also help maximize space. Just be sure to provide adequate support for the developing watermelons as they get heavier. Container gardening is also an option for dwarf varieties, but you’ll need a very large container (at least 20 gallons) and consistent watering and fertilization.
Q: What kind of soil is best for growing watermelons?
A: Watermelons thrive in well-drained, sandy loam soil that is rich in organic matter. The soil should have a pH between 6.0 and 6.8. Before planting, amend your soil with compost or well-rotted manure to improve its fertility and drainage. If your soil is heavy clay, consider adding sand or other amendments to improve drainage. Good drainage is crucial, as watermelons are susceptible to root rot in soggy conditions.
Q: How often should I water my watermelon plants?
A: Watermelons need consistent moisture, especially during fruit development. Water deeply and regularly, aiming for about 1-2 inches of water per week. Avoid overhead watering, as this can promote fungal diseases. Drip irrigation or soaker hoses are ideal for delivering water directly to the roots. Reduce watering as the watermelons ripen to concentrate the sugars and enhance their sweetness. Check the soil moisture regularly by sticking your finger a few inches into the soil. If it feels dry, it’s time to water.
Q: What are some common pests and diseases that affect watermelons, and how can I prevent them?
A: Common pests include aphids, squash bugs, and vine borers. Diseases include powdery mildew, fusarium wilt, and anthracnose. To prevent these problems, practice good garden hygiene. Remove any diseased or infested plant material promptly. Use insecticidal soap or neem oil to control pests. Ensure good air circulation around your plants to prevent fungal diseases. Consider using disease-resistant watermelon varieties. Crop rotation can also help prevent soilborne diseases. Regularly inspect your plants for signs of pests or diseases and take action promptly.
Q: How do I know when my watermelon is ripe and ready to harvest?
A: Determining when a watermelon is ripe can be tricky, but there are a few key indicators. First, look at the tendril closest to the watermelon stem. When this tendril turns brown and dries out, it’s a good sign that the watermelon is nearing ripeness. Second, check the underside of the watermelon where it rests on the ground. This spot, called the ground spot, should turn from white to a creamy yellow color. Finally, give the watermelon a gentle thump. A ripe watermelon will sound hollow and deep. With practice, you’ll develop an ear for the perfect watermelon thump.
Q: Can I grow watermelons in containers?
A: Yes, you can grow watermelons in containers, but it requires careful planning and attention. Choose a dwarf or bush variety specifically bred for container gardening. You’ll need a very large container, at least 20 gallons in size, with good drainage holes. Use a high-quality potting mix that is well-draining and rich in organic matter. Water regularly and fertilize frequently, as container-grown plants tend to dry out and deplete nutrients more quickly. Provide support for the vines as they grow. Be prepared to hand-pollinate the flowers if necessary, as pollinators may not be as active in container environments.
Q: What are some good companion plants for watermelons?
A: Companion planting can benefit watermelons in several ways. Marigolds can help deter pests like nematodes and aphids. Basil can improve the overall health of the watermelon plants and repel certain insects. Nasturtiums attract beneficial insects that prey on pests. Radishes can help break up the soil and improve drainage. Avoid planting watermelons near members of the cucurbit family (squash, pumpkins, cucumbers), as they can compete for resources and attract similar pests and diseases.
Q: How do I save watermelon seeds for next year?
A: Saving watermelon seeds is a great way to propagate your favorite varieties. After enjoying your watermelon, collect the seeds and rinse them thoroughly to remove any pulp. Spread the seeds out on a paper towel and let them dry completely for several days. Once dry, store the seeds in an airtight container in a cool, dark, and dry place. Properly stored watermelon seeds can remain viable for several years. Be aware that if you grew a hybrid watermelon variety, the seeds may not produce plants that are true to type.
Q: My watermelon plant is producing flowers, but no fruit. What’s going on?
A: This is a common problem, and it’s usually due to a lack of pollination. Watermelons have separate male and female flowers, and both are needed for fruit to develop. Bees and other pollinators are essential for transferring pollen from the male flowers to the female flowers. If you’re not seeing many bees in your garden, you may need to hand-pollinate the flowers. To do this, use a small paintbrush to collect pollen from the male flowers and transfer it to the stigma of the female flowers. You can identify female flowers by the small, immature watermelon at the base of the flower.
Leave a Comment