

Eggshell Bioplastic Bowl DIY: Ever wondered if you could transform something as simple as eggshells into a durable and eco-friendly material? I know I have! For centuries, resourceful individuals have sought ways to repurpose everyday items, and this project taps into that very spirit. While the term “bioplastic” might sound modern, the concept of using natural materials to create functional objects is deeply rooted in human history. Think of ancient civilizations using clay to craft pottery or weaving baskets from plant fibers.
Today, with growing concerns about plastic waste, the need for sustainable alternatives is more pressing than ever. That’s where this Eggshell Bioplastic Bowl DIY comes in! Imagine creating beautiful, biodegradable bowls right in your own kitchen, reducing your environmental footprint and adding a touch of handmade charm to your home. This isn’t just a fun craft project; it’s a step towards a more sustainable lifestyle. I’m so excited to share this simple yet impactful DIY with you, showing you how to turn discarded eggshells into something truly amazing. Let’s get started!
DIY Eggshell Bioplastic Bowl: A Sustainable and Creative Project
Hey there, fellow DIY enthusiasts! Today, I’m super excited to share a project that’s not only fun and creative but also eco-friendly: making a bioplastic bowl from eggshells! Yes, you read that right – eggshells! This project is a fantastic way to repurpose waste, learn about bioplastics, and create a unique, sustainable piece for your home. Let’s dive in!
Materials You’ll Need
Before we get started, let’s gather all the necessary materials. Trust me, having everything ready will make the process much smoother.
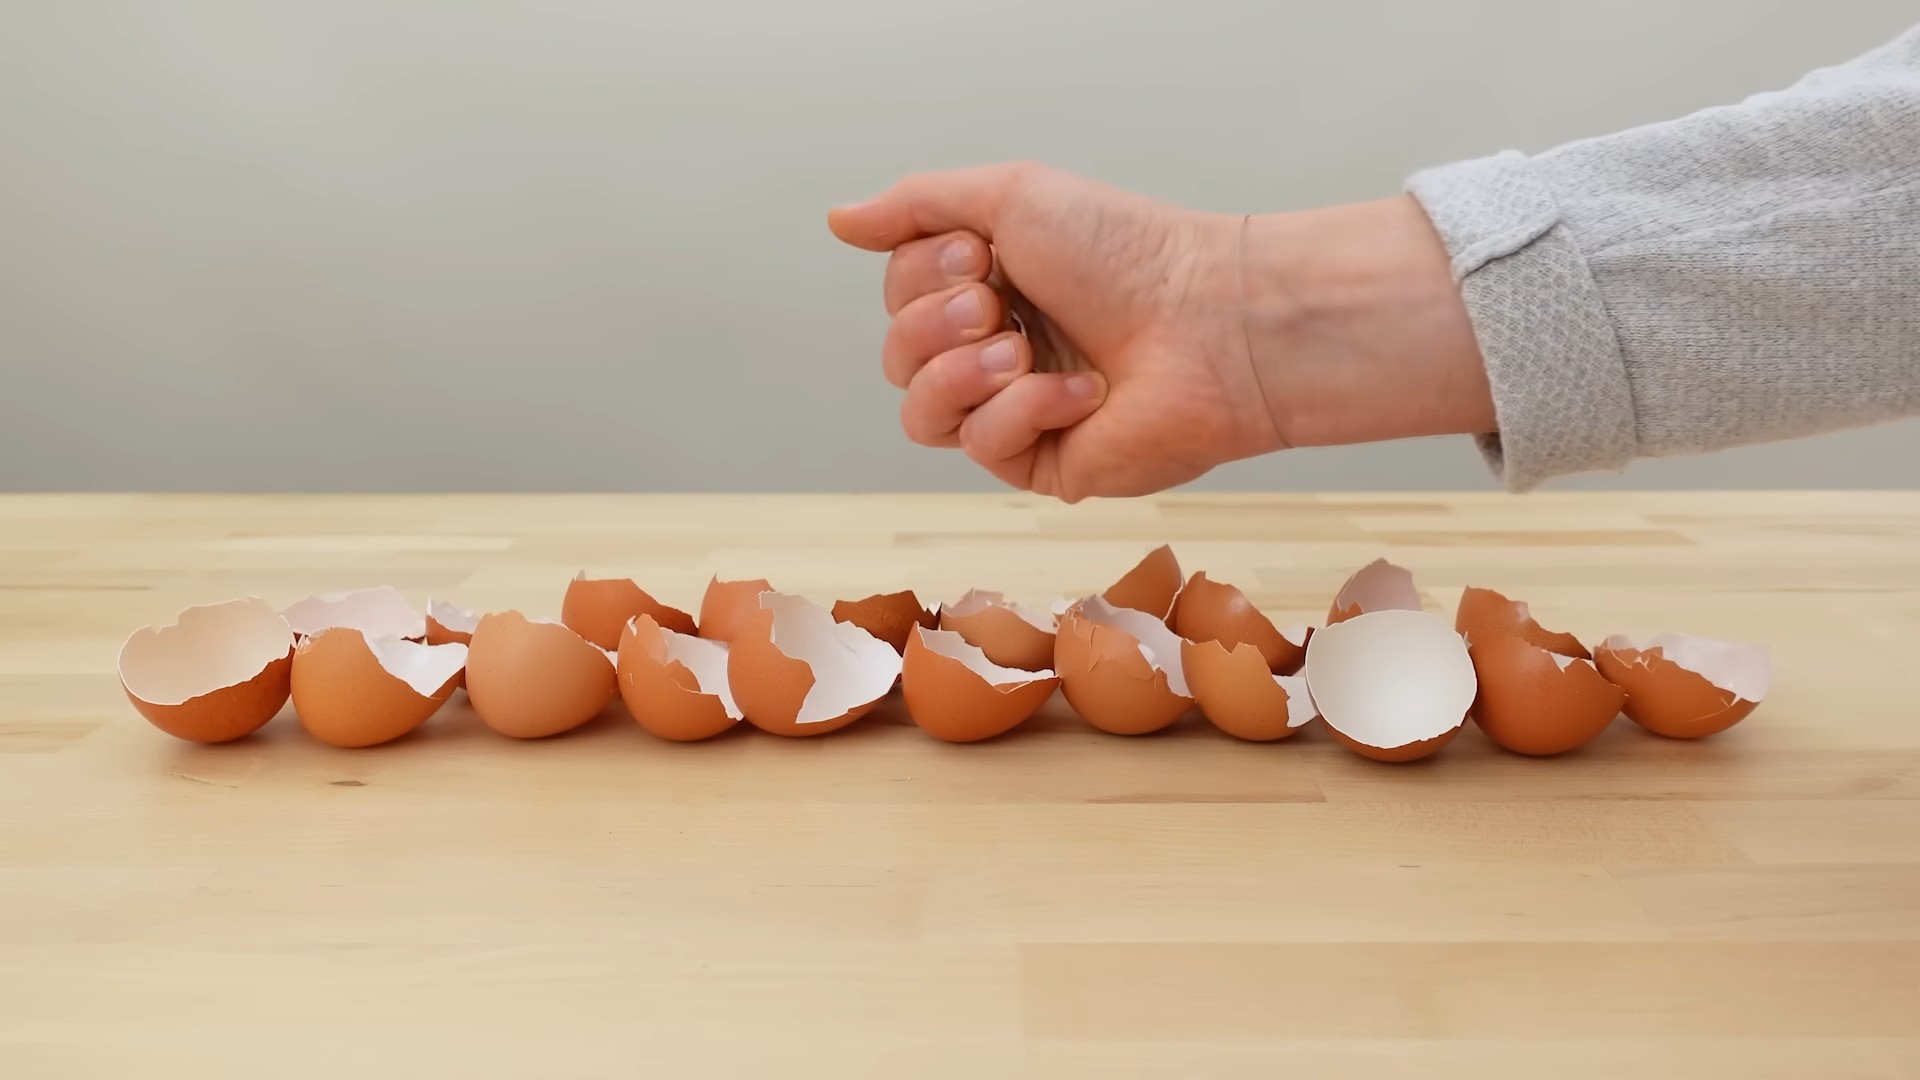
* Eggshells: Lots of them! Aim for at least 20-30 eggshells, depending on the size of the bowl you want to create. The more, the better, as some might break during the process.
* Cornstarch: This will act as our binding agent. You’ll need about 1/2 cup.
* Glycerin: This adds flexibility to the bioplastic. You’ll need about 2 tablespoons. You can find this at most pharmacies or online.
* White Vinegar: This helps break down the eggshells and create a smoother mixture. You’ll need about 1/4 cup.
* Water: For mixing and cleaning.
* Food Coloring (Optional): If you want to add some color to your bowl, grab your favorite food coloring.
* Mixing Bowls: You’ll need a couple of different sizes.
* Blender or Food Processor: To grind the eggshells into a fine powder. A coffee grinder can also work in a pinch.
* Spatula or Spoon: For stirring and mixing.
* Baking Sheet: To dry the bioplastic.
* Parchment Paper: To line the baking sheet and prevent sticking.
* Bowl for Molding: Choose a bowl that’s the size and shape you want your bioplastic bowl to be. This will act as our mold.
* Plastic Wrap: To line the molding bowl.
* Sandpaper (Optional): For smoothing any rough edges after drying.
* Protective Gloves: To protect your hands from the vinegar and bioplastic mixture.
* Dust Mask: To avoid inhaling eggshell dust during grinding.
Preparing the Eggshells
This is a crucial step, so let’s take our time and do it right.
1. Clean the Eggshells: After using eggs, rinse the shells thoroughly with water. Remove any remaining egg white or yolk. This is important to prevent any unpleasant smells or bacterial growth.
2. Boil the Eggshells (Optional but Recommended): Boiling the eggshells for about 10-15 minutes helps to further sanitize them and remove any lingering bacteria. This step is especially important if you’re concerned about hygiene.
3. Dry the Eggshells: Spread the cleaned eggshells on a baking sheet lined with parchment paper and let them air dry completely. You can also dry them in a low-temperature oven (around 200°F or 93°C) for about 30 minutes. Make sure they are completely dry before moving on to the next step.
4. Grind the Eggshells: This is where the blender or food processor comes in handy. Put on your dust mask! Place the dried eggshells into the blender or food processor and grind them into a fine powder. The finer the powder, the smoother your bioplastic will be. If you don’t have a blender, you can use a mortar and pestle, but it will take significantly longer.
5. Sift the Eggshell Powder (Optional): For an even smoother bioplastic, sift the eggshell powder through a fine-mesh sieve. This will remove any larger pieces that didn’t grind properly.
Making the Bioplastic Mixture
Now for the fun part – creating the bioplastic!
1. Combine Dry Ingredients: In a mixing bowl, combine the eggshell powder and cornstarch. Mix them well to ensure they are evenly distributed.
2. Add Wet Ingredients: Gradually add the white vinegar, glycerin, and water to the dry ingredients. Start with a small amount of water and add more as needed until you achieve a smooth, paste-like consistency. The mixture should be thick but still pourable.
3. Add Food Coloring (Optional): If you want to add color to your bowl, now is the time to add a few drops of food coloring. Stir well until the color is evenly distributed throughout the mixture.
4. Cook the Mixture: Pour the mixture into a saucepan and heat over medium heat, stirring constantly. Be careful not to let it burn. The mixture will start to thicken as it heats up. Continue stirring until it reaches a consistency similar to thick pudding. This usually takes about 5-10 minutes.
5. Cool Slightly: Remove the saucepan from the heat and let the mixture cool slightly for a few minutes. This will make it easier to handle.
Molding the Bioplastic Bowl
This is where we give our bioplastic its shape!
1. Prepare the Mold: Line the inside of your chosen bowl with plastic wrap. This will prevent the bioplastic from sticking to the bowl and make it easier to remove once it’s dry. Make sure the plastic wrap is smooth and wrinkle-free.
2. Pour the Bioplastic Mixture: Carefully pour the slightly cooled bioplastic mixture into the plastic-lined bowl. Spread it evenly around the inside of the bowl, making sure to cover all surfaces. The thickness of the bioplastic layer will determine the thickness of your final bowl.
3. Smooth the Surface: Use a spatula or spoon to smooth the surface of the bioplastic mixture. This will help to create a more even and aesthetically pleasing bowl.
4. Let it Dry: Now comes the waiting game. Let the bioplastic bowl dry completely. This can take anywhere from 24 to 72 hours, depending on the thickness of the bioplastic and the humidity of your environment. You can speed up the drying process by placing the bowl in a warm, dry place or using a fan.
Finishing Touches
Almost there! Let’s give our bowl a final polish.
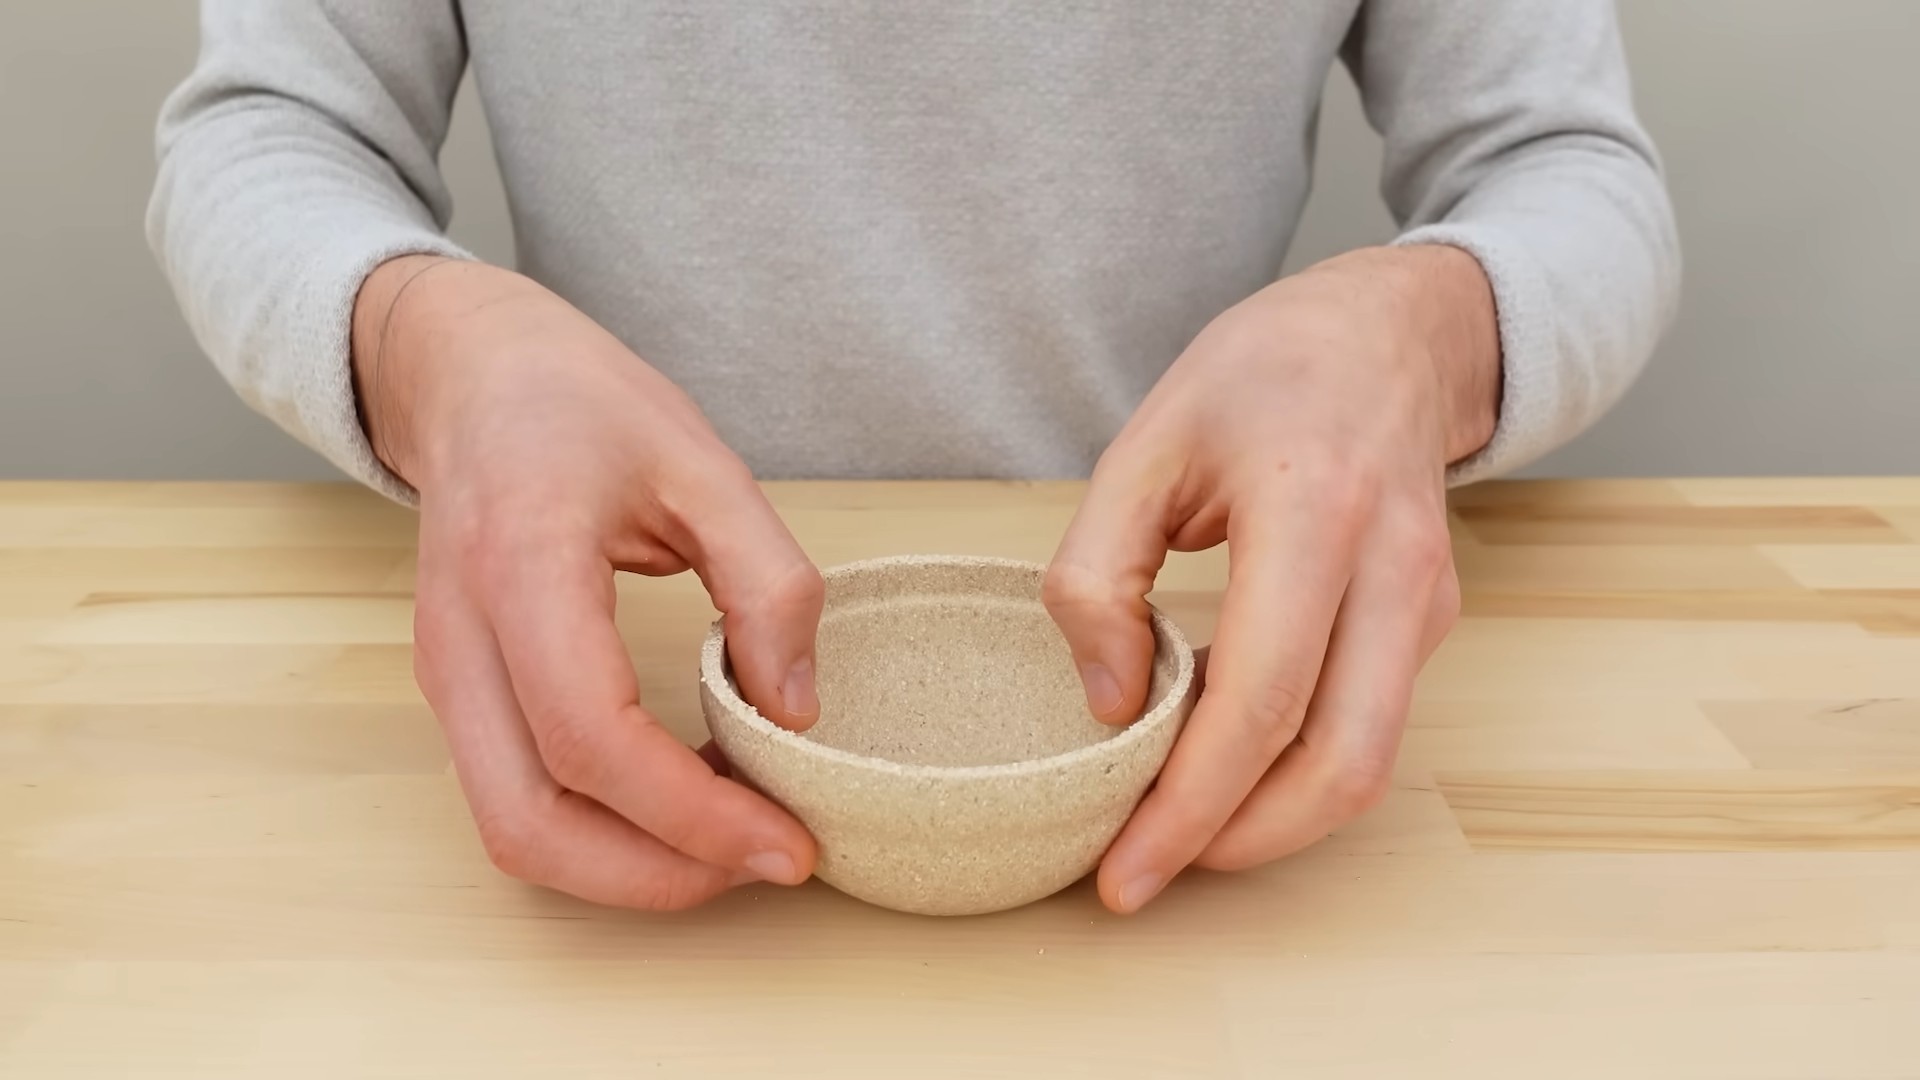
1. Remove from Mold: Once the bioplastic is completely dry, carefully remove it from the molding bowl. Gently peel away the plastic wrap.
2. Sand the Edges (Optional): If the edges of the bowl are rough or uneven, you can use sandpaper to smooth them down. Start with a coarse grit sandpaper and gradually move to a finer grit for a smoother finish.
3. Clean and Polish: Wipe down the bowl with a damp cloth to remove any dust or debris. You can also use a natural oil, like coconut oil, to polish the surface and give it a subtle sheen.
Important Considerations and Tips
* Experiment with Colors: Don’t be afraid to experiment with different food coloring to create unique and vibrant bowls. You can even try mixing different colors together to create custom shades.
* Add Textures: Before the bioplastic dries, you can add textures to the surface by pressing in small objects like seeds, beads, or dried flowers.
* Durability: Keep in mind that this bioplastic is not as durable as traditional plastic. It’s best suited for decorative purposes or for holding lightweight items. Avoid using it for liquids or heavy objects.
* Storage: Store your bioplastic bowl in a cool, dry place away from direct sunlight.
* Troubleshooting: If your bioplastic is too brittle, try adding more glycerin to the mixture. If it’s too sticky, try adding more cornstarch.
* Safety First: Always wear protective gloves and a dust mask when working with eggshells and chemicals.
* Variations: You can also experiment with different types of starches, such as tapioca starch or potato starch, to see how they affect the properties of the bioplastic.
* Larger Batches: If you want to make multiple bowls or larger bowls, simply increase the quantities of all the ingredients proportionally.
* Consider the Environment: While this is a sustainable project, remember that the bioplastic is still biodegradable under specific conditions. It’s not a replacement for proper waste management.
* Have Fun!: This is a creative project, so don’t be afraid to experiment and have fun with it!
Uses for Your Eggshell Bioplastic Bowl
Now that you’ve created your beautiful eggshell bioplastic bowl, what can you do with it? Here are a few ideas:
* Decorative Bowl: Use it as a decorative piece on your coffee table, shelf, or mantel.
* Jewelry Holder: Keep your rings, earrings, and other small jewelry items organized.
* Key Holder: Place it near your entryway to hold your keys.
* Potpourri Holder: Fill it with potpourri to add a pleasant scent to your home.
*
Conclusion
So, there you have it! Transforming humble eggshells into a surprisingly durable and beautiful bioplastic bowl is not just a fun craft project; it’s a small step towards a more sustainable lifestyle. We’ve walked you through the process, highlighting the simplicity and accessibility of this eco-friendly DIY trick.
Why is this a must-try? Because it’s a fantastic way to reduce waste, learn about material science in a hands-on way, and create something unique and functional. Instead of tossing those eggshells into the trash, you’re giving them a new life as a charming bowl that can hold small items, jewelry, or even serve as a decorative piece. Plus, it’s a conversation starter! Imagine the looks of surprise when you tell people your bowl is made from eggshells.
But the possibilities don’t stop there. Feel free to experiment with variations! Try adding natural dyes like beetroot juice for a pink hue, spinach juice for green, or turmeric for yellow. You can also incorporate dried flowers, herbs, or even small pieces of colorful paper into the bioplastic mixture for a truly personalized touch. Consider using different molds to create various shapes and sizes – think small dishes, coasters, or even decorative tiles. For a more polished finish, you can sand the dried bowl lightly and apply a natural sealant like beeswax.
The key to success with this eggshell bioplastic bowl DIY is patience and experimentation. Don’t be discouraged if your first attempt isn’t perfect. Each batch of eggshells is slightly different, and the drying time can vary depending on your climate. The more you practice, the better you’ll become at judging the consistency of the mixture and achieving the desired results.
We truly believe that this DIY project is a rewarding experience for crafters of all skill levels. It’s a chance to connect with nature, reduce your environmental impact, and unleash your creativity. So, gather your eggshells, grab your supplies, and get ready to embark on this exciting adventure.
We’re eager to hear about your experiences! Did you try any variations? What challenges did you encounter? What tips and tricks did you discover along the way? Share your photos and stories in the comments below. Let’s build a community of eggshell bioplastic enthusiasts and inspire others to embrace sustainable crafting! Let us know if you have any questions, and happy crafting!
Frequently Asked Questions (FAQ)
What kind of glue is best to use for this project?
The best type of glue to use for this eggshell bioplastic bowl DIY is a non-toxic, water-based glue like PVA glue (also known as white school glue). Avoid using solvent-based glues or super glues, as these can be harmful and may not bond well with the eggshell mixture. PVA glue is readily available, easy to work with, and dries clear, allowing the natural beauty of the eggshells to shine through. Make sure the glue is acid-free to prevent discoloration over time.
How long does it take for the bioplastic bowl to dry completely?
The drying time for your eggshell bioplastic bowl can vary depending on several factors, including the thickness of the mixture, the humidity in your environment, and the temperature. Generally, it takes between 24 to 72 hours for the bowl to dry completely. To ensure thorough drying, place the bowl in a well-ventilated area and avoid direct sunlight, which can cause cracking. You can also use a dehumidifier to speed up the drying process in humid climates. The bowl is dry when it feels hard and no longer pliable to the touch.
Can I use colored eggshells for this project?
Absolutely! Using colored eggshells can add a unique and vibrant touch to your bioplastic bowl. You can use naturally colored eggshells from different breeds of chickens, or you can dye the eggshells yourself using natural food coloring. To dye eggshells, simply soak them in a mixture of water and food coloring for a few hours or overnight. Rinse them thoroughly and let them dry completely before crushing them and incorporating them into the bioplastic mixture.
Is the eggshell bioplastic bowl food-safe?
While the eggshell bioplastic bowl is a beautiful and eco-friendly creation, it is generally not recommended for direct food contact, especially with wet or acidic foods. The porous nature of the bioplastic and the glue used in the process may harbor bacteria and could potentially leach into the food. However, you can use the bowl to hold dry snacks like nuts, candies, or dried fruits. It’s also perfect for holding non-food items like jewelry, keys, or small office supplies. If you intend to use it for food, consider lining it with parchment paper or a food-safe liner.
How can I make the bowl waterproof?
While the eggshell bioplastic bowl is relatively durable, it is not naturally waterproof. To make it more water-resistant, you can apply a sealant after it has dried completely. A natural sealant like beeswax or a food-safe varnish can help to protect the surface and prevent water from seeping into the bioplastic. Apply the sealant in thin, even coats, allowing each coat to dry completely before applying the next. Be sure to follow the manufacturer’s instructions for the sealant you choose. Keep in mind that even with a sealant, the bowl may not be completely waterproof and should not be submerged in water for extended periods.
What can I do if my bowl cracks during the drying process?
Cracking can sometimes occur during the drying process, especially if the mixture is too thick or if the environment is too dry. If you notice cracks forming, try to repair them as soon as possible. You can do this by mixing a small amount of fresh eggshell bioplastic mixture and applying it to the cracks. Gently press the mixture into the cracks and smooth it out with your fingers. Allow the repaired area to dry completely before handling the bowl. To prevent cracking in future projects, ensure that the mixture is not too thick and that the drying process is gradual and even.
How do I clean my eggshell bioplastic bowl?
To clean your eggshell bioplastic bowl, gently wipe it down with a damp cloth. Avoid using harsh chemicals or abrasive cleaners, as these can damage the surface of the bioplastic. If necessary, you can use a mild soap and water solution. Rinse the bowl thoroughly and allow it to air dry completely. Do not submerge the bowl in water or put it in the dishwasher. Regular cleaning will help to keep your bowl looking its best and prevent the buildup of dirt and grime.
Can I add other materials to the eggshell bioplastic mixture?
Yes, you can definitely experiment with adding other materials to the eggshell bioplastic mixture to create unique textures and designs. Some popular additions include dried flowers, herbs, glitter, small beads, or even pieces of colored paper. Be sure to add these materials in moderation, as too much can weaken the structure of the bioplastic. You can also try incorporating different types of natural fibers, such as cotton or hemp, to add strength and flexibility to the mixture. Let your creativity guide you and see what interesting effects you can achieve!
How do I ensure a smooth finish on my eggshell bioplastic bowl?
Achieving a smooth finish on your eggshell bioplastic bowl requires careful preparation and technique. First, make sure that the eggshells are finely ground and evenly distributed throughout the mixture. When applying the mixture to the mold, use a smooth tool, such as a spatula or the back of a spoon, to gently press and smooth the surface. After the bowl has dried completely, you can sand it lightly with fine-grit sandpaper to remove any rough edges or imperfections. Be careful not to sand too aggressively, as this can damage the bioplastic. Finally, you can apply a sealant or varnish to create a glossy and smooth finish.
Is this project suitable for children?
This eggshell bioplastic bowl DIY project can be a fun and educational activity for children, but adult supervision is required, especially when handling sharp objects or using glue. Children can help with tasks such as crushing the eggshells, mixing the ingredients, and decorating the bowl. It’s a great way to teach them about recycling, sustainability, and the wonders of material science. Make sure to use non-toxic glue and provide clear instructions to ensure a safe and enjoyable crafting experience.
Leave a Comment