

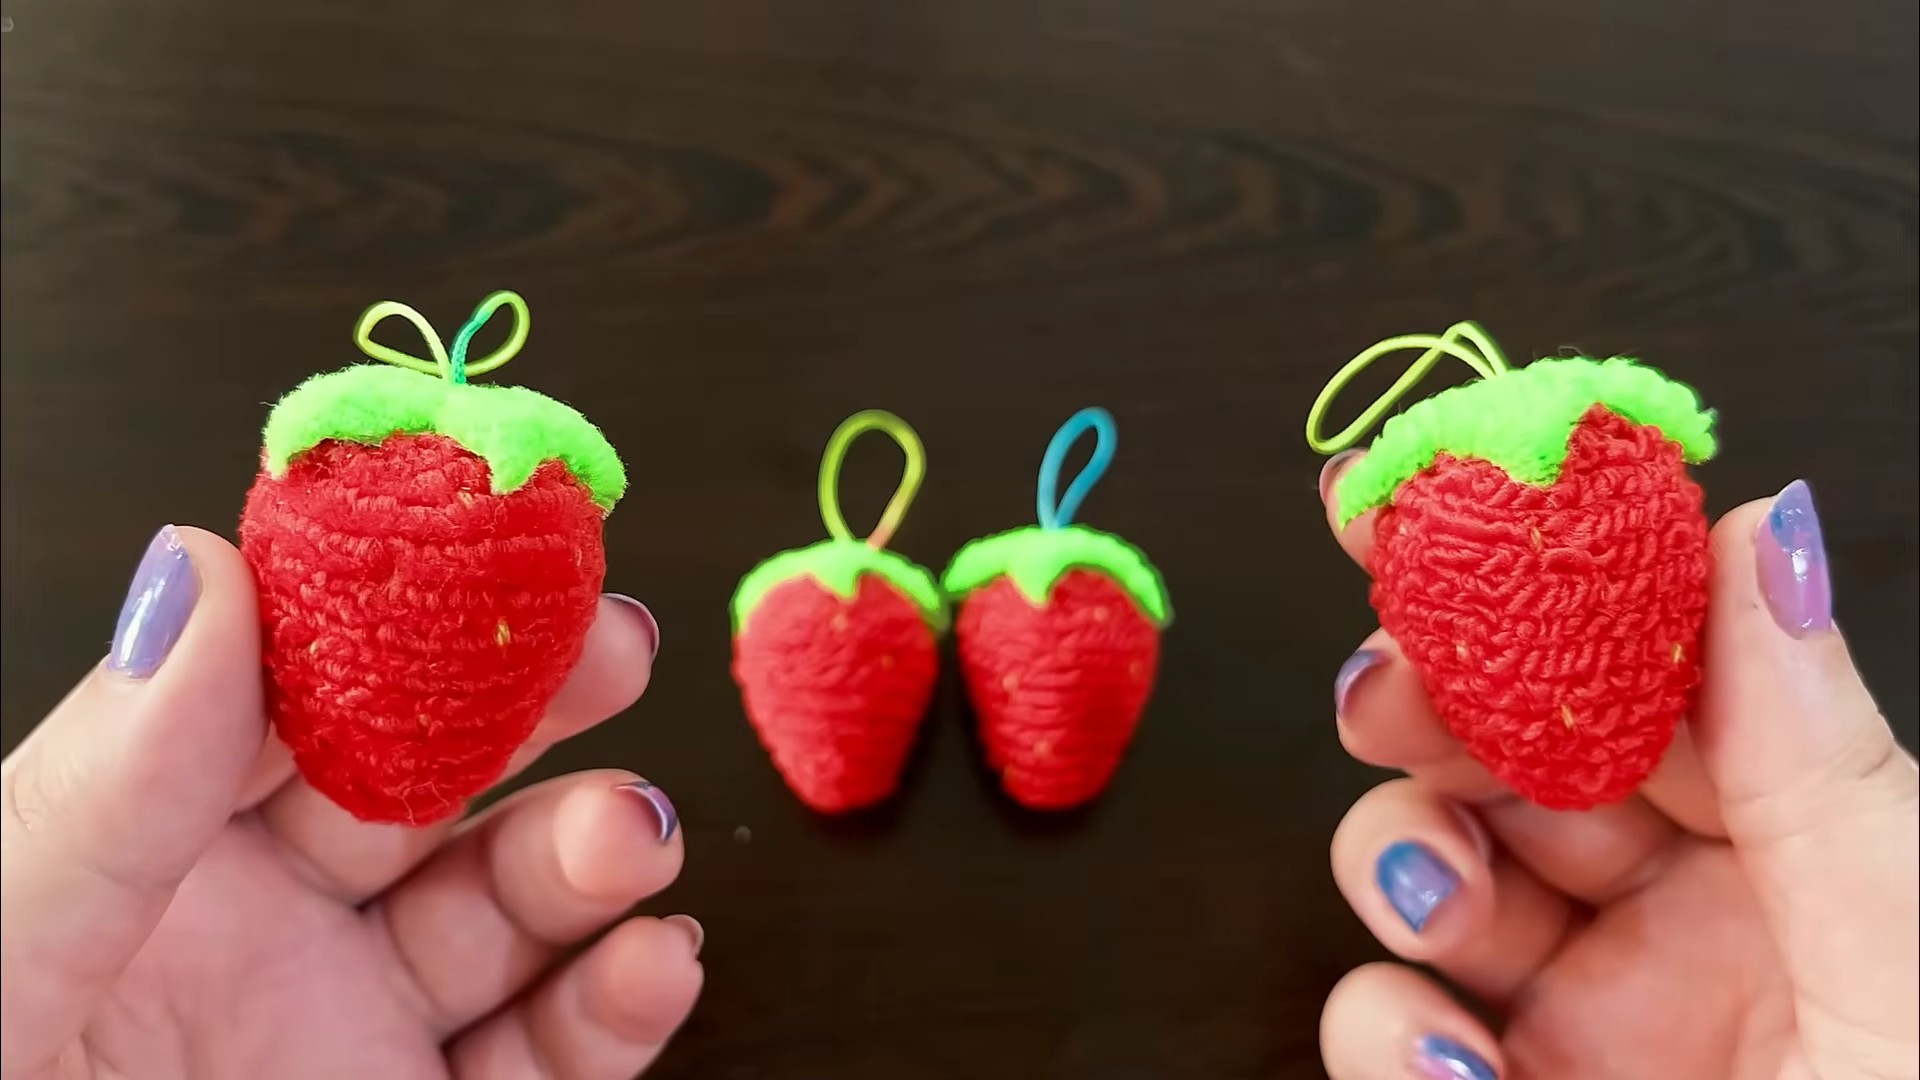
DIY Strawberry Keychain Craft: Ever wished you could carry a little piece of summer sunshine with you wherever you go? Or maybe you’re looking for a fun, easy, and adorable craft project that even the kids can get involved in? Well, you’re in the right place! This DIY strawberry keychain craft is not only incredibly cute, but it’s also a fantastic way to unleash your creativity and add a personal touch to your keys, backpack, or even as a sweet little gift for a friend.
The humble strawberry, a symbol of love, purity, and good fortune in many cultures, has been cherished for centuries. From ancient Roman gardens to modern-day farms, this vibrant fruit has always held a special place in our hearts. Now, we’re taking that beloved berry and transforming it into a delightful accessory!
In today’s fast-paced world, taking time for creative pursuits is more important than ever. This DIY strawberry keychain craft offers a relaxing and rewarding experience, allowing you to disconnect from screens and reconnect with your inner artist. Plus, who doesn’t love a little handmade charm? It’s a simple way to add a touch of personality to your everyday life and show off your crafting skills. So, grab your supplies, and let’s get started on creating these berry cute keychains!
DIY Adorable Strawberry Keychain: A Sweet Project for All Skill Levels!
Hey there, fellow crafters! I’m so excited to share this super cute and easy DIY strawberry keychain project with you. It’s perfect for adding a touch of sweetness to your keys, backpack, or even as a charming little gift. Don’t worry if you’re a beginner; I’ll guide you through every step of the way. Let’s get started!
What You’ll Need: Your Strawberry Supply List
Before we dive in, let’s gather all the necessary materials. Having everything organized will make the crafting process much smoother and more enjoyable.
* **Felt:** Red, green, and white felt sheets. The thicker the felt, the sturdier your keychain will be, but thinner felt is easier to sew. I usually go for a medium thickness.
* **Embroidery Floss:** Red, green, and white embroidery floss to match your felt colors. This will be used for sewing and adding details.
* **Embroidery Needle:** A sharp embroidery needle with a large enough eye to thread your embroidery floss.
* **Scissors:** A good pair of sharp scissors for cutting the felt. Small embroidery scissors are great for detail work.
* **Pencil or Fabric Marker:** For tracing the strawberry template onto the felt. A fabric marker is ideal as it won’t leave permanent marks.
* **Stuffing:** Polyester fiberfill to give your strawberry keychain a plump and cuddly shape.
* **Keychain Ring:** A standard keychain ring to attach your finished strawberry.
* **Jump Ring (Optional):** A small jump ring to connect the strawberry to the keychain ring. This can make it hang a little better.
* **Pliers (Optional):** If you’re using a jump ring, pliers will help you open and close it securely.
* **Strawberry Template:** You can either draw your own strawberry shape or find a printable template online. I’ll provide some tips on creating your own template below!
* **Ruler:** For measuring and ensuring accurate cuts.
Creating Your Strawberry Template: Size Matters!
The size of your strawberry keychain is entirely up to you! I personally like mine to be about 2-3 inches tall, but feel free to adjust the dimensions to your liking.
* **Drawing Your Own:** Grab a piece of paper and a pencil. Start by drawing a basic heart shape. Then, flatten the top of the heart slightly to create the strawberry’s characteristic shape. Don’t worry about perfection; strawberries aren’t perfectly symmetrical!
* **Finding a Printable Template:** A quick search online will reveal tons of free strawberry templates. Choose one that appeals to you and print it out. Make sure to adjust the size in your printer settings if needed.
* **Leaf Template:** You’ll also need a template for the green leaves. A simple starburst shape with 5-7 points works well. Again, you can draw your own or find a printable version.
Cutting the Felt: Precision is Key
Now that we have our templates, it’s time to cut out the felt pieces.
1. **Trace the Template:** Place your strawberry template onto the red felt and trace around it with a pencil or fabric marker. Repeat this so you have two identical strawberry shapes.
2. **Cut Out the Strawberry Shapes:** Carefully cut out the two strawberry shapes along the traced lines. Try to be as precise as possible for a clean and professional look.
3. **Trace and Cut the Leaves:** Place your leaf template onto the green felt and trace around it. You’ll need one or two leaf pieces, depending on how full you want the top of your strawberry to look.
4. **Cut Out the Leaf Shapes:** Carefully cut out the leaf shapes.
5. **White Seed Shapes (Optional):** You can cut out tiny teardrop shapes from the white felt to represent the strawberry seeds. These are optional, but they add a nice touch of detail. I usually cut out about 10-15 of these.
Sewing the Strawberry: Bringing it to Life
This is where the magic happens! We’ll be using a simple blanket stitch to sew the strawberry pieces together. Don’t worry if you’re not familiar with this stitch; I’ll explain it step-by-step.
1. **Attaching the Seeds (Optional):** If you’re using white felt seeds, now’s the time to attach them. Thread your needle with white embroidery floss and sew each seed onto one of the red strawberry pieces. A simple straight stitch or a tiny cross-stitch will do the trick. Space them randomly for a more natural look.
2. **Preparing to Sew:** Place the two red strawberry pieces together, aligning the edges. Thread your needle with red embroidery floss and tie a knot at the end.
3. **Starting the Blanket Stitch:** Insert the needle from the back of the fabric, coming up through both layers of felt near the bottom edge.
4. **Creating the First Stitch:** Bring the needle back down through both layers of felt, a short distance away from where you started (about 1/4 inch). Before pulling the thread all the way through, pass the needle through the loop of thread that’s formed on the edge of the fabric.
5. **Continuing the Blanket Stitch:** Pull the thread tight to create a neat stitch along the edge. Repeat steps 4 and 5, working your way around the entire strawberry. Make sure each stitch is evenly spaced and the same length for a consistent look.
6. **Leaving an Opening:** When you’re about two-thirds of the way around the strawberry, stop sewing and leave an opening for stuffing.
7. **Stuffing the Strawberry:** Gently stuff the strawberry with polyester fiberfill. Use small pieces of stuffing and distribute them evenly to avoid lumps. Stuff it firmly enough to give it a nice shape, but not so much that it becomes distorted.
8. **Finishing the Sewing:** Once the strawberry is stuffed to your liking, continue sewing the remaining opening using the blanket stitch.
9. **Securing the Thread:** When you reach the end, make a small knot on the back of the strawberry and trim the excess thread.
Adding the Leaves and Keychain: The Finishing Touches
Now for the final steps! We’ll attach the leaves and the keychain ring to complete our adorable strawberry.
1. **Attaching the Leaves:** Position the green leaf piece(s) at the top of the strawberry. Thread your needle with green embroidery floss and sew the leaves securely to the top of the strawberry using a few small stitches. Make sure the leaves are firmly attached so they don’t fall off.
2. **Creating a Loop for the Keychain:** Using a small piece of red embroidery floss, create a loop at the top of the strawberry, just behind the leaves. Sew the ends of the loop securely to the strawberry. This loop will be used to attach the keychain ring.
3. **Attaching the Keychain Ring:** If you’re using a jump ring, open it with pliers and attach it to the loop you created on the strawberry. Then, attach the keychain ring to the jump ring. If you’re not using a jump ring, simply thread the keychain ring directly through the loop.
4. **Final Touches:** Give your strawberry keychain a final inspection. Trim any stray threads and make sure everything is securely attached.
Admire Your Creation: You Did It!
Congratulations! You’ve successfully created your very own adorable strawberry keychain. I hope you enjoyed this DIY project as much as I did. Now you can proudly display your handmade creation on your keys, backpack, or give it as a thoughtful gift to a friend or loved one.
Remember, crafting is all about having fun and expressing your creativity. Don’t be afraid to experiment with different colors, sizes, and embellishments to make your strawberry keychain truly unique. Happy crafting!

Conclusion
So, there you have it! Transforming simple materials into an adorable, personalized strawberry keychain is not only incredibly easy but also immensely rewarding. This DIY strawberry keychain craft offers a fantastic opportunity to unleash your creativity, add a touch of handmade charm to your everyday life, and even create thoughtful, personalized gifts for friends and family.
Why is this DIY trick a must-try? Because it’s more than just a craft project; it’s an experience. It’s about slowing down, engaging your hands, and creating something unique and beautiful. In a world dominated by mass-produced items, a handmade keychain carries a special significance. It tells a story, reflects your personality, and adds a personal touch that store-bought items simply can’t replicate. Plus, it’s a fantastic way to upcycle leftover materials and reduce waste, making it a sustainable and eco-friendly choice.
But the fun doesn’t stop there! Feel free to experiment with different variations to truly make your strawberry keychain your own. Consider using different shades of red and green felt to create a variety of strawberry hues. You could even add tiny seed beads for a more realistic look or embroider intricate details onto the felt. For a more durable keychain, try using leather or faux leather instead of felt. And if you’re feeling adventurous, why not create a whole fruit salad of keychains? Imagine a collection featuring adorable apples, cheerful cherries, and plump blueberries – the possibilities are endless!
Another exciting variation is to incorporate different embellishments. Add a small bell for a whimsical touch, or attach a tiny charm that reflects your personal interests. You could even personalize the keychain with initials or a special date using fabric paint or embroidery. The key is to let your imagination run wild and create a keychain that truly reflects your unique style.
This DIY strawberry keychain craft is also a wonderful activity to enjoy with children. It’s a fun and engaging way to teach them basic sewing skills, encourage their creativity, and create lasting memories together. Imagine the joy on their faces as they proudly display their handmade keychains!
We are confident that you’ll find this DIY project both enjoyable and satisfying. So, gather your materials, unleash your inner artist, and create a charming strawberry keychain that you’ll cherish for years to come.
We can’t wait to see what you create! Don’t forget to share your finished strawberry keychains with us on social media using #DIYStrawberryKeychain. We’re eager to see your unique designs and creative variations. Happy crafting!
Frequently Asked Questions (FAQ)
What materials do I need to make a DIY strawberry keychain?
You’ll need felt in red and green (or shades of your choice), embroidery floss or thread in matching colors, a keychain ring, scissors, a needle, stuffing material (such as cotton balls or fiberfill), and a pencil or marker for tracing. Optional materials include seed beads, fabric paint, charms, and bells for embellishments.
Is this DIY project suitable for beginners?
Absolutely! This DIY strawberry keychain craft is designed to be beginner-friendly. The steps are simple and straightforward, and the basic sewing techniques required are easy to learn. Even if you’ve never sewn before, you should be able to complete this project with a little patience and practice. There are many online tutorials available that demonstrate basic sewing stitches, such as the running stitch and the blanket stitch, which can be helpful for beginners.
What kind of felt should I use?
Wool felt or acrylic felt are both suitable for this project. Wool felt is generally considered to be of higher quality and more durable, but it is also more expensive. Acrylic felt is a more affordable option and is readily available at most craft stores. Choose the type of felt that best suits your budget and preferences.
How do I make the strawberry shape?
You can either draw your own strawberry shape on paper and use it as a template, or you can find free printable strawberry templates online. Simply trace the template onto your felt and cut out two identical pieces for the front and back of the strawberry.
What kind of stuffing should I use?
Cotton balls, fiberfill, or even scraps of felt can be used to stuff your strawberry keychain. Fiberfill is a popular choice because it is lightweight, fluffy, and easy to work with. Cotton balls are a readily available alternative, but they may not provide as smooth of a finish.
How do I attach the keychain ring?
Before you completely sew the strawberry closed, insert the keychain ring into the top of the strawberry. You can either sew the ring directly onto the felt or create a small loop of felt to attach the ring to. Make sure the ring is securely attached so that it doesn’t come loose with use.
Can I use a sewing machine instead of hand sewing?
Yes, you can definitely use a sewing machine to sew the strawberry keychain together. However, hand sewing is recommended for beginners as it allows for more control and precision. If you choose to use a sewing machine, be sure to use a small stitch length and a needle appropriate for felt.
How can I personalize my strawberry keychain?
There are many ways to personalize your strawberry keychain! You can use different colors of felt, add seed beads for a realistic look, embroider intricate details onto the felt, or attach charms that reflect your personal interests. You can also personalize the keychain with initials or a special date using fabric paint or embroidery.
How do I clean my strawberry keychain?
Spot clean your strawberry keychain with a damp cloth and mild soap. Avoid submerging the keychain in water, as this could damage the stuffing and felt. Allow the keychain to air dry completely before using it.
Where can I find inspiration for my strawberry keychain design?
The internet is a great source of inspiration for DIY projects! Search for “strawberry keychain ideas” on Pinterest, Instagram, or Google Images to find a wealth of inspiration. You can also browse craft blogs and websites for tutorials and design ideas. Don’t be afraid to experiment and create your own unique design!


Leave a Comment