

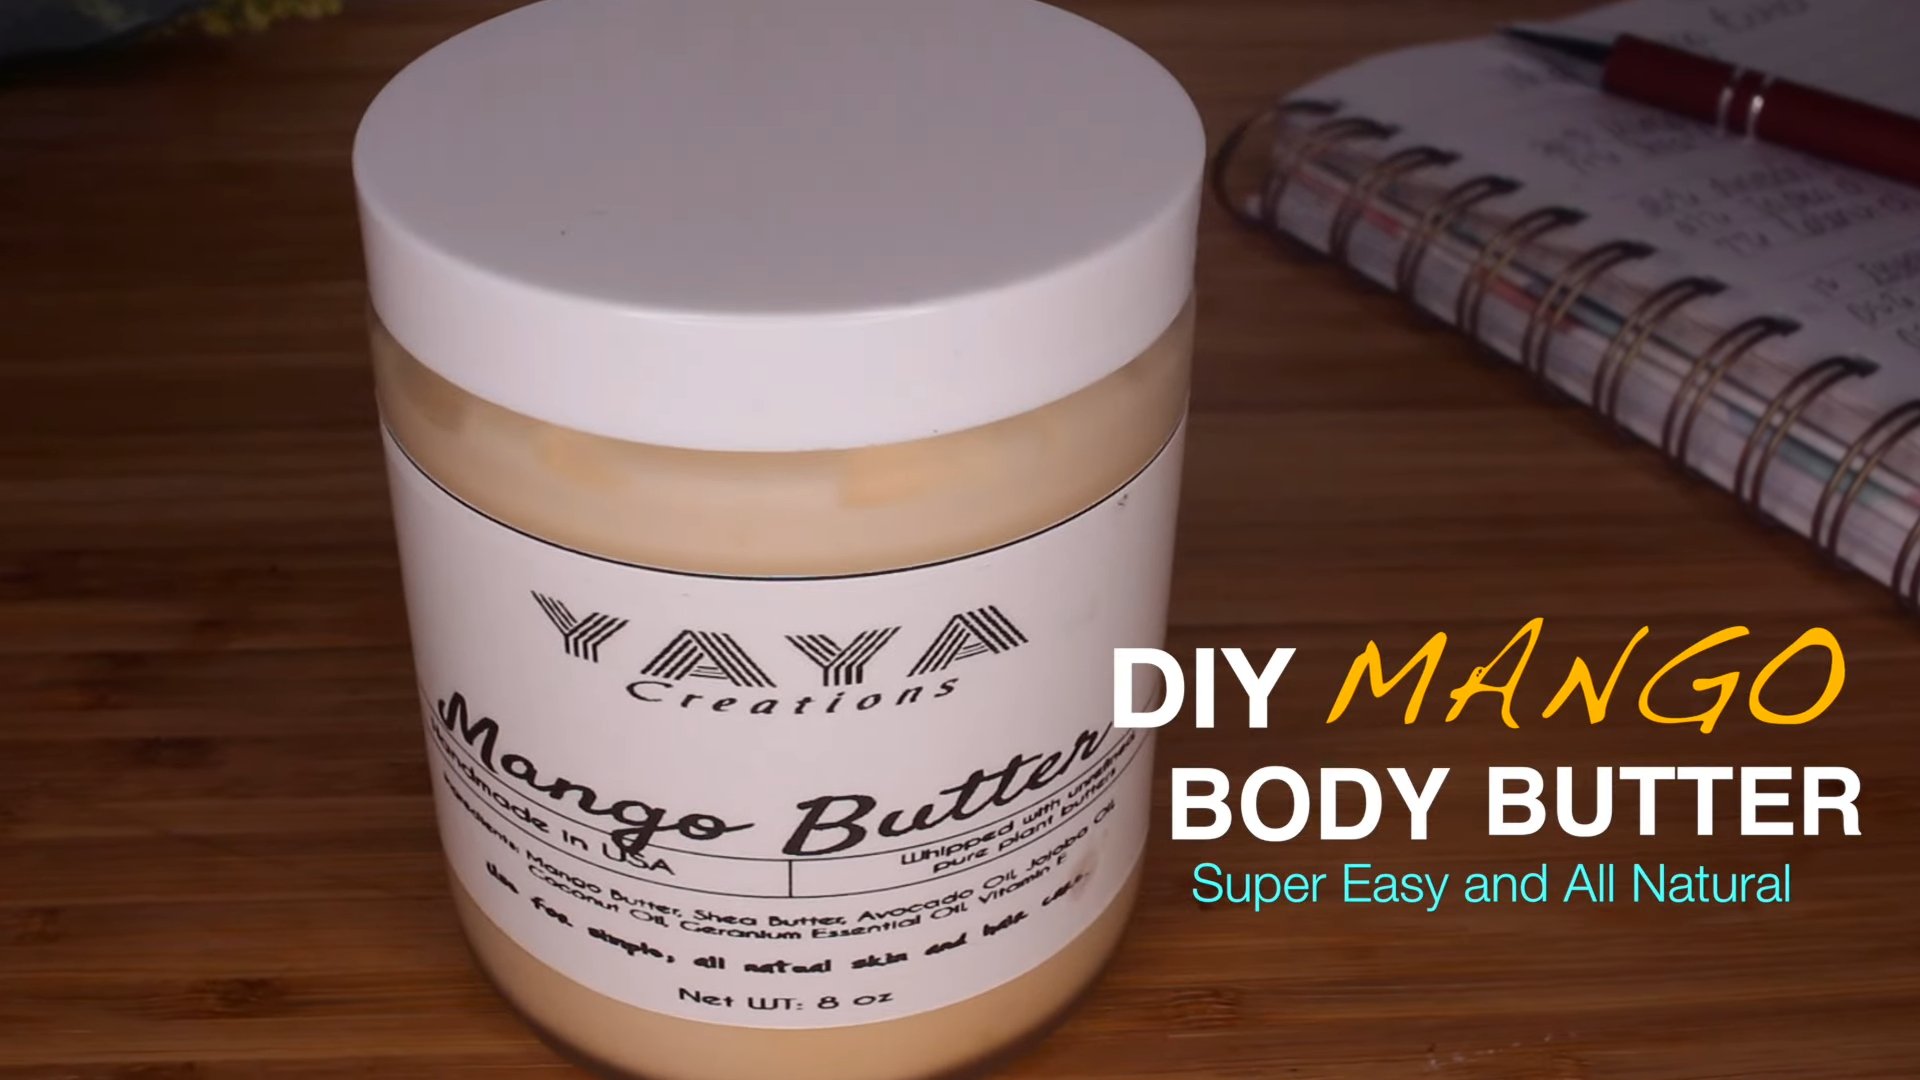
DIY Mango Body Butter Recipe: Unlock the secret to luxuriously soft and radiant skin with this simple, all-natural recipe! Have you ever dreamed of having skin that feels like silk, without breaking the bank on expensive store-bought lotions? I know I have! For centuries, cultures around the world have harnessed the power of natural ingredients like mango butter to nourish and protect their skin. From ancient Egyptians using shea butter to indigenous communities utilizing plant-based remedies, the tradition of DIY skincare is deeply rooted in history.
In today’s world, we’re constantly bombarded with chemicals and artificial fragrances in our skincare products. That’s why creating your own DIY Mango Body Butter Recipe is not just a fun project, but a conscious choice to prioritize your health and well-being. This recipe is perfect for anyone looking to hydrate dry skin, soothe irritation, or simply indulge in a little self-care. Plus, it’s incredibly easy to customize with your favorite essential oils for an added aromatherapy boost. Let’s dive in and discover how to make this amazing body butter together!
DIY Luscious Mango Body Butter: A Step-by-Step Guide
Hey there, fellow DIY enthusiasts! Get ready to pamper your skin with this incredibly nourishing and fragrant mango body butter. It’s surprisingly easy to make, and the results are absolutely divine. Trust me, your skin will thank you! This recipe is all-natural, packed with vitamins, and free from harsh chemicals. Let’s dive in!
What You’ll Need: The Ingredients
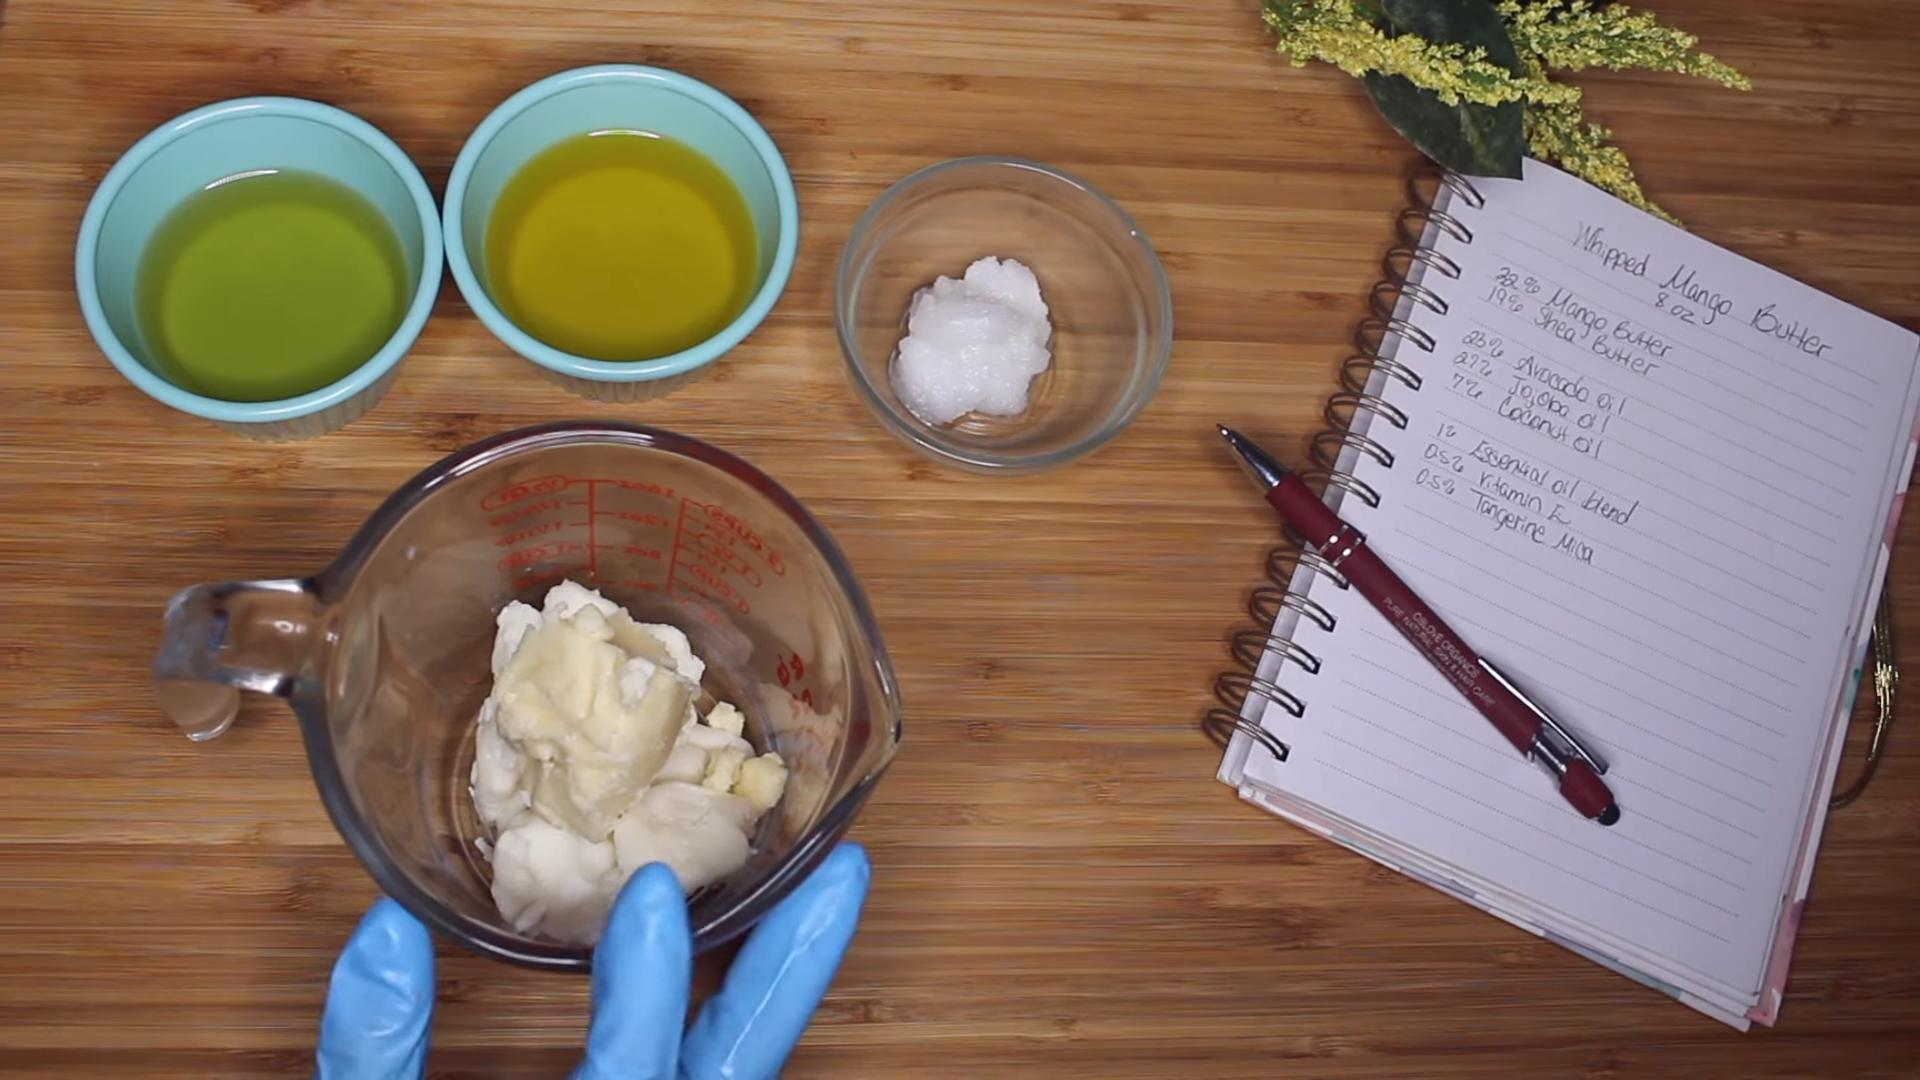
Before we get started, let’s gather all the necessary ingredients. Quality is key here, so try to source the best you can find.
* 1/2 cup (4 oz) Mango Butter: This is the star of the show! Mango butter is incredibly moisturizing and has a lovely, subtle scent. Make sure it’s pure and unrefined for the best results.
* 1/4 cup (2 oz) Shea Butter: Shea butter adds extra richness and helps to create a smooth, creamy texture. Unrefined shea butter retains more of its natural benefits.
* 1/4 cup (2 oz) Coconut Oil: Coconut oil contributes to the body butter’s emollient properties and gives it a beautiful sheen. Use refined coconut oil if you prefer a less pronounced coconut scent.
* 2 tablespoons (1 oz) Sweet Almond Oil (or Jojoba Oil): These oils are lightweight and easily absorbed, leaving your skin feeling soft and supple. Almond oil is a great all-around choice, while jojoba oil is particularly beneficial for oily or acne-prone skin.
* 1 teaspoon Vitamin E Oil: Vitamin E is a powerful antioxidant that helps to protect your skin from damage and extend the shelf life of your body butter.
* Optional: 10-15 drops Mango Essential Oil (or other essential oil of your choice): If you want to enhance the mango scent, a few drops of mango essential oil will do the trick. You can also experiment with other essential oils like lavender, chamomile, or frankincense for added therapeutic benefits.
The Equipment You’ll Need
Having the right tools makes the process so much smoother. Here’s what I recommend:
* Double Boiler (or a heat-safe bowl and a saucepan): This is essential for gently melting the butters and oils without overheating them.
* Heat-Resistant Spatula: For stirring and scraping down the sides of the bowl.
* Electric Mixer (handheld or stand mixer): This is crucial for whipping the body butter into a light and fluffy consistency. A whisk will work, but it will require a lot of elbow grease!
* Clean Jars or Containers: For storing your finished body butter. Make sure they are clean and dry to prevent contamination. I prefer using glass jars with airtight lids.
* Measuring Cups and Spoons: For accurate measurements.
* Kitchen Scale: Optional, but helpful for precise ingredient measurements.
Step-by-Step Instructions: Making Your Mango Body Butter
Alright, let’s get down to business! Follow these steps carefully, and you’ll have a jar of luxurious mango body butter in no time.
Phase 1: Melting the Butters and Oils
1. **Prepare the Double Boiler:** Fill the saucepan with about an inch or two of water and bring it to a simmer over medium heat. Place the heat-safe bowl on top of the saucepan, ensuring that the bottom of the bowl doesn’t touch the water. This creates a gentle, indirect heat source.
2. **Combine the Butters:** Add the mango butter and shea butter to the bowl. Let them melt slowly and evenly, stirring occasionally with the spatula. Be patient; this process can take a few minutes.
3. **Add the Oils:** Once the butters are completely melted, add the coconut oil and sweet almond oil (or jojoba oil) to the bowl. Stir until everything is fully combined and the mixture is smooth and homogenous.
4. **Remove from Heat:** Carefully remove the bowl from the double boiler and set it aside to cool slightly.
Phase 2: Cooling and Solidifying
1. **Add Vitamin E Oil:** Stir in the vitamin E oil. This will help preserve the body butter and add extra antioxidant benefits.
2. **Cool Down:** Allow the mixture to cool down completely at room temperature. This can take several hours. You want the mixture to solidify but not become rock hard. A good test is to poke it with your finger; it should be firm but still slightly pliable.
3. **Speed Up the Cooling (Optional):** If you’re impatient (like me!), you can speed up the cooling process by placing the bowl in the refrigerator for about 1-2 hours. Just be sure to check it frequently to prevent it from becoming too hard. You want it to be solid enough to whip, but not frozen.
Phase 3: Whipping to Perfection
1. **Prepare for Whipping:** Once the mixture has solidified to the right consistency, it’s time to whip it into a light and fluffy cloud.
2. **Whip It Good:** Using your electric mixer (either handheld or stand mixer), begin whipping the mixture on medium speed. As you whip, the mixture will start to lighten in color and increase in volume.
3. **Add Essential Oil (Optional):** If you’re using essential oil, now is the time to add it. Add the drops one at a time, mixing well after each addition. Be careful not to add too much, as essential oils can be potent.
4. **Continue Whipping:** Continue whipping for about 5-10 minutes, or until the body butter is light, fluffy, and resembles whipped cream. Scrape down the sides of the bowl periodically to ensure that everything is evenly incorporated.
5. **Check the Consistency:** The final consistency should be smooth, creamy, and easily spreadable. If it’s too hard, let it sit at room temperature for a few minutes and then whip it again. If it’s too soft, chill it in the refrigerator for a few minutes and then whip it again.
Phase 4: Storing Your Homemade Goodness
1. **Transfer to Jars:** Carefully transfer the whipped body butter to your clean jars or containers. Use a spatula to scoop it out and pack it in tightly.
2. **Seal and Label:** Seal the jars tightly with their lids and label them with the date you made the body butter. This will help you keep track of its freshness.
3. **Store Properly:** Store your mango body butter in a cool, dark place away from direct sunlight and heat. This will help to prevent it from melting or going rancid. Properly stored, your body butter should last for about 6-12 months.
Tips and Tricks for the Best Body Butter
Here are a few extra tips to help you create the perfect mango body butter:
* Adjust the Ratios: Feel free to adjust the ratios of the butters and oils to suit your preferences. If you prefer a richer, more emollient body butter, increase the amount of shea butter or coconut oil. If you prefer a lighter, more easily absorbed body butter, increase the amount of sweet almond oil or jojoba oil.
* Experiment with Essential Oils: Don’t be afraid to experiment with different essential oils to create your own unique scent blends. Lavender, chamomile, rose, and frankincense are all great choices for body butter.
* Add Natural Colorants (Optional): If you want to add a touch of color to your body butter, you can use natural colorants like beet root powder (for a pink hue) or spirulina powder (for a green hue). Add a small amount at a time until you achieve the desired color.
* Avoid Overheating: Be careful not to overheat the butters and oils when melting them. Overheating can damage their beneficial properties and affect the texture of the final product.
* Use a Clean Environment: Always work in a clean environment to prevent contamination. Wash your hands thoroughly before starting and sanitize all of your equipment.
* Patch Test: Before applying the body butter all over your body, do a patch test on a small area of skin to check for any allergic reactions.
Troubleshooting: What to Do If Things Go Wrong
Sometimes, things don’t go exactly as planned. Here are a few common problems and how to fix them:
* Body Butter is Grainy: This can happen if the butters cool down too slowly. To fix it, remelt the body butter and then cool it down quickly in the refrigerator.
* Body Butter is Too Hard: This can happen if you cool the body butter down too much. To fix it, let it sit at room temperature for a few minutes and then whip it again.
* Body Butter is Too Soft: This can happen if the room temperature is too warm. To fix it, chill the body butter in the refrigerator for a few minutes and then whip it again.
* Body Butter Smells Rancid: This means that the oils have gone bad. Unfortunately, there’s no way to fix this. You’ll need to discard the body butter and start over with fresh ingredients.
Enjoy Your Homemade Mango Body Butter!
And there you have it! Your very own jar of luxurious mango body
Conclusion
So there you have it – a simple, effective, and utterly delightful way to create your own luxurious DIY mango body butter. Forget those expensive, store-bought lotions filled with questionable ingredients. This recipe puts you in control, allowing you to nourish your skin with the goodness of natural ingredients and the tropical essence of mango.
Why is this DIY trick a must-try? Because it’s more than just a recipe; it’s an experience. It’s the satisfaction of knowing exactly what you’re putting on your skin, the joy of creating something beautiful and beneficial with your own hands, and the sheer indulgence of slathering on a rich, creamy butter that smells like a sun-drenched paradise. This homemade body butter is intensely moisturizing, leaving your skin feeling soft, supple, and radiant. It’s perfect for combating dry skin, soothing irritation, and simply pampering yourself. Plus, it makes a thoughtful and personalized gift for friends and family.
But the beauty of this recipe lies in its adaptability. Feel free to experiment with different carrier oils to find your perfect blend. Avocado oil adds extra richness, while grapeseed oil offers a lighter, more easily absorbed texture. You can also customize the scent by adding a few drops of your favorite essential oils. Lavender for relaxation, peppermint for invigoration, or a citrus blend for a burst of sunshine – the possibilities are endless! For an even more luxurious experience, consider adding a teaspoon of honey for its humectant properties or a pinch of arrowroot powder for a smoother, less greasy finish.
Don’t be intimidated by the “DIY” label. This recipe is incredibly easy to follow, even for beginners. The process is straightforward, and the results are well worth the effort. Imagine the feeling of accomplishment as you whip up your own batch of mango body butter, knowing that you’ve created a product that’s both good for your skin and good for the environment.
We truly believe that once you try this DIY mango body butter recipe, you’ll never go back to store-bought lotions again. It’s a game-changer for your skincare routine, offering a natural, effective, and affordable way to keep your skin healthy and glowing.
So, what are you waiting for? Gather your ingredients, clear your schedule, and prepare to embark on a journey of self-care and creativity. We’re confident that you’ll love the results. And most importantly, we want to hear about your experience! Share your photos, tips, and variations in the comments below. Let’s build a community of DIY skincare enthusiasts and spread the word about the amazing benefits of homemade body butter. Your feedback will not only help other readers but also inspire us to create even more exciting and innovative recipes in the future. Happy crafting!
Frequently Asked Questions (FAQ)
What are the benefits of using mango butter in skincare?
Mango butter is a fantastic ingredient for skincare due to its rich emollient properties. It’s derived from the kernel of the mango fruit and is packed with vitamins A, C, and E, as well as antioxidants. These nutrients help to nourish and protect the skin, promoting a healthy and radiant complexion. Mango butter is also known for its ability to moisturize dry skin, soothe irritation, and reduce the appearance of scars and stretch marks. Its non-comedogenic nature means it won’t clog pores, making it suitable for most skin types.
Can I use a different type of butter if I don’t have mango butter?
Yes, you can substitute mango butter with other types of butter, but the results may vary slightly. Shea butter is a popular alternative and offers similar moisturizing and healing properties. Cocoa butter is another option, but it has a stronger scent and can be comedogenic for some individuals. If you choose to use a different butter, be sure to research its properties and consider your skin type before making the substitution. You might need to adjust the amount of carrier oil to achieve the desired consistency.
What carrier oils are best to use in this DIY mango body butter recipe?
The best carrier oils for this recipe depend on your skin type and preferences. Coconut oil is a popular choice for its moisturizing and antimicrobial properties, but it can be comedogenic for some. Sweet almond oil is a lightweight and versatile option that’s suitable for most skin types. Jojoba oil is similar to the skin’s natural sebum, making it a great choice for balancing oily skin. Avocado oil is rich in vitamins and fatty acids, making it ideal for dry and mature skin. Grapeseed oil is a light and easily absorbed oil that’s perfect for sensitive skin. Experiment with different oils to find the blend that works best for you.
How long will this DIY mango body butter last?
The shelf life of your homemade body butter will depend on the ingredients you use and how you store it. Generally, it can last for up to 6 months if stored in a cool, dark place. To extend its shelf life, use fresh, high-quality ingredients and avoid introducing water into the mixture. You can also add a natural preservative like vitamin E oil. Be sure to check the body butter regularly for any signs of spoilage, such as changes in color, odor, or texture.
Can I add essential oils to this recipe? If so, which ones are recommended?
Absolutely! Adding essential oils is a great way to customize your DIY mango body butter and enhance its therapeutic benefits. Lavender essential oil is known for its calming and relaxing properties, making it perfect for bedtime use. Peppermint essential oil can invigorate and refresh the skin. Tea tree oil has antibacterial and anti-inflammatory properties, making it a good choice for acne-prone skin. Citrus essential oils like lemon and orange can brighten the skin and uplift the mood. When adding essential oils, be sure to use them sparingly, as they can be potent. A general guideline is to use no more than 1-2% essential oil concentration in your body butter. Always perform a patch test before applying the body butter to your entire body to ensure you don’t have any allergic reactions.
How do I store the finished mango body butter?
Store your finished DIY mango body butter in an airtight container in a cool, dark place. Direct sunlight and heat can cause the butter to melt and lose its consistency. A glass jar or a plastic container with a tight-fitting lid is ideal. Avoid storing the body butter in the bathroom, as the humidity can promote bacterial growth. If you live in a warm climate, you may want to store the body butter in the refrigerator to prevent it from melting. However, keep in mind that refrigeration can make the butter harder and more difficult to apply.
My body butter is too greasy. How can I fix it?
If your body butter feels too greasy, there are a few things you can try. First, make sure you’re not using too much carrier oil in the recipe. You can also add a small amount of arrowroot powder or cornstarch to absorb excess oil. Start with a teaspoon and add more as needed until you reach the desired consistency. Another option is to use a lighter carrier oil, such as grapeseed oil or apricot kernel oil. Finally, make sure you’re not applying too much body butter to your skin. A little goes a long way!
Can I use this body butter on my face?
While this DIY mango body butter is generally safe for use on the body, it may not be suitable for all skin types on the face. Mango butter is non-comedogenic, but some of the carrier oils you use may clog pores, especially if you have oily or acne-prone skin. If you want to use this body butter on your face, choose non-comedogenic carrier oils like jojoba oil or grapeseed oil and avoid using coconut oil. It’s also a good idea to perform a patch test on a small area of your face before applying it to your entire face. If you have sensitive skin, consult with a dermatologist before using this body butter on your face.


Leave a Comment