

DIY Cucumber Soap Recipe: Who doesn’t love the refreshing feeling of a cool cucumber on a hot summer day? Now, imagine capturing that invigorating sensation in your daily shower! I’m so excited to share a fantastic DIY project that will transform your cleansing routine: a homemade cucumber soap recipe that’s as easy to make as it is beneficial for your skin.
The use of cucumbers in skincare isn’t new; in fact, it stretches back centuries. Ancient civilizations, including the Egyptians and Romans, recognized the hydrating and soothing properties of cucumbers, using them in various beauty treatments. Think Cleopatra and her legendary beauty secrets – I bet cucumbers were involved! Today, we’re taking that ancient wisdom and putting a modern, DIY spin on it.
Why should you bother making your own cucumber soap? Well, for starters, you get complete control over the ingredients. Many commercial soaps are packed with harsh chemicals and artificial fragrances that can irritate sensitive skin. With this DIY cucumber soap recipe, you can use natural, gentle ingredients that nourish and protect your skin. Plus, it’s a fun and rewarding project that will leave you feeling accomplished and smelling amazing. I’ve found that making my own soap is a great way to relax and unwind, and the end result is something I can actually use and enjoy every day. So, let’s dive in and create some skin-loving magic!
DIY Refreshing Cucumber Soap: A Step-by-Step Guide
Hey there, soap-making enthusiasts! Today, I’m super excited to share my favorite recipe for a refreshing and incredibly soothing cucumber soap. This DIY project is perfect for anyone looking to create a gentle, hydrating soap at home, especially if you have sensitive skin. Cucumber is known for its cooling and anti-inflammatory properties, making it a fantastic addition to your skincare routine. So, let’s dive in and create this amazing soap together!
What You’ll Need: The Ingredients & Equipment
Before we get started, let’s gather all the necessary ingredients and equipment. Having everything ready will make the process smooth and enjoyable.
Ingredients:
* Melt and Pour Soap Base (Glycerin or Goat Milk): 2 pounds. I personally prefer goat milk for its extra moisturizing benefits, but glycerin works great too!
* Fresh Cucumber: 1 medium-sized cucumber. Organic is always best if you can find it.
* Olive Oil: 1 tablespoon. This adds extra moisture and a luxurious feel.
* Honey: 1 teaspoon. Honey is a natural humectant, meaning it helps to draw moisture to the skin.
* Vitamin E Oil (Optional): 1 teaspoon. This is a powerful antioxidant that can help protect your skin.
* Cucumber Essential Oil or Fragrance Oil (Optional): A few drops. This will enhance the cucumber scent, but it’s not essential if you prefer a more natural, subtle fragrance.
* Green Soap Colorant (Optional): A few drops. If you want to give your soap a vibrant green hue.
Equipment:
* Double Boiler or Microwave-Safe Bowl: For melting the soap base.
* Sharp Knife and Cutting Board: For preparing the cucumber.
* Blender or Food Processor: To puree the cucumber.
* Spatula or Spoon: For stirring the soap mixture.
* Soap Molds: Silicone molds are the easiest to use, but you can also use loaf molds or individual molds.
* Measuring Cups and Spoons: For accurate measurements.
* Spray Bottle with Rubbing Alcohol: To remove bubbles from the soap surface.
* Thermometer (Optional): To monitor the soap base temperature.
Phase 1: Preparing the Cucumber Puree
This is a crucial step because the quality of your cucumber puree will directly impact the final product. We want a smooth, fine puree to avoid any chunky bits in our soap.
1. Wash the Cucumber: Thoroughly wash the cucumber under running water to remove any dirt or pesticides.
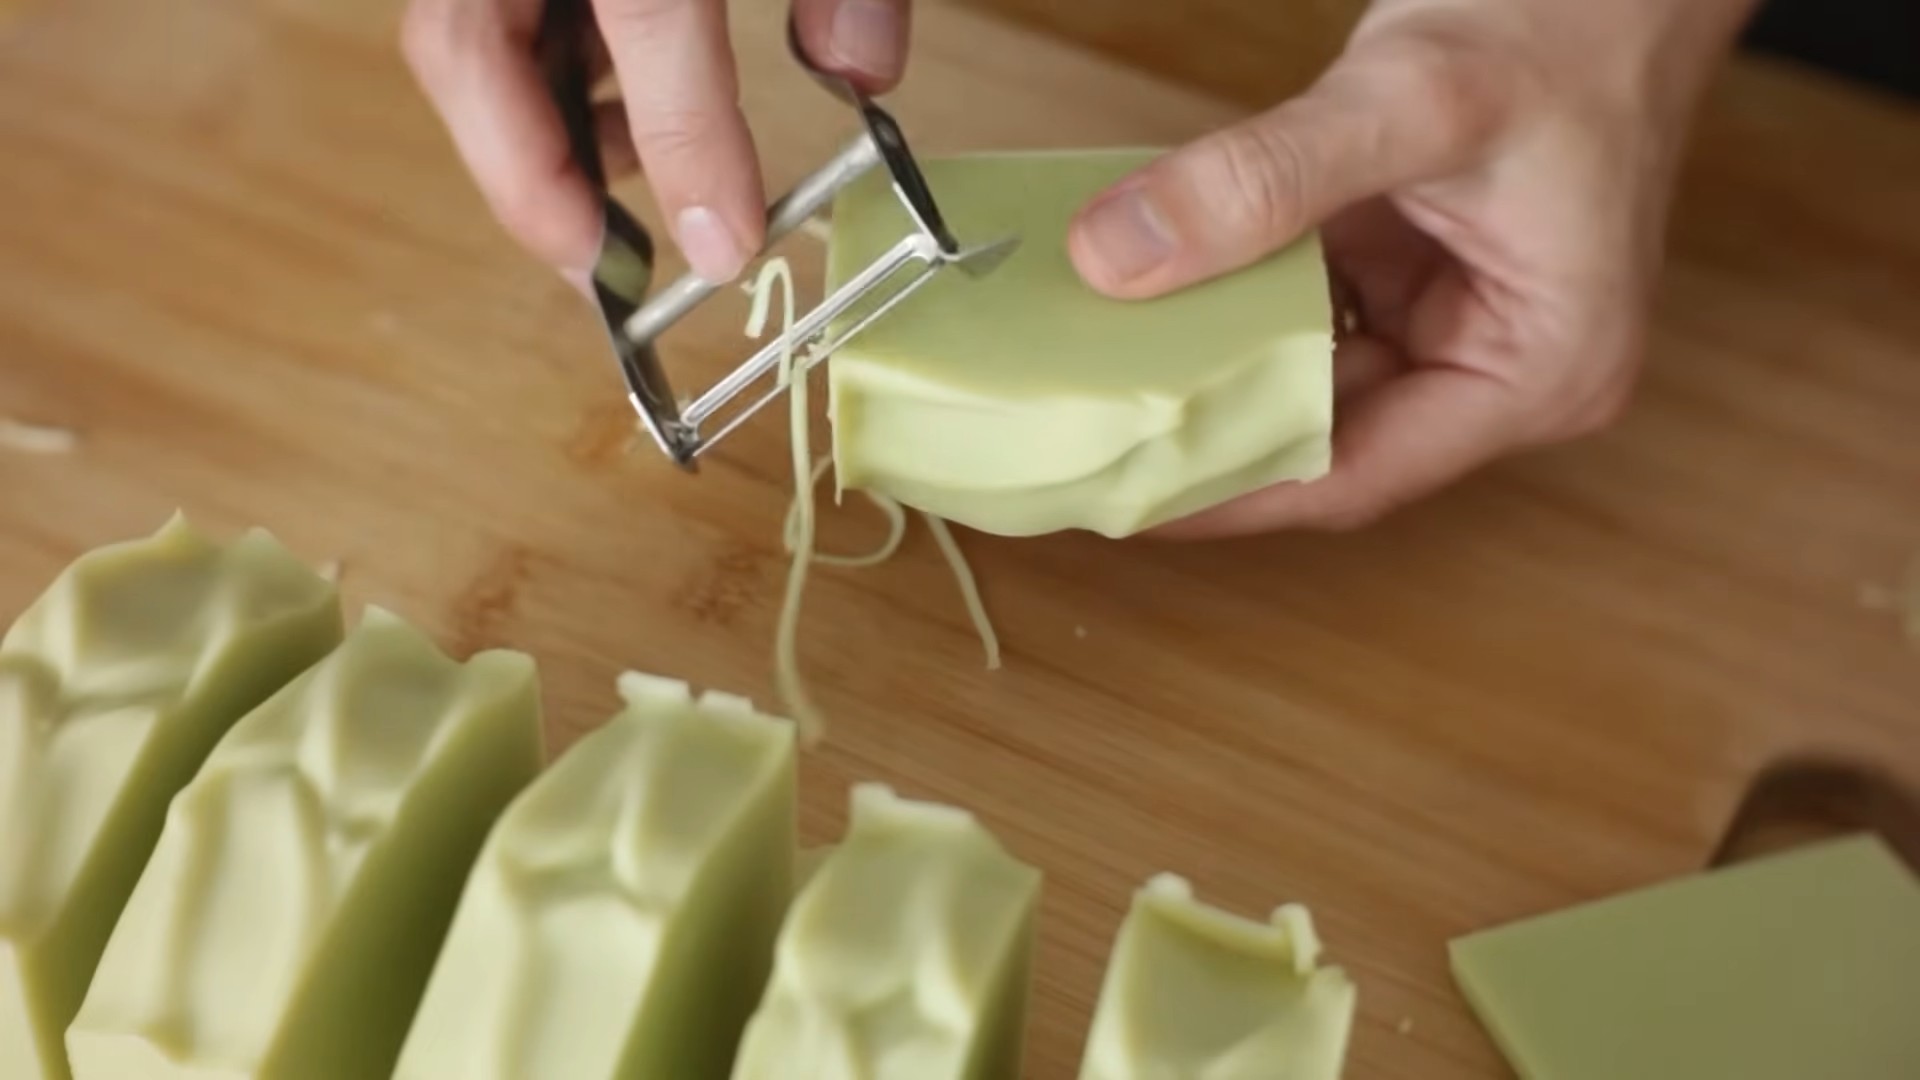
2. Peel the Cucumber (Optional): You can peel the cucumber if you prefer a smoother soap, but I usually leave the peel on for added nutrients and a slightly textured feel. It’s up to you!
3. Chop the Cucumber: Chop the cucumber into small pieces. This will make it easier for the blender or food processor to create a smooth puree.
4. Puree the Cucumber: Place the chopped cucumber into a blender or food processor and blend until you achieve a smooth, lump-free puree.
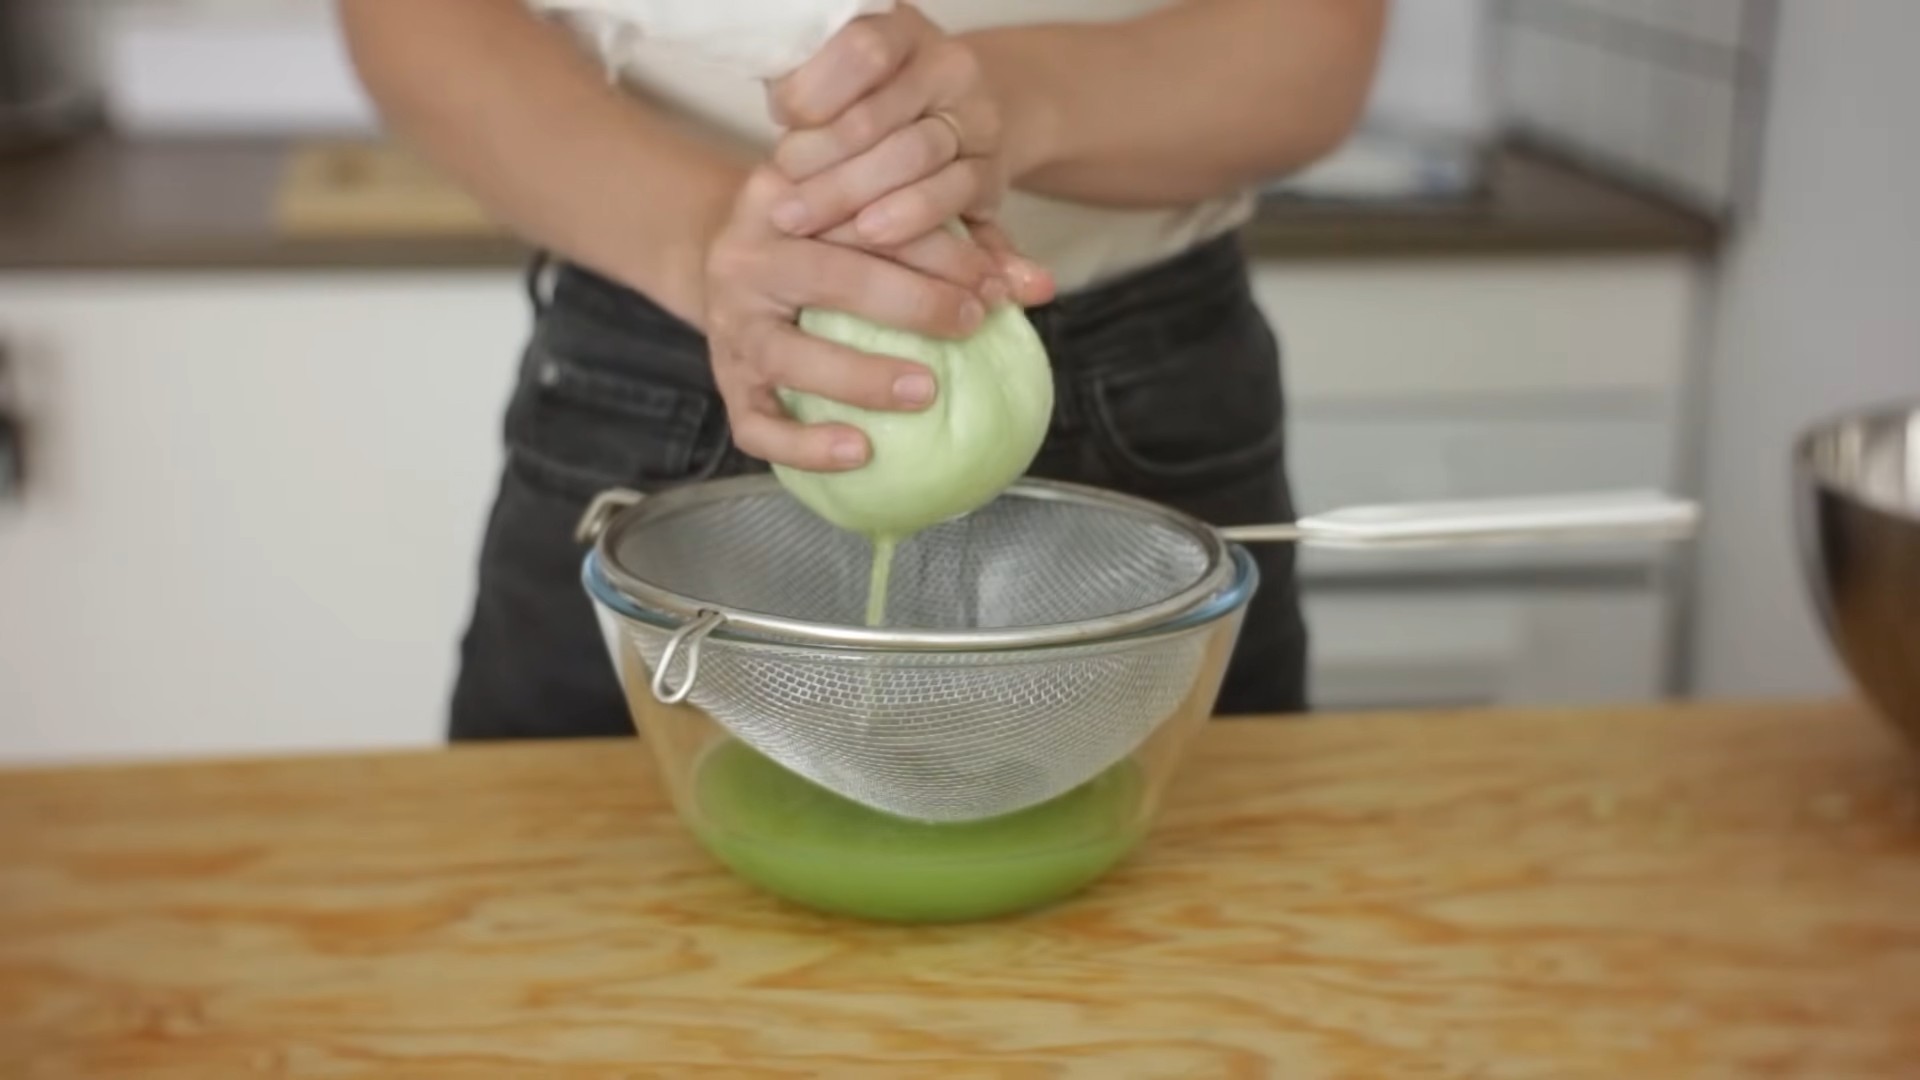
5. Strain the Puree (Optional): If you want an extra smooth soap, you can strain the puree through a fine-mesh sieve to remove any remaining solids. This step is optional, but it can make a difference in the final texture.
Phase 2: Melting the Soap Base
Melting the soap base correctly is essential for a smooth and even soap. We want to avoid overheating the soap, as this can affect its quality.
1. Cut the Soap Base: Cut the melt and pour soap base into small, uniform cubes. This will help it melt evenly and quickly.
2. Melt the Soap Base: There are two ways to melt the soap base:
* Double Boiler: Place the soap base cubes in a double boiler over medium heat. Stir occasionally until the soap is completely melted.
* Microwave: Place the soap base cubes in a microwave-safe bowl. Microwave in 30-second intervals, stirring in between, until the soap is completely melted. Be careful not to overheat the soap!
3. Check the Temperature (Optional): If you’re using a thermometer, aim for a temperature of around 130-140°F (54-60°C). This is the ideal temperature for working with melt and pour soap.
Phase 3: Combining the Ingredients
Now comes the fun part – blending everything together to create our amazing cucumber soap!
1. Add the Cucumber Puree: Once the soap base is completely melted, remove it from the heat and gently stir in the cucumber puree. Start with a small amount and gradually add more until you reach your desired consistency and color. I usually add about 1/4 cup of cucumber puree per pound of soap base.
2. Add the Olive Oil, Honey, and Vitamin E Oil (Optional): Stir in the olive oil, honey, and vitamin E oil (if using). These ingredients will add extra moisture and nourishment to your soap.
3. Add the Essential Oil or Fragrance Oil (Optional): If you’re using cucumber essential oil or fragrance oil, add a few drops at a time, stirring well after each addition. Be careful not to add too much, as this can irritate the skin.
4. Add the Soap Colorant (Optional): If you want to add a green color to your soap, add a few drops of green soap colorant, stirring well until you achieve your desired shade.
5. Stir Gently: Stir the mixture gently but thoroughly to ensure that all the ingredients are evenly distributed. Avoid over-stirring, as this can create bubbles in the soap.
Phase 4: Pouring and Setting the Soap
This is the final step before we get to enjoy our homemade cucumber soap!
1. Pour the Soap into Molds: Carefully pour the soap mixture into your chosen soap molds.
2. Spray with Rubbing Alcohol: Spray the surface of the soap with rubbing alcohol to remove any bubbles. This will give your soap a smooth and professional finish.
3. Let the Soap Set: Allow the soap to set completely. This usually takes about 2-3 hours at room temperature, or you can speed up the process by placing the molds in the refrigerator for about an hour.
4. Remove the Soap from Molds: Once the soap is completely set, gently remove it from the molds. If you’re having trouble removing the soap, you can try placing the molds in the freezer for a few minutes.
Phase 5: Curing and Storing the Soap
While melt and pour soap doesn’t require a long curing time like cold process soap, allowing it to sit for a few days can improve its hardness and longevity.
1. Cure the Soap (Optional): Place the soap bars on a wire rack in a cool, dry place for a few days. This will allow any excess moisture to evaporate, resulting in a harder and longer-lasting soap.
2. Store the Soap: Store the finished soap bars in an airtight container or wrap them individually in plastic wrap to prevent them from drying out.
Tips and Tricks for Perfect Cucumber Soap
* Use Fresh, High-Quality Ingredients: The better the quality of your ingredients, the better the quality of your soap.
* Don’t Overheat the Soap Base: Overheating the soap base can cause it to become brittle and crumbly.
* Stir Gently: Over-stirring can create bubbles in the soap.
* Experiment with Additives: Feel free to experiment with other additives, such as essential oils, herbs, and exfoliants.
* Adjust the Cucumber Puree Amount: The amount of cucumber puree you add will affect the color and consistency of your soap. Adjust the amount to your liking.
* Consider Adding Clay: Adding a teaspoon of bentonite or kaolin clay can help absorb excess oil and create a smoother, more luxurious lather.
* Customize Your Scent: While cucumber essential oil is a great choice, you can also blend it with other complementary scents like aloe vera, green tea, or even a touch of mint for an extra refreshing kick.
* For Sensitive Skin: If you have particularly sensitive skin, consider using a fragrance-free soap base and omitting the essential oil altogether. The natural cucumber scent is often enough!
* Preventing Mold: Cucumber contains a lot of water, which can potentially lead to mold growth in your soap. To minimize this risk, ensure your cucumber puree is as fine as possible and consider adding a preservative like Germaben II if you plan on storing the soap for an extended period.
* Packaging for Gifts: These soaps make wonderful gifts! Wrap them in pretty paper, tie them with ribbon, or place them in small organza bags for a personal touch.
Troubleshooting Common Issues
* Soap is too soft: You may have added
Conclusion
So, there you have it! A simple, effective, and incredibly refreshing way to create your own DIY cucumber soap. We’ve walked you through the process step-by-step, highlighting the benefits of each ingredient and offering tips to ensure your soap-making adventure is a resounding success. But why is this DIY trick a must-try?
Firstly, it’s about control. You know exactly what’s going into your soap. No hidden chemicals, no harsh detergents, just pure, natural goodness. This is especially important for those with sensitive skin or allergies. Commercial soaps often contain ingredients that can irritate and dry out the skin, whereas our DIY cucumber soap is gentle and nourishing.
Secondly, it’s about customization. While we’ve provided a solid base recipe, the beauty of DIY lies in its adaptability. Feel free to experiment with different essential oils. Lavender, chamomile, or tea tree oil would all complement the cucumber beautifully, adding their own unique therapeutic properties. You could also incorporate other natural ingredients like honey for extra moisturizing power, or finely ground oatmeal for gentle exfoliation. Consider adding a swirl of green clay for a visually appealing touch and added detoxifying benefits.
Thirdly, it’s about sustainability. By making your own soap, you’re reducing your reliance on mass-produced products that often come with excessive packaging and a hefty carbon footprint. You’re also minimizing the amount of potentially harmful chemicals that end up down the drain and into our waterways.
Beyond these core benefits, making your own cucumber soap is simply a fun and rewarding experience. There’s something incredibly satisfying about creating something useful and beautiful with your own hands. It’s a chance to connect with nature, unleash your creativity, and pamper yourself with a truly luxurious product.
Don’t be intimidated by the idea of soap making. It’s much easier than you might think. Just follow our instructions carefully, and you’ll be amazed at the results. And remember, even if your first batch isn’t perfect, that’s okay! Every mistake is a learning opportunity.
We truly believe that this DIY cucumber soap recipe is a game-changer for anyone looking for a natural, effective, and customizable skincare solution. So, gather your ingredients, clear your workspace, and get ready to embark on a soap-making adventure.
We’re confident that you’ll love the results. And we can’t wait to hear about your experience! Share your photos, tips, and variations in the comments below. Let’s build a community of DIY soap enthusiasts and spread the word about the amazing benefits of homemade skincare. Happy soaping!
Frequently Asked Questions (FAQ)
What kind of cucumber should I use?
You can use any type of cucumber for this recipe! English cucumbers, garden cucumbers, or even pickling cucumbers will work just fine. The key is to ensure it’s fresh and ripe. Organic cucumbers are always a good choice if you’re concerned about pesticides. Remember to peel the cucumber before pureeing it for a smoother soap.
Can I use cucumber juice instead of pureed cucumber?
Yes, you can substitute cucumber juice for pureed cucumber. However, keep in mind that the juice will have a higher water content, which might affect the curing time of your soap. You may need to adjust the amount of liquid you use in the recipe to compensate. Using pureed cucumber adds a bit of fiber and nutrients to the soap, which some people prefer.
What kind of soap base is best for this recipe?
We recommend using a melt-and-pour soap base for this recipe, especially if you’re a beginner. Glycerin soap base is a popular choice because it’s clear, allowing the green color of the cucumber to shine through. Olive oil soap base is another great option for its moisturizing properties. You can also use a goat milk soap base for added creaminess. Just make sure the soap base is unscented so it doesn’t clash with the cucumber and any essential oils you choose to add.
How long does the soap need to cure?
Melt-and-pour soap doesn’t require a long curing time like cold-process soap. However, it’s still a good idea to let it sit for at least 24-48 hours after pouring to allow it to harden completely. This will also help the soap release from the mold more easily. If you live in a humid environment, you might need to let it cure for a bit longer.
Can I add other ingredients to this soap?
Absolutely! That’s the beauty of DIY soap making. You can customize the recipe to suit your preferences and needs. Some popular additions include:
* **Essential oils:** Lavender, chamomile, tea tree, and peppermint are all great choices.
* **Honey:** Adds extra moisturizing power.
* **Oatmeal:** Provides gentle exfoliation.
* **Green clay:** Adds a beautiful green color and detoxifying benefits.
* **Shea butter or cocoa butter:** For added richness and moisture.
* **Vitamin E oil:** An antioxidant that helps protect the skin.
Just be sure to add these ingredients in small amounts and adjust the recipe accordingly.
How do I store the finished soap?
Store your homemade cucumber soap in a cool, dry place away from direct sunlight. This will help prevent it from melting or becoming discolored. You can wrap each bar individually in plastic wrap or store them in an airtight container.
My soap is sweating. What should I do?
“Sweating” or glycerin dew is a common occurrence with melt-and-pour soap, especially in humid environments. It’s caused by the soap attracting moisture from the air. To prevent sweating, try wrapping the soap tightly in plastic wrap as soon as it’s cooled and hardened. You can also store it in an airtight container with a desiccant packet. If your soap does sweat, simply wipe it off with a clean cloth. It doesn’t affect the quality of the soap.
Can I use this soap on my face?
Yes, this DIY cucumber soap is gentle enough to use on your face. However, it’s always a good idea to do a patch test first to make sure you don’t have any adverse reactions. Avoid getting the soap in your eyes.
How long will this soap last?
Homemade soap typically lasts for several months, depending on the ingredients and storage conditions. The cucumber may cause the soap to spoil faster than other types of soap, so it’s best to use it within 6-12 months.
What if I don’t have a soap mold?
You can use any container that’s heat-safe and non-reactive as a soap mold. Silicone molds are ideal because they’re flexible and make it easy to remove the soap. You can also use plastic containers, glass dishes, or even cardboard boxes lined with parchment paper.
Is it safe to use food coloring to enhance the green color?
While you *can* use food coloring, we generally advise against it. Many food colorings can bleed or fade over time, and some may even irritate the skin. A better option is to use natural colorants like green clay or spirulina powder. These will not only add a beautiful green color but also provide additional skin-nourishing benefits.
Can I sell this soap?
If you plan to sell your homemade soap, it’s important to research and comply with all applicable regulations and labeling requirements in your area. This may include registering your business, obtaining permits, and ensuring your soap is properly labeled with ingredients and warnings.

Leave a Comment