

Growing tomatoes at home can feel like striking gold in your backyard! Imagine biting into a juicy, sun-ripened tomato that you nurtured from a tiny seed. There’s nothing quite like it, right? For centuries, tomatoes have been a staple in cuisines around the world, from the vibrant sauces of Italy to the refreshing salads of the Mediterranean. Their journey from the Andes Mountains to our gardens is a testament to their deliciousness and adaptability.
But let’s be honest, sometimes growing tomatoes at home can feel more like a battle against pests, diseases, and unpredictable weather. That’s where a few clever DIY tricks and hacks come in handy! I’m here to share some simple, effective, and budget-friendly solutions that will help you maximize your tomato yield and enjoy a bountiful harvest. Whether you’re a seasoned gardener or just starting out, these tips will empower you to create a thriving tomato patch that’s the envy of the neighborhood. Get ready to roll up your sleeves and transform your garden into a tomato paradise!
Growing Tomatoes Like a Pro: My Foolproof DIY Guide
Okay, tomato lovers, gather ’round! I’m going to share my secrets to growing the juiciest, most flavorful tomatoes right in your own backyard (or even on your balcony!). Forget those bland, store-bought tomatoes – we’re talking homegrown goodness that will elevate your salads, sauces, and sandwiches to a whole new level. This isn’t rocket science, but a little know-how goes a long way. So, let’s get our hands dirty!
Choosing the Right Tomato Variety
Before we even think about soil, we need to pick our tomato stars! There are literally hundreds of varieties, so it can be a bit overwhelming. Here’s a breakdown to help you choose:
* Determinate vs. Indeterminate: This is crucial! Determinate tomatoes grow to a certain size and then produce all their fruit at once, making them great for canning. Indeterminate tomatoes keep growing and producing fruit throughout the season, giving you a continuous harvest. I personally prefer indeterminate for fresh eating.
* Size and Shape: Do you want big beefsteak tomatoes for burgers, Roma tomatoes for sauce, or cherry tomatoes for snacking? Think about how you plan to use your tomatoes.
* Disease Resistance: Look for varieties labeled with letters like V, F, N, T, or A. These indicate resistance to common tomato diseases like Verticillium wilt, Fusarium wilt, Nematodes, Tobacco Mosaic Virus, and Alternaria. Trust me, disease resistance is your friend!
* My Personal Recommendations:
* ‘Early Girl’: A reliable early producer, great for cooler climates.
* ‘Roma’: Perfect for making sauces and pastes.
* ‘Sungold’: The sweetest cherry tomato you’ll ever taste!
* ‘Brandywine’: A classic heirloom beefsteak with incredible flavor.
Starting Your Tomato Seeds (or Buying Seedlings)
You have two options here: start your own seeds indoors or buy seedlings from a nursery. Starting seeds gives you more control over the varieties you grow and can save you money, but it requires a bit more effort.
Starting Seeds Indoors (My Preferred Method!)
1. Gather Your Supplies:
* Seed starting trays or small pots
* Seed starting mix (this is different from regular potting soil – it’s lighter and sterile)
* Tomato seeds
* Spray bottle
* Heat mat (optional, but helpful)
* Grow lights (essential if you don’t have a very sunny window)
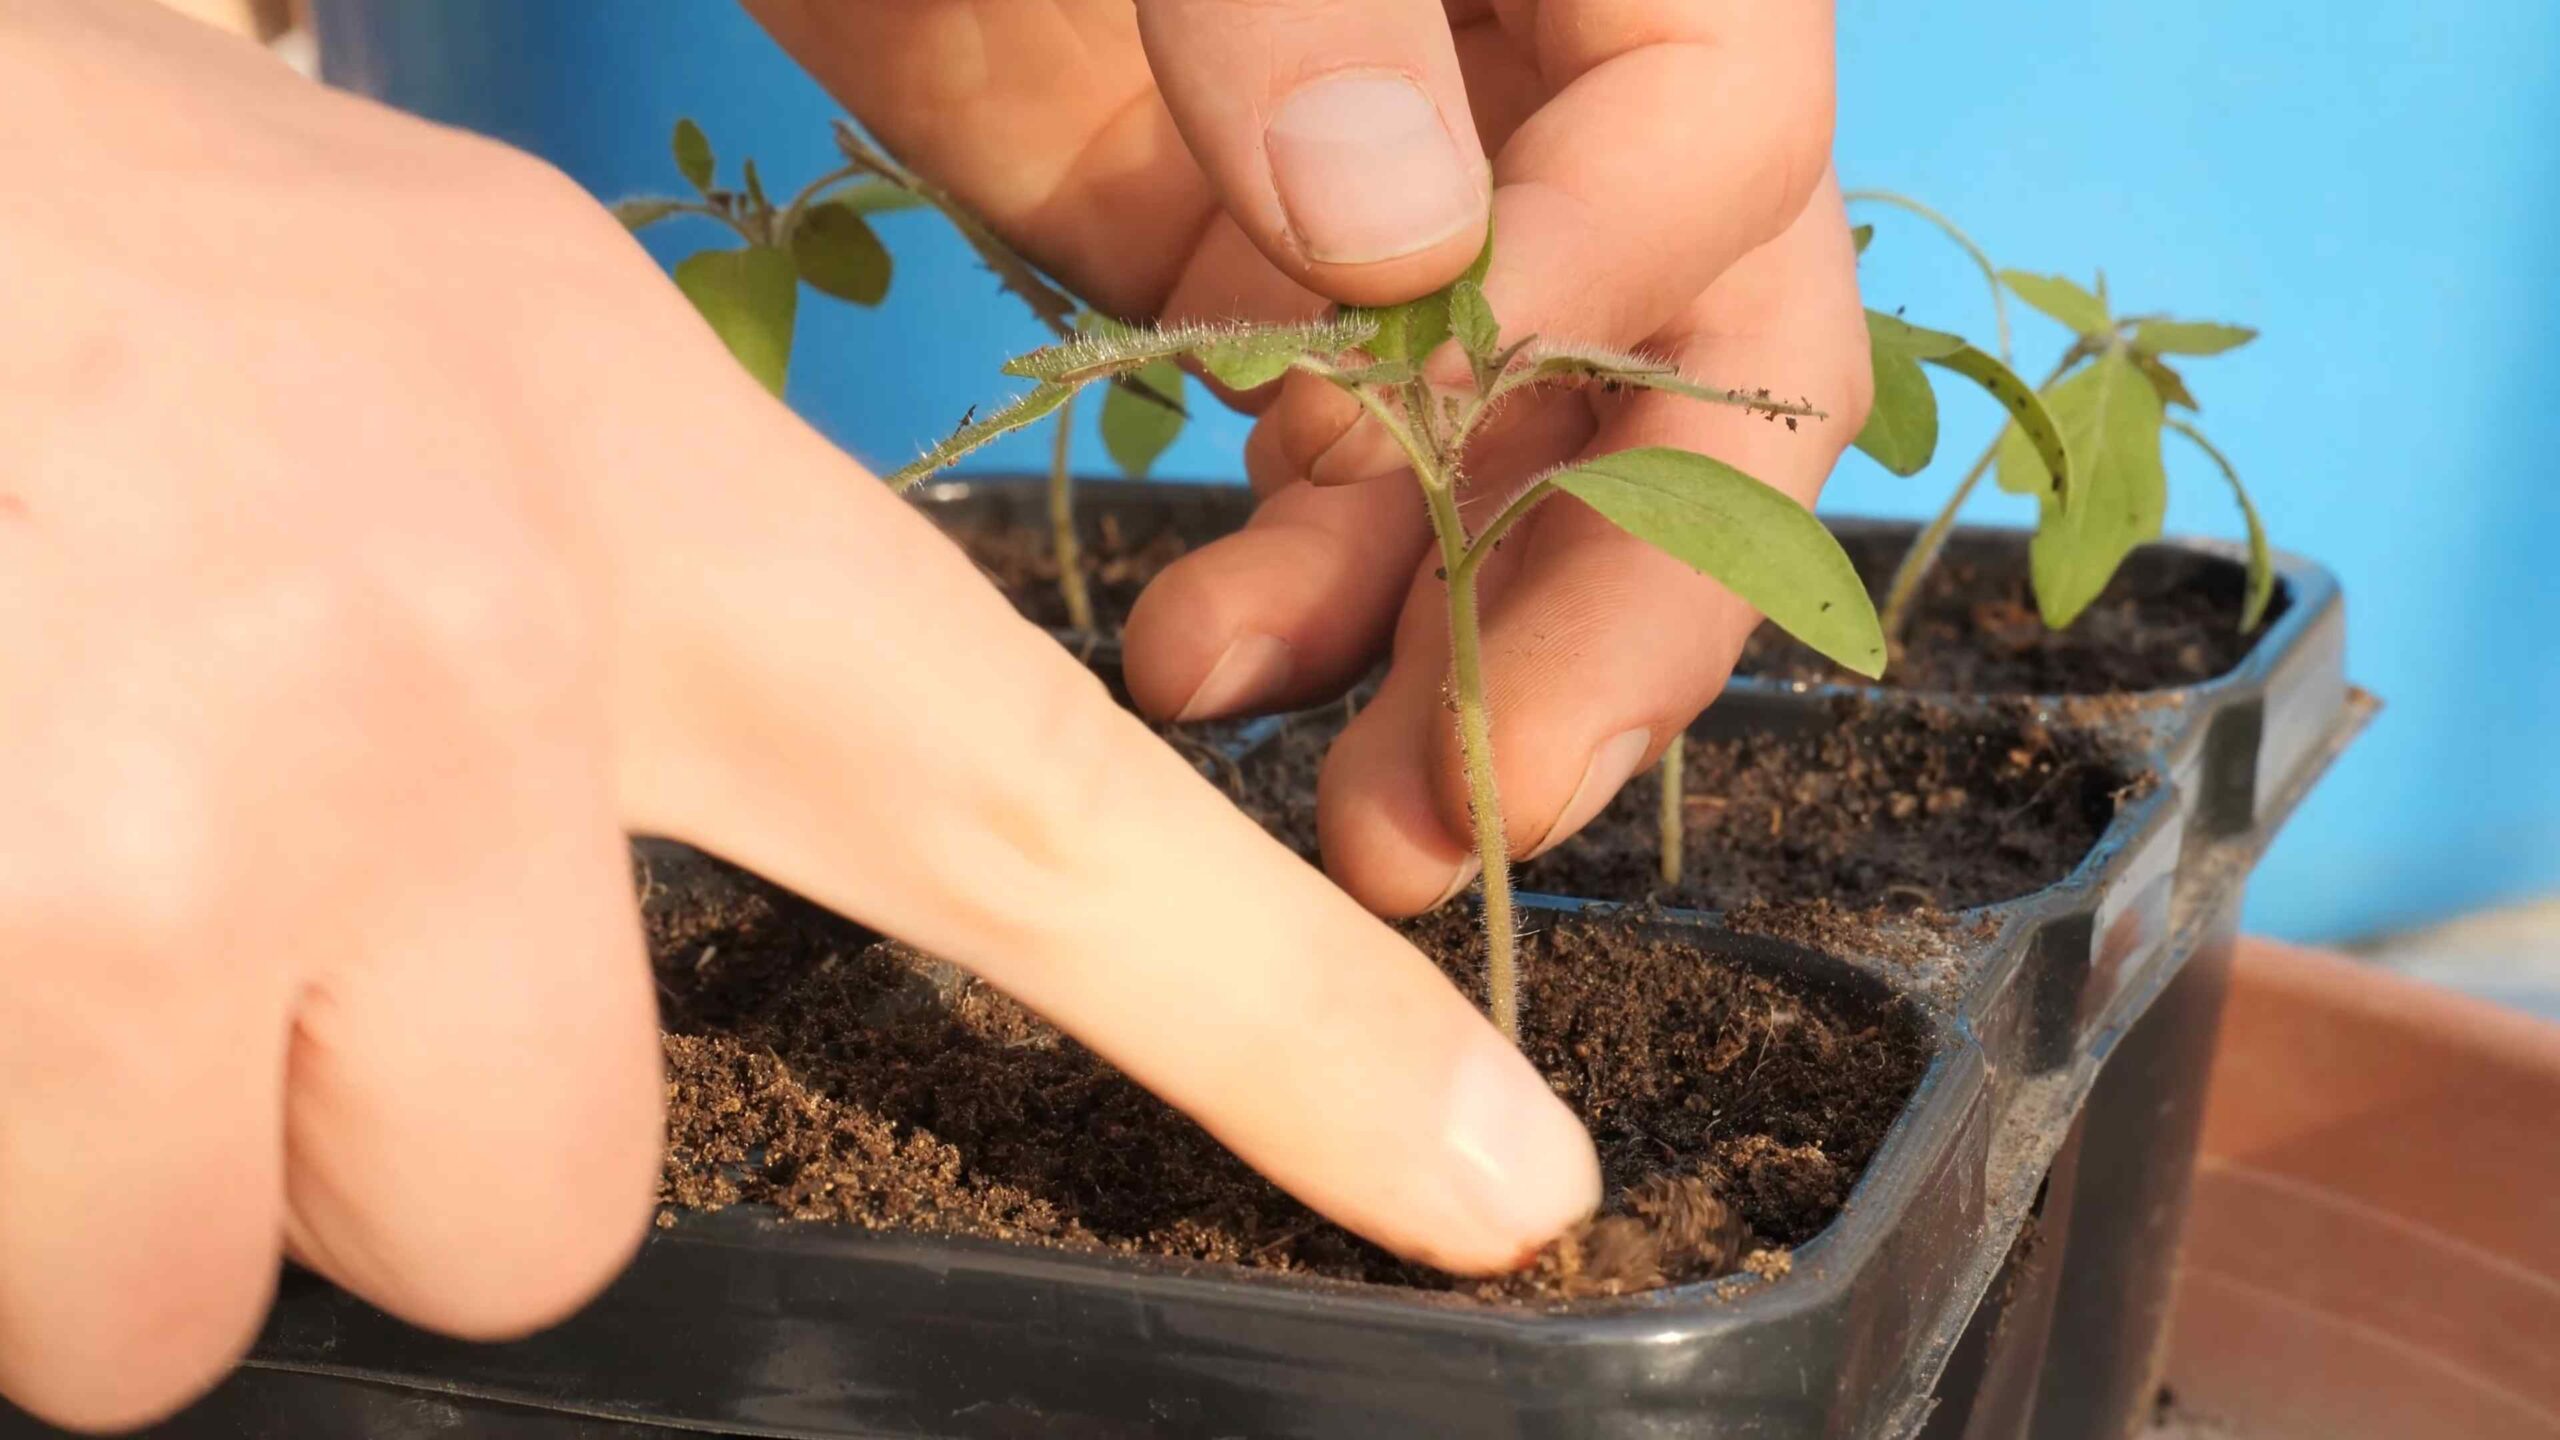
2. Sow the Seeds: Fill your seed starting trays or pots with seed starting mix. Moisten the mix with your spray bottle. Plant 2-3 tomato seeds per cell or pot, about ¼ inch deep. Gently cover the seeds with more mix.
3. Provide Warmth and Moisture: Place the trays or pots on a heat mat (if using) and cover them with a clear plastic dome or plastic wrap to create a humid environment. Keep the soil consistently moist, but not soggy.
4. Wait for Germination: Tomato seeds typically germinate in 5-10 days. Once the seedlings emerge, remove the plastic dome or wrap and place them under grow lights.
5. Provide Light: Keep the grow lights on for 14-16 hours per day. Adjust the height of the lights as the seedlings grow, keeping them a few inches above the plants.
6. Thin the Seedlings: Once the seedlings have their first true leaves (the second set of leaves that appear after the initial seed leaves), thin them to one seedling per cell or pot. Snip off the weaker seedlings at the soil line with scissors.
7. Harden Off the Seedlings: About a week before you plan to transplant the seedlings outdoors, you need to “harden them off.” This means gradually exposing them to outdoor conditions. Start by placing them outside for an hour or two each day in a sheltered location, gradually increasing the amount of time they spend outdoors each day.
Buying Seedlings
If you’re buying seedlings, choose plants that are healthy, stocky, and green. Avoid plants that are leggy (tall and spindly), yellowing, or have spots on their leaves.
Preparing Your Garden Bed
Tomatoes need at least 6-8 hours of sunlight per day and well-drained soil.
1. Choose a Sunny Location: Pick a spot in your garden that gets plenty of sunshine.
2. Prepare the Soil: Tomatoes are heavy feeders, so you need to amend your soil with plenty of organic matter. Dig in compost, aged manure, or other organic amendments to improve drainage and fertility.
3. Check the Soil pH: Tomatoes prefer a soil pH of 6.0-6.8. You can test your soil pH with a soil testing kit. If your soil is too acidic, add lime to raise the pH. If it’s too alkaline, add sulfur to lower the pH.
4. Consider Raised Beds: Raised beds are a great option for growing tomatoes, especially if you have poor soil drainage.
Transplanting Your Tomato Seedlings
Now for the exciting part – getting those little plants into the ground!
1. Wait for Warm Weather: Don’t transplant your tomato seedlings until after the last frost. Tomatoes are very sensitive to frost.
2. Dig a Hole: Dig a hole that is deep enough to bury the bottom third of the tomato seedling’s stem. This encourages the plant to develop more roots along the buried stem, resulting in a stronger, healthier plant.
3. Plant Deep: Gently remove the tomato seedling from its pot and place it in the hole. Backfill the hole with soil, gently firming the soil around the plant.
4. Water Thoroughly: Water the newly transplanted tomato seedlings thoroughly.
5. Add Support: Tomatoes, especially indeterminate varieties, need support to keep them from sprawling on the ground. Use stakes, cages, or trellises to support your plants. I prefer cages because they provide all-around support.
6. Mulch: Apply a layer of mulch around the base of the plants to help retain moisture, suppress weeds, and regulate soil temperature. Straw, wood chips, or shredded leaves are all good options.
Caring for Your Tomato Plants
Now that your tomatoes are in the ground, it’s time to give them the TLC they need to thrive.
1. Water Regularly: Tomatoes need consistent moisture, especially during hot, dry weather. Water deeply and regularly, aiming for about 1-2 inches of water per week. Avoid overhead watering, which can lead to fungal diseases.
2. Fertilize: Tomatoes are heavy feeders and benefit from regular fertilization. Use a balanced fertilizer specifically formulated for tomatoes, following the instructions on the package. I like to use a liquid fertilizer every 2-3 weeks.
3. Prune: Pruning tomato plants can improve air circulation, reduce disease, and encourage fruit production. For indeterminate tomatoes, remove the “suckers” that grow in the crotch between the main stem and the branches. These suckers will eventually produce their own stems and fruit, but they will also compete with the main stem for resources.
4. Watch for Pests and Diseases: Keep an eye out for common tomato pests and diseases, such as aphids, tomato hornworms, and early blight. Treat any problems promptly with appropriate organic or chemical controls.
5. Pollination: While tomatoes are self-pollinating, sometimes they need a little help, especially in hot weather. Gently shake the plants or use a small brush to transfer pollen from one flower to another.
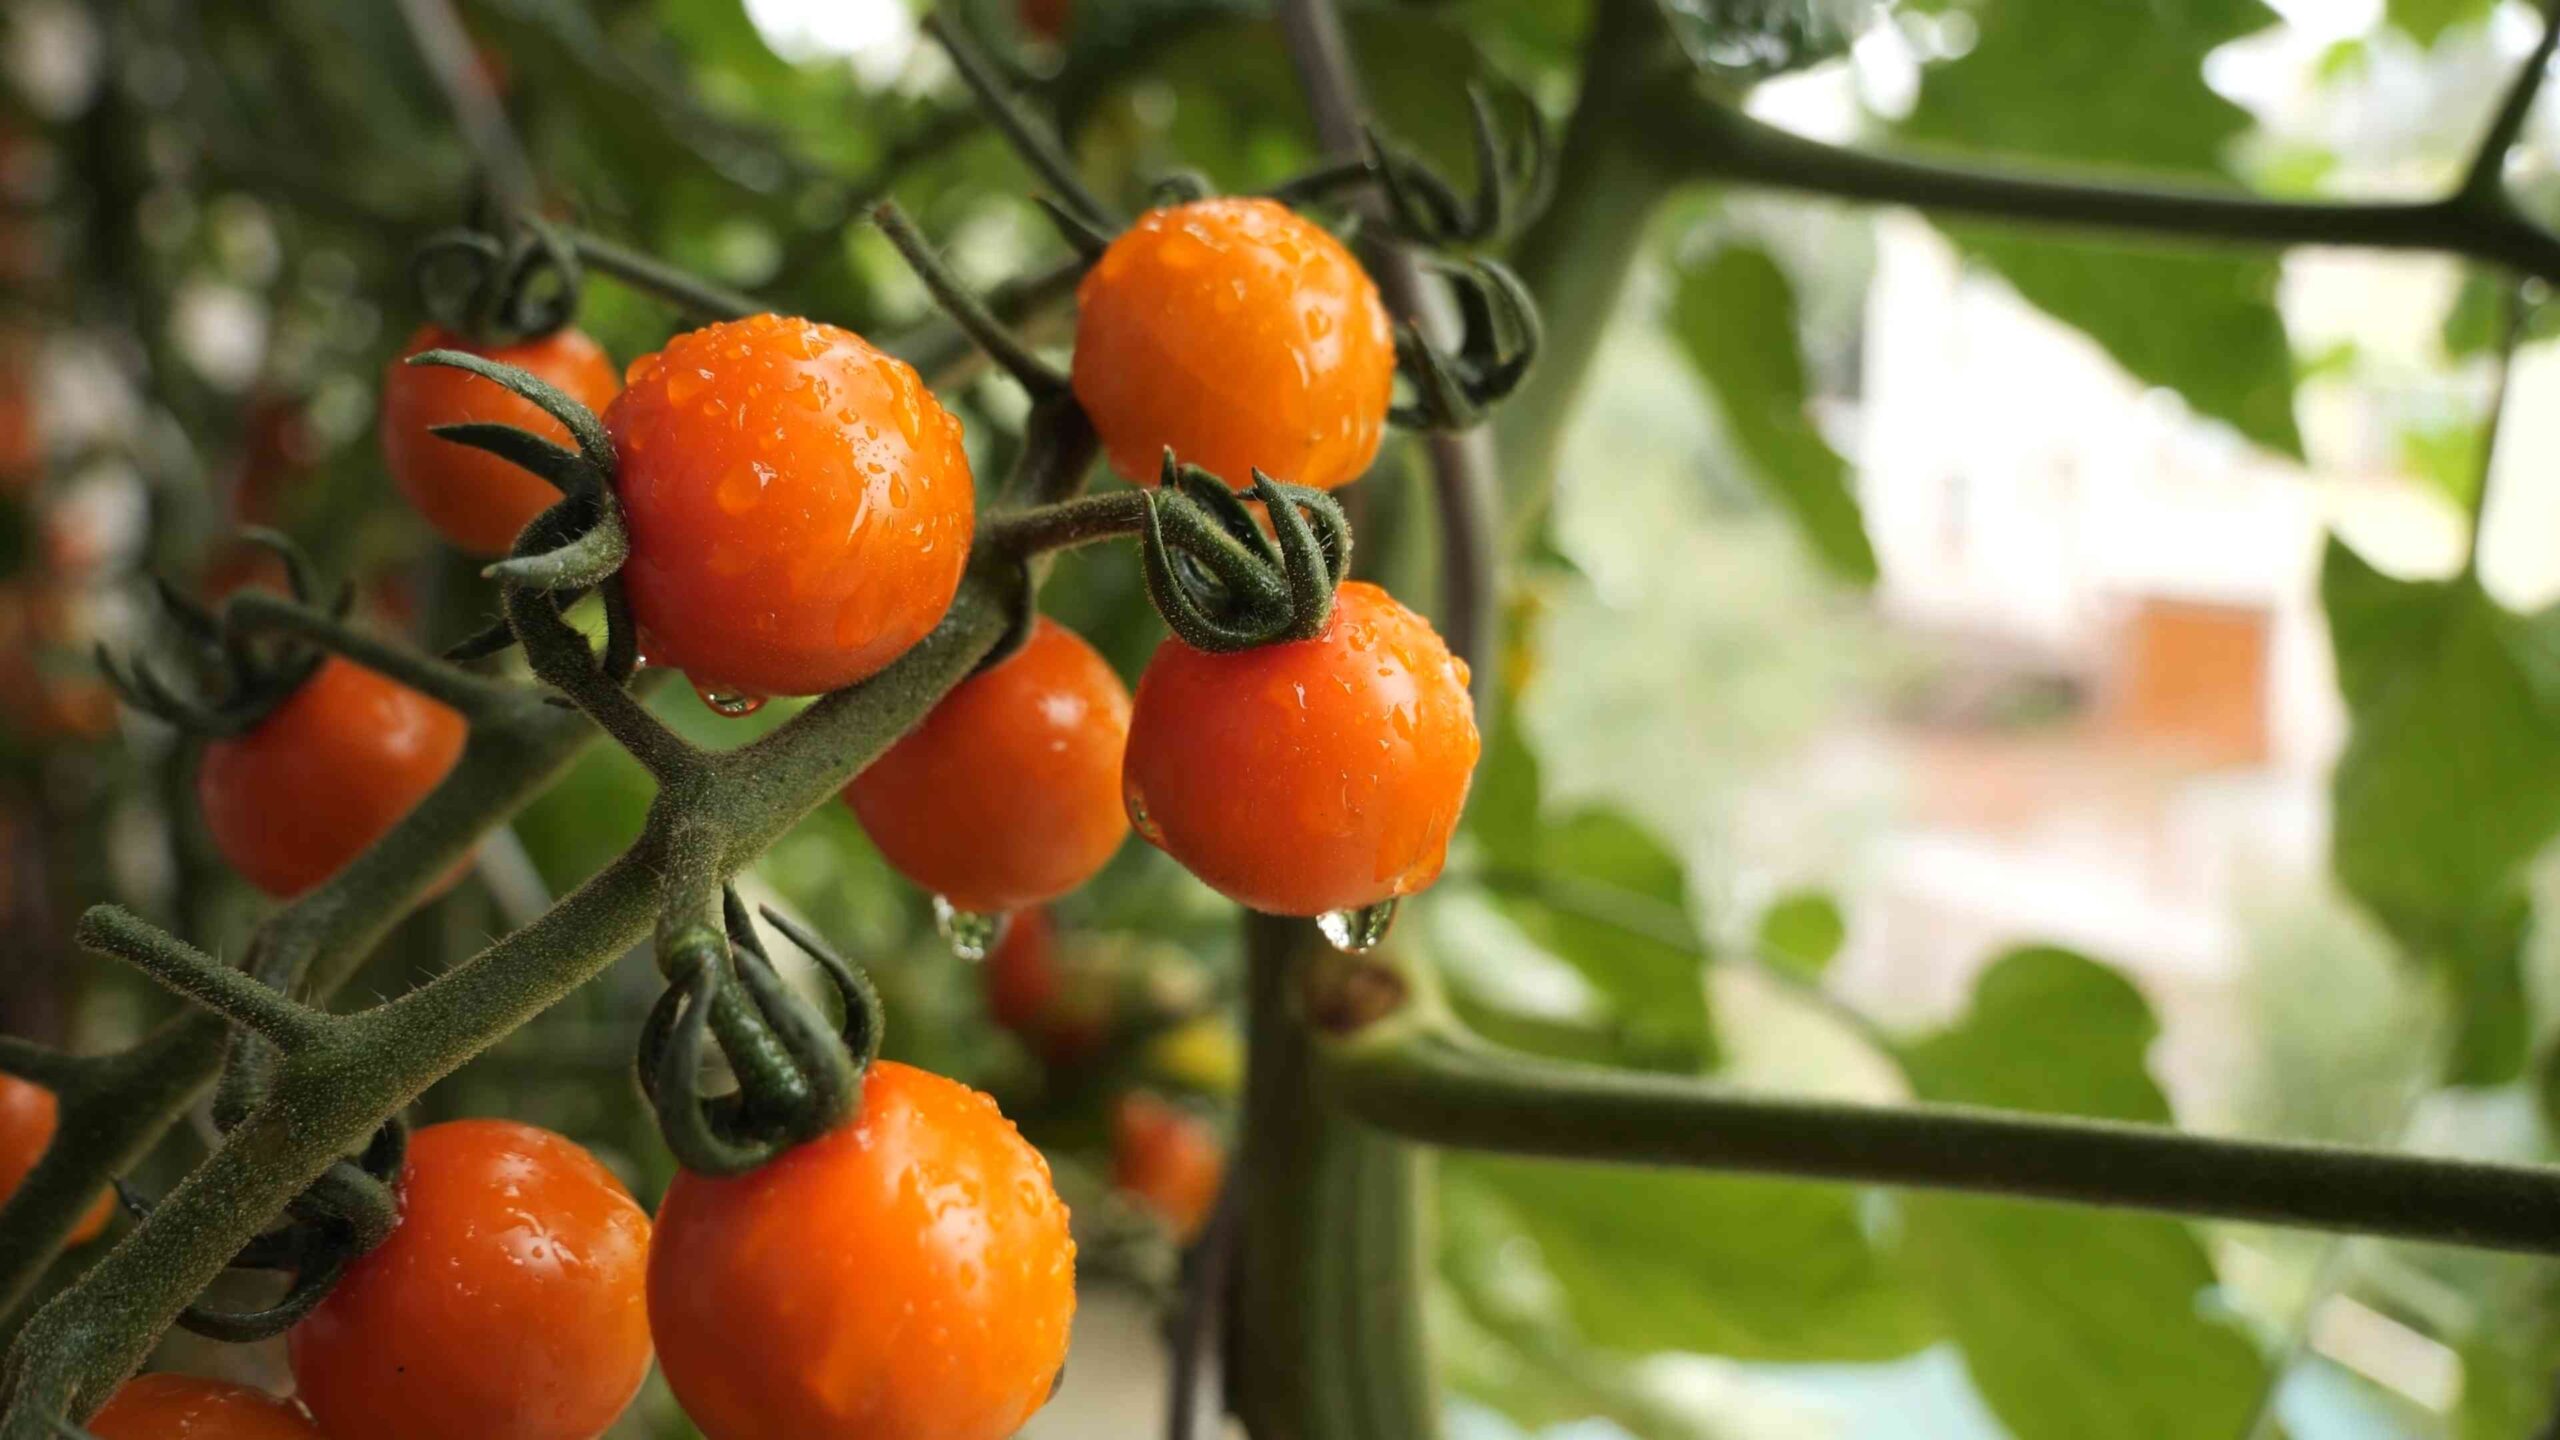
Harvesting Your Tomatoes
The moment we’ve all been waiting for!
1. Wait for Ripeness: Tomatoes are ripe when they are fully colored and slightly soft to the touch.
2. Harvest Gently: Gently twist or cut the tomato from the vine.
3. Enjoy! Savor the taste of your homegrown tomatoes! Use them in salads, sauces, sandwiches, or just eat them straight off the vine.
Troubleshooting Common Tomato Problems
Even with the best care, you might encounter some problems along the way. Here are a few common issues and how to deal with them:
* Blossom End Rot: This is caused by a calcium deficiency. Make sure your soil has enough calcium and water your plants consistently.
* Early Blight: This is a fungal disease that causes spots on the leaves. Remove infected leaves and apply a fungicide.
* Tomato Hornworms: These large green caterpillars can quickly defoliate your tomato plants. Handpick them off the plants or use Bacillus thuringiensis (Bt), a natural insecticide.
* Cracking: This is caused by inconsistent watering. Water your plants regularly and evenly.
Extra Tips for Tomato Success
* Companion Planting: Plant basil, marigolds, or other companion plants near your tomatoes to deter pests and improve growth.
* Crop Rotation: Don’t plant tomatoes in the
Conclusion
So, there you have it! Growing tomatoes at home, especially with this simple DIY trick, is more than just a gardening project; it’s an investment in flavor, freshness, and a deeper connection to your food. We’ve shown you how to bypass some of the common pitfalls and unlock the potential for a truly bountiful harvest, even if you’re a complete beginner.
Why is this DIY method a must-try? Because it addresses the core needs of tomato plants in a way that’s both efficient and accessible. It promotes strong root development, provides consistent moisture, and delivers nutrients directly where they’re needed most. This translates to healthier plants, increased yields, and, most importantly, tomatoes that taste absolutely incredible. Forget those bland, watery supermarket tomatoes – imagine biting into a sun-ripened, juicy tomato bursting with flavor, grown right in your own backyard or balcony!
But don’t stop there! This DIY approach is incredibly versatile. Feel free to experiment with different types of containers, from repurposed buckets to fabric grow bags. Consider adding companion plants like basil or marigolds to your tomato patch to deter pests and enhance flavor. You can also tailor the nutrient solution to your specific soil conditions and the needs of your tomato variety. For example, if you’re growing heirloom tomatoes, you might want to use a fertilizer blend that’s specifically formulated for them. If you are growing cherry tomatoes, you might want to add a trellis to support the plant.
And speaking of varieties, the possibilities are endless! From classic beefsteak tomatoes to sweet cherry tomatoes, tangy Roma tomatoes to colorful heirloom varieties, there’s a tomato out there for everyone. Experiment with different types to find your favorites and discover the unique flavors and textures that each one has to offer.
This DIY trick isn’t just about growing tomatoes; it’s about creating a sustainable and rewarding gardening experience. It’s about connecting with nature, learning new skills, and enjoying the fruits (or vegetables!) of your labor. It’s about knowing exactly where your food comes from and taking pride in the fact that you grew it yourself.
We wholeheartedly encourage you to give this DIY tomato growing method a try. Whether you have a sprawling garden or a small balcony, you can grow delicious, homegrown tomatoes with just a little bit of effort and the right knowledge. And once you’ve tasted the difference between homegrown and store-bought, you’ll never go back!
So, grab your seeds, gather your supplies, and get ready to experience the joy of growing your own tomatoes. And don’t forget to share your experiences with us! We’d love to hear about your successes, your challenges, and any variations you’ve tried. Share your photos, your tips, and your stories in the comments below. Let’s create a community of tomato-growing enthusiasts and inspire others to discover the magic of homegrown produce. Happy gardening!
Frequently Asked Questions
What kind of soil should I use for growing tomatoes at home?
The best soil for growing tomatoes at home is a well-draining, nutrient-rich potting mix. Avoid using garden soil directly in containers, as it can become compacted and doesn’t drain well. Look for a potting mix that contains ingredients like peat moss, perlite, and vermiculite. These ingredients help to improve drainage, aeration, and water retention. You can also amend your potting mix with compost or other organic matter to boost its nutrient content. A slightly acidic soil pH of around 6.0 to 6.8 is ideal for tomato growth.
How often should I water my tomato plants?
Watering frequency depends on several factors, including the size of your container, the weather conditions, and the stage of growth of your tomato plants. In general, you should water your tomato plants deeply whenever the top inch of soil feels dry to the touch. During hot, dry weather, you may need to water them daily. Avoid overwatering, as this can lead to root rot. A good rule of thumb is to water thoroughly until water drains out of the bottom of the container.
What kind of fertilizer should I use for my tomato plants?
Tomato plants are heavy feeders and require a consistent supply of nutrients to thrive. Use a balanced fertilizer with an NPK ratio (nitrogen, phosphorus, potassium) of around 10-10-10 or 14-14-14. You can also use a fertilizer specifically formulated for tomatoes, which will typically have a higher phosphorus content to promote fruit development. Apply fertilizer according to the package directions, usually every 2-3 weeks. You can also supplement with organic fertilizers like compost tea or fish emulsion.
How much sunlight do tomato plants need?
Tomato plants need at least 6-8 hours of direct sunlight per day to produce a good crop of tomatoes. Choose a location that receives plenty of sunlight throughout the day. If you’re growing tomatoes indoors, you may need to supplement with grow lights.
How do I prevent pests and diseases from attacking my tomato plants?
There are several things you can do to prevent pests and diseases from attacking your tomato plants. Start by choosing disease-resistant varieties. Practice good sanitation by removing any dead or diseased leaves. Water your plants at the base to avoid wetting the foliage, which can promote fungal diseases. Use insecticidal soap or neem oil to control common pests like aphids and whiteflies. You can also use companion planting to deter pests. For example, planting basil near your tomatoes can help to repel aphids and other insects.
What are some common problems that tomato plants face, and how can I fix them?
Some common problems that tomato plants face include blossom end rot, sunscald, and fungal diseases. Blossom end rot is caused by a calcium deficiency and can be prevented by adding calcium to the soil or using a calcium-rich fertilizer. Sunscald is caused by excessive sun exposure and can be prevented by providing shade during the hottest part of the day. Fungal diseases can be prevented by practicing good sanitation and using a fungicide if necessary.
Can I grow tomatoes indoors?
Yes, you can grow tomatoes indoors, but it requires some extra effort. You’ll need to provide your tomato plants with plenty of light, either from a sunny window or grow lights. You’ll also need to pollinate the flowers manually, as there won’t be any bees or other insects to do it for you. Use a small paintbrush to transfer pollen from one flower to another. Choose a compact or dwarf variety of tomato that is well-suited for indoor growing.
How do I know when my tomatoes are ripe?
Tomatoes are ripe when they are fully colored and slightly soft to the touch. The color will vary depending on the variety of tomato. Gently squeeze the tomato; it should give slightly but not be mushy. The tomato should also have a pleasant aroma.
What are some good companion plants for tomatoes?
Some good companion plants for tomatoes include basil, marigolds, carrots, onions, and garlic. Basil helps to repel aphids and other insects, while marigolds help to deter nematodes. Carrots, onions, and garlic can help to improve the flavor of tomatoes.
How can I save seeds from my tomato plants?
Saving seeds from your tomato plants is a great way to preserve your favorite varieties and save money. To save seeds, allow the tomatoes to ripen fully on the vine. Cut the tomatoes open and scoop out the seeds and pulp. Place the seeds and pulp in a jar with a little bit of water. Let the mixture ferment for a few days, stirring occasionally. This will help to remove the gelatinous coating from the seeds. After a few days, rinse the seeds thoroughly and spread them out on a paper towel to dry. Once the seeds are completely dry, store them in an airtight container in a cool, dark place.

Leave a Comment