

Growing Coral Cactus at Home might seem daunting, but trust me, it’s an incredibly rewarding experience! Have you ever looked at those quirky, brain-like succulents and thought, “I wish I could have one of those!”? Well, you absolutely can, and this guide is your ticket to successfully cultivating these fascinating plants right in your own living space.
Coral cacti, with their unique, almost otherworldly appearance, have been captivating plant enthusiasts for decades. While not technically a true cactus (they’re often a grafted Euphorbia), their striking form evokes images of vibrant coral reefs, bringing a touch of the exotic indoors. The art of grafting, which is often used to create these beauties, has a long history in horticulture, dating back centuries and allowing us to combine the best traits of different plants.
But why should you bother learning how to grow these unique plants? In today’s busy world, bringing nature into our homes is more important than ever. Growing Coral Cactus at Home offers a therapeutic escape, a chance to connect with the natural world, and a way to add a touch of personality to your décor. Plus, they’re relatively low-maintenance, making them perfect for even the busiest plant parents. I’m here to share some simple DIY tricks and hacks that will ensure your coral cactus thrives, bringing joy and a touch of the extraordinary to your everyday life.
Growing Coral Cactus at Home: A DIY Guide
Coral cacti, with their unique, brain-like appearance, are fascinating additions to any indoor garden. They’re relatively low-maintenance, making them perfect for beginner plant enthusiasts like myself. This guide will walk you through everything you need to know to successfully grow these quirky succulents at home.
Understanding Coral Cactus
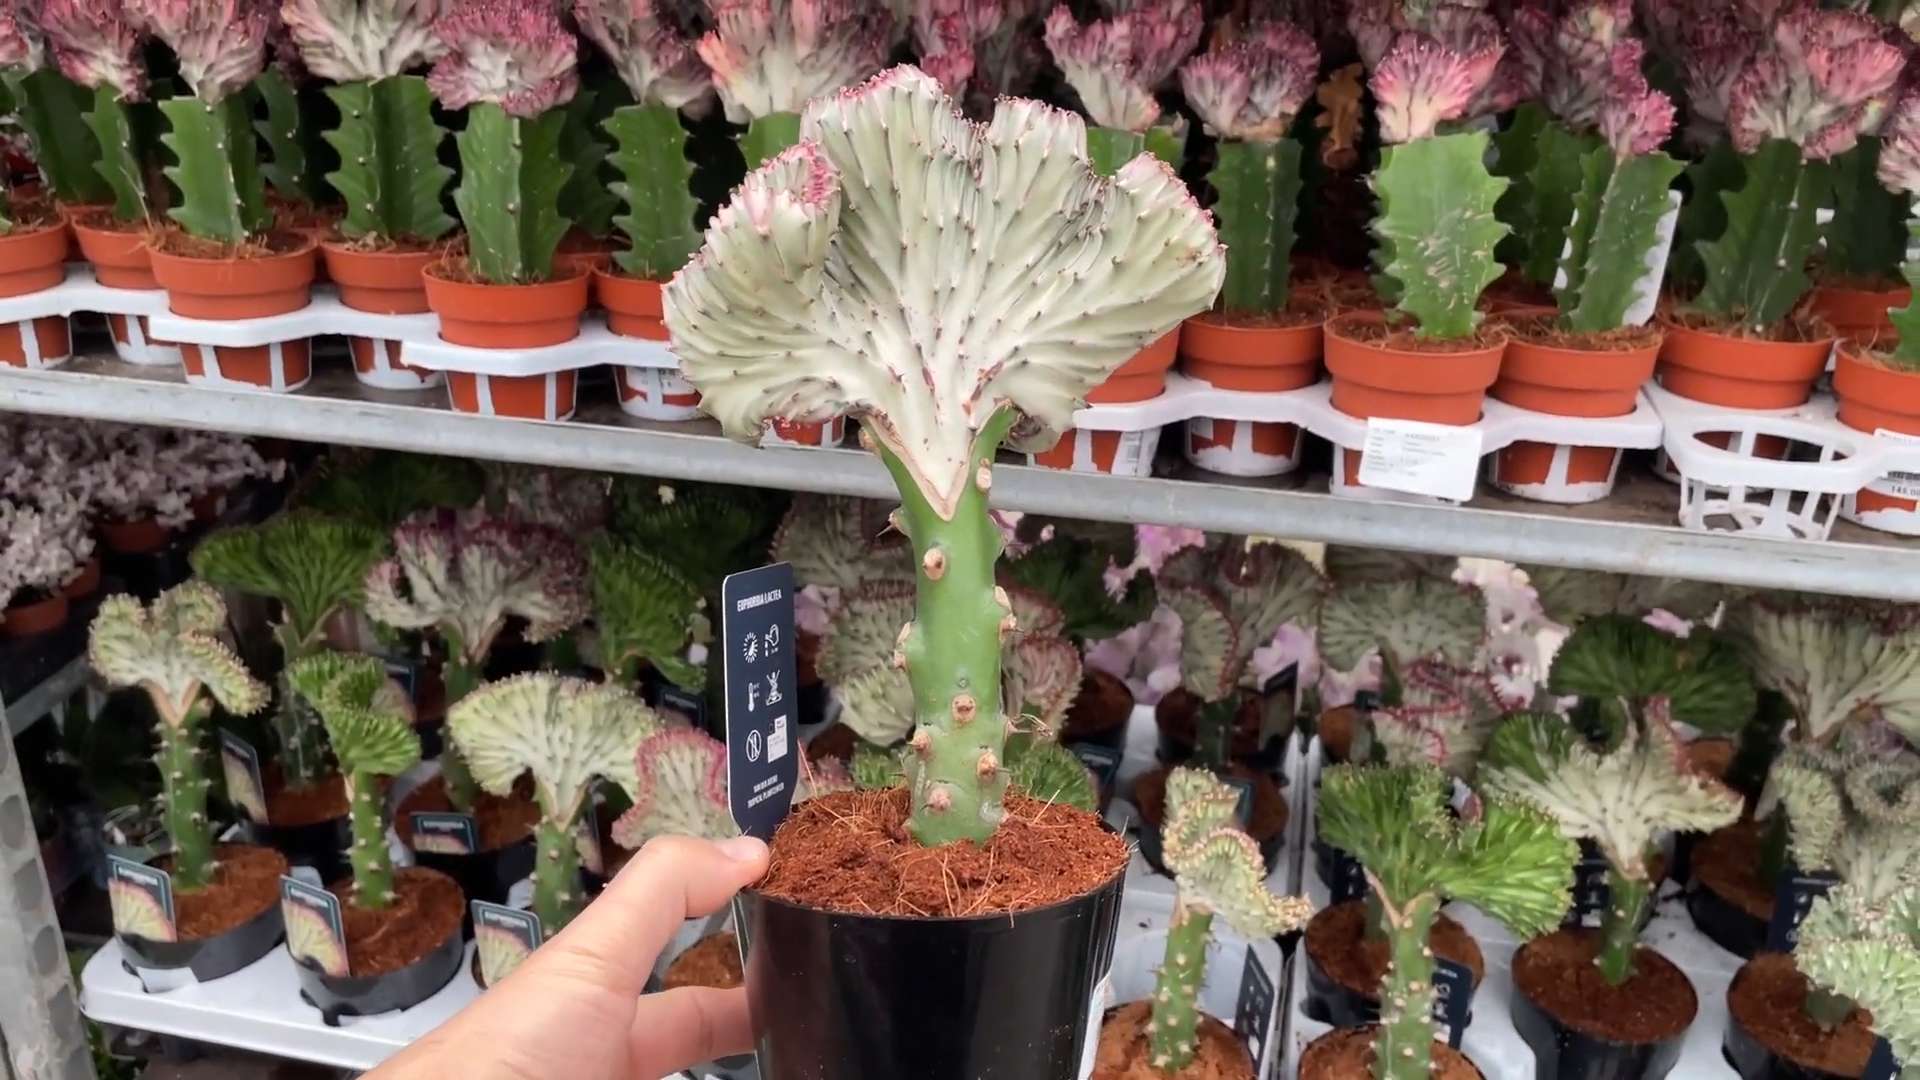
Before we dive into the how-to, let’s understand what a coral cactus actually is. It’s not a single plant, but rather a graft. Typically, it consists of a *Euphorbia neriifolia* (the green, sturdy base) and a *Euphorbia lactea cristata* (the colorful, fan-like top). The *cristata* part lacks chlorophyll, meaning it can’t photosynthesize on its own, hence the need for grafting onto a base that can. This also means that if the base starts to sprout its own branches, you’ll need to prune them to ensure the *cristata* gets all the nutrients.
Materials You’ll Need
* A healthy coral cactus (available at most nurseries or online).
* Well-draining potting mix specifically formulated for cacti and succulents. I prefer a mix of perlite, coarse sand, and regular potting soil.
* A pot with drainage holes. Terracotta pots are ideal because they allow the soil to dry out faster.
* Gardening gloves (to protect your hands from the sap, which can be irritating).
* Watering can or spray bottle.
* Optional: Top dressing like pebbles or decorative rocks.
Planting Your Coral Cactus
1. Choosing the Right Pot: Select a pot that’s slightly larger than the root ball of your coral cactus. Make sure it has ample drainage holes. Good drainage is absolutely crucial to prevent root rot, which is a common killer of succulents. I usually opt for terracotta pots because they’re breathable and help the soil dry out quickly.
2. Preparing the Potting Mix: As I mentioned earlier, well-draining soil is key. You can buy pre-made cactus and succulent mix, or you can create your own. I like to mix equal parts of perlite, coarse sand, and regular potting soil. The perlite and sand improve drainage, while the potting soil provides nutrients.
3. Planting the Cactus:
* Carefully remove the coral cactus from its original container. Gently loosen the roots if they’re tightly packed.
* Place a layer of potting mix at the bottom of the new pot.
* Position the coral cactus in the center of the pot.
* Fill in the remaining space around the cactus with potting mix, leaving about an inch of space between the soil surface and the rim of the pot.
* Gently tap the pot to settle the soil.
* Optional: Add a top dressing of pebbles or decorative rocks. This helps to retain moisture and adds a nice aesthetic touch.
4. Watering After Planting: After planting, water the coral cactus thoroughly, allowing the excess water to drain out of the drainage holes. Then, let the soil dry out completely before watering again. This is a crucial step! Overwatering is a surefire way to kill your coral cactus.
Caring for Your Coral Cactus
Now that your coral cactus is planted, let’s talk about how to keep it thriving.
Light Requirements
Coral cacti need bright, indirect light. Direct sunlight can scorch the *cristata* part, causing it to turn brown or yellow. An east-facing window is ideal, or a spot near a south-facing window with a sheer curtain to filter the light. If you don’t have enough natural light, you can supplement with a grow light. I’ve found that using a grow light during the winter months really helps my coral cactus stay healthy and vibrant.
Watering
Watering is arguably the most important aspect of coral cactus care. As I’ve emphasized, overwatering is a major problem. The general rule of thumb is to water only when the soil is completely dry. To check the soil moisture, stick your finger about an inch into the soil. If it feels dry, it’s time to water. When you do water, water thoroughly until the excess water drains out of the drainage holes. Then, let the soil dry out completely before watering again. During the winter months, when the plant is dormant, you’ll need to water even less frequently. I usually water mine about once a month during the winter.
Temperature and Humidity
Coral cacti prefer warm temperatures, ideally between 65°F and 80°F (18°C and 27°C). They can tolerate slightly cooler temperatures, but they don’t like frost. Average humidity levels are fine. They don’t need high humidity like some other houseplants.
Fertilizing
Coral cacti don’t need a lot of fertilizer. You can fertilize them once or twice during the growing season (spring and summer) with a balanced liquid fertilizer diluted to half strength. Avoid fertilizing during the winter months.
Pruning
Pruning is important for maintaining the health and appearance of your coral cactus. As I mentioned earlier, if the *Euphorbia neriifolia* base starts to sprout its own branches, you’ll need to prune them off. This is because the *cristata* part relies on the base for nutrients, and if the base is putting energy into growing its own branches, it will take away from the *cristata*. To prune, use a clean, sharp knife or pruning shears. Be careful to avoid getting the sap on your skin, as it can be irritating.
Repotting
You’ll need to repot your coral cactus every few years as it outgrows its pot. Choose a pot that’s slightly larger than the current pot. The best time to repot is in the spring or summer. When repotting, be careful not to damage the roots.
Troubleshooting Common Problems
Even with the best care, you might encounter some problems with your coral cactus. Here are some common issues and how to address them:
* Root Rot: This is usually caused by overwatering. Symptoms include soft, mushy stems and roots. If you suspect root rot, stop watering immediately and allow the soil to dry out completely. If the rot is severe, you may need to repot the cactus with fresh, dry soil. In extreme cases, you might need to take cuttings from healthy parts of the plant and propagate them.
* Scorched Leaves: This is caused by too much direct sunlight. Move the cactus to a location with bright, indirect light.
* Pests: Coral cacti are relatively pest-resistant, but they can occasionally be infested with mealybugs or spider mites. If you notice pests, you can try wiping them off with a cotton swab dipped in rubbing alcohol. You can also use an insecticidal soap or neem oil.
* Yellowing Leaves: This can be caused by a variety of factors, including overwatering, underwatering, nutrient deficiency, or pests. Check the soil moisture and adjust your watering accordingly. If you suspect a nutrient deficiency, fertilize the cactus with a balanced liquid fertilizer. If you see pests, treat them as described above.
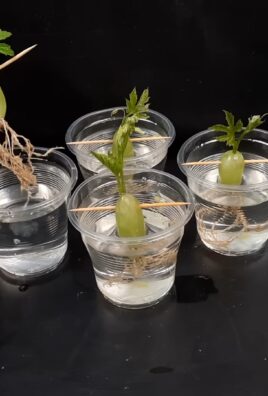
Propagating Coral Cactus
While propagating a grafted coral cactus is tricky (you can’t propagate the *cristata* part on its own), you can propagate the *Euphorbia neriifolia* base. Here’s how:
1. Taking Cuttings: Use a clean, sharp knife or pruning shears to take a cutting from the base. The cutting should be several inches long.
2. Callusing: Allow the cutting to callus over for several days. This means letting the cut end dry out and form a protective layer. This helps prevent rot.
3. Planting: Plant the calloused cutting in well-draining potting mix.
4. Watering: Water sparingly until the cutting roots. You can check for roots by gently tugging on the cutting. If it resists, it has rooted.
5. Care: Once the cutting has rooted, care for it as you would a mature coral cactus.
Choosing the Right Coral Cactus
When selecting a coral cactus, look for a healthy specimen with vibrant color and firm stems. Avoid plants with soft, mushy spots or signs of pests. Also, check the graft union (where the *cristata* is attached to the base) to make sure it’s strong and secure. A wobbly graft can indicate problems.
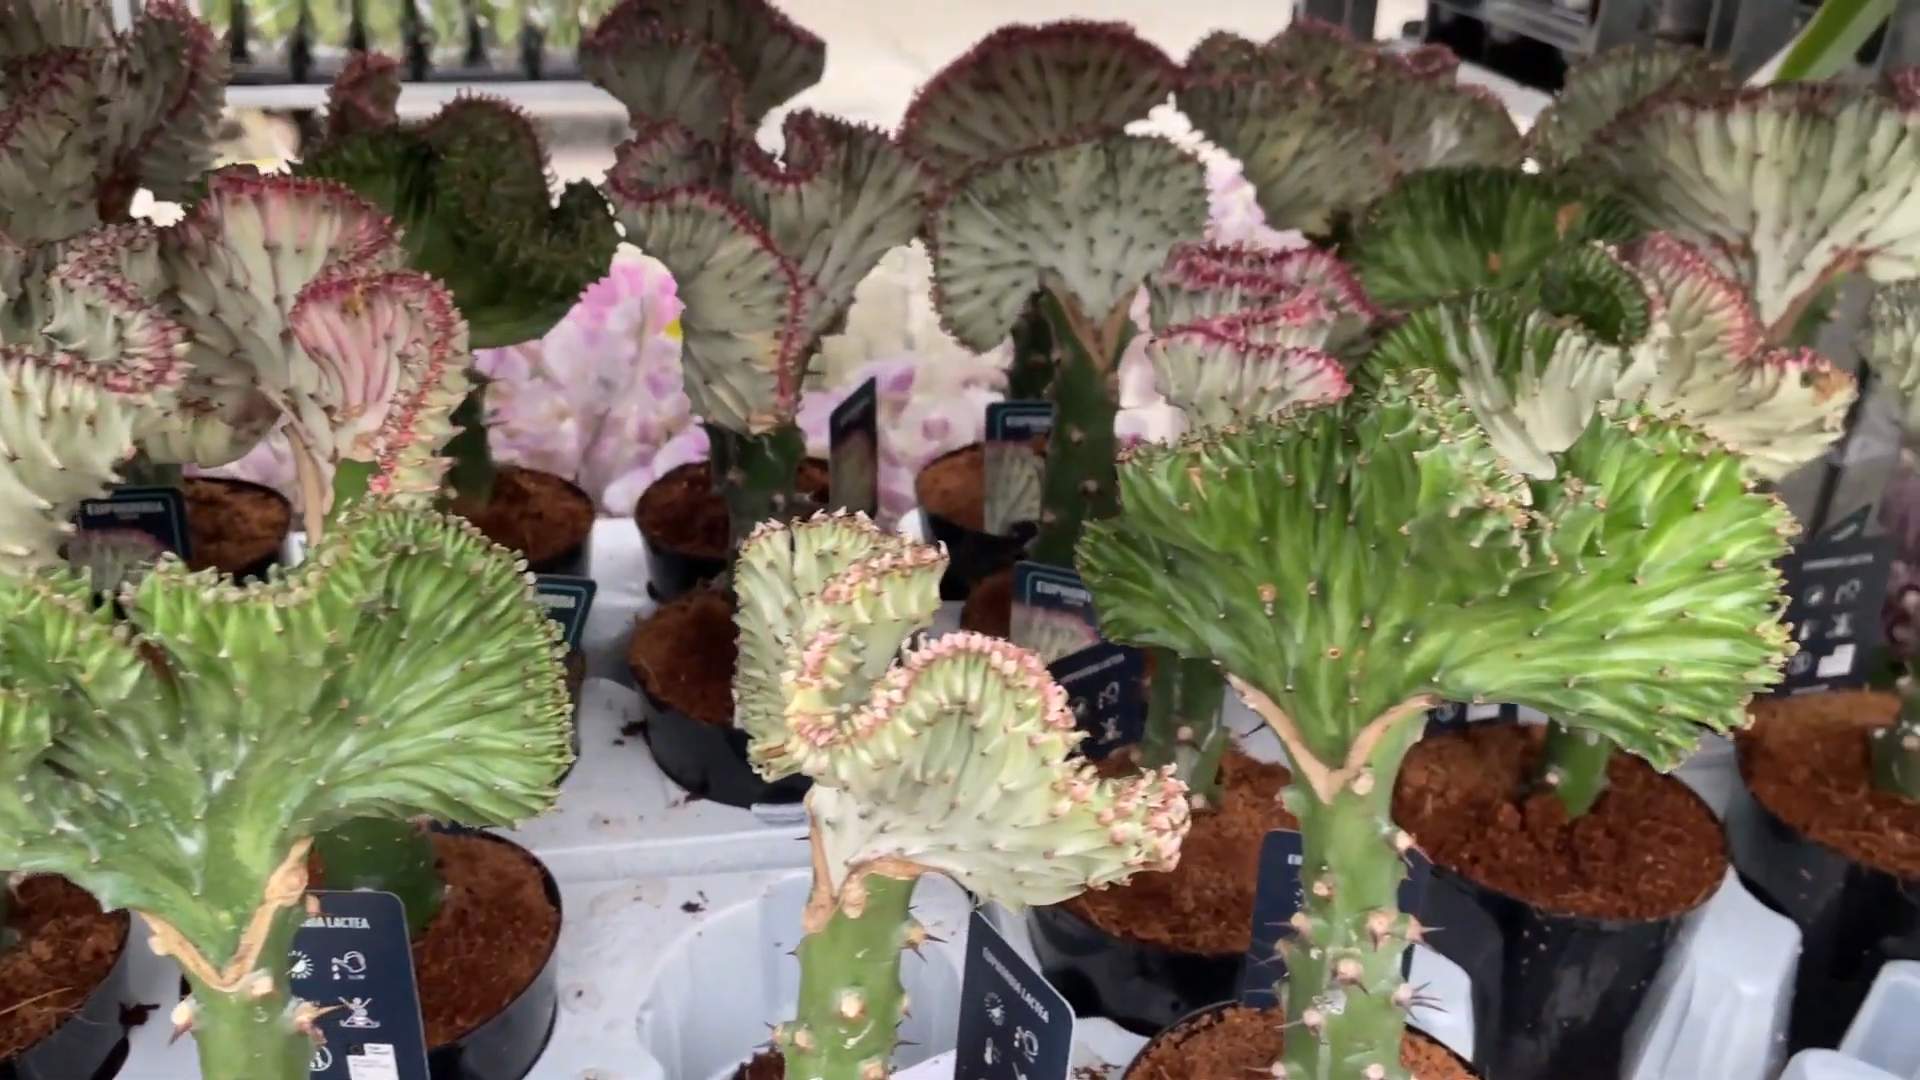
Displaying Your Coral Cactus
Coral cacti make excellent focal points in any room. Their unique shape and texture add a touch of whimsy and intrigue. You can display them on shelves, windowsills, or plant stands. Just make sure they’re getting enough light. I love to group mine with other succulents and cacti to create a mini desert landscape.
Final Thoughts
Growing coral cacti at home is a rewarding experience. With a little care and attention, you can enjoy these fascinating plants for many years to come. Remember the key is well-draining soil, bright indirect light, and careful watering. Happy growing!
Conclusion
So, there you have it! Growing your own coral cactus at home is not only achievable but also incredibly rewarding. This simple DIY trick transforms a seemingly intimidating plant into a manageable and thriving addition to your indoor garden. We’ve walked you through the process, highlighting the key steps to ensure your success. The beauty of this method lies in its accessibility; you don’t need a green thumb or specialized equipment to witness the magic unfold.
Why is this DIY trick a must-try? Because it empowers you to propagate your own coral cactus, expanding your collection without breaking the bank. It’s a fantastic way to share the joy of gardening with friends and family, gifting them unique and personalized plants. Furthermore, it allows you to control the growing environment, ensuring your coral cactus receives the optimal care it needs to flourish. This hands-on approach fosters a deeper connection with your plants, transforming you from a mere observer into an active participant in their growth.
Looking for variations? Consider experimenting with different types of rooting mediums. While we recommended a well-draining cactus mix, you could also try perlite or vermiculite. Observe how your coral cactus responds to each medium and adjust accordingly. Another fun variation is to use decorative pots to showcase your newly propagated plants. Choose pots that complement the coral cactus’s unique form and add a touch of personality to your indoor space. You can also try grafting different colored Euphorbia crests onto a standard Euphorbia base for a truly unique and eye-catching specimen. Remember to always use clean, sterilized tools when grafting to prevent infection.
The key to success with this DIY trick is patience and observation. Don’t be discouraged if your first attempt isn’t perfect. Gardening is a learning process, and every experience, whether successful or not, provides valuable insights. Pay close attention to your coral cactus’s needs, adjusting your watering and lighting as necessary. With a little care and attention, you’ll be rewarded with a thriving collection of these fascinating plants.
We are confident that you’ll find this DIY trick both enjoyable and fulfilling. It’s a fantastic way to connect with nature, learn new skills, and add a touch of beauty to your home. So, gather your supplies, follow our instructions, and embark on your coral cactus growing adventure today!
We encourage you to try this DIY trick and share your experience with us! Post photos of your newly propagated coral cacti on social media using #CoralCactusDIY and tag us so we can see your success. We’re eager to hear your stories, answer your questions, and celebrate your gardening achievements. Let’s create a community of coral cactus enthusiasts and inspire others to embrace the joy of DIY propagation. Remember, growing your own coral cactus is more than just a hobby; it’s a testament to your creativity, patience, and love for the natural world. So, get started today and witness the magic unfold!
Frequently Asked Questions (FAQ)
What exactly is a coral cactus?
The term “coral cactus” is a bit of a misnomer. It’s not actually a cactus, but rather a crested (or cristata) form of Euphorbia lactea, a succulent native to Asia. The “coral” appearance comes from the fan-like, wavy growth of the crested top, which is often grafted onto a standard Euphorbia base. This grafting creates the unique and visually striking plant we know as the coral cactus.
Is it difficult to grow a coral cactus from cuttings?
While propagating a coral cactus from cuttings can be a bit more challenging than propagating other succulents, it’s definitely achievable with the right techniques and a little patience. The key is to ensure the cutting is properly calloused before planting and to provide the right growing conditions. This DIY trick simplifies the process and increases your chances of success.
How often should I water my coral cactus?
Watering frequency depends on several factors, including the size of the pot, the type of soil, and the climate. As a general rule, water thoroughly when the soil is dry to the touch. During the growing season (spring and summer), you may need to water more frequently than during the dormant season (fall and winter). Avoid overwatering, as this can lead to root rot. Always allow the soil to dry out completely between waterings.
What kind of soil is best for a coral cactus?
A well-draining cactus mix is ideal for coral cacti. This type of mix typically contains ingredients like perlite, vermiculite, and coarse sand, which help to improve drainage and prevent waterlogging. You can purchase pre-made cactus mixes at most garden centers, or you can create your own by combining equal parts potting soil, perlite, and coarse sand.
How much sunlight does a coral cactus need?
Coral cacti thrive in bright, indirect sunlight. Avoid placing them in direct sunlight, especially during the hottest part of the day, as this can scorch the leaves. A location near an east- or west-facing window is usually ideal. If you don’t have access to natural light, you can supplement with artificial grow lights.
My coral cactus is turning yellow. What should I do?
Yellowing leaves can be a sign of several problems, including overwatering, underwatering, or lack of sunlight. Check the soil moisture to determine if you’re watering too much or too little. If the soil is consistently wet, reduce your watering frequency. If the soil is bone dry, water thoroughly. Also, ensure your coral cactus is receiving adequate sunlight. If the yellowing persists, consider repotting the plant in fresh soil.
Can I grow a coral cactus outdoors?
In warm climates (USDA zones 9-11), you can grow coral cacti outdoors. However, it’s important to protect them from frost and excessive heat. Choose a location that receives bright, indirect sunlight and well-draining soil. In colder climates, it’s best to grow coral cacti in containers so you can bring them indoors during the winter months.
How do I prevent root rot in my coral cactus?
Root rot is a common problem with succulents, including coral cacti. To prevent root rot, use a well-draining soil mix, avoid overwatering, and ensure your plant has adequate drainage. If you suspect your coral cactus has root rot, carefully remove it from the pot and inspect the roots. Remove any rotted roots and repot the plant in fresh soil.
Is the sap of a coral cactus poisonous?
Yes, the sap of Euphorbia lactea, including the coral cactus, is toxic and can cause skin irritation and allergic reactions. Wear gloves when handling the plant and avoid getting the sap in your eyes or mouth. Keep coral cacti out of reach of children and pets. If you come into contact with the sap, wash the affected area thoroughly with soap and water.
How do I encourage my coral cactus to bloom?
Coral cacti rarely bloom indoors. However, providing optimal growing conditions, such as bright, indirect sunlight, well-draining soil, and proper watering, can increase your chances of seeing flowers. During the growing season, you can also fertilize your coral cactus with a balanced fertilizer diluted to half strength. Remember that blooming is not guaranteed, and the coral cactus is primarily grown for its unique foliage.

Leave a Comment