

DIY Bolster Pillow: Ever feel like your couch or bed is missing that certain *something*? That little touch of comfort and style that pulls the whole room together? I know I have! And that’s where the magic of a DIY bolster pillow comes in. Forget those generic, store-bought cushions – we’re about to embark on a fun and easy project that will not only elevate your home decor but also give you a serious sense of accomplishment.
Bolster pillows have a rich history, dating back centuries and appearing in various cultures. From adding regal comfort to royal seating in ancient civilizations to providing lumbar support in traditional Japanese homes, these cylindrical cushions have always been associated with luxury and well-being. But you don’t need a royal budget to enjoy the benefits of a bolster pillow!
In today’s fast-paced world, creating a cozy and inviting home environment is more important than ever. A DIY bolster pillow is the perfect way to add a personal touch to your space, reflecting your unique style and personality. Plus, let’s be honest, who doesn’t love a good DIY project? This is a fantastic way to save money, reuse materials, and create something truly special. I’m going to show you how to make your own beautiful and functional bolster pillow, step-by-step, so you can finally achieve that picture-perfect, cozy haven you’ve always dreamed of. Get ready to unleash your inner crafter!
DIY Bolster Pillow: A Beginner’s Guide to Sewing Comfort
Hey there, fellow crafters! Ever wanted to add a touch of elegance and comfort to your living space without breaking the bank? Well, you’re in the right place! Today, I’m going to walk you through creating your very own bolster pillow. It’s a surprisingly simple project, even for sewing newbies, and the results are absolutely stunning. Trust me, once you’ve made one, you’ll want to make them for every room!
What is a Bolster Pillow?
Before we dive in, let’s quickly define what we’re making. A bolster pillow is a long, cylindrical pillow often used for lumbar support, decoration on beds, or even as a comfy armrest on a sofa. They add a touch of sophistication and can be customized to perfectly match your decor.
Materials You’ll Need
Okay, let’s gather our supplies. Here’s what you’ll need to create your beautiful bolster pillow:
* Fabric: This is where you can really let your personality shine! Choose a fabric that complements your existing decor. Consider the durability and washability of the fabric, especially if you plan on using the pillow frequently. I recommend a medium-weight fabric like cotton, linen, or a durable upholstery fabric. You’ll need enough fabric for the body of the pillow and the two circular end pieces. A good rule of thumb is to measure the desired length and circumference of your pillow, then add a few extra inches for seam allowances.
* Inner Pillow Form: You can purchase a pre-made bolster pillow form online or at craft stores. Alternatively, you can create your own using fiberfill stuffing. If you’re making your own, you’ll need a lot of fiberfill!
* Sewing Machine: A sewing machine will make this project much faster and easier, but you can also hand-sew it if you’re feeling ambitious.
* Thread: Choose a thread that matches your fabric.
* Scissors or Rotary Cutter: For cutting your fabric accurately.
* Measuring Tape or Ruler: Essential for accurate measurements.
* Pins: To hold your fabric pieces together while sewing.
* Pencil or Fabric Marker: For marking your fabric.
* Compass or Circular Object: To trace perfect circles for the end pieces. A plate or bowl works great!
* Optional: Zipper (if you want a removable cover), piping or trim for embellishment.
Planning Your Bolster Pillow
Before you start cutting and sewing, it’s a good idea to plan out the dimensions of your pillow. Consider where you’ll be using it and how large you want it to be.
* Length: Decide on the desired length of your bolster pillow. Common lengths range from 20 inches to 36 inches.
* Diameter: Determine the diameter of your pillow. This will affect the overall thickness and shape. A diameter of 6 to 8 inches is a good starting point.
* Fabric Calculations: Once you have your dimensions, calculate the amount of fabric you’ll need. For the body of the pillow, you’ll need a rectangle that is the desired length plus seam allowance (about 1 inch) by the circumference of the circle (diameter x pi) plus seam allowance (about 1 inch). For the end pieces, you’ll need two circles with a diameter that is the same as your desired pillow diameter plus seam allowance (about 1 inch).
Sewing the Bolster Pillow: Step-by-Step
Alright, let’s get to the fun part – sewing! Follow these steps carefully, and you’ll have your own beautiful bolster pillow in no time.
1. Cutting the Fabric
* Body Piece: Using your measurements, cut out the rectangular piece of fabric for the body of the pillow. Remember to add seam allowances! I usually add 1/2 inch on all sides.
* End Pieces: Trace two circles onto your fabric using a compass or circular object. Again, add seam allowances. Cut out the circles carefully.
2. Preparing the Body Piece
* Folding and Pinning: Fold the rectangular piece of fabric in half lengthwise, with the right sides (the pretty sides) facing each other. Pin along the long edge to secure the fabric.
3. Sewing the Body Seam
* Sewing the Seam: Using your sewing machine, sew along the pinned edge with a straight stitch. Leave about a 6-8 inch opening in the middle of the seam. This opening will be used to insert the pillow form later. Remember to backstitch at the beginning and end of your seam to secure the stitches.
4. Finishing the Seam
* Pressing the Seam: Press the seam open with an iron. This will help to create a smoother, more professional finish.
* Turning Right Side Out: Turn the fabric tube right side out through the opening you left in the seam.
5. Attaching the End Pieces
This is where things can get a little tricky, but don’t worry, I’ll guide you through it!
* Pinning the First End: Take one of the circular end pieces and pin it to one end of the fabric tube, with the right sides facing each other. Make sure the edge of the circle aligns with the edge of the tube. Pin all the way around, using plenty of pins to ensure the fabric stays in place. You might need to ease the fabric of the tube slightly to fit the circle.
* Sewing the First End: Carefully sew the circle to the tube, using a straight stitch. Sew slowly and carefully, making sure to catch both layers of fabric. Backstitch at the beginning and end of your seam.
* Pinning the Second End: Repeat the process with the second circular end piece, pinning it to the other end of the fabric tube, with the right sides facing each other.
* Sewing the Second End: Sew the second circle to the tube, leaving a small opening (about 4-5 inches) for inserting the pillow form. Backstitch at the beginning and end of your seam.
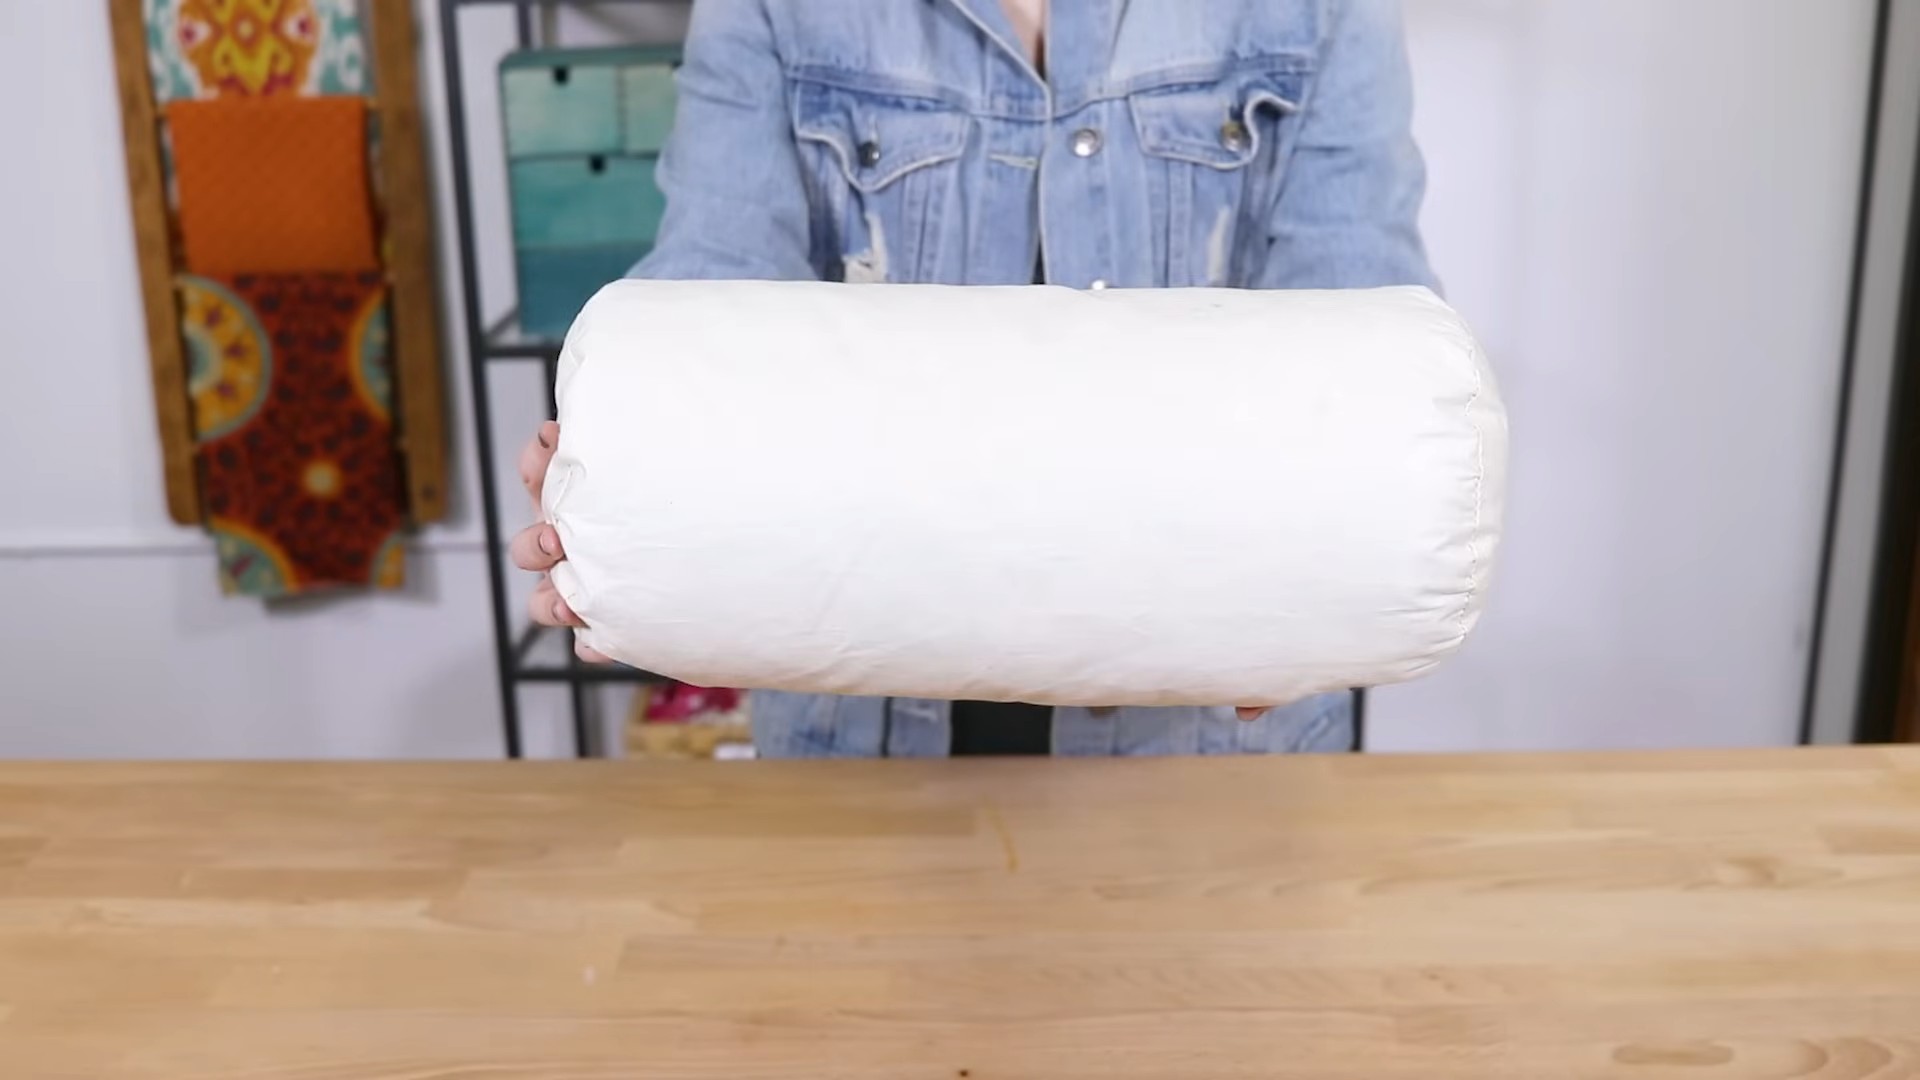
6. Inserting the Pillow Form
* Stuffing the Pillow: If you’re using a pre-made pillow form, simply insert it through the opening. If you’re using fiberfill, start stuffing the pillow with the fiberfill, making sure to fill it evenly and firmly. You want the pillow to be nice and plump!
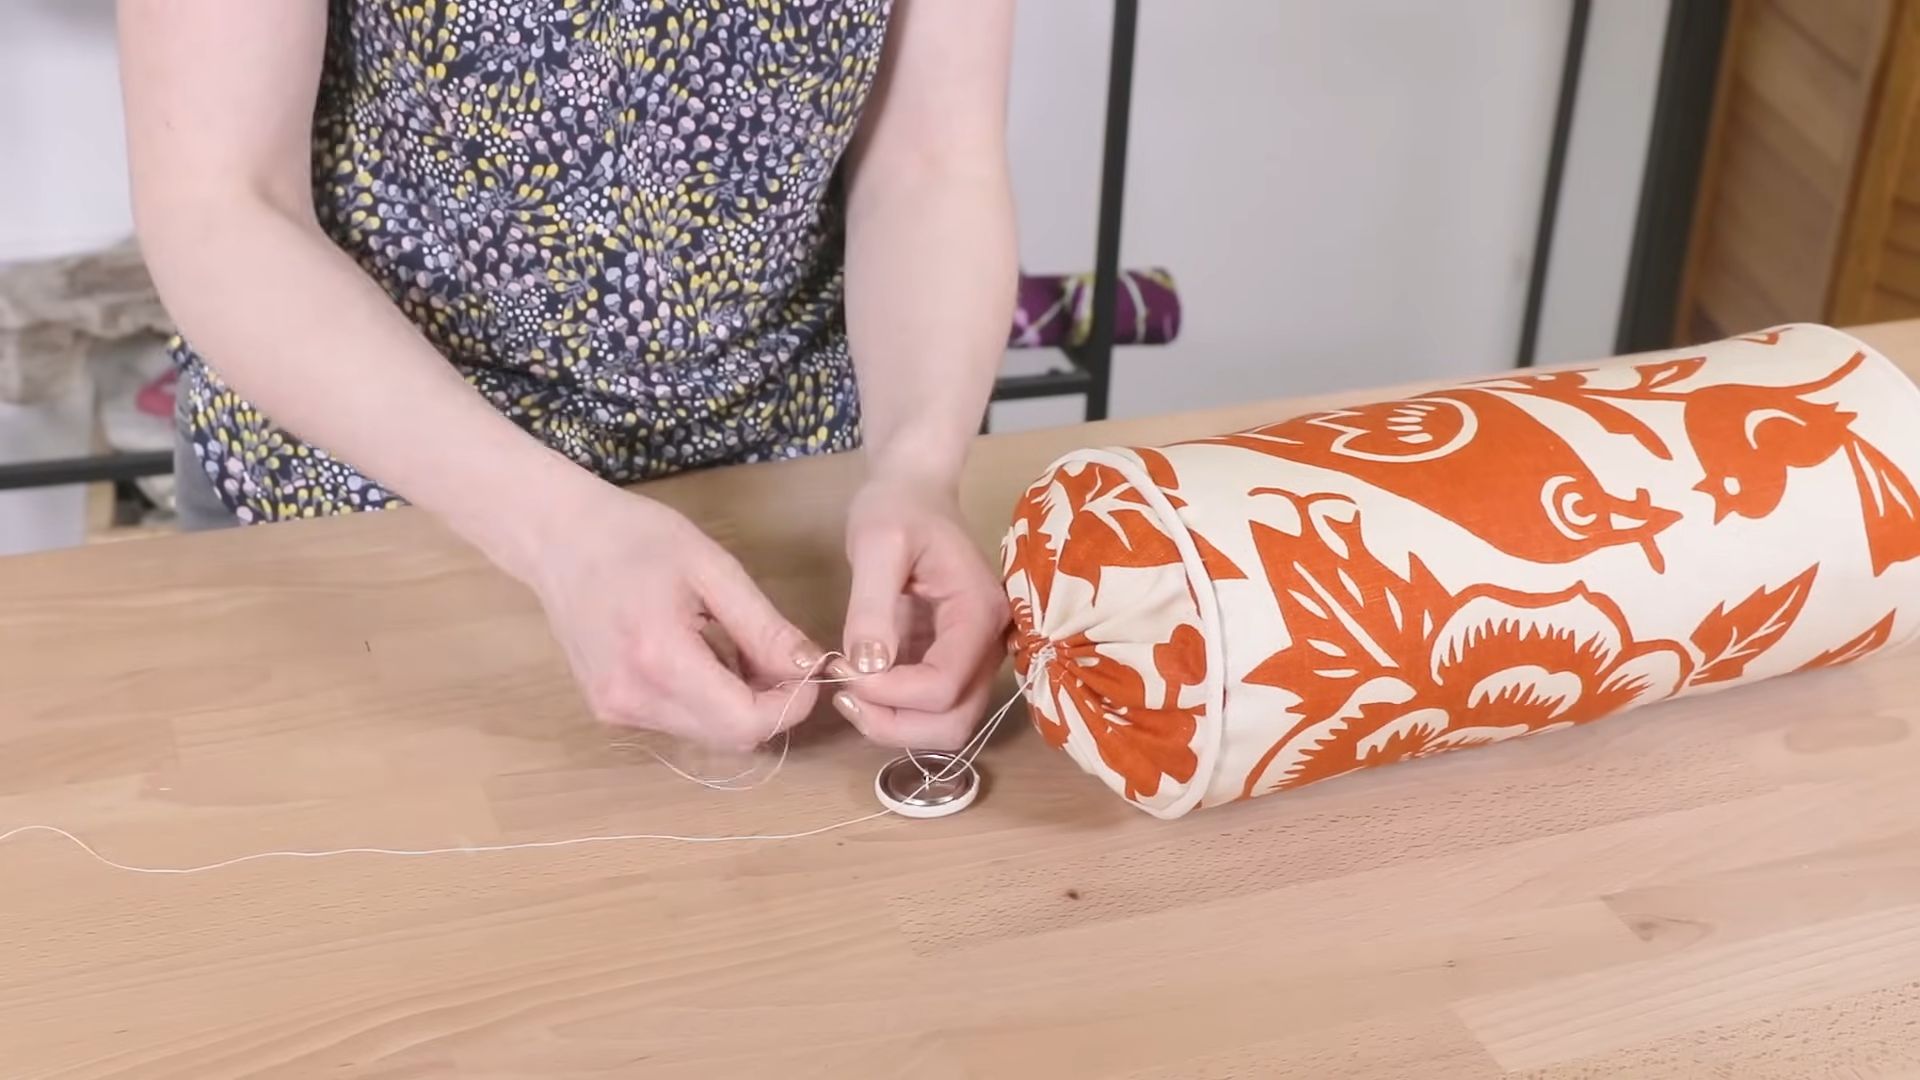
7. Closing the Opening
* Hand-Sewing the Opening: Once the pillow is stuffed to your liking, it’s time to close the opening. Fold the raw edges of the opening inward and pin them together. Using a needle and thread, hand-sew the opening closed with a blind stitch. This will create an invisible seam.
Adding a Zipper (Optional)
If you want to be able to remove the cover for washing, you can add a zipper to the seam of the body piece.
* Installing the Zipper: Before sewing the body seam, insert a zipper into the opening you planned to leave. Use a zipper foot on your sewing machine to sew the zipper in place.
Embellishing Your Bolster Pillow (Optional)
Now for the fun part – adding some personal touches!
* Piping: Add piping around the edges of the end pieces for a more polished look. You can buy pre-made piping or make your own using fabric scraps and cording.
* Trim: Add trim, such as tassels, fringe, or ribbon, to the ends of the pillow for a decorative touch.
* Embroidery: Embroider a design or monogram onto the pillow for a personalized touch.
* Buttons: Sew buttons onto the pillow for added detail.
Tips and Tricks
Here are a few extra tips to help you create the perfect bolster pillow:
* Use a Walking Foot: If you’re working with thick or slippery fabrics, a walking foot can help to feed the fabric evenly through the sewing machine.
* Clip the Curves: When sewing the circular end pieces to the tube, clip the curves of the seam allowance. This will help the fabric to lie flat and prevent puckering.
* Take Your Time: Don’t rush the process. Sewing takes practice, so be patient with yourself and enjoy the journey.
* Experiment with Fabrics: Don’t be afraid to experiment with different fabrics and textures to create a unique and personalized bolster pillow.
Conclusion
And there you have it! Your very own handmade bolster pillow. I hope you enjoyed this tutorial and found it helpful. Now go forth and create some beautiful and comfortable pillows for your home! Happy sewing!
Conclusion
So, there you have it! Creating your own DIY bolster pillow isn’t just a cost-effective alternative to buying one; it’s an opportunity to personalize your comfort and inject your unique style into your living space. We’ve walked you through the simple steps, highlighting the ease and accessibility of this project. But why is this DIY trick a must-try?
Firstly, think about the customization. Store-bought bolster pillows often come in limited sizes, shapes, and fabrics. With this DIY approach, you’re in complete control. Need a longer bolster for your king-size bed? No problem! Prefer a specific shade of velvet to match your curtains? You got it! Want to use a hypoallergenic filling for sensitive skin? Absolutely! The possibilities are truly endless.
Secondly, consider the satisfaction of creating something with your own hands. In a world of mass-produced goods, there’s something incredibly rewarding about crafting an item that’s both functional and beautiful. Each stitch, each carefully chosen fabric, reflects your personal touch and adds a unique character to your home.
Thirdly, let’s talk about sustainability. By repurposing old fabrics, blankets, or even clothing, you’re contributing to a more eco-friendly lifestyle. This DIY project is a fantastic way to give new life to materials that might otherwise end up in a landfill. Plus, you can choose organic or recycled filling options for an even greener approach.
Ready to take your DIY bolster pillow to the next level? Here are a few suggestions and variations to spark your creativity:
* Add embellishments: Consider adding tassels, pom-poms, or embroidery to your bolster pillow for a touch of whimsy and personality.
* Experiment with textures: Mix and match different fabrics like linen, cotton, and velvet to create a visually interesting and tactile bolster pillow.
* Create a removable cover: This will make it easier to wash and maintain your bolster pillow. You can even make multiple covers to switch up the look seasonally.
* Incorporate aromatherapy: Add dried lavender or chamomile to the filling for a calming and relaxing bolster pillow.
* Make it a travel bolster: Reduce the size and use a travel-friendly filling like microbeads for a comfortable neck pillow on the go.
* Consider different shapes: While we focused on a cylindrical bolster, you could experiment with other shapes like rectangular or even triangular bolsters.
We are confident that you will find this DIY project to be both enjoyable and rewarding. It’s a fantastic way to express your creativity, personalize your home decor, and create a comfortable and supportive bolster pillow that perfectly suits your needs.
So, what are you waiting for? Gather your materials, unleash your inner crafter, and get started on your very own DIY bolster pillow today! We can’t wait to see what you create. Don’t forget to share your finished projects with us on social media using #DIYBolsterPillow. We’re eager to see your unique designs and hear about your experience. Happy crafting!
Frequently Asked Questions (FAQ)
What kind of fabric is best for a DIY bolster pillow?
The best fabric for your DIY bolster pillow depends on your personal preferences and the intended use. For a durable and easy-to-clean option, consider cotton or linen. These fabrics are breathable, relatively inexpensive, and come in a wide variety of colors and patterns. For a more luxurious feel, velvet or silk are excellent choices, but they may require more delicate care. If you’re looking for a more rustic or textured look, consider using burlap or canvas. Ultimately, the best fabric is one that you love and that complements your existing decor. Don’t be afraid to experiment with different textures and patterns to create a truly unique bolster pillow. Remember to pre-wash your fabric before sewing to prevent shrinkage later on.
What kind of filling should I use for my DIY bolster pillow?
The filling you choose for your DIY bolster pillow will significantly impact its comfort and support. Polyester fiberfill is a popular and affordable option that is soft, fluffy, and easy to work with. It’s also hypoallergenic, making it a good choice for people with allergies. However, it can flatten over time and may require occasional fluffing. Buckwheat hulls are a natural and eco-friendly option that provides firm support and conforms to your body shape. They are also breathable, which can help regulate temperature. However, they can be a bit noisy and may not be suitable for people who are sensitive to sound. Memory foam is another option that provides excellent support and conforms to your body shape. It’s also durable and long-lasting. However, it can be more expensive than other filling options. Kapok fiber is a natural and lightweight option that is soft and fluffy. It’s also hypoallergenic and resistant to mold and mildew. Consider your personal preferences and needs when choosing the right filling for your DIY bolster pillow.
How do I clean my DIY bolster pillow?
The cleaning method for your DIY bolster pillow will depend on the fabric and filling you used. If you used a washable fabric like cotton or linen and polyester fiberfill, you can likely machine wash the entire pillow on a gentle cycle. However, it’s always best to check the care instructions for your specific fabric and filling. If you used a more delicate fabric like velvet or silk, you may need to spot clean the pillow or have it professionally dry cleaned. If you used buckwheat hulls or memory foam filling, you will need to remove the filling before washing the cover. The filling can be aired out in the sun to freshen it up. To prevent your bolster pillow from getting dirty in the first place, consider using a removable cover that can be easily washed. Regular vacuuming can also help remove dust and debris.
Can I make a bolster pillow without a sewing machine?
Yes, absolutely! While a sewing machine can speed up the process, you can definitely make a bolster pillow by hand. Hand sewing is a perfectly viable option, especially for smaller projects or if you enjoy the meditative process of hand stitching. Use a sturdy needle and thread, and choose a simple stitch like a running stitch or a back stitch. Be sure to reinforce the seams for added durability. Hand sewing may take a bit longer, but the result will be just as beautiful and functional.
How much fabric do I need for a DIY bolster pillow?
The amount of fabric you need will depend on the size of your desired bolster pillow. Measure the length and circumference of the pillow you want to create. Add a few inches to each measurement for seam allowance. As a general guideline, for a standard bolster pillow (approximately 6 inches in diameter and 24 inches long), you will need about 3/4 to 1 yard of fabric. It’s always better to have a little extra fabric than not enough.
How do I make a bolster pillow cover removable?
Making a removable cover for your DIY bolster pillow is a great way to keep it clean and easily change up the look. The easiest way to create a removable cover is to add a zipper or button closure along one of the seams. You can also use Velcro for a quick and easy closure. Another option is to create an envelope closure, where one end of the cover overlaps the other. This is a simple and elegant solution that doesn’t require any hardware. Be sure to add seam allowance to your measurements when creating the cover.
Can I use old clothes or blankets as filling for my DIY bolster pillow?
Yes, repurposing old clothes or blankets is a fantastic way to save money and reduce waste. Cut the fabric into small pieces or strips and use it as filling for your bolster pillow. Be sure to wash the fabric thoroughly before using it. You can also mix old clothes or blankets with other filling materials like polyester fiberfill for added comfort and support. This is a great way to give new life to items that might otherwise end up in the trash.
How do I prevent my DIY bolster pillow from losing its shape?
To prevent your DIY bolster pillow from losing its shape, choose a high-quality filling that is durable and resilient. Buckwheat hulls and memory foam are excellent options for maintaining shape. You can also use a combination of different filling materials to create a more supportive and long-lasting pillow. Regularly fluffing your bolster pillow can also help maintain its shape. If you notice that your pillow is starting to flatten, you can add more filling to restore its original shape.

Leave a Comment