

Growing Cauliflower at Home might seem daunting, but trust me, with a few simple tricks and a little DIY spirit, you can harvest your own creamy, delicious cauliflower heads right in your backyard! Forget those bland, overpriced heads at the grocery store – imagine the satisfaction of serving up a dish featuring cauliflower you nurtured from seedling to table.
For centuries, cauliflower has been a staple in gardens and kitchens worldwide. Originating in the Mediterranean, this versatile vegetable has been cultivated and enjoyed for its unique flavor and nutritional benefits. From Roman emperors to modern-day foodies, cauliflower has consistently proven its worth. But let’s be honest, sometimes getting it to thrive can feel like a battle against pests, diseases, and unpredictable weather.
That’s where these DIY tricks come in! I’m going to share some easy-to-follow hacks that will help you overcome common challenges and maximize your cauliflower yield. Whether you’re a seasoned gardener or just starting out, these tips will empower you to successfully growing cauliflower at home. Think of it as unlocking the secrets to a bountiful harvest, saving money, and enjoying the freshest, most flavorful cauliflower imaginable. So, grab your gardening gloves, and let’s get started!
Growing Cauliflower at Home: A Beginner’s Guide
Okay, so you want to grow cauliflower at home? Awesome! It might seem a little intimidating at first, but trust me, with a little patience and the right know-how, you can totally pull it off. I’ve grown cauliflower successfully for years, and I’m here to share all my secrets. Let’s get started!
Choosing the Right Cauliflower Variety
First things first, you need to pick the right cauliflower variety for your climate and growing season. There are tons of options out there, but here are a few of my favorites:
* Snowball Y Improved: This is a classic, reliable variety that produces medium-sized, pure white heads. It’s relatively early maturing, which is great if you have a shorter growing season.
* Cheddar: If you want something a little different, try Cheddar cauliflower. It has a beautiful orange color and a slightly sweeter flavor than white varieties.
* Graffiti: For a real showstopper, go with Graffiti cauliflower. It has vibrant purple heads that are sure to impress.
* Early White Hybrid: As the name suggests, this is an early maturing variety, perfect for those who want to harvest quickly.
Consider your local climate and the length of your growing season when making your choice. Check the seed packet for specific information on days to maturity.
Starting Cauliflower Seeds (or Buying Transplants)
You have two options here: start your own seeds indoors or buy transplants from a local nursery. Starting seeds gives you more control over the process, but buying transplants is a quicker and easier option.
Starting Seeds Indoors
I personally prefer starting my own seeds because it gives me a head start on the growing season. Here’s how I do it:
1. Gather Your Supplies: You’ll need seed starting trays or small pots, seed starting mix (not regular potting soil!), cauliflower seeds, a spray bottle, and a grow light (optional, but highly recommended).
2. Sow the Seeds: Fill your seed starting trays or pots with seed starting mix. Moisten the mix with the spray bottle. Sow 2-3 cauliflower seeds per cell or pot, about ¼ inch deep. Gently cover the seeds with more seed starting mix.
3. Water and Cover: Water the seeds gently with the spray bottle. Cover the trays or pots with a clear plastic dome or plastic wrap to create a humid environment.
4. Provide Light and Warmth: Place the trays or pots in a warm location (around 70-75°F) and under a grow light if you have one. If you don’t have a grow light, place them near a sunny window, but be sure to rotate them regularly to prevent the seedlings from becoming leggy.
5. Keep the Soil Moist: Check the soil moisture daily and water as needed to keep it consistently moist, but not soggy.
6. Remove the Cover: Once the seeds germinate (usually within 5-10 days), remove the plastic dome or plastic wrap.
7. Thin the Seedlings: Once the seedlings have their first true leaves (the second set of leaves), thin them to one seedling per cell or pot. Choose the strongest, healthiest seedling and snip off the others at the soil line.
8. Harden Off the Seedlings: Before transplanting the seedlings outdoors, you need to harden them off. This means gradually exposing them to outdoor conditions over a period of 7-10 days. Start by placing them outdoors in a sheltered location for an hour or two each day, gradually increasing the amount of time they spend outdoors.
Buying Transplants
If you’re buying transplants, choose healthy-looking plants with sturdy stems and green leaves. Avoid plants that are yellowed, wilted, or have signs of pests or diseases.
Preparing the Garden Bed
Cauliflower needs a sunny location with well-drained soil that is rich in organic matter. Here’s how I prepare my garden bed:
1. Choose a Sunny Spot: Select a location that receives at least 6 hours of direct sunlight per day.
2. Test the Soil: Ideally, you should test your soil to determine its pH and nutrient levels. Cauliflower prefers a soil pH of 6.0 to 7.0. You can buy a soil testing kit at most garden centers.
3. Amend the Soil: Amend the soil with plenty of compost or other organic matter to improve drainage and fertility. I usually add a few inches of compost to my garden bed and work it into the soil.
4. Add Fertilizer: Cauliflower is a heavy feeder, so it’s important to add fertilizer to the soil. I like to use a balanced organic fertilizer, such as 10-10-10, following the instructions on the package.
5. Create Raised Beds (Optional): If your soil is poorly drained, consider creating raised beds to improve drainage.
Transplanting Cauliflower Seedlings
Once your seedlings are hardened off or you’ve purchased transplants, it’s time to transplant them into the garden.
1. Choose the Right Time: Transplant cauliflower seedlings outdoors 2-3 weeks before the last expected frost in spring, or in late summer for a fall harvest.
2. Space the Plants: Space the plants 18-24 inches apart in rows that are 24-36 inches apart.
3. Dig the Holes: Dig holes that are slightly larger than the root balls of the seedlings.
4. Plant the Seedlings: Gently remove the seedlings from their containers and place them in the holes. Make sure the top of the root ball is level with the soil surface.
5. Fill the Holes: Fill the holes with soil and gently firm the soil around the plants.
6. Water Thoroughly: Water the plants thoroughly after transplanting.
Caring for Cauliflower Plants
Cauliflower requires consistent care to thrive. Here’s what I do to keep my plants healthy and productive:
1. Water Regularly: Cauliflower needs consistent moisture, especially during head formation. Water deeply and regularly, especially during dry periods. Aim for about 1-2 inches of water per week.
2. Fertilize Regularly: Fertilize the plants every 2-3 weeks with a balanced organic fertilizer. You can also side-dress the plants with compost or aged manure.
3. Weed Regularly: Keep the garden bed free of weeds, which can compete with the cauliflower plants for nutrients and water.
4. Protect from Pests: Cauliflower is susceptible to several pests, including cabbage worms, aphids, and flea beetles. Inspect your plants regularly for signs of pests and take action as needed. I like to use organic pest control methods, such as insecticidal soap or neem oil. You can also cover your plants with row covers to prevent pests from reaching them.
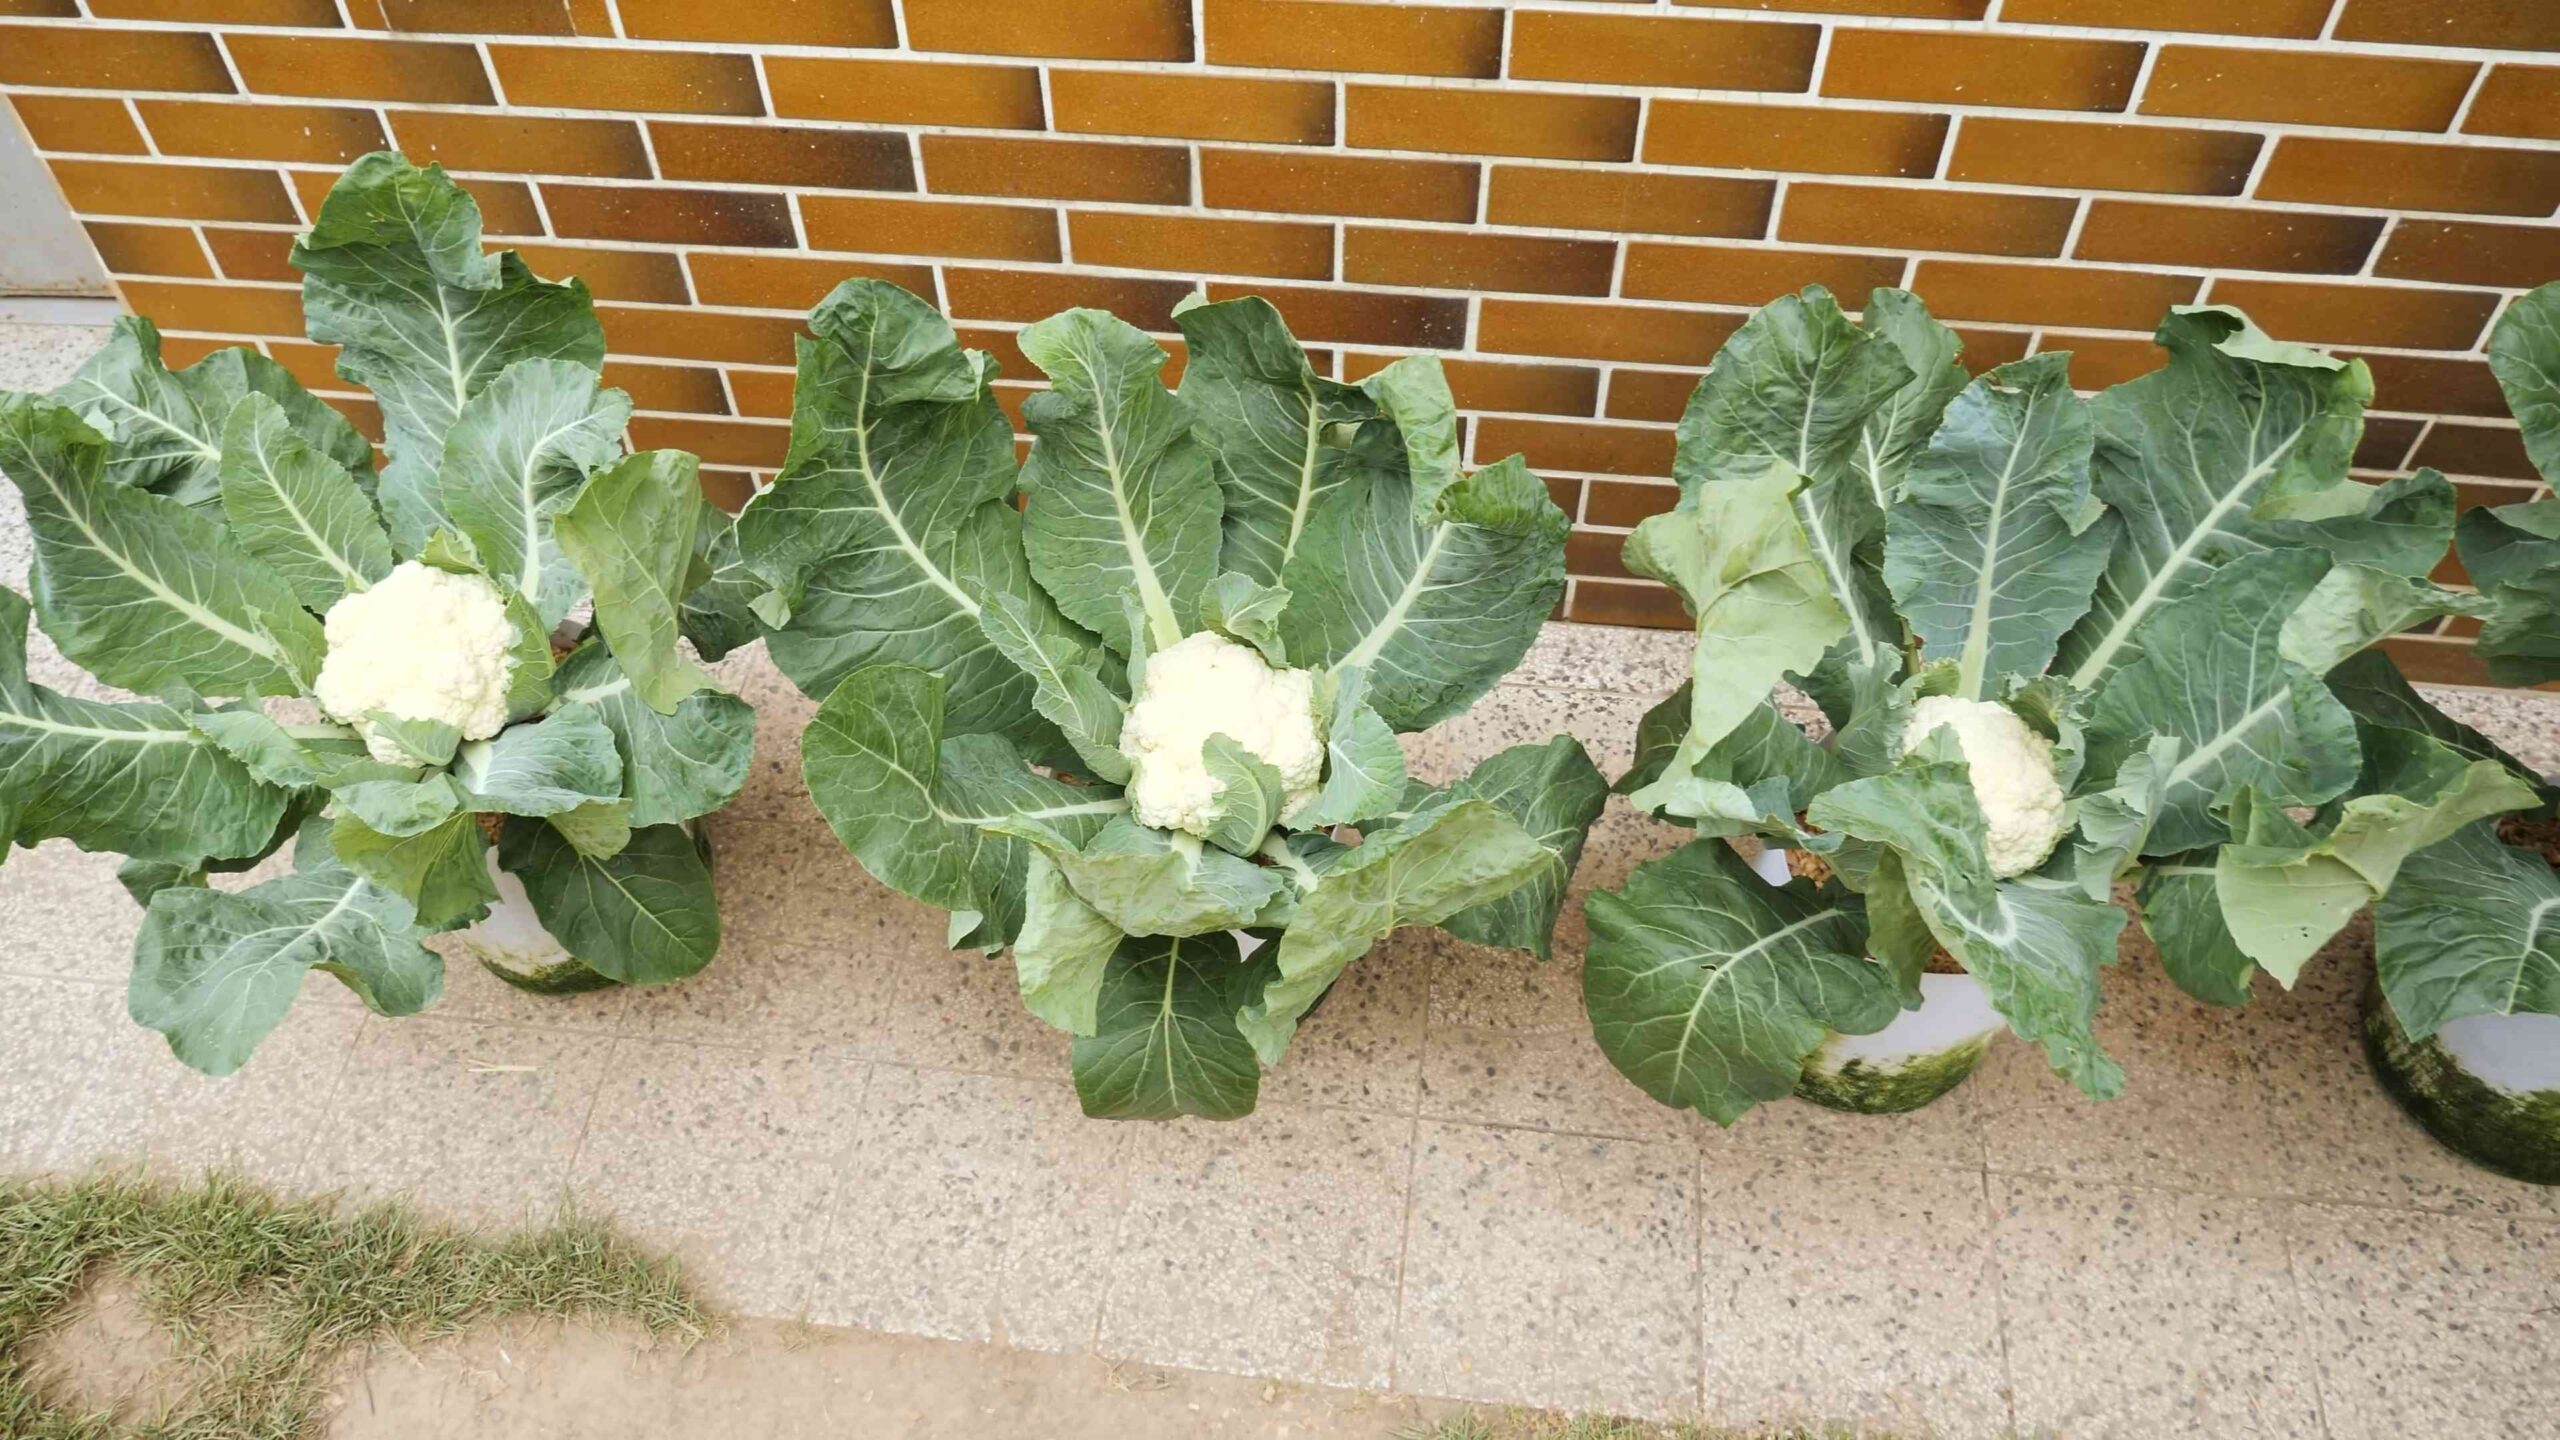
5. Blanching (Optional): Blanching is the process of covering the cauliflower head to prevent it from turning yellow or brown. This is especially important for white varieties. To blanch the head, when it reaches about 2-3 inches in diameter, tie the outer leaves together over the head with twine or rubber bands. Check the head regularly and harvest it when it reaches the desired size.
Dealing with Common Cauliflower Problems
Even with the best care, you might encounter some problems when growing cauliflower. Here are a few common issues and how to deal with them:
* Buttoning: This is when the cauliflower head forms prematurely and remains small. It’s often caused by stress, such as lack of water or nutrients. Make sure your plants are getting enough water and fertilizer.
* Yellowing Heads: Yellowing heads are usually caused by exposure to sunlight. Blanching the heads can prevent this.
* Pest Infestations: As mentioned earlier, cauliflower is susceptible to several pests. Inspect your plants regularly and take action as needed.
* Clubroot: This is a soilborne disease that can cause stunted growth and swollen roots. To prevent clubroot, make sure your soil is well-drained and has a pH of 6.0 to 7.0. You can also rotate your crops to avoid planting cauliflower in the same location year after year.
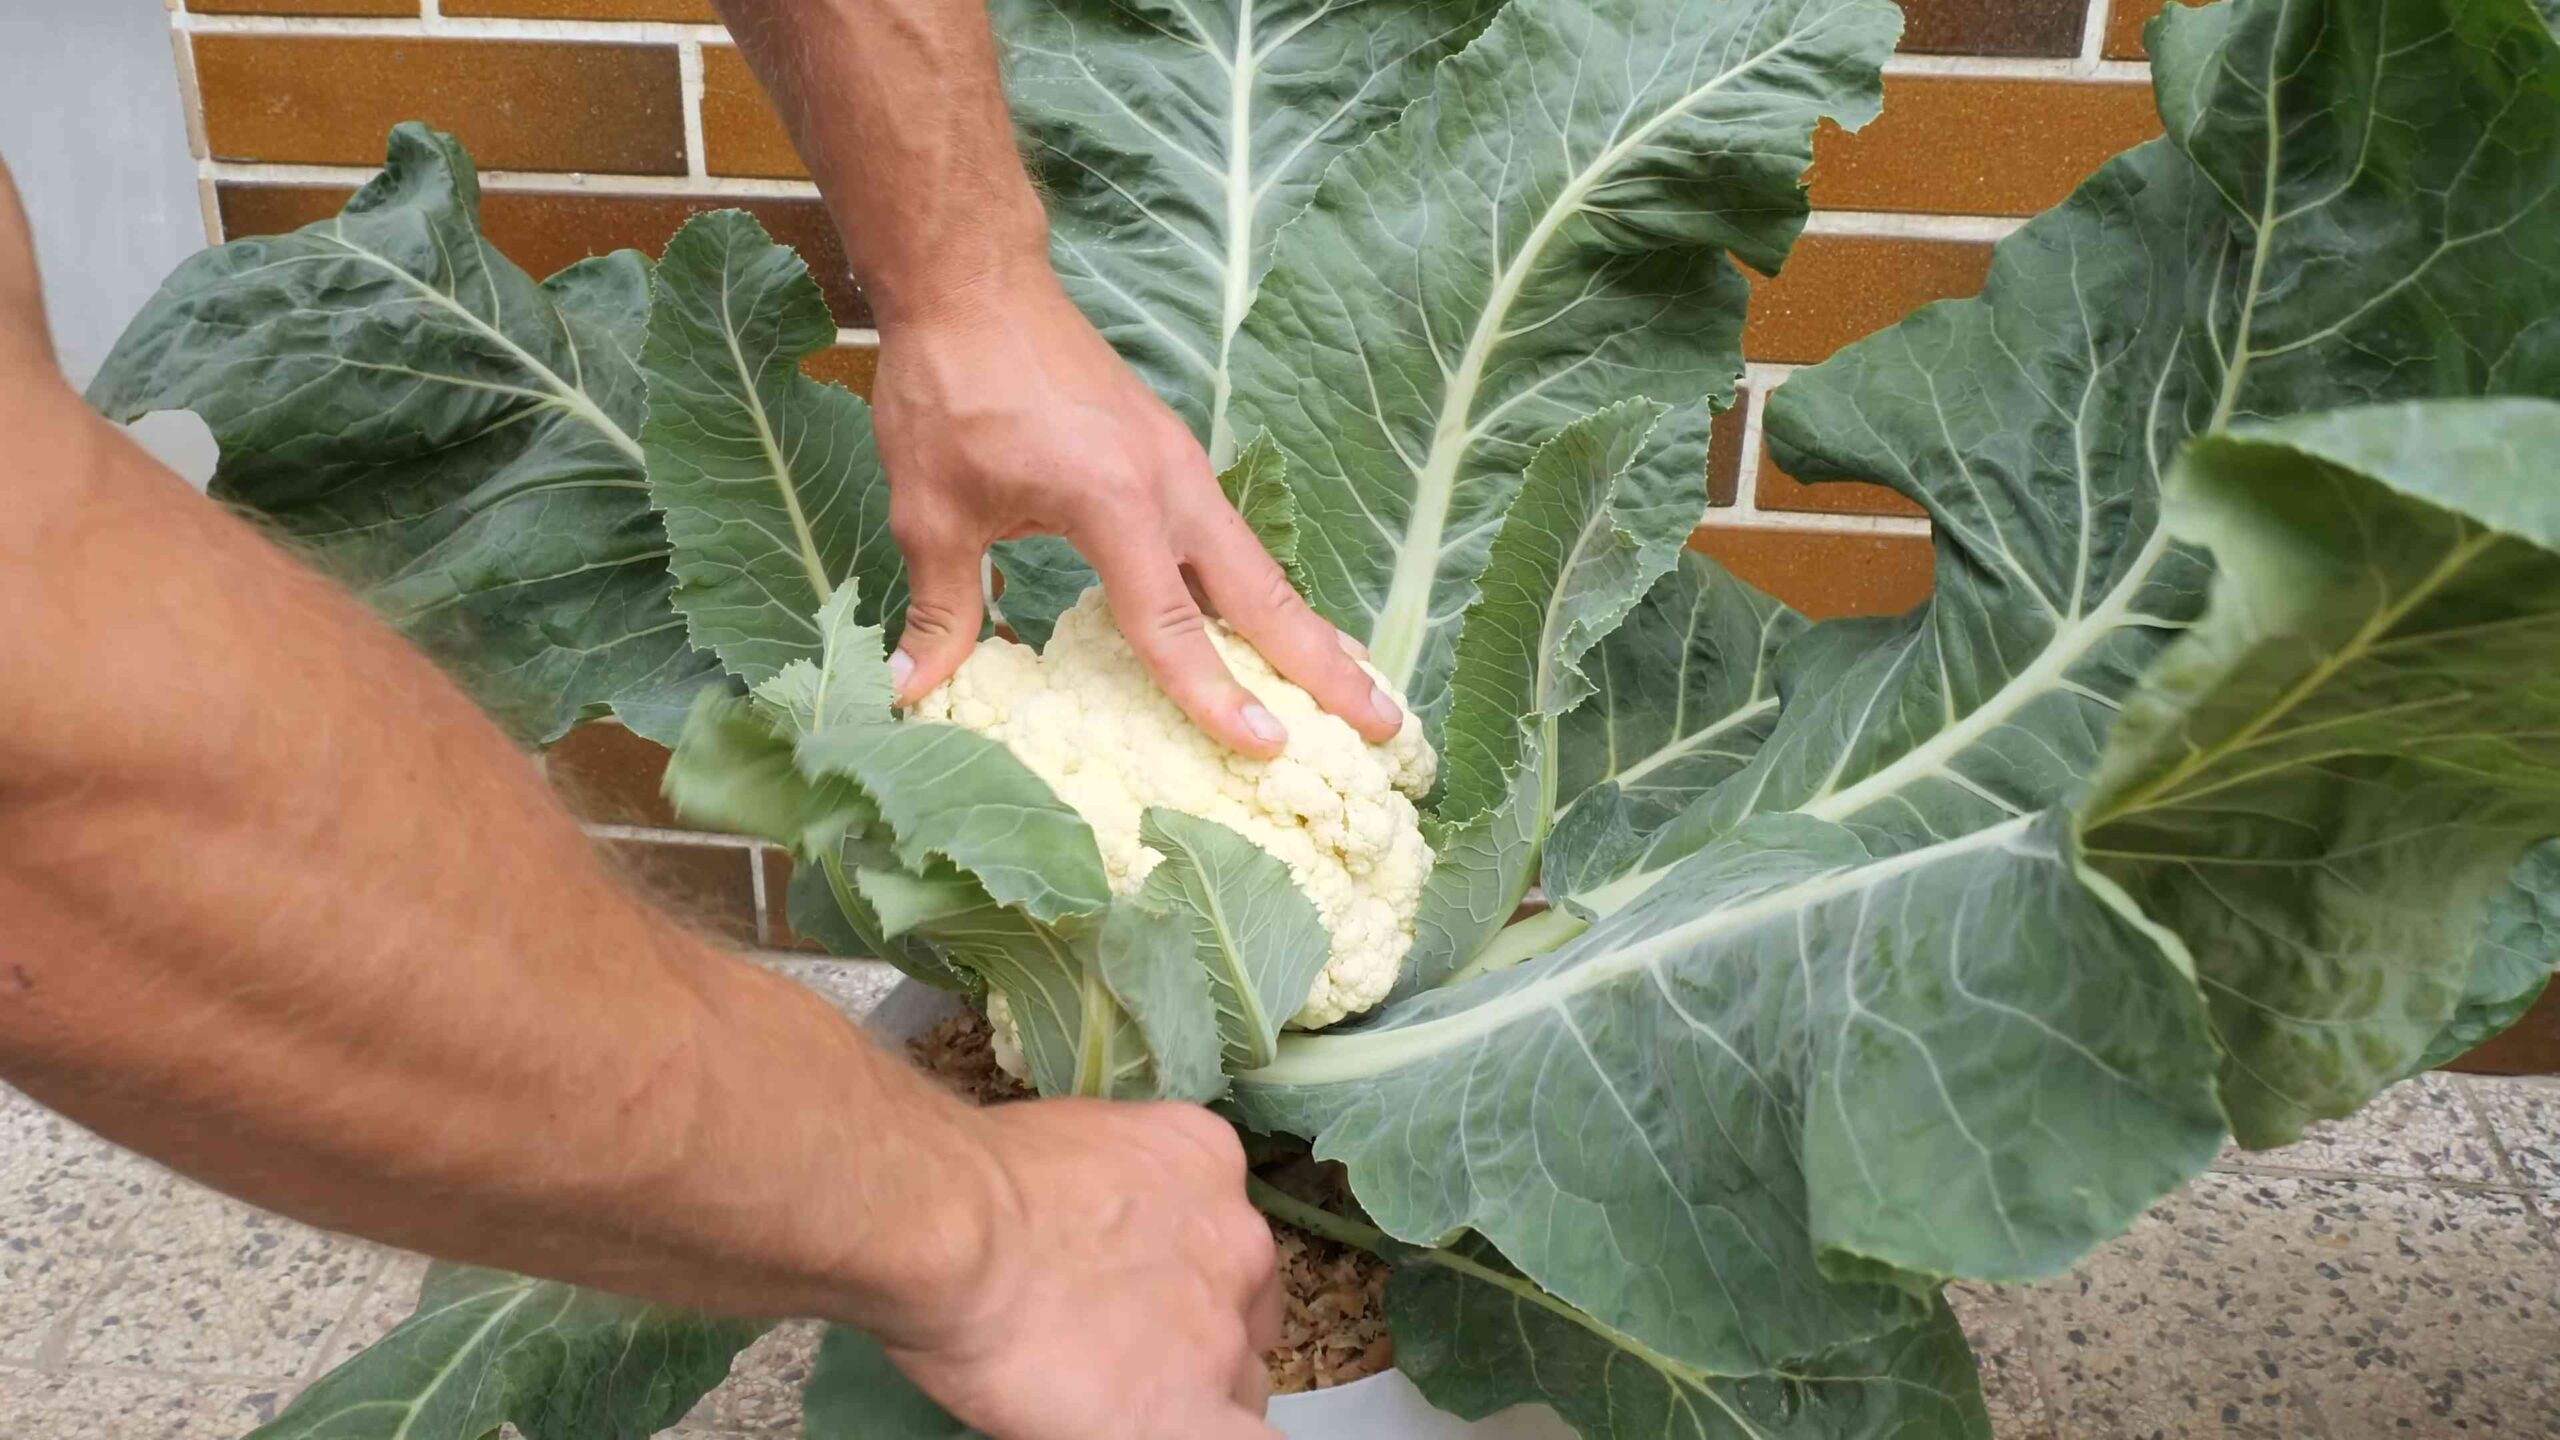
Harvesting Cauliflower
Harvest cauliflower when the head is firm, compact, and reaches the desired size. The exact size will depend on the variety you’re growing.
1. Check for Maturity: The head should be dense and tightly packed. If the curds are starting to separate, it’s time to harvest.
2. Cut the Head: Use a sharp knife to cut the head from the plant, leaving a few leaves attached to protect the head.
3. Store the Head: Store the cauliflower head in the refrigerator for up to a week.
Enjoying Your Homegrown Cauliflower
Now comes the best part: enjoying your homegrown cauliflower! You can eat it raw, steamed, roasted, or added to soups and stews. I love roasting cauliflower with olive oil, garlic, and
Conclusion
So, there you have it! Growing cauliflower at home might seem daunting at first, but with a little patience, the right techniques, and a dash of dedication, you can cultivate your own delicious and nutritious crop. This DIY approach not only guarantees the freshest possible cauliflower, bursting with flavor and vitamins, but also offers a rewarding connection to the food you eat. Forget the bland, pre-packaged heads from the supermarket; imagine the satisfaction of harvesting a crisp, white cauliflower that you nurtured from a tiny seedling.
This method is a must-try for several compelling reasons. First, you have complete control over the growing process, ensuring that your cauliflower is free from harmful pesticides and chemicals. Second, you can select varieties that are best suited to your local climate and personal preferences. Want a vibrant purple cauliflower? Or perhaps a Romanesco with its stunning fractal patterns? Growing your own opens up a world of possibilities beyond the standard white variety. Third, and perhaps most importantly, it’s an incredibly cost-effective way to enjoy fresh produce. The initial investment in seeds, soil, and fertilizer is quickly offset by the savings you’ll reap from not having to purchase cauliflower at the grocery store.
Variations and Suggestions
Don’t be afraid to experiment! Try succession planting to ensure a continuous harvest throughout the growing season. Consider companion planting with herbs like rosemary or thyme to deter pests naturally. If you’re short on space, explore container gardening options using large pots or raised beds. And for those in colder climates, starting your cauliflower indoors under grow lights can give you a significant head start. You can also try different fertilizers, both organic and synthetic, to see what works best for your soil and growing conditions. Remember to keep a journal of your progress, noting what works and what doesn’t, so you can refine your technique each year.
Embrace the Cauliflower Challenge
We wholeheartedly encourage you to give this DIY trick a try. Growing cauliflower at home is a journey of learning and discovery, and the rewards are well worth the effort. From the moment you sow the seeds to the day you harvest your first head, you’ll gain a newfound appreciation for the magic of gardening. And the taste of homegrown cauliflower? It’s simply unparalleled.
Don’t hesitate to share your experiences with us! We’d love to hear about your successes, your challenges, and any tips or tricks you’ve discovered along the way. Post photos of your cauliflower creations on social media using #HomegrownCauliflower and inspire others to embark on their own gardening adventures. Let’s build a community of cauliflower enthusiasts and celebrate the joy of growing our own food! So, grab your gardening gloves, prepare your soil, and get ready to experience the satisfaction of harvesting your very own, perfectly grown cauliflower. Happy gardening!
Frequently Asked Questions (FAQ)
Q: How much sunlight does cauliflower need?
A: Cauliflower thrives in full sun, requiring at least 6 hours of direct sunlight per day. Insufficient sunlight can lead to stunted growth and smaller heads. If you live in a particularly hot climate, providing some afternoon shade can help prevent the plants from bolting (going to seed prematurely). Observe your plants carefully and adjust their location or provide shade as needed to ensure they receive the optimal amount of sunlight. Remember that consistent sunlight is crucial for healthy cauliflower development.
Q: What type of soil is best for growing cauliflower?
A: Cauliflower prefers well-drained, fertile soil that is rich in organic matter. The ideal soil pH is between 6.0 and 7.0. Before planting, amend your soil with compost, aged manure, or other organic materials to improve its structure and fertility. Heavy clay soils can be improved by adding sand and organic matter to enhance drainage. Consider conducting a soil test to determine the pH and nutrient levels of your soil and adjust accordingly. Proper soil preparation is essential for healthy root development and optimal cauliflower growth.
Q: How often should I water my cauliflower plants?
A: Cauliflower requires consistent moisture, especially during head formation. Water deeply and regularly, aiming to keep the soil consistently moist but not waterlogged. The frequency of watering will depend on your climate, soil type, and the age of your plants. Check the soil moisture regularly by sticking your finger about an inch into the soil. If it feels dry, it’s time to water. Avoid overhead watering, as this can increase the risk of fungal diseases. Instead, water at the base of the plants using a soaker hose or drip irrigation system.
Q: When is the best time to plant cauliflower?
A: The best time to plant cauliflower depends on your climate. In cooler climates, start seeds indoors 6-8 weeks before the last expected frost and transplant seedlings outdoors after the danger of frost has passed. In warmer climates, you can plant cauliflower in the fall for a winter harvest. Check your local planting calendar for specific recommendations based on your region’s climate. Consider the maturity time of the cauliflower variety you are growing and plan your planting schedule accordingly.
Q: How do I prevent pests and diseases from affecting my cauliflower?
A: Several pests and diseases can affect cauliflower, including cabbage worms, aphids, and clubroot. To prevent these problems, practice good garden hygiene, such as removing plant debris and weeds regularly. Use row covers to protect young plants from pests. Inspect your plants regularly for signs of infestation or disease and take action promptly. Organic pest control methods, such as insecticidal soap or neem oil, can be effective against many common pests. Ensure proper soil drainage and avoid overwatering to prevent fungal diseases. Crop rotation can also help reduce the risk of soilborne diseases.
Q: How do I know when my cauliflower is ready to harvest?
A: Cauliflower is ready to harvest when the head is firm, compact, and has reached the desired size. The size will vary depending on the variety you are growing. Check the seed packet or plant tag for specific information on the expected head size. The curds (the individual florets that make up the head) should be tightly packed together and free from blemishes. If the curds start to separate or the head begins to loosen, it’s time to harvest. Use a sharp knife to cut the head from the plant, leaving a few leaves attached to protect the head.
Q: Can I grow cauliflower in containers?
A: Yes, you can grow cauliflower in containers, but you’ll need to choose a large container that is at least 18 inches in diameter and 12 inches deep. Use a well-draining potting mix that is rich in organic matter. Provide adequate sunlight and water regularly. Container-grown cauliflower may require more frequent fertilization than plants grown in the ground. Choose a compact cauliflower variety that is well-suited for container gardening.
Q: What are some common problems when growing cauliflower and how can I fix them?
A: Common problems include bolting (premature flowering), buttoning (small heads), and pest infestations. Bolting can be caused by temperature fluctuations or stress. Buttoning is often caused by nutrient deficiencies or insufficient sunlight. Pest infestations can be controlled with organic pest control methods. Ensure proper soil drainage, provide adequate sunlight, and fertilize regularly to prevent these problems. Monitor your plants closely and take action promptly if you notice any signs of trouble.

Leave a Comment