

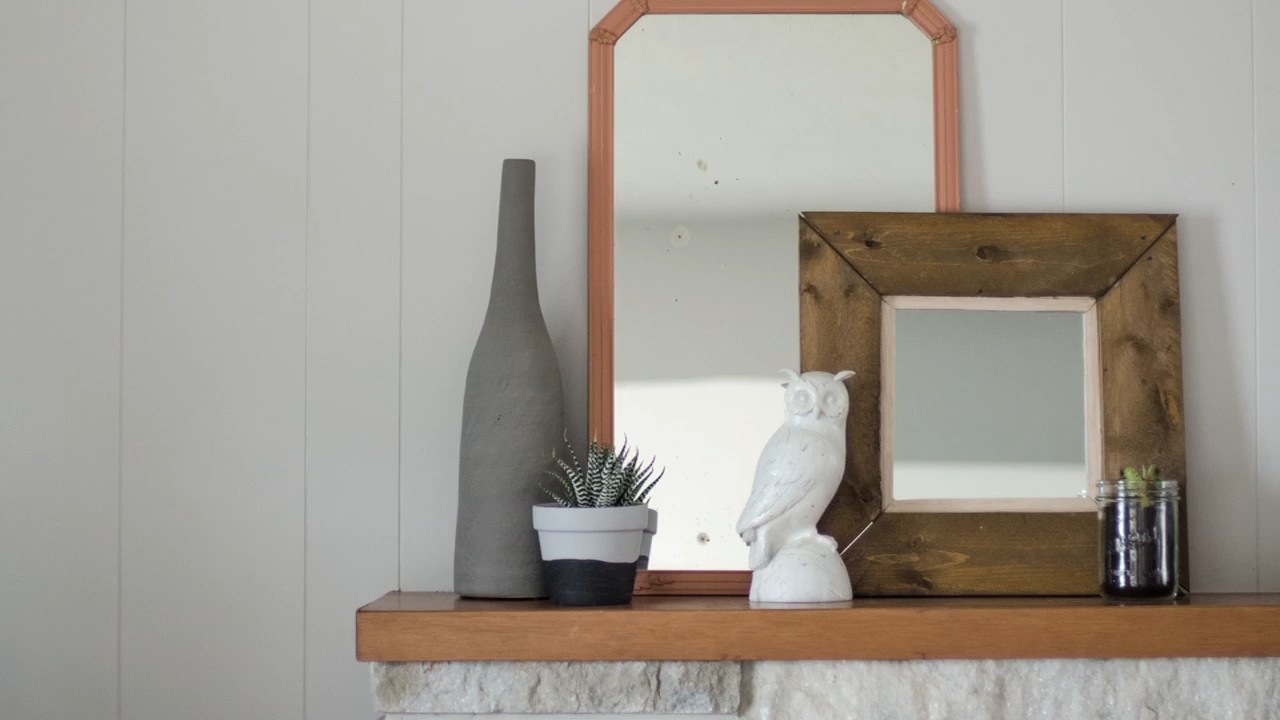
DIY Rustic Wooden Mirror: Ever feel like your home decor is missing that certain *something*? I know I have! You could spend a fortune at antique stores searching for the perfect piece, or you could unleash your inner craftsperson and create something truly unique and personal. This DIY project isn’t just about adding a mirror; it’s about adding character, warmth, and a touch of rustic charm to your living space.
The beauty of rustic design lies in its simplicity and connection to nature. Think back to the early American settlers, crafting furniture from readily available materials. While we’re not exactly pioneers, we can certainly channel that resourceful spirit! This project draws inspiration from that history, offering a modern twist on a classic aesthetic. Plus, there’s something incredibly satisfying about creating something with your own two hands.
Why do you need this DIY Rustic Wooden Mirror in your life? Because it’s more than just a reflection; it’s a statement piece. It’s a conversation starter. It’s a way to inject your personality into your home without breaking the bank. And let’s be honest, who doesn’t love a good DIY project that’s both functional and beautiful? I’m going to show you how to transform ordinary materials into a stunning mirror that will elevate any room. Get ready to roll up your sleeves and let’s get crafting!
DIY Rustic Wooden Mirror: A Step-by-Step Guide
Hey there, fellow DIY enthusiasts! Today, I’m super excited to share a project that’s close to my heart: creating a stunning rustic wooden mirror. This isn’t just any mirror; it’s a statement piece that adds warmth, character, and a touch of nature to any room. Plus, it’s a fantastic way to upcycle old wood and give it a new lease on life. So, grab your tools, and let’s get started!
Materials You’ll Need:
Before we dive in, let’s gather all the necessary materials. Trust me, having everything organized beforehand will make the whole process smoother and more enjoyable.
* A plain mirror (any size you prefer – I used a 24×36 inch rectangular mirror for this project).
* Reclaimed wood planks (the amount will depend on the size of your mirror and the width of your planks. I used a variety of widths for a more rustic look).
* Wood glue (a strong, reliable brand is essential).
* Construction adhesive (like Liquid Nails – for securing the mirror to the backing).
* Plywood or MDF board (slightly larger than the mirror to serve as a backing).
* Wood screws (various lengths for different stages).
* Sandpaper (various grits, from coarse to fine – 80, 120, and 220 grit).
* Wood stain (optional, depending on the look you want to achieve).
* Wood sealant or varnish (to protect the wood and enhance its beauty).
* Picture hanging hardware (D-rings, wire, or heavy-duty hooks).
Tools You’ll Need:
Having the right tools is just as important as having the right materials. Here’s a list of the tools you’ll need to bring this project to life:
* Measuring tape.
* Pencil.
* Safety glasses.
* Work gloves.
* Circular saw or hand saw (for cutting the wood planks).
* Miter saw (optional, but helpful for precise angle cuts).
* Sander (electric or manual sanding block).
* Drill with various drill bits.
* Clamps (to hold the wood in place while the glue dries).
* Caulk gun (for applying construction adhesive).
* Paintbrushes or rags (for applying stain and sealant).
* Level.
Preparing the Wood:
This is where the magic begins! Preparing the wood is crucial for achieving that authentic rustic look.
1. Clean the Wood: Start by cleaning your reclaimed wood planks. Remove any dirt, debris, nails, or staples. A wire brush can be really helpful for this step.
2. Sand the Wood: Next, sand the wood to smooth out any rough edges and splinters. I like to start with a coarser grit sandpaper (80 grit) to remove any major imperfections, then move to a medium grit (120 grit) and finish with a fine grit (220 grit) for a smooth finish. Remember to sand with the grain of the wood. Don’t over-sand; you want to preserve some of the wood’s natural character.
3. Cut the Wood to Size: Measure the dimensions of your mirror. You’ll need to cut the wood planks to create a frame around the mirror. I decided to create an overlapping frame, so I cut the planks to different lengths to create a staggered effect. Remember to add extra length to account for the overlap.
4. Arrange the Wood: Before gluing anything, lay out the wood planks around the mirror to get a sense of the final design. Experiment with different arrangements until you find one you love. This is your chance to get creative and personalize your mirror.
Building the Frame:
Now comes the fun part – assembling the frame!
1. Prepare the Backing Board: Cut the plywood or MDF board to a size slightly larger than your mirror. This will serve as the backing for the mirror and the frame.
2. Attach the First Layer of Wood: Apply wood glue to the back of the first layer of wood planks and attach them to the backing board. Use clamps to hold the planks in place while the glue dries. Make sure the planks are aligned properly and that they overlap as desired.
3. Add Additional Layers: Once the first layer of glue is dry (usually after a few hours), add the second layer of wood planks. Again, apply wood glue to the back of the planks and attach them to the first layer. Use clamps to hold everything in place. Continue adding layers until you achieve the desired thickness and rustic look.
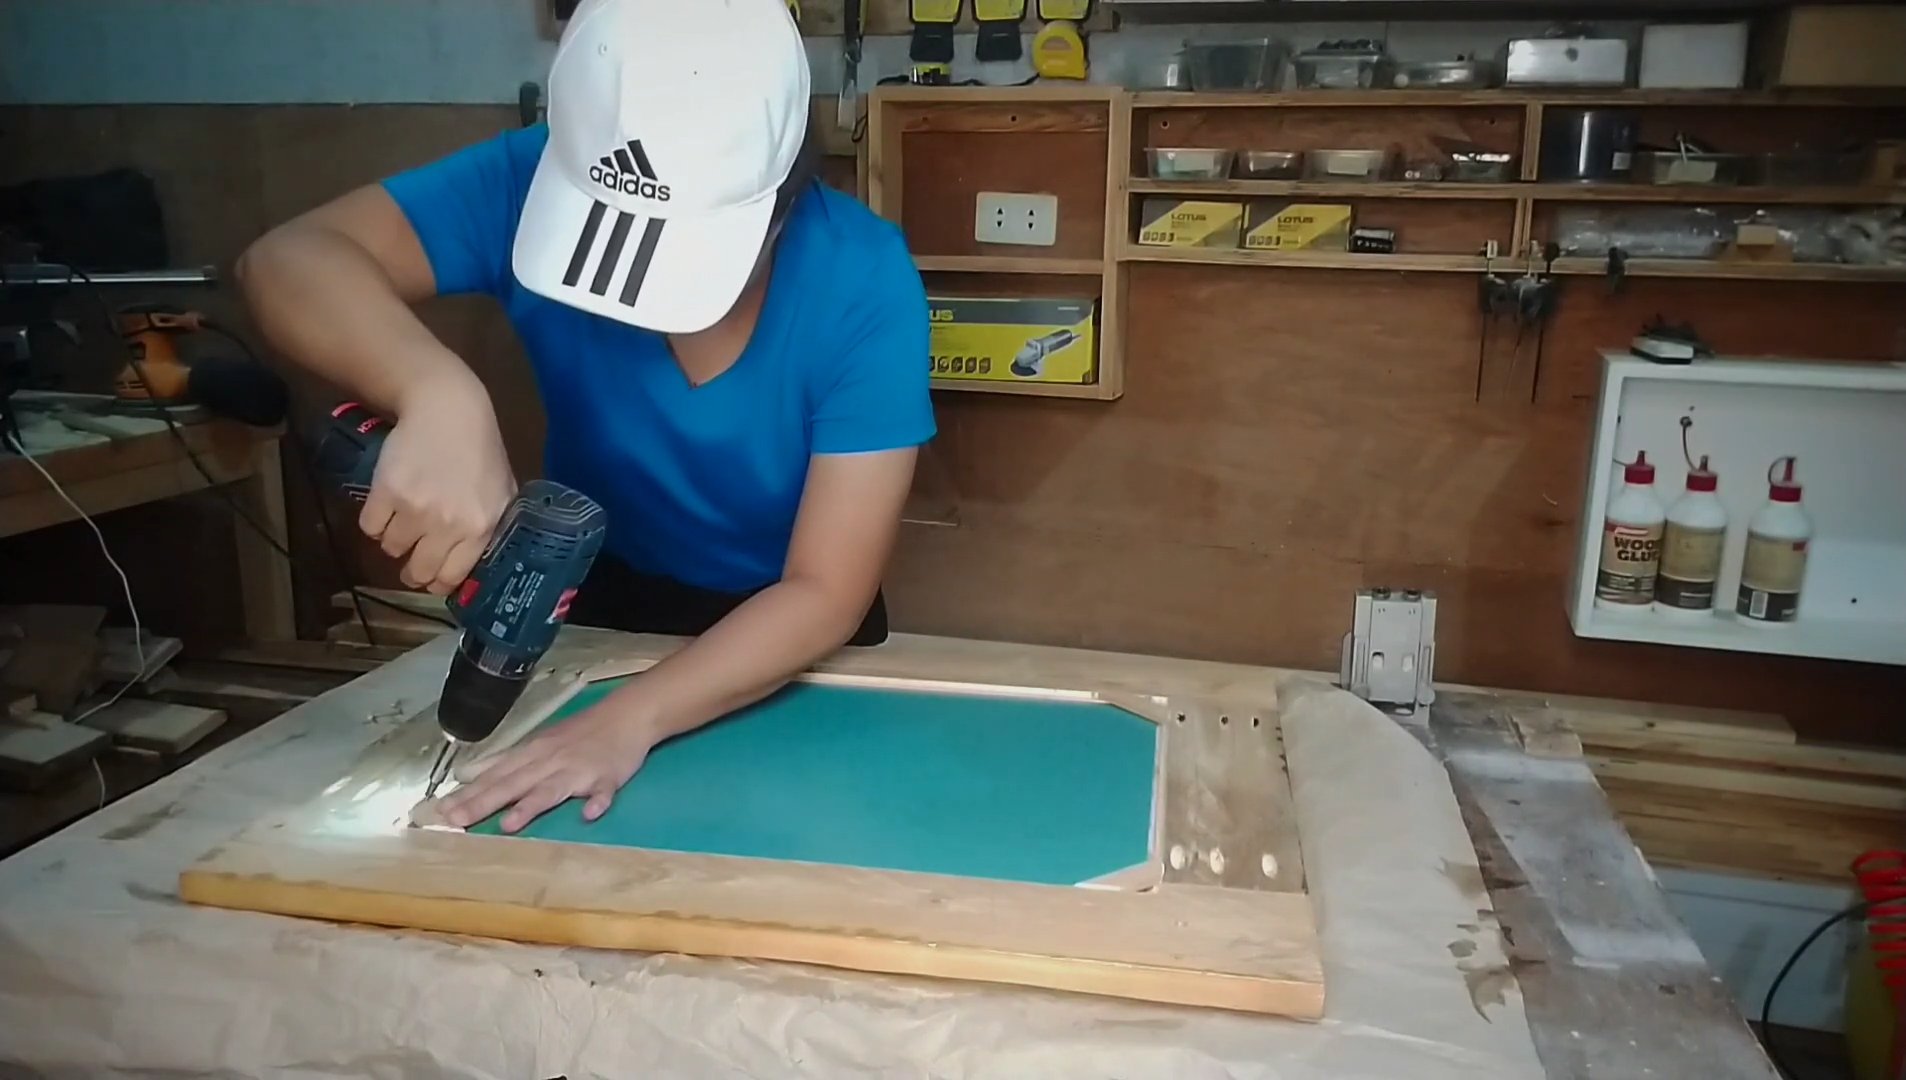
4. Secure with Screws: For added strength and stability, use wood screws to secure the wood planks to the backing board. Drill pilot holes before inserting the screws to prevent the wood from splitting. Countersink the screws so they are flush with the surface of the wood.
Attaching the Mirror:
This step requires a bit of patience and precision.
1. Clean the Mirror: Clean the mirror thoroughly to remove any dust or fingerprints.
2. Apply Construction Adhesive: Apply a generous amount of construction adhesive to the back of the mirror. Be sure to apply it evenly across the entire surface.
3. Position the Mirror: Carefully position the mirror in the center of the frame. Press it firmly against the backing board to ensure good adhesion.
4. Secure the Mirror: To further secure the mirror, you can use mirror clips or small pieces of wood to hold it in place while the adhesive dries. Let the adhesive dry completely according to the manufacturer’s instructions (usually 24-48 hours).
Finishing Touches:
These final steps will really bring your rustic mirror to life!
1. Sand the Edges: Once the adhesive is dry, sand the edges of the frame to smooth out any rough spots and create a more finished look.
2. Stain the Wood (Optional): If you want to add color or enhance the wood grain, apply a wood stain to the frame. Choose a stain that complements your decor. Follow the manufacturer’s instructions for application and drying time. I personally love using a dark walnut stain for a rich, rustic look.
3. Apply Sealant or Varnish: To protect the wood and enhance its beauty, apply a sealant or varnish to the frame. This will also make the mirror easier to clean. Apply several coats, allowing each coat to dry completely before applying the next.
4. Attach Hanging Hardware: Attach picture hanging hardware to the back of the frame. I recommend using D-rings and wire for a secure and adjustable hanging system. Make sure the hardware is strong enough to support the weight of the mirror.
5. Hang Your Mirror: Finally, hang your beautiful rustic wooden mirror on the wall and admire your handiwork! Use a level to ensure the mirror is hanging straight.
Tips and Tricks:
Here are a few extra tips and tricks to help you create the perfect rustic wooden mirror:
* Embrace Imperfections: The beauty of rustic decor lies in its imperfections. Don’t worry about making everything perfect. Embrace the knots, cracks, and variations in the wood.
* Mix and Match Wood Types: Use a variety of wood types to create a more interesting and textured look.
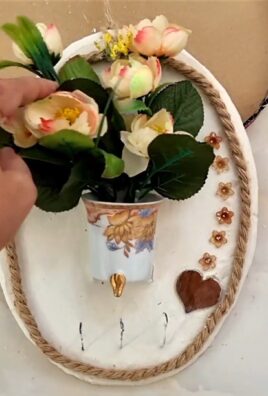
* Add Decorative Elements: Consider adding decorative elements to the frame, such as metal accents, rope, or even dried flowers.
* Protect Your Work Surface: Always protect your work surface with a drop cloth or newspaper to prevent spills and stains.
* Work in a Well-Ventilated Area: When working with wood glue, stain, and sealant, be sure to work in a well-ventilated area to avoid inhaling harmful fumes.
* Take Your Time: Don’t rush the process. Take your time and enjoy the creative journey.
Safety First!
Before you start any DIY project, it’s important to prioritize safety. Here are a few safety tips to keep in mind:
* Wear Safety Glasses: Always wear safety glasses to protect your eyes from flying debris.
* Wear Work Gloves: Wear work gloves to protect your hands from splinters and chemicals.
* Use Power Tools Safely: Read and follow the manufacturer’s instructions for all power tools.
* Be Careful with Sharp Objects: Be careful when handling sharp objects, such as saws and knives.
* Keep Your Work Area Clean: Keep your work area clean and organized to prevent accidents.
Variations and Customization:
The beauty of DIY is that you can customize the project to suit your own style and preferences. Here are a few ideas for variations and customization:
* Different Wood Finishes: Experiment with different wood finishes, such as whitewash, distressed paint, or even a natural oil finish.
* Different Frame Styles: Try different frame styles, such as a simple rectangular frame, a chunky frame, or even a frame with decorative molding.
* Different Mirror Shapes: Use a different mirror shape, such as a
Conclusion
So, there you have it! Transforming ordinary materials into a stunning, one-of-a-kind DIY rustic wooden mirror is not only achievable but incredibly rewarding. This project offers a fantastic way to inject personality and warmth into your home decor without breaking the bank. Forget mass-produced, generic mirrors; this is about crafting something truly unique that reflects your individual style and creativity.
Why is this DIY trick a must-try? Because it’s more than just a mirror; it’s a statement piece. It’s a conversation starter. It’s a testament to your resourcefulness and artistic flair. It allows you to control every aspect of the design, from the type of wood used to the level of distressing applied. You can perfectly tailor it to complement your existing decor, whether you’re aiming for a farmhouse chic vibe, a rugged industrial look, or a cozy cabin feel.
But the benefits extend beyond aesthetics. This project is also incredibly therapeutic. The process of working with wood, of shaping and sanding and staining, can be incredibly calming and meditative. It’s a chance to disconnect from the digital world and reconnect with your hands. Plus, you’ll have the immense satisfaction of knowing that you created something beautiful and functional with your own two hands.
Looking for variations? Absolutely! Consider using reclaimed wood for an even more rustic and eco-friendly touch. Experiment with different stains and finishes to achieve your desired look. Try adding decorative elements like rope, metal accents, or even dried flowers for a truly personalized touch. For a modern twist, you could incorporate geometric patterns or use a sleek, minimalist frame. Don’t be afraid to get creative and let your imagination run wild!
Another fantastic variation is to create a gallery wall of smaller rustic wooden mirrors. This is a great way to fill a large space and add visual interest to any room. You could even use different sizes and shapes of wood to create a more eclectic and dynamic display.
And if you’re feeling particularly ambitious, you could even try incorporating lighting into your DIY rustic wooden mirror. Imagine a soft, warm glow emanating from behind the frame, creating a cozy and inviting ambiance. This would be a particularly stunning addition to a bathroom or bedroom.
We wholeheartedly encourage you to give this DIY project a try. It’s easier than you might think, and the results are truly stunning. Don’t be intimidated if you’re not an experienced woodworker; this project is perfect for beginners. With a little patience and creativity, you can create a beautiful and unique DIY rustic wooden mirror that you’ll be proud to display in your home for years to come.
Once you’ve completed your masterpiece, we’d love to see it! Share your creations with us on social media using #RusticMirrorDIY. We can’t wait to see what you come up with! Your experiences and insights will inspire others to embark on their own DIY adventures. Let’s build a community of creative makers and share the joy of crafting beautiful things with our own hands. So grab your tools, gather your materials, and get ready to transform your space with a stunning DIY rustic wooden mirror!
Frequently Asked Questions (FAQ)
What kind of wood is best for a DIY rustic wooden mirror?
The best type of wood for a DIY rustic wooden mirror depends on the look you’re going for and your budget. Pine is a popular and affordable option that’s easy to work with. It takes stain well and has a naturally rustic appearance. Reclaimed wood is another excellent choice, offering a unique and weathered look. Pallet wood is a budget-friendly option, but be sure to inspect it carefully for nails, splinters, and any signs of chemical treatment. Cedar is a more expensive option, but it’s naturally rot-resistant and has a beautiful grain pattern. Ultimately, the best wood is the one that you like the look of and that fits your budget and skill level. Consider the grain, color, and texture of the wood when making your selection.
How do I distress the wood to achieve a rustic look?
There are several ways to distress wood to achieve a rustic look. One popular method is to use a hammer and nails to create dents and dings. You can also use a chain or a wire brush to create scratches and gouges. Another technique is to use a wood stain and then sand it back in certain areas to reveal the natural wood underneath. This creates a worn and weathered look. You can also use a chisel or a screwdriver to create small imperfections and add character to the wood. Experiment with different techniques to find the ones that you like best and that achieve the desired level of distressing. Remember to work in a well-ventilated area and wear safety glasses to protect your eyes.
What type of mirror should I use?
You can use a standard glass mirror that you purchase from a hardware store or online retailer. Be sure to measure the mirror carefully before building your frame to ensure a proper fit. You can also repurpose an old mirror from a thrift store or flea market. This is a great way to save money and add a unique touch to your project. If you’re using an old mirror, be sure to clean it thoroughly before incorporating it into your DIY rustic wooden mirror. Consider the shape and size of the mirror when designing your frame. A round mirror can create a softer, more organic look, while a rectangular mirror can create a more modern and streamlined look.
How do I attach the mirror to the wooden frame?
There are several ways to attach the mirror to the wooden frame. One common method is to use mirror clips. These are small metal clips that attach to the back of the frame and hold the mirror in place. You can also use construction adhesive to glue the mirror to the frame. Be sure to use an adhesive that is specifically designed for mirrors to avoid damaging the reflective surface. Another option is to create a rabbet (a groove) in the back of the frame that the mirror can sit in. This provides a secure and stable way to hold the mirror in place. Whichever method you choose, be sure to handle the mirror carefully to avoid breaking it.
What kind of finish should I use on the wood?
The type of finish you use on the wood will depend on the look you’re going for and the type of wood you’re using. A clear coat of polyurethane will protect the wood and enhance its natural beauty. A stain will add color and depth to the wood. A wax finish will provide a soft, matte sheen. You can also use paint to create a more colorful and vibrant look. If you’re using reclaimed wood, you may want to leave it unfinished to preserve its natural character. Experiment with different finishes to find the one that you like best and that complements your overall design. Be sure to follow the manufacturer’s instructions when applying any finish.
How do I hang my DIY rustic wooden mirror?
The best way to hang your DIY rustic wooden mirror will depend on its size and weight. For smaller, lighter mirrors, you can use picture-hanging hooks or D-rings. For larger, heavier mirrors, you’ll need to use more substantial hardware, such as heavy-duty picture hangers or a French cleat system. Be sure to use the appropriate hardware for the weight of your mirror to prevent it from falling. When hanging your mirror, use a level to ensure that it’s straight. You may also want to use a stud finder to locate wall studs for added support. If you’re unsure about how to hang your mirror safely, consult a professional.
Can I use power tools for this project?
Yes, you can definitely use power tools for this project, especially if you’re working with larger pieces of wood or if you want to speed up the process. A power saw can be used to cut the wood to size, a power sander can be used to smooth the edges, and a power drill can be used to create pilot holes for screws. However, it’s important to use power tools safely and to wear appropriate safety gear, such as safety glasses and hearing protection. If you’re not comfortable using power tools, you can still complete this project using hand tools, but it will take longer.
How long will this project take to complete?
The amount of time it takes to complete this project will depend on your skill level, the complexity of your design, and the tools you have available. A simple DIY rustic wooden mirror can be completed in a few hours, while a more elaborate design may take a few days. Be sure to allow enough time for each step of the process, including cutting, sanding, staining, and assembling the frame. Don’t rush the process, as this can lead to mistakes. Take your time and enjoy the process of creating something beautiful with your own hands.

Leave a Comment