

Deep cleaning kitchen tips – are you ready to transform your kitchen from a chaotic culinary space into a sparkling sanctuary? Let’s face it, the kitchen is the heart of the home, but it’s also a magnet for spills, splatters, and stubborn grime. I know, I’ve been there! It can feel overwhelming, but trust me, with a few clever DIY tricks and a little elbow grease, you can achieve a professional-level clean without breaking the bank.
Throughout history, a clean kitchen has been a symbol of health and prosperity. In many cultures, the kitchen was considered the most important room in the house, and maintaining its cleanliness was a daily ritual. While we might not have the time for daily scrubbing, we can certainly adopt some time-saving strategies to keep our kitchens looking their best.
Why is deep cleaning your kitchen so important? Beyond the obvious aesthetic benefits, a clean kitchen is crucial for food safety and overall hygiene. Lingering bacteria and mold can lead to health problems, and nobody wants that! Plus, a clean and organized kitchen makes cooking more enjoyable and efficient. This DIY article is packed with practical tips and hacks to help you tackle even the toughest kitchen cleaning challenges. So, grab your gloves, put on some music, and let’s dive into these essential deep cleaning kitchen tips that will leave your space gleaming!

Deep Cleaning Your Kitchen: A DIY Guide to Sparkling Cleanliness
Okay, let’s face it, the kitchen. It’s the heart of the home, but also a magnet for grime, spills, and that mysterious sticky residue that seems to appear out of nowhere. Don’t worry, I’m here to guide you through a deep clean that will leave your kitchen sparkling and feeling brand new. We’re going to tackle everything, from the oven to the grout, and I promise, it’s totally achievable!
What You’ll Need: Your Arsenal of Cleaning Supplies
Before we dive in, let’s gather our supplies. Having everything on hand will make the process much smoother. Here’s what I recommend:
* All-Purpose Cleaner: A good all-purpose cleaner is your best friend for general cleaning.
* Dish Soap: For washing dishes and degreasing surfaces.
* Baking Soda: A natural abrasive and deodorizer.
* White Vinegar: Excellent for cutting through grease and disinfecting.
* Hydrogen Peroxide: A powerful disinfectant and stain remover.
* Microfiber Cloths: These are amazing for cleaning without leaving streaks.
* Scrub Brushes: Different sizes for various tasks, like scrubbing grout or cleaning around faucets.
* Sponges: For general cleaning and wiping.
* Rubber Gloves: To protect your hands from harsh chemicals and hot water.
* Spray Bottles: For mixing cleaning solutions.
* Old Toothbrush: Perfect for getting into tight spaces and cleaning grout.
* Oven Cleaner: Choose a fume-free option if possible.
* Glass Cleaner: For sparkling windows and mirrors.
* Trash Bags: For disposing of waste.
* Paper Towels: For quick cleanups and drying.
* Screwdriver: You might need this to remove vent covers or appliance parts for cleaning.
* Vacuum Cleaner with attachments: For cleaning floors and hard-to-reach areas.
* Mop and Bucket: For cleaning floors.
* Lemon (Optional): For a fresh, natural scent and cleaning boost.
Phase 1: Tackling the Appliances
Appliances are often the biggest culprits when it comes to kitchen grime. Let’s start with the big ones.
1. Cleaning the Oven: The Grimiest Job, But So Worth It
This is probably the task we all dread, but a clean oven makes a huge difference!
1. Remove Oven Racks: Take out all the racks and soak them in hot, soapy water in your sink or bathtub. You can add a cup of baking soda to the water for extra cleaning power.
2. Apply Oven Cleaner: Follow the instructions on your oven cleaner. If you’re using a fume-free option, you can usually spray it on and let it sit overnight. For traditional oven cleaner, be sure to ventilate the area well and wear gloves.
3. Scrub and Wipe: After the cleaner has had time to work, scrub the oven interior with a sponge or scrub brush. Wipe away the loosened grime with a damp cloth. You might need to repeat this process a few times for stubborn spots.
4. Clean the Racks: Scrub the oven racks with a scrub brush to remove any baked-on food. Rinse them thoroughly and dry them before placing them back in the oven.
5. Final Wipe Down: Give the oven a final wipe down with a clean, damp cloth to remove any remaining cleaner residue.
2. Refrigerator Refresh: Out with the Old, In with the Clean
A clean fridge is essential for food safety and preventing unpleasant odors.
1. Empty the Fridge: Take everything out of the refrigerator, checking expiration dates and discarding anything that’s past its prime.
2. Remove Shelves and Drawers: Take out all the removable shelves and drawers and wash them in hot, soapy water.
3. Wipe Down the Interior: Use an all-purpose cleaner or a mixture of equal parts white vinegar and water to wipe down the interior of the refrigerator. Pay attention to spills and sticky spots.
4. Clean the Door Seals: Use a damp cloth to clean the door seals, removing any dirt or grime.
5. Wash the Exterior: Wipe down the exterior of the refrigerator with an all-purpose cleaner.
6. Replace Shelves and Drawers: Once the shelves and drawers are dry, put them back in the refrigerator.
7. Restock the Fridge: Put your food back in the refrigerator, organizing it for easy access.
3. Dishwasher Detox: Keeping Your Dishwasher Sparkling
A clean dishwasher ensures your dishes come out sparkling clean.
1. Remove Food Debris: Check the drain at the bottom of the dishwasher and remove any food debris.
2. Clean the Spray Arms: Remove the spray arms and clean them under running water, using a toothpick or small brush to unclog any blocked holes.
3. Run a Cleaning Cycle: Place a dishwasher-safe cup filled with white vinegar on the top rack of the dishwasher. Run a normal cycle with no dishes.
4. Clean the Exterior: Wipe down the exterior of the dishwasher with an all-purpose cleaner.
4. Microwave Makeover: Quick and Easy Cleaning
The microwave is often overlooked, but it can get surprisingly dirty.
1. Steam Clean: Place a microwave-safe bowl filled with water and a few slices of lemon in the microwave. Microwave on high for 2-3 minutes, or until the water boils and the microwave is steamy.
2. Wipe Down: Let the microwave sit for a few minutes to allow the steam to loosen the grime. Then, carefully remove the bowl and wipe down the interior of the microwave with a damp cloth.
Phase 2: Countertops, Cabinets, and Backsplash
These surfaces are prone to spills, splatters, and general wear and tear.
1. Countertop Cleaning: Choosing the Right Method
The best cleaning method depends on your countertop material.
* Granite: Use a pH-neutral cleaner specifically designed for granite. Avoid harsh chemicals like vinegar or ammonia.
* Quartz: Use a mild dish soap and water or a quartz-specific cleaner.
* Laminate: Use an all-purpose cleaner or a mixture of dish soap and water.
* Butcher Block: Clean with a damp cloth and mild dish soap. Sanitize with a mixture of white vinegar and water. Be sure to oil your butcher block regularly to prevent drying and cracking.
1. Clear the Countertops: Remove everything from the countertops.
2. Clean the Surface: Use the appropriate cleaner for your countertop material to wipe down the surface.
3. Dry the Countertops: Use a clean, dry cloth to dry the countertops.
2. Cabinet Care: Removing Grease and Grime
Cabinets can accumulate grease and grime, especially around the stove.
1. Mix a Cleaning Solution: Mix a solution of warm water and dish soap. You can also add a tablespoon of baking soda for extra cleaning power.
2. Wipe Down the Cabinets: Dip a microfiber cloth into the cleaning solution and wring it out well. Wipe down the cabinets, paying attention to areas with grease or grime.
3. Rinse with Clean Water: Use a clean, damp cloth to rinse the cabinets.
4. Dry the Cabinets: Use a clean, dry cloth to dry the cabinets.
3. Backsplash Brilliance: Removing Splatters and Stains
The backsplash protects your walls from splatters and stains.
1. Identify the Material: Determine the material of your backsplash (tile, glass, stainless steel, etc.).
2. Choose the Right Cleaner: Use an appropriate cleaner for your backsplash material. For tile, you can use an all-purpose cleaner or a mixture of white vinegar and water. For glass, use a glass cleaner. For stainless steel, use a stainless steel cleaner.
3. Apply the Cleaner: Spray the cleaner onto the backsplash and let it sit for a few minutes.
4. Scrub and Wipe: Scrub the backsplash with a sponge or scrub brush to remove any splatters or stains.
5. Rinse with Clean Water: Rinse the backsplash with clean water.
6. Dry the Backsplash: Use a clean, dry cloth to dry the backsplash.
Phase 3: Sinks, Faucets, and Grout
These areas are prone to water stains, soap scum, and mildew.
1. Sink Sanitation: Sparkling Clean and Germ-Free
Your sink is a breeding ground for germs, so it’s important to keep it clean.
1. Rinse the Sink: Rinse the sink with hot water to remove any loose debris.
2. Apply a Cleaning Paste: Make a paste of baking
Conclusion
So, there you have it! Transforming your kitchen from a chaotic culinary space to a sparkling sanctuary doesn’t require expensive cleaning services or harsh chemicals. This DIY deep cleaning kitchen trick is a game-changer, offering a cost-effective, eco-friendly, and surprisingly satisfying way to revitalize the heart of your home. We’ve walked you through the essential steps, from decluttering and degreasing to sanitizing and shining, providing you with the knowledge and confidence to tackle even the most daunting kitchen grime.
But why is this DIY approach a must-try? Beyond the obvious benefits of a cleaner, healthier kitchen, this method empowers you to take control of your cleaning process. You know exactly what ingredients are being used, avoiding potentially harmful chemicals that can linger in your food preparation areas. Plus, there’s a certain sense of accomplishment that comes with knowing you’ve achieved a professional-level clean using simple, readily available materials.
Don’t be afraid to experiment and adapt this method to suit your specific needs and preferences. For instance, if you’re dealing with particularly stubborn grease buildup on your stovetop, consider letting the baking soda paste sit for a longer period, perhaps even overnight. For stainless steel appliances, a mixture of vinegar and olive oil can work wonders in restoring their shine. If you prefer a more fragrant cleaning experience, add a few drops of your favorite essential oil, such as lemon or lavender, to your cleaning solutions. Remember to always test any new cleaning solution on an inconspicuous area first to ensure it doesn’t damage the surface.
This deep cleaning kitchen method isn’t just about aesthetics; it’s about creating a healthier and more enjoyable cooking environment. A clean kitchen reduces the risk of foodborne illnesses, makes meal preparation more efficient, and simply feels more inviting. Imagine the satisfaction of cooking in a space that is not only spotless but also smells fresh and clean.
We are confident that once you try this DIY deep cleaning kitchen trick, you’ll be amazed by the results. It’s a simple, effective, and rewarding way to maintain a clean and healthy kitchen. So, gather your supplies, put on some music, and get ready to transform your kitchen into a sparkling haven.
Now, we want to hear from you! Have you tried this DIY deep cleaning kitchen method? What were your results? Do you have any tips or variations to share? Leave a comment below and let us know your experience. Your insights could help other readers achieve their own kitchen cleaning goals. Let’s create a community of clean kitchen enthusiasts!
FAQ
What exactly does “deep cleaning” entail in the kitchen?
Deep cleaning goes beyond your regular daily or weekly cleaning routine. It involves tackling areas and tasks that are often overlooked, such as cleaning inside appliances (oven, refrigerator, dishwasher), scrubbing grout, cleaning under appliances, and thoroughly degreasing surfaces. It’s about removing built-up grime, dirt, and bacteria to create a truly clean and healthy cooking environment.
How often should I deep clean my kitchen?
The frequency of deep cleaning depends on how often you cook and the level of use your kitchen gets. As a general guideline, aim for a deep clean every 3-6 months. However, if you cook frequently or have pets, you might consider deep cleaning more often. Regular maintenance cleaning in between deep cleans will help prevent grime buildup and make the deep cleaning process easier.
What are the essential supplies I need for deep cleaning my kitchen?
The beauty of this DIY method is that it relies on readily available and affordable supplies. You’ll need:
* Baking soda: A natural abrasive and deodorizer.
* White vinegar: A powerful disinfectant and degreaser.
* Dish soap: For general cleaning and degreasing.
* Microfiber cloths: For wiping surfaces without leaving streaks.
* Sponges: For scrubbing stubborn grime.
* Spray bottles: For mixing and applying cleaning solutions.
* Old toothbrush: For cleaning grout and tight spaces.
* Rubber gloves: To protect your hands.
* Warm water: For rinsing and diluting cleaning solutions.
* Optional: Essential oils (lemon, lavender, etc.) for fragrance.
Is vinegar safe to use on all kitchen surfaces?
While vinegar is a fantastic cleaning agent, it’s not suitable for all surfaces. Avoid using vinegar on natural stone surfaces like granite or marble, as it can etch and damage them. Also, avoid using vinegar on waxed wood surfaces. Always test vinegar on an inconspicuous area first to ensure it doesn’t cause any damage.
How do I clean my oven using baking soda and vinegar?
This is a simple and effective method. First, remove the oven racks and soak them in hot, soapy water. Then, make a paste of baking soda and water and spread it all over the inside of the oven, avoiding the heating elements. Let the paste sit overnight. The next day, spray the baking soda paste with vinegar and watch it fizz. Wipe away the loosened grime with a damp cloth.
How do I clean my refrigerator effectively?
Start by removing all the food from the refrigerator. Discard any expired or spoiled items. Then, remove the shelves and drawers and wash them with warm, soapy water. Wipe down the inside of the refrigerator with a solution of baking soda and water. Pay attention to spills and stains. Rinse with clean water and dry thoroughly before replacing the shelves and drawers.
How do I clean my dishwasher?
To clean your dishwasher, start by removing any food debris from the bottom. Then, place a cup of white vinegar in the top rack of the dishwasher and run a hot cycle. This will help to remove grease and grime. You can also sprinkle baking soda on the bottom of the dishwasher before running the cycle for extra cleaning power.
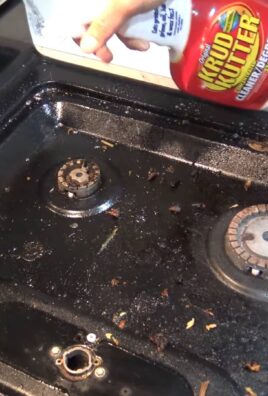
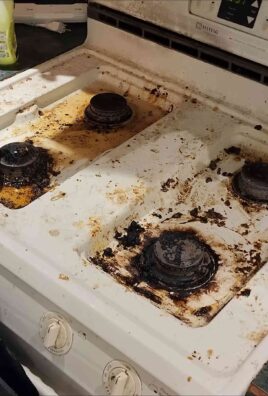
How do I get rid of stubborn grease stains on my stovetop?
For stubborn grease stains, create a paste of baking soda and water and apply it to the affected area. Let it sit for at least 30 minutes, or even overnight for particularly tough stains. Then, scrub the area with a sponge or brush and wipe away the residue with a damp cloth.
How can I prevent grime buildup in my kitchen?
Regular maintenance cleaning is key to preventing grime buildup. Wipe down surfaces after each use, clean up spills immediately, and regularly clean your appliances. Also, ensure proper ventilation in your kitchen to prevent grease and moisture from accumulating.
What if I don’t have time for a full deep clean?
Even if you don’t have time for a full deep clean, you can still tackle smaller tasks to maintain a clean kitchen. Focus on high-traffic areas like the stovetop, sink, and countertops. A quick wipe-down after each use can make a big difference in preventing grime buildup.

Leave a Comment