

Vertical squash growing DIY: Ever dreamed of a lush, overflowing garden bursting with delicious squash, but you’re short on space? I get it! We’ve all been there, staring longingly at those sprawling squash vines in magazines, thinking it’s just not possible in our little patch. But what if I told you there’s a way to maximize your harvest and minimize the footprint of your squash plants?
For centuries, gardeners have been finding clever ways to work with limited space. From ancient hanging gardens to modern-day urban farms, the ingenuity of growing upwards has always been a testament to our connection with nature. Think about it – even the humble beanstalk in Jack’s fairytale climbed skyward! This DIY project taps into that same spirit of resourcefulness.
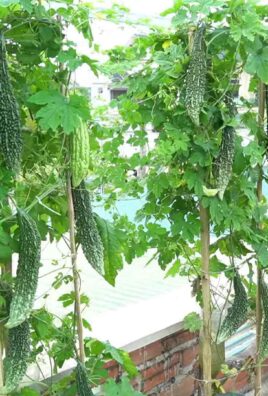
Why is vertical squash growing DIY so essential? Well, traditional squash plants are notorious for their sprawling vines that can quickly take over an entire garden bed. This can lead to overcrowding, reduced airflow (inviting pests and diseases), and a whole lot of wasted space. By training your squash to grow vertically, you’ll not only save precious real estate but also improve air circulation, making your plants healthier and more productive. Plus, harvesting becomes a breeze! Imagine plucking ripe squash right off the vine, standing upright – no more backaches from bending over! So, let’s dive into this easy and rewarding DIY project that will transform your squash-growing experience.

DIY Vertical Squash Growing: Maximize Your Harvest in Minimal Space!
Hey there, fellow gardeners! Are you dreaming of a bountiful squash harvest but short on garden space? Well, you’re in the right place! I’m going to walk you through building a vertical squash growing system that will not only save space but also add a unique and beautiful element to your garden. Get ready to say goodbye to sprawling vines and hello to a tower of delicious squash!
Why Grow Squash Vertically?
Before we dive into the how-to, let’s quickly cover why vertical squash growing is so awesome:
* Space Saving: This is the biggest benefit! Vertical growing allows you to grow a lot more squash in a smaller footprint. Perfect for small gardens, balconies, or patios.
* Improved Air Circulation: By lifting the squash off the ground, you’ll improve air circulation around the plants. This helps prevent fungal diseases like powdery mildew, which can be a real pain.
* Easier Harvesting: No more bending over and searching through a jungle of vines! Harvesting becomes much easier and more comfortable.
* Pest Control: It’s easier to spot and manage pests when your plants are growing vertically.
* Aesthetic Appeal: Let’s be honest, a vertical squash tower looks pretty darn cool! It adds a unique and eye-catching element to your garden.
Choosing the Right Squash Variety
Not all squash varieties are created equal when it comes to vertical growing. You’ll want to choose varieties that are more compact and have smaller fruits. Here are a few of my favorites:
* Zucchini: Compact zucchini varieties like ‘Bush Baby’ or ‘Spacemiser’ are excellent choices.
* Yellow Squash: Similar to zucchini, look for bush varieties of yellow squash.
* Delicata Squash: This smaller winter squash is well-suited for vertical growing.
* Patty Pan Squash: These cute, saucer-shaped squash are relatively compact and easy to manage.
* Smaller Butternut Squash: Some newer, smaller butternut squash varieties are available that work well.
Important Note: Avoid growing large, heavy squash varieties like pumpkins or giant winter squash vertically. The weight of the fruit can be too much for the support structure.
Materials You’ll Need
Okay, let’s gather our supplies! Here’s what you’ll need to build your vertical squash growing system:
* Sturdy Support Structure: This is the backbone of your system. You have a few options here:
* Trellis: A strong wooden or metal trellis is a classic choice. Make sure it’s tall enough to accommodate the mature size of your squash plants (at least 6-8 feet).
* Cattle Panel: A curved cattle panel creates a beautiful and sturdy arch.
* DIY Tower: You can build your own tower using wood, bamboo, or even repurposed materials like pallets.
* Planting Containers: You’ll need containers to hold your squash plants.
* Large Pots: Choose pots that are at least 12-18 inches in diameter.
* Grow Bags: Grow bags are a lightweight and affordable option.
* Hanging Baskets: You can even incorporate hanging baskets into your vertical system.
* High-Quality Potting Mix: Use a well-draining potting mix that’s rich in organic matter.
* Squash Seedlings or Seeds: Choose your favorite squash variety!
* Plant Ties or Twine: To help train the vines to grow up the support structure.
* Fertilizer: A balanced fertilizer to feed your plants.
* Watering Can or Hose: For watering your plants.
* Gloves: To protect your hands.
* Tools: Depending on the support structure you choose, you may need tools like a drill, saw, hammer, or wire cutters.
Building Your Vertical Squash System: Step-by-Step
Alright, let’s get building! I’m going to outline the steps for using a trellis as the support structure, but you can adapt these instructions to fit your chosen method.
1. Prepare Your Trellis
* Choose a Location: Select a sunny spot in your garden that receives at least 6-8 hours of direct sunlight per day.
* Install the Trellis: Make sure your trellis is securely anchored in the ground. You may need to use stakes or concrete to provide extra support, especially if you live in a windy area.
* Test the Stability: Give the trellis a good shake to make sure it’s sturdy and won’t topple over when the squash plants start to grow.
2. Prepare Your Planting Containers
* Choose Your Containers: Select containers that are large enough to accommodate the root systems of your squash plants.
* Add Drainage: Make sure your containers have adequate drainage holes to prevent waterlogging.
* Fill with Potting Mix: Fill the containers with a high-quality potting mix, leaving a few inches of space at the top.
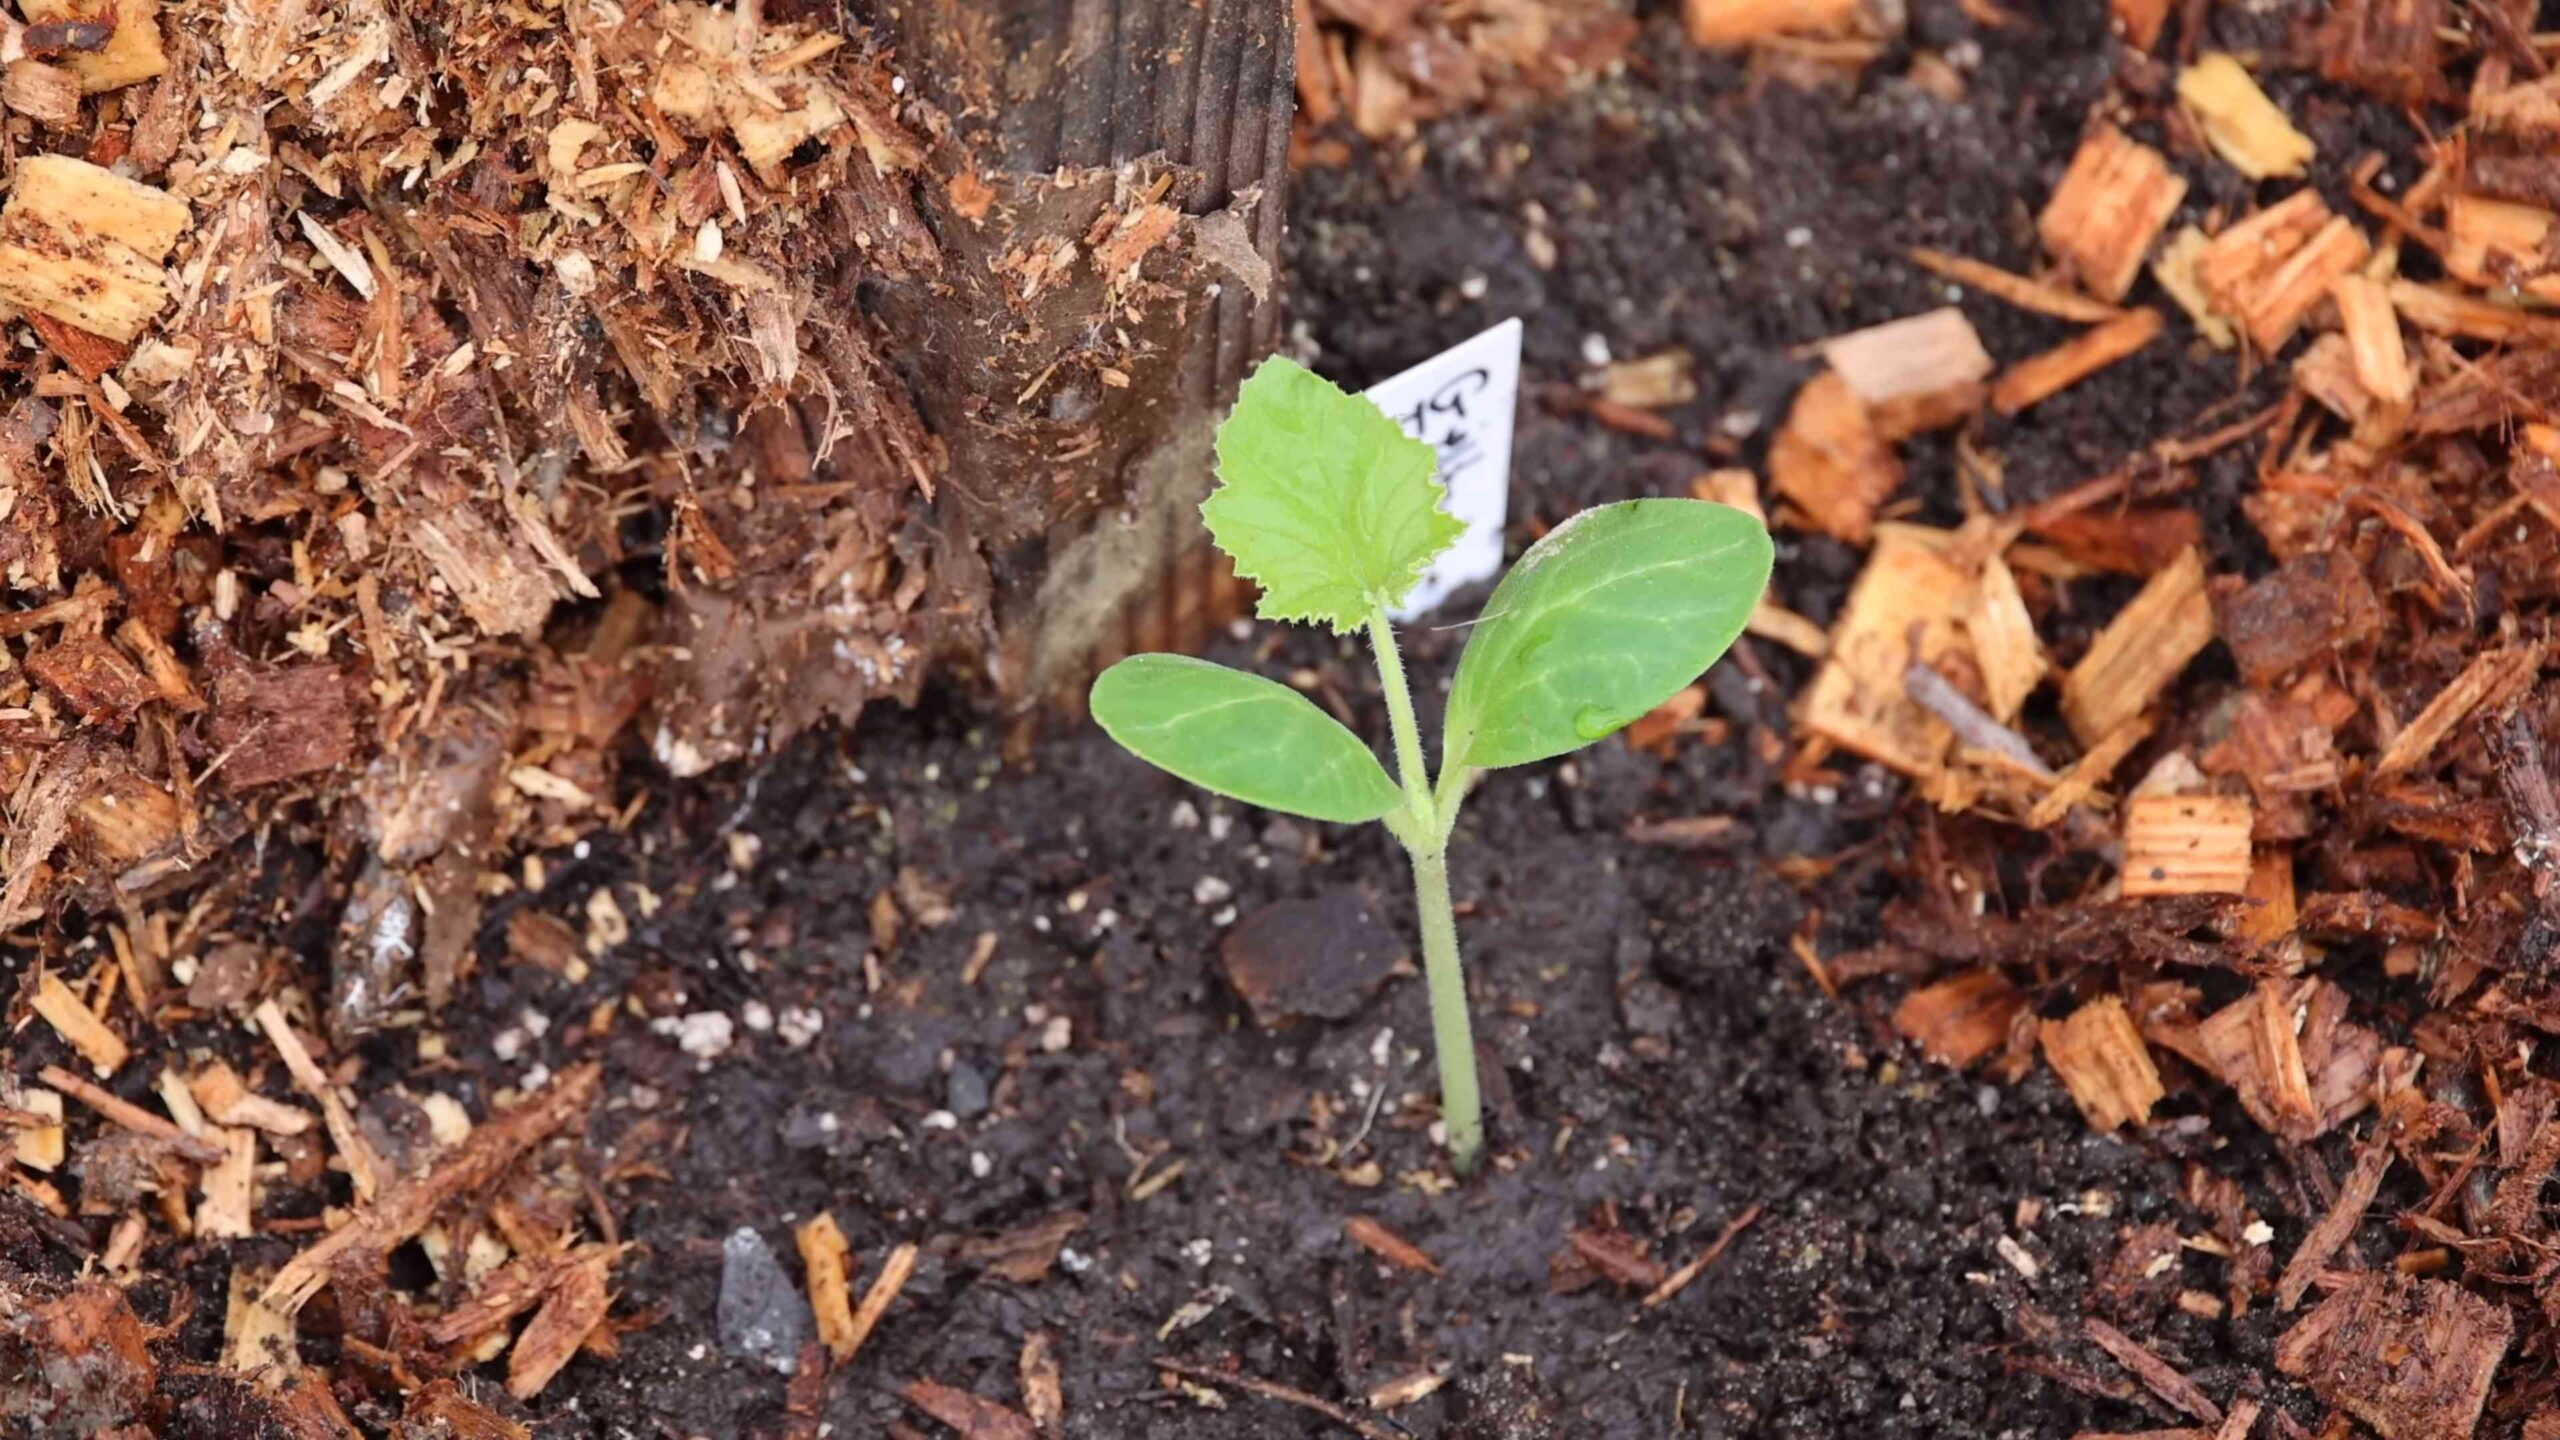
3. Plant Your Squash
* Start with Seedlings or Seeds: You can either start your squash plants from seeds indoors or purchase seedlings from a local nursery.
* Plant Seedlings: If you’re using seedlings, gently remove them from their containers and plant them in the prepared pots, spacing them according to the variety’s recommendations.
* Plant Seeds: If you’re starting from seeds, sow them directly into the pots, following the instructions on the seed packet.
* Water Thoroughly: After planting, water the plants thoroughly to help them settle in.
4. Train the Vines
* Guide the Vines: As the squash vines start to grow, gently guide them towards the trellis.
* Use Plant Ties: Use plant ties or twine to secure the vines to the trellis. Be careful not to tie them too tightly, as this can damage the stems.
* Encourage Upward Growth: Continue to train the vines as they grow, encouraging them to climb up the trellis.
* Prune if Necessary: If the vines become too dense, you can prune them to improve air circulation and sunlight penetration.
5. Water and Fertilize
* Water Regularly: Squash plants need consistent moisture, especially during hot weather. Water deeply whenever the top inch of soil feels dry to the touch.
* Fertilize Regularly: Feed your squash plants with a balanced fertilizer every 2-3 weeks to promote healthy growth and abundant fruit production. Follow the instructions on the fertilizer label.
6. Support the Fruit
* Provide Support: As the squash fruits start to develop, they may need additional support, especially if they are large.
* Use Slings or Netting: You can use slings made from fabric or netting to support the fruits and prevent them from breaking off the vines.
* Tie to the Trellis: Secure the slings or netting to the trellis to provide extra support.
Troubleshooting Tips
Even with the best planning, you might encounter a few challenges along the way. Here are some common issues and how to address them:
* Powdery Mildew: This fungal disease can be a problem for squash plants. To prevent it, ensure good air circulation, avoid overhead watering, and apply a fungicide if necessary.
* Squash Vine Borers: These pests can tunnel into the stems of squash plants and kill them. To prevent them, wrap the base of the stems with aluminum foil or use row covers.
* Aphids: These tiny insects can suck the sap from squash plants. To control them, spray the plants with insecticidal soap or neem oil.
* Lack of Pollination: Squash plants need to be pollinated in order to produce fruit. If you’re not seeing any fruit develop, you may need to hand-pollinate the flowers.
Harvesting Your Squash
The moment you’ve been waiting for! Harvesting your squash is the most rewarding part of the process.
* Check for Ripeness: The time it takes for squash to mature varies depending on the variety. Check the seed packet or plant tag for specific harvesting instructions.
* Look for a Dull Rind: Winter squash is typically ready to harvest when the rind is hard and dull.
* Cut the Stem: Use a sharp knife or pruners to cut the stem of the squash, leaving a few inches of stem attached.
* Handle with Care: Be careful not to bruise or damage the squash during harvesting.
Enjoy Your Harvest!
Congratulations! You’ve successfully grown squash vertically. Now it’s time to enjoy the fruits (or rather, vegetables) of your labor. Use your homegrown squash in your favorite recipes, share it with friends and neighbors, or preserve it for later use.
I hope this guide has inspired you to try vertical squash growing. It’s a fun, rewarding,
Conclusion
So, there you have it! Embracing the vertical squash growing DIY method isn’t just a trendy gardening experiment; it’s a game-changer for maximizing your yields, conserving precious garden space, and adding a touch of architectural flair to your outdoor haven. We’ve explored the myriad benefits, from improved air circulation that combats common squash diseases like powdery mildew, to the sheer joy of watching your squash vines climb gracefully skyward.
Think about it: no more sprawling vines taking over your entire vegetable patch, no more struggling to find hidden fruits nestled amongst the foliage, and no more back-breaking bending to harvest your bounty. Instead, imagine a vibrant green wall adorned with plump, healthy squashes, easily accessible and a visual delight.
But the beauty of this DIY approach lies in its adaptability. Feel free to experiment with different support structures. While we’ve discussed trellises and cages, consider repurposing old ladders, constructing A-frames, or even using sturdy netting suspended between posts. The possibilities are truly endless, limited only by your imagination and the resources at your disposal.
For those seeking variations, consider the type of squash you choose to grow vertically. While smaller varieties like zucchini, yellow squash, and delicata are naturally well-suited, even larger squashes like butternut or acorn can thrive with proper support. Just be sure to provide ample reinforcement to accommodate their weight as they mature. You might even want to try growing pumpkins vertically, but be prepared to provide slings or hammocks to support the developing fruit.
Another exciting variation involves companion planting. Consider planting herbs like basil or marigolds at the base of your vertical squash structure. These not only add beauty but also help deter pests and attract beneficial insects, further enhancing the health and productivity of your squash plants.
Don’t be intimidated if you’re a beginner gardener. The vertical squash growing DIY method is surprisingly straightforward, and the rewards are well worth the effort. Start small, experiment with different techniques, and don’t be afraid to learn from your mistakes. Gardening is a journey, not a destination, and every season brings new opportunities for growth and discovery.
We wholeheartedly encourage you to give this DIY trick a try. Transform your garden into a vertical oasis, and experience the satisfaction of harvesting your own homegrown squashes in a whole new way. And most importantly, we want to hear about your experiences! Share your photos, tips, and challenges in the comments below. Let’s create a community of vertical squash growers, sharing our knowledge and inspiring each other to cultivate thriving gardens. Your insights could be invaluable to other gardeners embarking on this exciting adventure. So, grab your tools, gather your seeds, and get ready to elevate your squash growing game! Happy gardening!
Frequently Asked Questions (FAQ)
What types of squash are best suited for vertical growing?
While many squash varieties can be grown vertically, some are naturally better suited than others. Smaller, bush-type squashes like zucchini, yellow squash, and delicata are excellent choices due to their compact size and manageable weight. However, larger vining varieties like butternut, acorn, and even some pumpkins can also be grown vertically with proper support. The key is to provide a sturdy structure that can handle the weight of the mature fruit. For heavier squashes, consider using slings or hammocks made from fabric or netting to support the individual fruits as they develop. Remember to research the specific growth habits of your chosen squash variety to determine the best approach for vertical growing.
How do I provide adequate support for my vertical squash plants?
The type of support structure you choose will depend on the variety of squash you’re growing and the space you have available. Trellises, cages, A-frames, and even repurposed ladders can all be effective options. Ensure that the structure is sturdy enough to support the weight of the mature plants and fruits. For vining varieties, provide ample climbing space by using netting or twine to guide the vines upwards. Regularly check the support structure for any signs of weakness or damage, and reinforce it as needed. For heavier squashes, consider using slings or hammocks made from fabric or netting to support the individual fruits as they develop. These slings can be attached to the support structure to prevent the fruits from pulling the vines down.
How often should I water and fertilize my vertical squash plants?
Vertical squash plants tend to dry out more quickly than those grown on the ground, so regular watering is essential. Check the soil moisture regularly, and water deeply whenever the top inch feels dry. Avoid overhead watering, as this can promote fungal diseases. Instead, water at the base of the plants. Fertilize your vertical squash plants regularly with a balanced fertilizer, following the instructions on the product label. Squash are heavy feeders, so providing them with adequate nutrients is crucial for healthy growth and abundant fruit production. Consider using a slow-release fertilizer or supplementing with liquid fertilizer every few weeks.
What are some common pests and diseases that affect vertical squash plants, and how can I prevent them?
Vertical squash plants are susceptible to the same pests and diseases as those grown on the ground, including squash vine borers, squash bugs, aphids, and powdery mildew. However, the improved air circulation afforded by vertical growing can help reduce the risk of fungal diseases like powdery mildew. Regularly inspect your plants for signs of pests or diseases, and take action promptly if you notice any problems. Use organic pest control methods whenever possible, such as insecticidal soap, neem oil, or hand-picking pests off the plants. To prevent powdery mildew, ensure good air circulation, avoid overhead watering, and consider using a fungicide if necessary. Companion planting with herbs like basil or marigolds can also help deter pests and attract beneficial insects.
Can I grow squash vertically in containers?
Yes, you can definitely grow squash vertically in containers, but it’s important to choose a large enough container to accommodate the plant’s root system. A container that is at least 24 inches in diameter and 12 inches deep is recommended. Use a high-quality potting mix that drains well, and provide adequate support for the vines. Container-grown squash plants may require more frequent watering and fertilizing than those grown in the ground, as the soil in containers tends to dry out more quickly and nutrients can leach out over time. Choose smaller, bush-type squash varieties for container growing, as they are less likely to become root-bound.
What do I do if my squash fruits are too heavy for the vines to support?
If your squash fruits are becoming too heavy for the vines to support, you can provide additional support by using slings or hammocks made from fabric or netting. These slings can be attached to the support structure to prevent the fruits from pulling the vines down. Simply create a sling that cradles the fruit and attach it to the trellis or other support structure. This will help distribute the weight of the fruit and prevent the vines from breaking. You can also try pruning some of the excess foliage to reduce the overall weight of the plant.
How do I harvest my vertical squash?
Harvest your vertical squash when they are mature and have reached the desired size and color. Use a sharp knife or pruning shears to cut the squash from the vine, leaving a short stem attached. Handle the squash carefully to avoid bruising or damaging the skin. Store your harvested squash in a cool, dry place. The storage life of squash varies depending on the variety, but most winter squashes can be stored for several months if properly cured and stored.


Leave a Comment