

House cleaning tips – who doesn’t need them? Let’s be honest, maintaining a sparkling clean home can feel like a never-ending battle. You conquer one room, and another mess magically appears! But what if I told you there are simple, effective, and even enjoyable ways to keep your house looking its best without spending hours scrubbing?
For centuries, cultures around the world have developed unique cleaning rituals and techniques, often passed down through generations. From using natural ingredients like vinegar and baking soda to employing specific cleaning schedules, the pursuit of a tidy home is a timeless tradition. Think about the old wives’ tales your grandmother shared – many of them are surprisingly effective!
In today’s busy world, finding the time and energy for extensive cleaning can be a real challenge. That’s why I’m so excited to share these DIY house cleaning tips and hacks with you. They’re designed to save you time, money, and effort, allowing you to enjoy a cleaner, healthier, and more relaxing living space. We’ll explore everything from quick daily habits to tackling those stubborn cleaning tasks, all with easy-to-follow instructions and readily available supplies. Get ready to transform your cleaning routine and reclaim your weekends!

DIY Home Cleaning Hacks: Sparkling Clean on a Budget!
Okay, let’s face it, cleaning isn’t exactly anyone’s favorite pastime. But a clean home is a happy home, right? And it doesn’t have to break the bank or involve harsh chemicals. I’m going to share some of my favorite DIY cleaning hacks that will leave your place sparkling and smelling fresh, all while saving you money and being kinder to the environment.
General Cleaning Supplies Checklist
Before we dive into the specific hacks, let’s make sure you have the basics on hand. These are the staples I use for almost every cleaning task:
* Microfiber cloths: These are amazing! They pick up so much more dirt and dust than regular cloths, and they’re reusable.
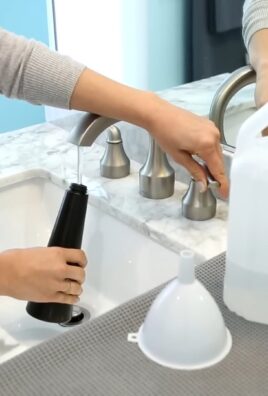
* Spray bottles: Essential for mixing your own cleaning solutions.
* Baking soda: A natural deodorizer and mild abrasive.
* White vinegar: A powerful cleaner and disinfectant.
* Lemon juice: Adds a fresh scent and helps cut through grease.
* Dish soap: A degreasing powerhouse.
* Essential oils (optional): For adding a pleasant scent to your cleaning solutions. Lavender, lemon, and tea tree are my go-to’s.
* Old toothbrush: Perfect for scrubbing hard-to-reach areas.
* Squeegee: For streak-free windows and shower doors.
* Rubber gloves: Protect your hands!
Cleaning Hack 1: The All-Purpose Cleaner
This is my go-to cleaner for almost everything – countertops, sinks, appliances, you name it! It’s simple, effective, and smells great.
Ingredients:
* 1 part white vinegar
* 1 part water
* A few drops of your favorite essential oil (optional)
Instructions:
1. Mix it up: In a spray bottle, combine the white vinegar and water.
2. Add fragrance (optional): Add a few drops of essential oil if you want a pleasant scent. I usually go for lemon or lavender.
3. Shake well: Make sure everything is mixed thoroughly.
4. Spray and wipe: Spray the solution onto the surface you want to clean and wipe it down with a microfiber cloth. For tougher stains, let the solution sit for a few minutes before wiping.
Important Note: Don’t use this cleaner on natural stone surfaces like granite or marble, as the vinegar can damage them.
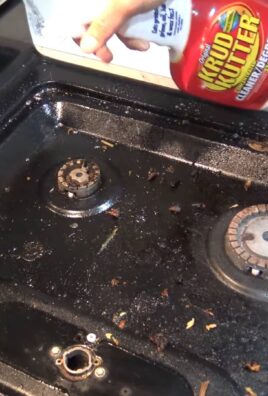
Cleaning Hack 2: Oven Cleaning Powerhouse
Oven cleaning is the worst, right? But this DIY method makes it so much easier and avoids those harsh chemical fumes.
Ingredients:
* Baking soda
* Water
* White vinegar
Instructions:
1. Empty the oven: Remove any racks, pans, or other items from your oven.
2. Make a baking soda paste: In a bowl, mix 1/2 cup of baking soda with enough water to form a thick paste.
3. Coat the oven: Spread the baking soda paste all over the inside of your oven, avoiding the heating elements. I usually wear gloves for this part.
4. Let it sit overnight: This is the key! Let the baking soda paste sit for at least 12 hours, or even better, overnight.
5. Wipe it down: The next day, use a damp cloth to wipe away as much of the baking soda paste as possible. You might need to use a scraper for stubborn areas.
6. Vinegar spray: Pour some white vinegar into a spray bottle and spray it all over the inside of the oven. The vinegar will react with any remaining baking soda, creating a foamy mixture.
7. Final wipe: Wipe away the vinegar and any remaining baking soda residue with a clean, damp cloth.
8. Replace the racks: Put the oven racks back in, and you’re done!
Cleaning Hack 3: Sparkling Shower and Tub
Soap scum and mildew can make your shower and tub look grimy. This DIY cleaner will cut through the grime and leave them sparkling.
Ingredients:
* White vinegar
* Dish soap
* Spray bottle
* Scrub brush or sponge
Instructions:
1. Heat the vinegar: Heat 1 cup of white vinegar in the microwave for about 2 minutes, or until it’s hot but not boiling.
2. Mix the solution: Pour the hot vinegar into a spray bottle and add 1 cup of dish soap.
3. Spray and let sit: Spray the solution all over the shower and tub surfaces, focusing on areas with soap scum and mildew. Let it sit for at least 30 minutes, or even longer for tough stains.
4. Scrub and rinse: Use a scrub brush or sponge to scrub away the grime. Rinse thoroughly with water.
5. Prevent future buildup: To prevent future buildup, keep a squeegee in your shower and use it to wipe down the walls and door after each use.
Cleaning Hack 4: Grout Cleaning Magic
Dirty grout can make your entire bathroom look dingy. This simple paste will brighten your grout and make it look like new.
Ingredients:
* Baking soda
* Hydrogen peroxide
* Old toothbrush
Instructions:
1. Make a paste: In a small bowl, mix baking soda and hydrogen peroxide to form a thick paste.
2. Apply to grout: Apply the paste to the grout lines using an old toothbrush.
3. Let it sit: Let the paste sit for about 10-15 minutes.
4. Scrub and rinse: Scrub the grout lines with the toothbrush and then rinse thoroughly with water.
5. Repeat if necessary: For stubborn stains, you may need to repeat the process.
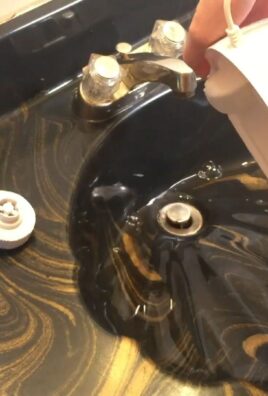
Cleaning Hack 5: Window and Mirror Shine
Streaky windows and mirrors are a pet peeve of mine! This DIY cleaner will give you a streak-free shine.
Ingredients:
* White vinegar
* Water
* Spray bottle
* Microfiber cloth or newspaper
Instructions:
1. Mix the solution: In a spray bottle, combine equal parts white vinegar and water.
2. Spray and wipe: Spray the solution onto the window or mirror and wipe it down with a microfiber cloth or crumpled newspaper. Newspaper actually works surprisingly well!
3. Dry with a clean cloth: Dry the surface with a clean, dry microfiber cloth to prevent streaks.
Cleaning Hack 6: Freshen Up Your Mattress
We spend a lot of time on our mattresses, so it’s important to keep them clean and fresh. This DIY method will help eliminate odors and dust mites.
Ingredients:
* Baking soda
* Essential oil (optional)
* Vacuum cleaner
Instructions:
1. Strip the bed: Remove all bedding from the mattress.
2. Sprinkle with baking soda: Sprinkle a generous amount of baking soda all over the mattress.
3. Add essential oil (optional): If you want to add a fresh scent, mix a few drops of your favorite essential oil with the baking soda before sprinkling it on the mattress.
4. Let it sit: Let the baking soda sit for at least 30 minutes, or even longer for a deeper clean.
5. Vacuum thoroughly: Vacuum the entire mattress thoroughly to remove all the baking soda.
6. Flip the mattress: Flip the mattress and repeat the process on the other side.
Cleaning Hack 7: Unclog a Drain Naturally
Clogged drains are a common problem, but you can often unclog them without resorting to harsh chemicals.
Ingredients:
* Baking soda
* White vinegar
* Boiling water
Instructions:
1. Pour baking soda: Pour about 1/2 cup of baking soda down the drain.
2. Add vinegar: Pour 1 cup of white vinegar down the drain.
3. Let it fizz: Let the mixture fizz for about 30 minutes.
4. Flush with boiling water: Pour a pot of boiling water down the drain to flush away the clog.
5. Repeat if necessary: If the drain is still clogged, repeat the process.
Cleaning Hack 8: Microwave Cleaning Made Easy
Microwaves can get pretty gross with splattered food. This hack makes cleaning them a breeze.
Ingredients:
* White vinegar or lemon juice
* Water
* Microwave-safe bowl
Instructions:
1. Mix the solution: In a microwave-safe bowl, combine 1 cup of water with 1/4 cup of white vinegar or lemon juice.
2. Microwave for 5 minutes: Microwave the mixture on high for 5 minutes

Conclusion
So, there you have it! Mastering these simple yet effective DIY house cleaning tips can truly revolutionize your cleaning routine and transform your home into a sparkling sanctuary. We’ve explored how to leverage readily available ingredients and clever techniques to tackle common household messes, all while saving money and reducing your reliance on harsh chemicals.
The beauty of these DIY solutions lies in their adaptability. Feel free to experiment with different essential oils in your all-purpose cleaner to create a scent that invigorates you. For instance, a few drops of lemon and tea tree oil not only smell fantastic but also boast antibacterial properties. If you’re dealing with particularly stubborn stains, consider adding a tablespoon of washing soda to your cleaning mixture for an extra boost. Remember to always test any new cleaning solution on an inconspicuous area first to ensure it doesn’t damage the surface.
Don’t underestimate the power of preventative measures either. Regularly wiping down surfaces after use, addressing spills immediately, and decluttering regularly can significantly reduce the amount of deep cleaning required. Think of it as a daily maintenance routine that keeps your home consistently fresh and inviting.
Beyond the practical benefits, embracing these DIY house cleaning tips is also a step towards a more sustainable lifestyle. By reducing your consumption of commercially produced cleaning products, you’re minimizing plastic waste and lessening your environmental footprint. It’s a small change that can make a big difference.
We genuinely believe that these tips will simplify your cleaning process and leave you with a cleaner, healthier, and happier home. But the real magic happens when you put them into practice. So, go ahead, give them a try! We’re confident that you’ll be amazed by the results.
And most importantly, we want to hear about your experiences! Share your successes, your challenges, and any variations you’ve discovered in the comments below. Let’s create a community where we can learn from each other and collectively elevate our cleaning game. Your insights could be invaluable to someone else who’s just starting their DIY cleaning journey. Let us know which of these **house cleaning tips** worked best for you!
Frequently Asked Questions (FAQ)
Q: Are these DIY cleaning solutions safe for all surfaces?
A: While most of these DIY cleaning solutions are generally safe for a wide range of surfaces, it’s always crucial to test them on an inconspicuous area first, especially on delicate materials like wood, marble, or granite. Avoid using abrasive cleaners or scrub brushes on surfaces that are prone to scratching. For instance, vinegar, while a powerful cleaner, can etch natural stone surfaces over time. For these surfaces, a mild soap and water solution is often the best choice. When in doubt, consult the manufacturer’s instructions for your specific surface.
Q: Can I use essential oils other than the ones mentioned in the recipes?
A: Absolutely! Essential oils offer a wonderful way to customize your cleaning solutions and add a pleasant aroma to your home. Lavender, eucalyptus, peppermint, and grapefruit are all excellent choices with their own unique properties. Lavender is known for its calming scent, eucalyptus has antibacterial and antiviral properties, peppermint can help to deter pests, and grapefruit offers a refreshing citrus scent. Just be sure to use pure, high-quality essential oils for the best results. Also, be mindful of potential allergies or sensitivities to certain oils. If you have pets, research which essential oils are safe to use around them, as some can be toxic.
Q: How long can I store these DIY cleaning solutions?
A: The shelf life of your DIY cleaning solutions will depend on the ingredients used. Solutions containing water are more prone to bacterial growth and should ideally be used within a week or two. Solutions made with vinegar or alcohol, which have natural preservative properties, can last longer, typically up to a month or two. Store your solutions in airtight containers in a cool, dark place to maximize their shelf life. Always label your containers clearly with the date and contents to avoid any confusion. If you notice any changes in color, odor, or consistency, it’s best to discard the solution and make a fresh batch.
Q: Are these DIY cleaning solutions effective against bacteria and viruses?
A: While some ingredients like vinegar, hydrogen peroxide, and certain essential oils possess antibacterial and antiviral properties, it’s important to understand that DIY cleaning solutions may not be as effective as commercially produced disinfectants that are specifically formulated to kill a wide range of pathogens. For general cleaning and maintenance, these DIY solutions are excellent. However, for situations where thorough disinfection is required, such as after someone has been sick, consider using a commercially available disinfectant that is EPA-registered.
Q: Can I use these DIY cleaning solutions if I have allergies or sensitivities?
A: If you have allergies or sensitivities, it’s crucial to be cautious when using any new cleaning product, including DIY solutions. Carefully review the ingredients list and avoid using anything you know you’re allergic to. Consider wearing gloves and a mask while cleaning to minimize exposure. If you experience any adverse reactions, such as skin irritation, respiratory problems, or headaches, discontinue use immediately and consult with a healthcare professional. You can also try making smaller batches of the solutions to test your tolerance before committing to a larger quantity.
Q: What’s the best way to clean a really dirty oven using DIY methods?
A: Cleaning a grimy oven can feel like a daunting task, but a simple baking soda paste can work wonders. Mix baking soda with enough water to form a spreadable paste. Coat the entire interior of your oven with the paste, avoiding the heating elements. Let it sit overnight (or for at least 12 hours). The next day, wipe away the paste with a damp cloth. For stubborn spots, use a scrub brush or sponge. You can also spray a little vinegar on any remaining baking soda residue to create a fizzing action that helps to loosen the grime. This method is non-toxic and effective at breaking down baked-on food and grease.
Q: How can I naturally freshen the air in my home?
A: There are several natural ways to freshen the air in your home without resorting to chemical-laden air fresheners. Simmering a pot of water with citrus peels, cinnamon sticks, and cloves can create a warm and inviting aroma. You can also place bowls of baking soda around your home to absorb odors. Another option is to use an essential oil diffuser with your favorite scents. Houseplants are also excellent air purifiers, helping to remove toxins and improve air quality. Regularly opening windows to ventilate your home is also a simple yet effective way to freshen the air.
Leave a Comment