

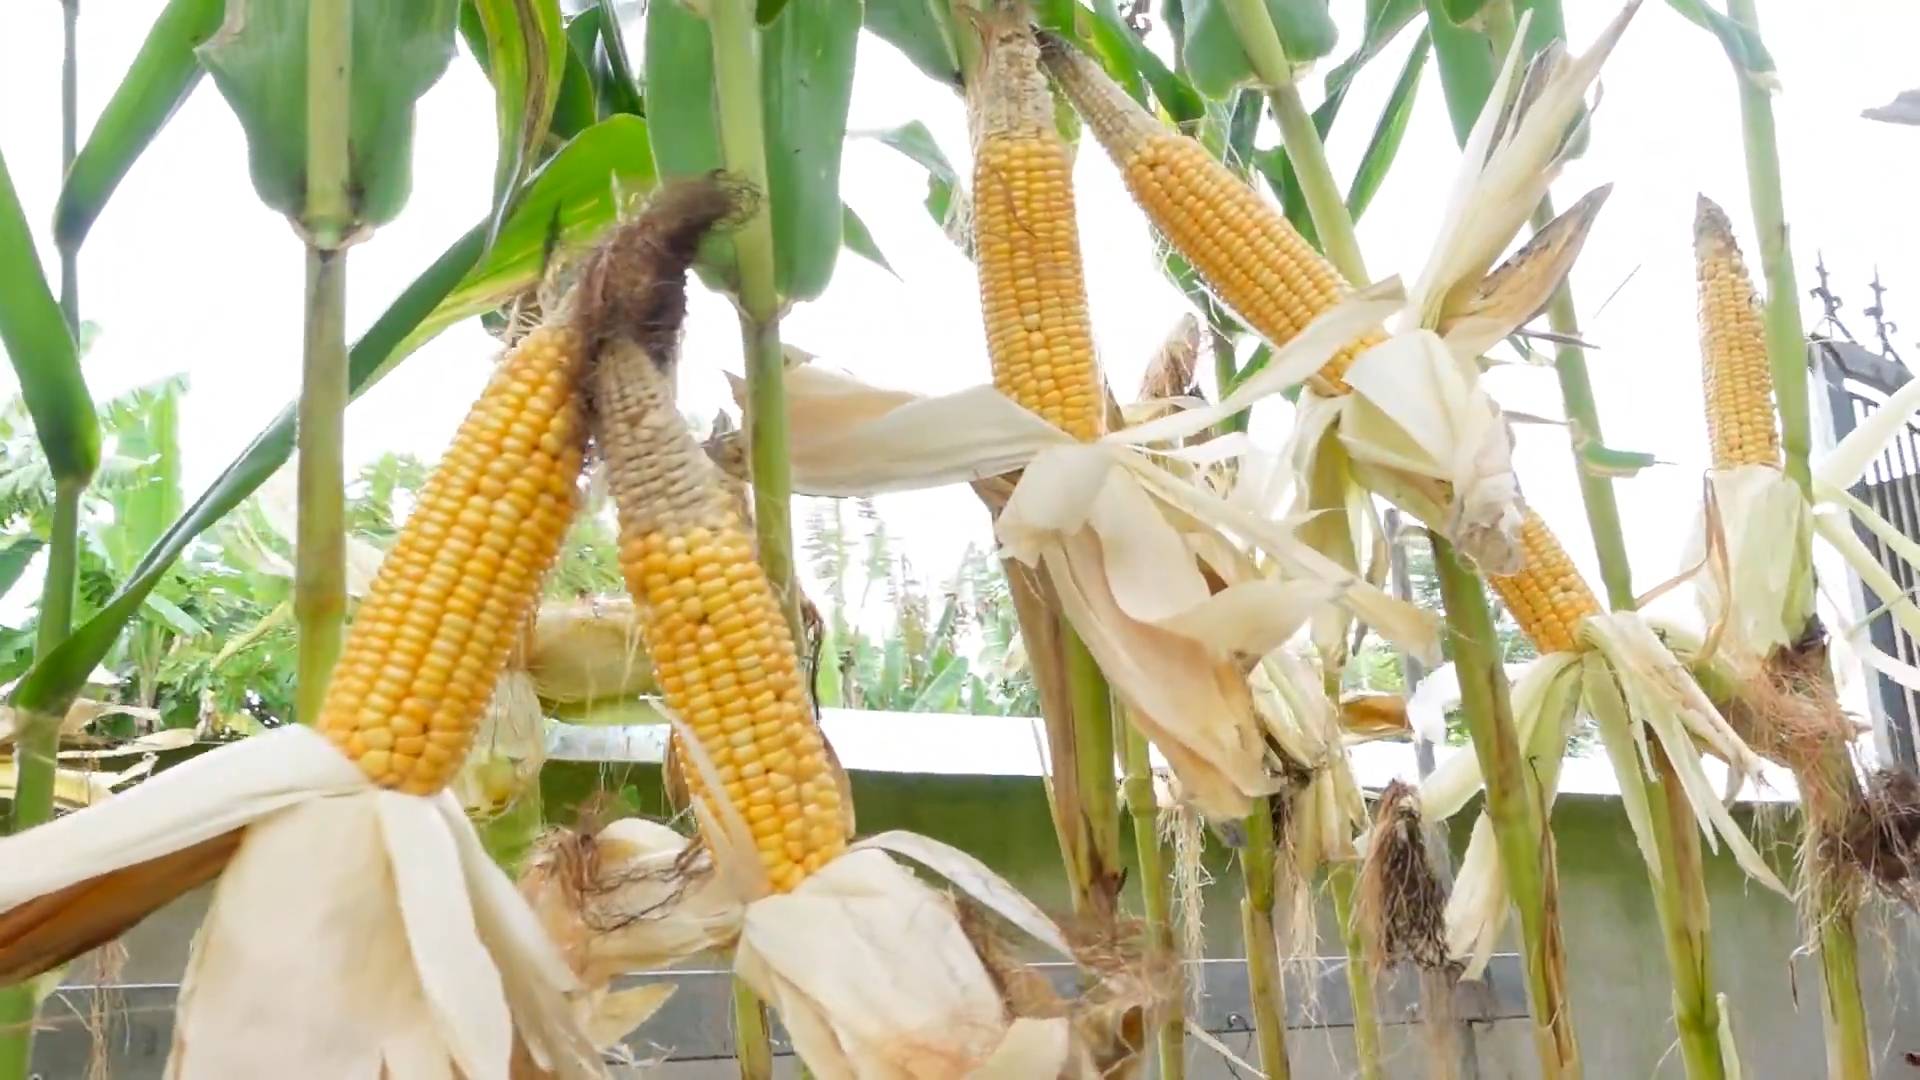
Growing corn in sacks might sound unconventional, but trust me, it’s a game-changer for home gardeners like us! Are you dreaming of sweet, juicy corn on the cob, but limited by space? Or perhaps you’re battling poor soil conditions that make traditional gardening a challenge? Well, get ready to ditch the limitations and embrace a surprisingly simple and effective DIY method that will bring the taste of summer right to your doorstep.
The concept of container gardening, including using sacks, isn’t new. Throughout history, resourceful gardeners have adapted to their environments, utilizing whatever materials were available to cultivate food. From ancient rooftop gardens to modern urban farming initiatives, the spirit of innovation has always been at the heart of growing our own food. This method of growing corn in sacks is a modern twist on that resourceful tradition.
But why should you bother with this DIY trick? Because it’s incredibly practical! It allows you to control the soil quality, move your corn plants to the sunniest spots, and even extend your growing season. Plus, it’s a fantastic way to recycle old sacks and reduce waste. In this article, I’ll walk you through every step of the process, from choosing the right sack to harvesting your delicious, homegrown corn. Get ready to unleash your inner gardener and enjoy the satisfaction of growing your own corn, no matter how small your space!
Growing Corn in Sacks: A DIY Guide to Bountiful Harvests in Small Spaces
Hey there, fellow gardening enthusiasts! Ever dreamed of enjoying fresh, homegrown corn but thought you didn’t have the space? Well, I’m here to tell you that you absolutely can! Growing corn in sacks is a fantastic way to cultivate this delicious crop, even if you’re short on garden real estate. It’s a surprisingly simple and rewarding project, and I’m excited to share my tried-and-true method with you. Let’s get started!
What You’ll Need
Before we dive into the nitty-gritty, let’s gather our supplies. This is crucial for a smooth and enjoyable gardening experience. Here’s a comprehensive list:
* Sacks: Burlap sacks, heavy-duty plastic bags (like those used for animal feed), or even large grow bags will work. Aim for a size that’s at least 24 inches in diameter and 36 inches tall. The larger the sack, the more corn you can grow!
* Potting Mix: A high-quality potting mix is essential. Avoid using garden soil directly, as it can compact and hinder drainage in a sack. I recommend a mix that’s rich in organic matter and well-draining.
* Compost: Compost is your corn’s best friend! It provides essential nutrients and improves soil structure. Use well-rotted compost for optimal results.
* Slow-Release Fertilizer: Corn is a heavy feeder, so a slow-release fertilizer will provide a steady supply of nutrients throughout the growing season. Look for a fertilizer specifically formulated for vegetables.
* Corn Seeds: Choose a variety of corn that’s suitable for your climate and growing season. Sweet corn is a popular choice, but you can also grow popcorn or ornamental corn.
* Watering Can or Hose: Consistent watering is key to successful corn cultivation.
* Trowel or Shovel: For mixing soil and planting seeds.
* Stakes or Support System (Optional): Depending on the corn variety and your local weather conditions, you may need to provide support to prevent the stalks from falling over.
* Gloves: To keep your hands clean and protected.
* Measuring Cup or Spoon: For accurate fertilizer application.
Preparing Your Sacks
This step is all about creating the perfect environment for your corn to thrive.
1. Choose Your Location: Corn needs at least 6-8 hours of direct sunlight per day. Select a sunny spot in your yard or on your balcony where your sacks will receive ample sunlight.
2. Prepare the Sacks: If you’re using burlap sacks, you don’t need to do much preparation. If you’re using plastic bags, poke several drainage holes in the bottom to prevent waterlogging. This is super important!
3. Create a Soil Mixture: In a large container or on a tarp, mix together the potting mix, compost, and slow-release fertilizer. I usually go for a ratio of 2 parts potting mix, 1 part compost, and follow the fertilizer instructions on the package. Mix everything thoroughly to ensure even distribution of nutrients.
4. Fill the Sacks: Fill each sack with the soil mixture, leaving about 4-6 inches of space at the top. This will make watering easier and prevent soil from spilling over.
Planting Your Corn Seeds
Now for the fun part – planting!
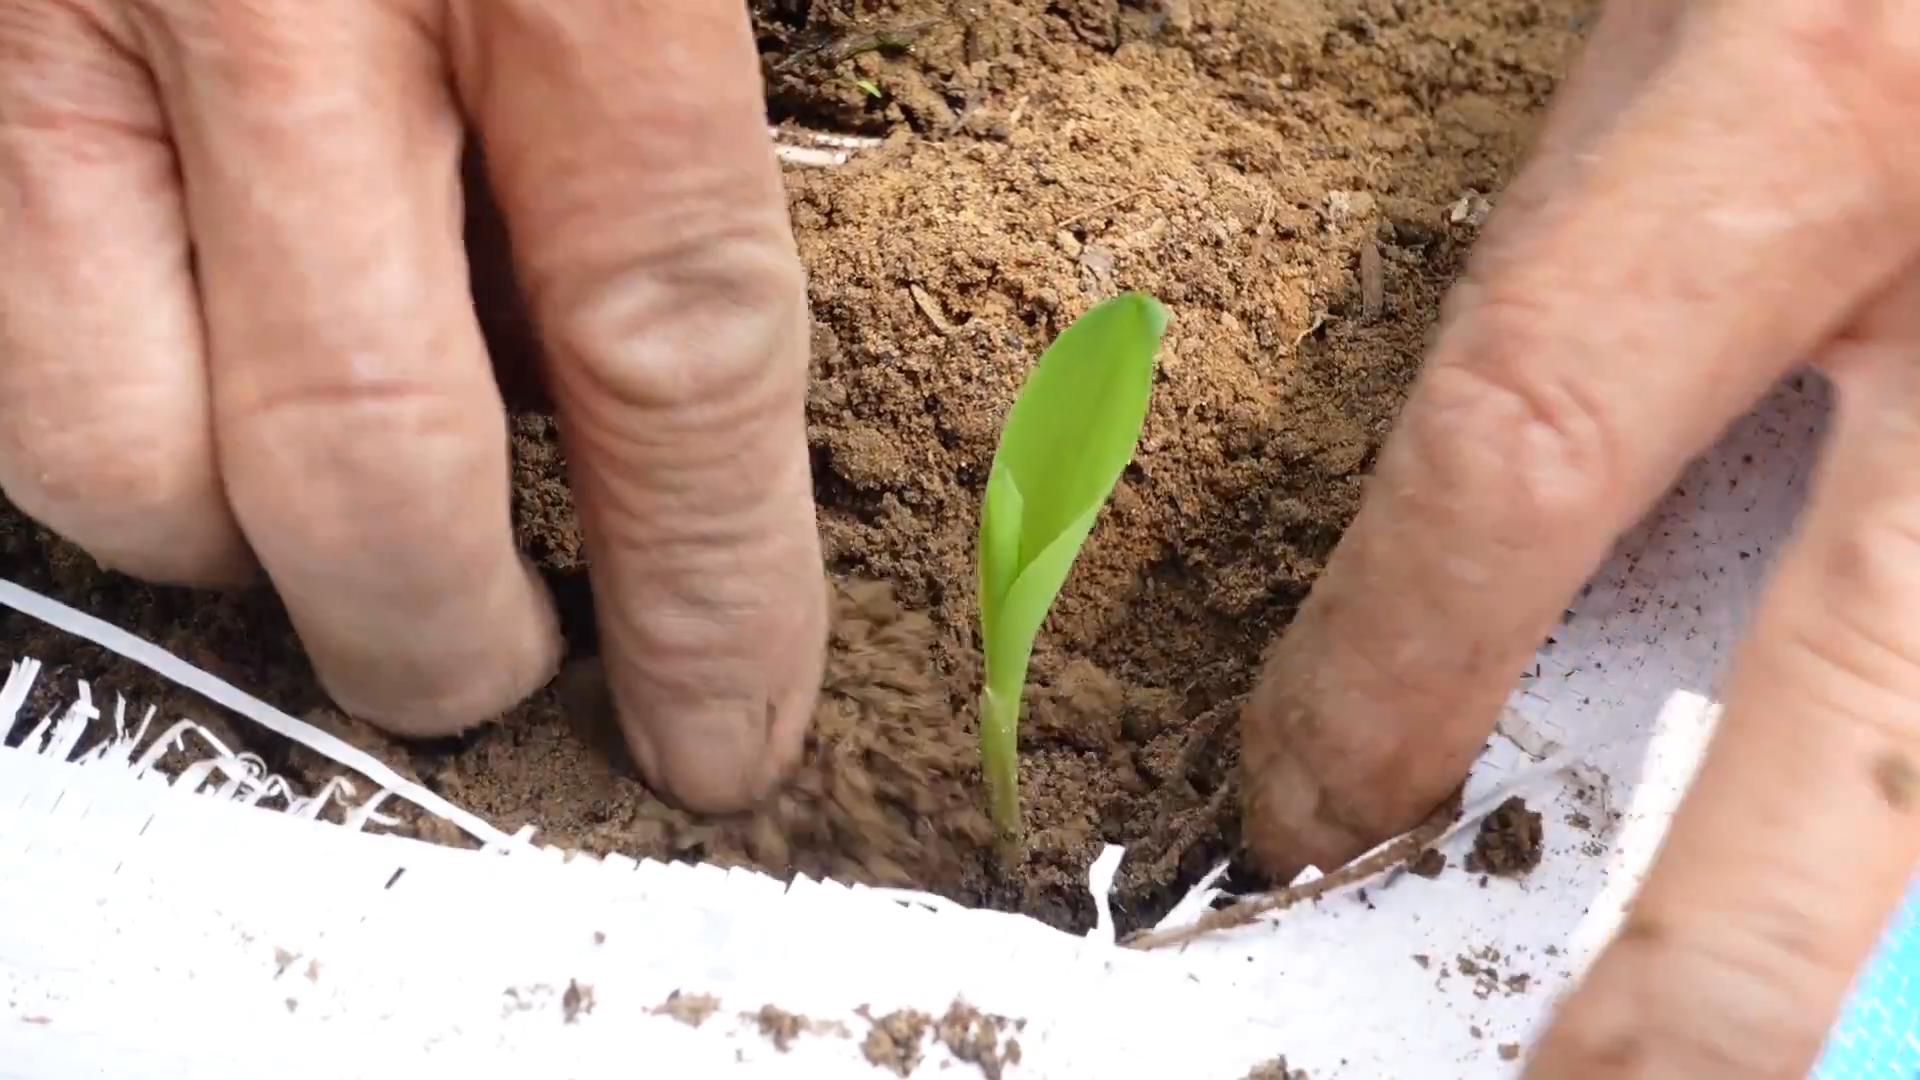
1. Sowing the Seeds: Plant 3-4 corn seeds per sack, spacing them evenly around the center. Plant the seeds about 1-2 inches deep. I like to make small holes with my finger and then gently cover the seeds with soil.
2. Water Thoroughly: After planting, water the sacks thoroughly until the soil is evenly moist. Be careful not to overwater, as this can cause the seeds to rot.
3. Thinning Seedlings: Once the seedlings emerge (usually within 7-10 days), thin them to the strongest 2-3 plants per sack. This will give the remaining plants enough space to grow and develop. I know it’s hard to remove the weaker ones, but trust me, it’s for the best!
Caring for Your Corn
Consistent care is essential for a successful corn harvest.
1. Watering: Corn needs consistent moisture, especially during hot weather. Water deeply whenever the top inch of soil feels dry to the touch. Avoid watering the foliage directly, as this can promote fungal diseases. I prefer to water in the morning to allow the foliage to dry out during the day.
2. Fertilizing: Corn is a heavy feeder, so you’ll need to supplement the slow-release fertilizer with additional feedings throughout the growing season. I like to use a liquid fertilizer every 2-3 weeks, following the instructions on the package.
3. Weeding: Keep the sacks free of weeds, as they can compete with the corn for nutrients and water. Hand-pull any weeds that emerge.
4. Pollination: Corn is wind-pollinated, so you may need to assist with pollination if you’re growing corn in a sheltered location. When the tassels (the male flowers at the top of the plant) begin to shed pollen, gently shake the stalks to release the pollen. You can also cut off a tassel and rub it against the silks (the female flowers that emerge from the ears of corn). This is especially important if you’re only growing a few plants.
5. Support: As the corn stalks grow taller, they may become susceptible to wind damage. If you live in a windy area, consider providing support by staking the stalks or using a tomato cage.
6. Pest Control: Keep an eye out for common corn pests, such as corn earworms and aphids. If you notice any pests, take action immediately to prevent them from damaging your crop. I prefer to use organic pest control methods, such as insecticidal soap or neem oil.
Harvesting Your Corn
The moment you’ve been waiting for!
1. Determining Ripeness: Corn is typically ready to harvest about 60-100 days after planting, depending on the variety. The silks will turn brown and dry, and the ears will feel plump and full.
2. Checking the Kernels: To check for ripeness, peel back a small portion of the husk and puncture a kernel with your fingernail. If the liquid that comes out is milky, the corn is ready to harvest. If the liquid is clear, the corn needs more time to mature.
3. Harvesting the Ears: To harvest the ears, grasp the ear firmly and twist it downward. The ear should snap off easily from the stalk.
4. Enjoy Your Harvest: Enjoy your fresh, homegrown corn! You can eat it right off the cob, grill it, or use it in your favorite recipes.
Troubleshooting
Even with the best planning, sometimes things don’t go exactly as expected. Here are a few common issues you might encounter and how to address them:
* Poor Germination: If your seeds don’t germinate, it could be due to several factors, such as cold soil, overwatering, or poor-quality seeds. Make sure the soil temperature is warm enough (around 60-70°F) before planting. Avoid overwatering, and use fresh, high-quality seeds.
* Yellowing Leaves: Yellowing leaves can indicate a nutrient deficiency, especially nitrogen. Fertilize with a nitrogen-rich fertilizer to correct the deficiency.
* Stunted Growth: Stunted growth can be caused by a variety of factors, such as poor soil, lack of sunlight, or pest infestations. Make sure your corn is getting enough sunlight and nutrients, and control any pests that may be present.
* Ears Not Filling Out: If the ears of corn are not filling out properly, it could be due to poor pollination or a lack of nutrients. Assist with pollination by shaking the stalks or rubbing the tassels against the silks. Fertilize with a fertilizer that’s high in phosphorus and potassium.
Choosing the Right Corn Variety
Selecting the right corn variety is crucial for success. Consider these factors:
* Climate: Choose a variety that’s well-suited to your local climate and growing season. Some varieties are more tolerant of heat or cold than others.
* Days to Maturity: Pay attention to the days to maturity, which is the number of days it takes for the corn to reach harvest. Choose a variety that will mature within your growing season.
* Sweetness: Sweet corn varieties vary in sweetness. Some are super sweet, while others are more traditional. Choose a variety that suits your taste preferences.
* Purpose: Consider what you want to use the corn for. Sweet corn is best for eating fresh, while popcorn is best for popping. Ornamental corn is grown for its colorful kernels and is often used for decoration.
Tips for Success
Here are a few extra tips to help you achieve a bountiful corn harvest:
* Start Early:
Conclusion
So, there you have it! Growing corn in sacks is not just a quirky gardening experiment; it’s a game-changer for anyone with limited space, challenging soil conditions, or simply a desire for a more controlled and efficient harvest. We’ve explored the ins and outs of this method, highlighting its benefits, from space-saving efficiency to improved soil management and pest control.
This DIY trick is a must-try because it democratizes corn cultivation. No longer do you need acres of farmland to enjoy the sweet taste of homegrown corn. Whether you have a small balcony, a patio, or a tiny backyard, you can now cultivate your own mini cornfield. The satisfaction of harvesting your own corn, knowing you nurtured it from seed to cob, is an experience that’s hard to beat.
But the beauty of growing corn in sacks lies not only in its practicality but also in its adaptability. Feel free to experiment with different varieties of corn. Try growing sweet corn for grilling, popcorn varieties for movie nights, or even ornamental corn for fall decorations. You can also adjust the size of your sacks to suit your space and desired yield. Consider using different types of growing mediums, such as a mix of compost, perlite, and vermiculite, to optimize drainage and nutrient availability.
Don’t be afraid to get creative with your sack design. You can use burlap sacks for a rustic look, plastic grow bags for durability, or even repurposed feed sacks for an eco-friendly option. You can also add drainage holes to the bottom of the sacks to prevent waterlogging.
Remember to monitor your corn plants regularly for signs of pests or diseases. Early detection is key to preventing major problems. You can use organic pest control methods, such as neem oil or insecticidal soap, to keep your plants healthy.
We believe that growing corn in sacks is a rewarding and accessible gardening project for everyone. It’s a chance to connect with nature, learn about the growing process, and enjoy the fruits (or rather, the cobs) of your labor.
So, what are you waiting for? Grab some sacks, soil, and corn seeds, and get started on your own corn-growing adventure. We’re confident that you’ll be amazed by the results.
And most importantly, we want to hear about your experience! Share your photos, tips, and challenges with us in the comments below. Let’s create a community of sack-corn growers and learn from each other. Your insights could inspire others to try this innovative method and discover the joy of homegrown corn. Let’s make growing corn in sacks a widespread success!
Frequently Asked Questions (FAQ)
1. What type of sack is best for growing corn?
The best type of sack depends on your preferences and resources. Burlap sacks offer a natural, breathable option, but they may decompose over time. Plastic grow bags are durable and waterproof, but they may not be as environmentally friendly. Repurposed feed sacks are a sustainable choice, but make sure they are clean and free of any harmful residues. The key is to choose a sack that is large enough to accommodate the corn plants’ root system and that provides adequate drainage. Aim for a sack that is at least 18 inches in diameter and 24 inches deep.
2. What kind of soil should I use for growing corn in sacks?
Corn thrives in well-draining, nutrient-rich soil. A good mix would be equal parts of compost, topsoil, and either perlite or vermiculite. The compost provides essential nutrients, the topsoil provides structure, and the perlite or vermiculite improves drainage and aeration. Avoid using heavy clay soil, as it can become waterlogged and suffocate the roots. You can also amend your soil with slow-release fertilizer to provide a steady supply of nutrients throughout the growing season.
3. How many corn plants can I grow in one sack?
This depends on the size of the sack and the variety of corn you are growing. As a general rule, you can plant 3-4 corn plants in a sack that is 18 inches in diameter. Make sure to space the plants evenly around the sack to allow for adequate sunlight and air circulation. Overcrowding can lead to stunted growth and increased susceptibility to pests and diseases.
4. How often should I water corn grown in sacks?
Corn grown in sacks needs regular watering, especially during hot and dry weather. Check the soil moisture regularly by sticking your finger into the soil. If the top inch of soil feels dry, it’s time to water. Water deeply until the water drains out of the bottom of the sack. Avoid overwatering, as this can lead to root rot. A good rule of thumb is to water every 2-3 days, but adjust the frequency based on the weather conditions and the moisture level of the soil.
5. How much sunlight does corn need when grown in sacks?
Corn requires at least 6-8 hours of direct sunlight per day to thrive. Choose a location for your sacks that receives plenty of sunlight throughout the day. If you live in a particularly hot climate, you may need to provide some afternoon shade to prevent the plants from scorching.
6. What are some common pests and diseases that affect corn, and how can I prevent them?
Common pests that affect corn include corn earworms, aphids, and spider mites. Common diseases include corn smut and leaf blight. To prevent these problems, monitor your plants regularly for signs of infestation or disease. Use organic pest control methods, such as neem oil or insecticidal soap, to control pests. Ensure good air circulation around the plants to prevent fungal diseases. Remove any infected leaves or plants promptly to prevent the spread of disease.
7. How do I know when my corn is ready to harvest?
The time it takes for corn to mature depends on the variety and the growing conditions. Generally, sweet corn is ready to harvest about 60-90 days after planting. The silks on the ears will turn brown and dry, and the kernels will be plump and milky when squeezed. To test for ripeness, peel back a portion of the husk and puncture a kernel with your fingernail. If the liquid that comes out is milky, the corn is ready to harvest. If the liquid is clear, the corn needs more time to mature.
8. Can I grow corn in sacks indoors?
While it’s possible to grow corn in sacks indoors, it’s not ideal. Corn requires a lot of sunlight, which can be difficult to provide indoors. You would need to supplement with strong grow lights to provide adequate light for the plants to thrive. Additionally, indoor corn plants may be more susceptible to pests and diseases due to the lack of natural predators and air circulation. If you do decide to grow corn indoors, choose a dwarf variety and provide plenty of light, ventilation, and humidity.
9. Can I reuse the soil from the sacks for future plantings?
Yes, you can reuse the soil from the sacks, but it’s important to replenish the nutrients that have been depleted by the corn plants. Amend the soil with compost, fertilizer, or other organic matter to restore its fertility. You may also want to sterilize the soil to kill any pests or diseases that may be present. You can do this by baking the soil in the oven at 200 degrees Fahrenheit for 30 minutes or by solarizing it in a black plastic bag for several weeks.
10. What are some other variations I can try when growing corn in sacks?
There are many variations you can try when growing corn in sacks. You can experiment with different varieties of corn, different types of growing mediums, and different sack designs. You can also try companion planting, such as planting beans or squash alongside your corn to improve soil fertility and pest control. Another variation is to use a vertical growing system, such as a tower garden, to maximize space and yield. The possibilities are endless!
Leave a Comment