

Vegetable gardening without a garden might sound like an oxymoron, right? But trust me, it’s absolutely possible, and I’m here to show you how! Forget the sprawling backyard and back-breaking tilling – we’re about to unlock the secrets to fresh, homegrown veggies, even if your “garden” is a sunny balcony, a small patio, or even just a windowsill.
Humans have cultivated food in containers for centuries. From the hanging gardens of Babylon to the humble window boxes of European cottages, the desire to nurture life and enjoy fresh produce has always found a way. Today, with urban living on the rise and space at a premium, the need for innovative gardening solutions is greater than ever.
Are you tired of bland, store-bought vegetables lacking that vibrant, homegrown flavor? Do you dream of snipping fresh herbs for your dinner, but lack the space for a traditional garden? Then this DIY guide is for you! I’ll walk you through simple, effective techniques to start your own thriving vegetable gardening without a garden. We’ll cover everything from choosing the right containers and soil to selecting the best vegetables for small spaces and mastering essential care tips. Get ready to transform your limited space into a bountiful edible oasis!
Vegetable Gardening Without a Garden: Container Gardening for Beginners
Okay, so you’re itching to grow your own veggies, but you don’t have a sprawling backyard? No problem! Container gardening is your answer. It’s a fantastic way to enjoy fresh, homegrown produce even if you only have a balcony, patio, or even just a sunny windowsill. I’m going to walk you through everything you need to know to get started. Trust me, it’s easier than you think, and the rewards are delicious!
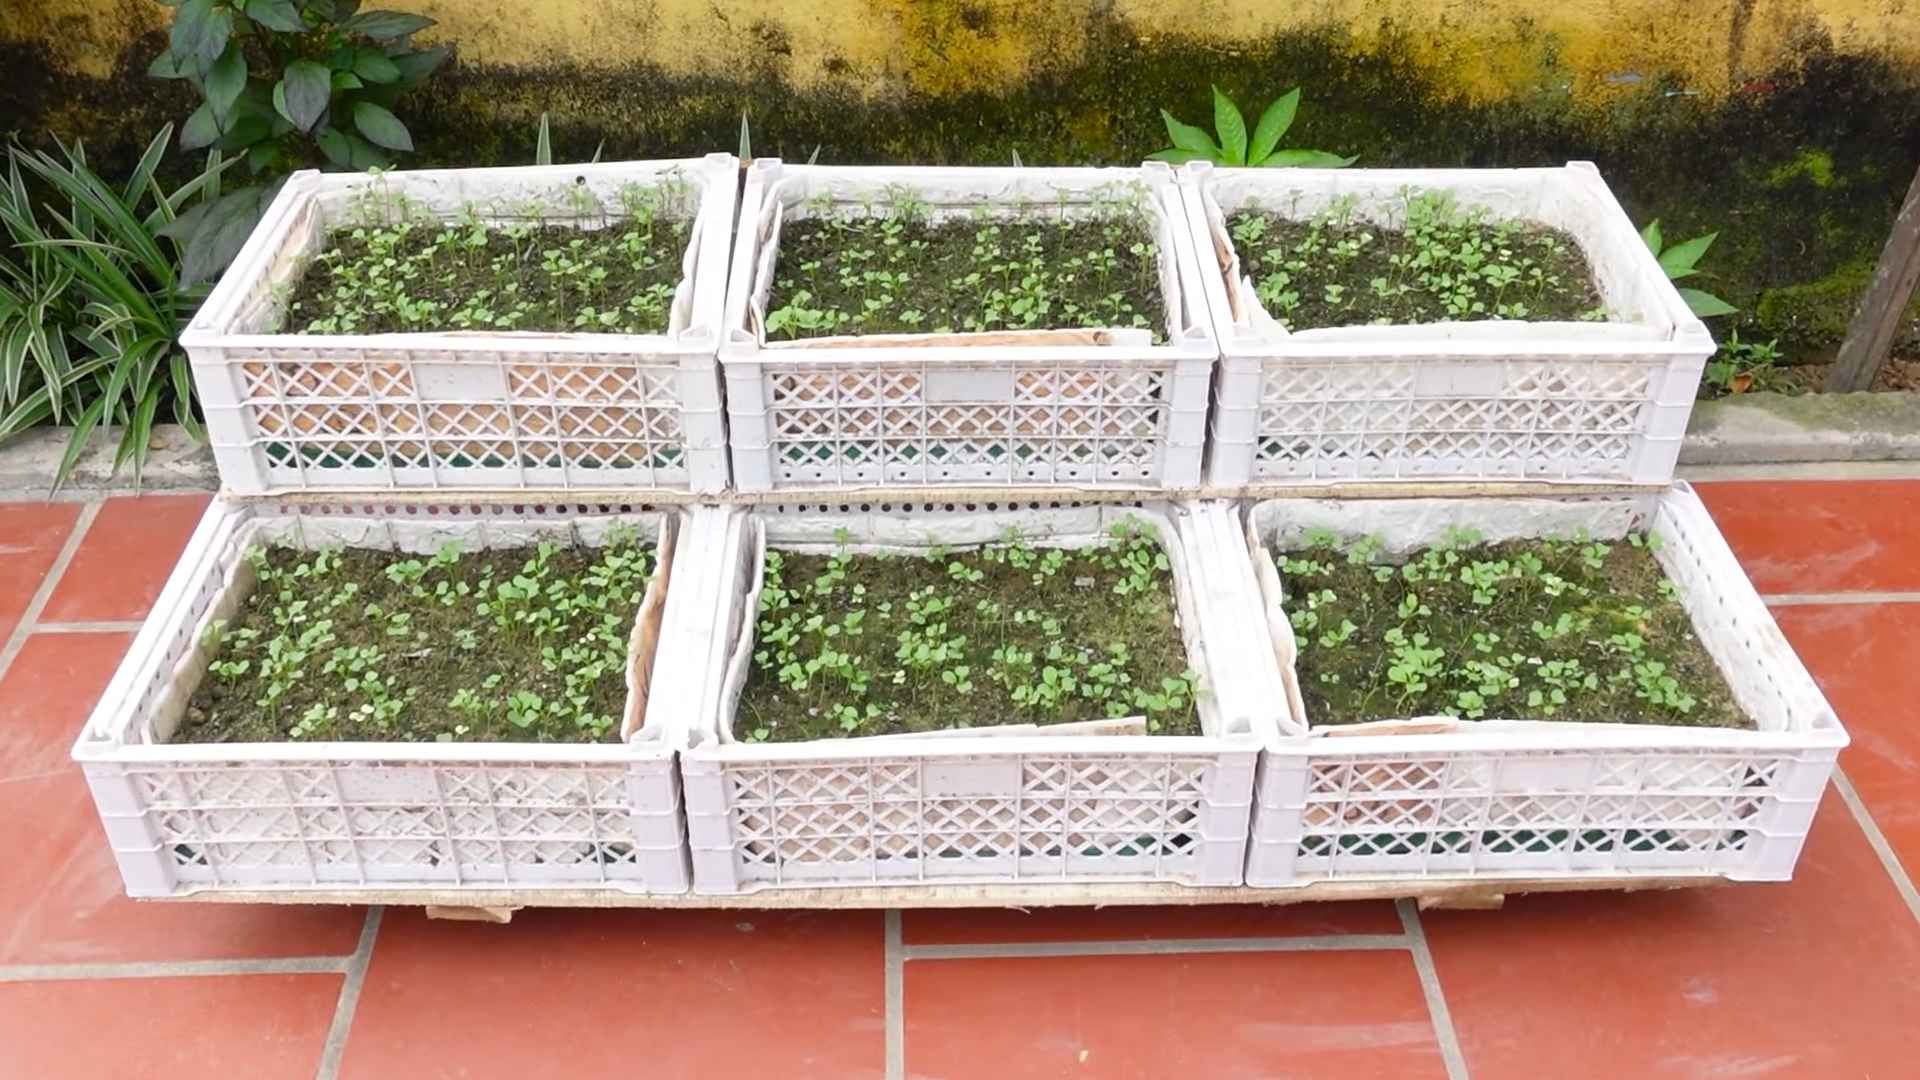
Choosing the Right Containers
The first step is picking the perfect homes for your future veggies. Don’t just grab the first pot you see! Consider these factors:
* Size Matters: This is crucial! Different vegetables need different amounts of space for their roots to thrive.
* Small Plants (Herbs, Lettuce, Radishes): 6-8 inch diameter pots are usually sufficient.
* Medium Plants (Peppers, Bush Beans, Eggplant): 12-14 inch diameter pots are ideal.
* Large Plants (Tomatoes, Zucchini, Cucumbers): 18-24 inch diameter pots are a must. These guys need room to spread out!
* Material: You have tons of options here!
* Plastic: Lightweight, inexpensive, and retains moisture well. Great for beginners! Just make sure they’re UV-resistant to prevent them from cracking in the sun.
* Terracotta: Classic and beautiful, but they dry out faster than plastic. You’ll need to water more frequently.
* Ceramic: Similar to terracotta, but often glazed, which helps retain moisture a bit better. Can be heavy, though.
* Wood: Adds a rustic touch, but needs to be treated to prevent rotting. Cedar is a good choice because it’s naturally rot-resistant.
* Fabric Pots: These are becoming increasingly popular! They allow for excellent drainage and air circulation, which promotes healthy root growth.
* Drainage: This is non-negotiable! Every container *must* have drainage holes. Soggy roots are a recipe for disaster. If your chosen container doesn’t have holes, you’ll need to drill some.
* Location, Location, Location: Think about where you’ll be placing your containers. Dark-colored pots absorb more heat, which can be beneficial in cooler climates but detrimental in hotter ones.
Selecting the Right Soil
Forget using garden soil straight from the ground! It’s too heavy and doesn’t drain well in containers. You need a good quality potting mix.
* Potting Mix vs. Potting Soil: These terms are often used interchangeably, but technically, potting mix is a soilless medium. It’s usually a blend of peat moss, perlite, vermiculite, and sometimes compost.
* Why Potting Mix? It’s lightweight, drains well, and provides good aeration for the roots.
* DIY Potting Mix: If you’re feeling ambitious, you can make your own! A simple recipe is equal parts peat moss (or coconut coir), perlite, and compost.
* Enriching Your Soil: Consider adding some slow-release fertilizer to your potting mix. This will provide your plants with a steady supply of nutrients over time. Bone meal and blood meal are great organic options.
Choosing Your Vegetables
Not all vegetables are created equal when it comes to container gardening. Some thrive in pots, while others are better suited for in-ground planting. Here are some of my favorites for containers:
* Tomatoes: Cherry tomatoes and determinate (bush) varieties are your best bet. Indeterminate (vining) tomatoes need a lot of space and support.
* Peppers: Bell peppers, chili peppers, and sweet peppers all do well in containers.
* Eggplant: Choose compact varieties.
* Lettuce and Salad Greens: Easy to grow and harvest repeatedly.
* Spinach: Similar to lettuce, spinach is a great container crop.
* Radishes: Quick to mature and don’t need much space.
* Bush Beans: Pole beans need a trellis, so stick with bush varieties for containers.
* Herbs: Basil, mint, oregano, thyme, rosemary – the possibilities are endless! Herbs are perfect for containers.
* Strawberries: A delightful addition to any container garden.
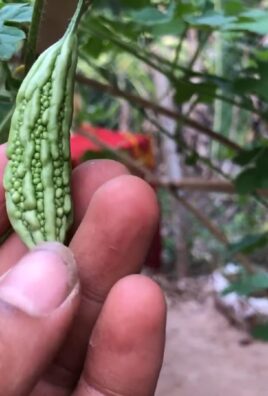
* Cucumbers: Choose bush or compact varieties. You’ll still need to provide some support for them to climb.
* Zucchini: Select bush varieties for container gardening.
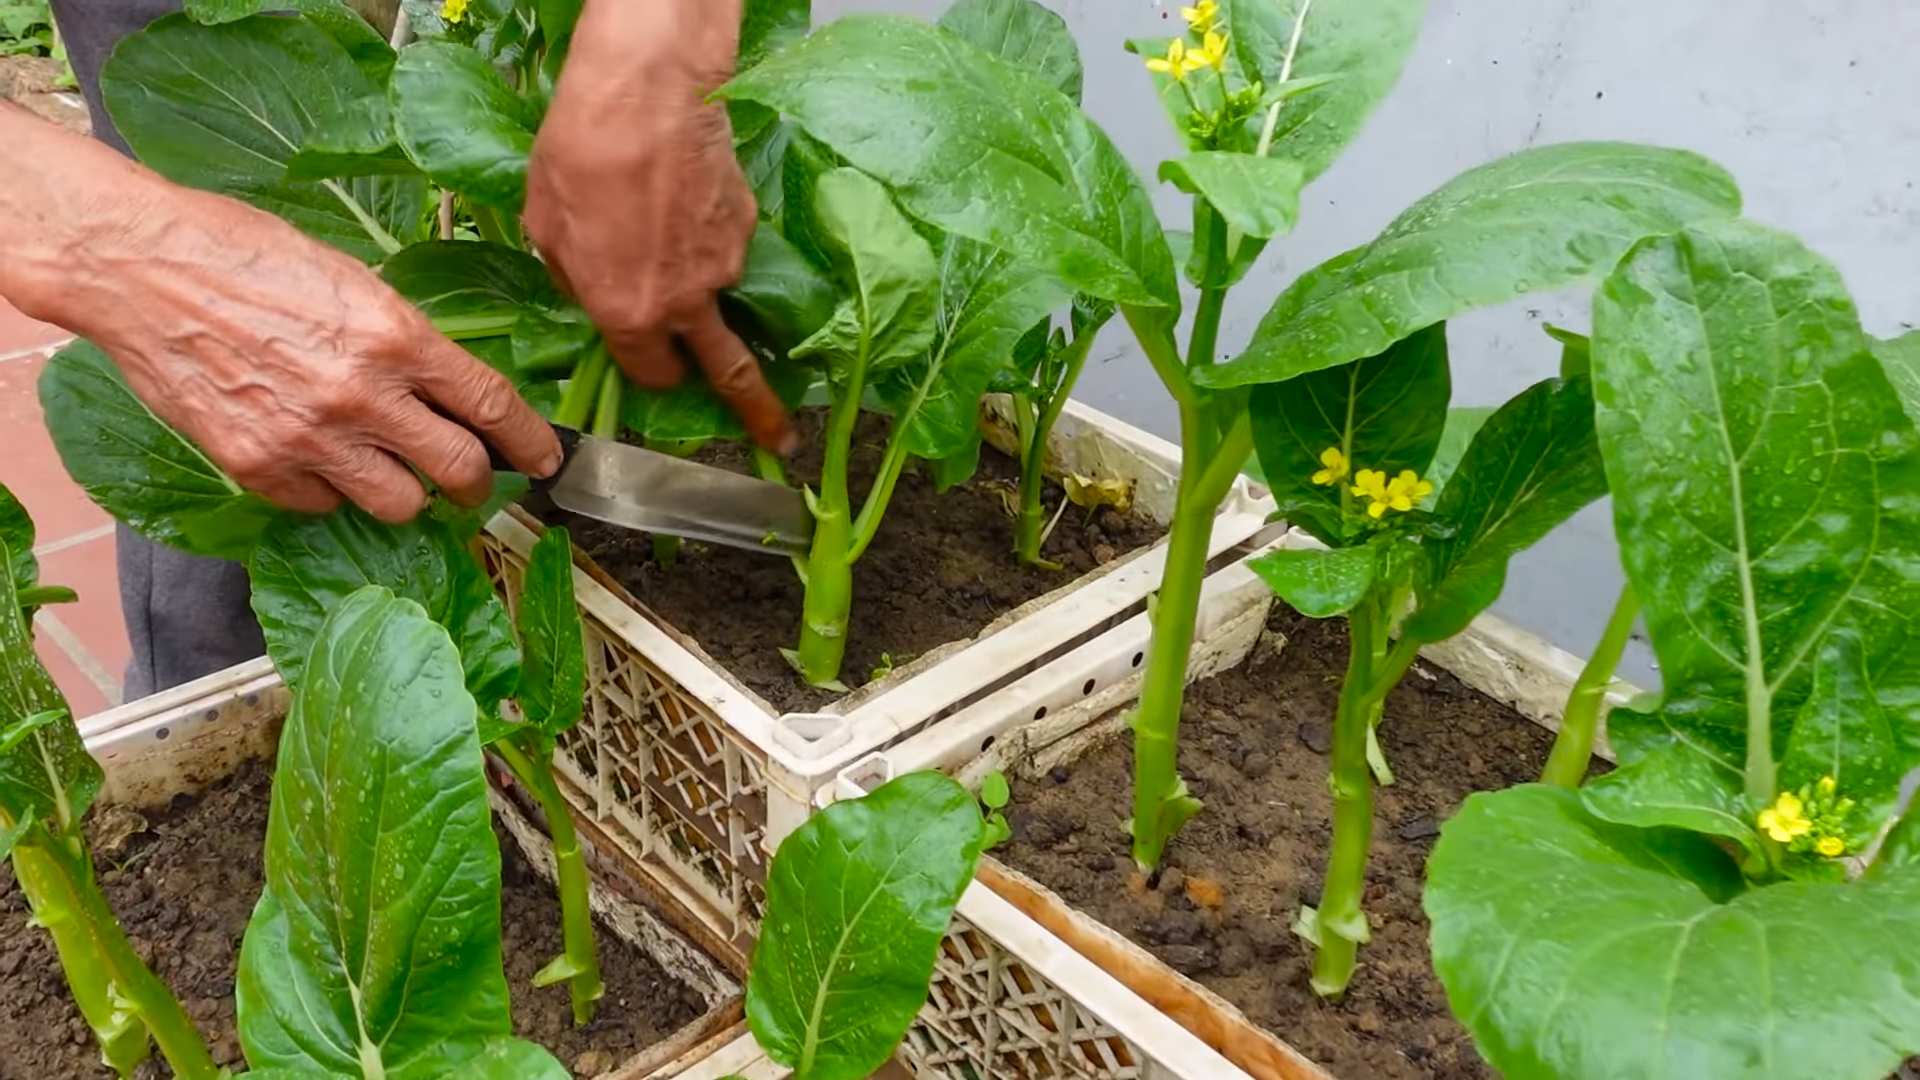
Planting Your Vegetables
Alright, let’s get our hands dirty!
1. Gather Your Supplies: You’ll need your containers, potting mix, vegetable seedlings or seeds, a trowel, and watering can.
2. Prepare the Containers: If you’re using new containers, give them a quick rinse. If you’re reusing containers, wash them thoroughly with soap and water to remove any lingering pathogens.
3. Fill the Containers: Fill the containers with potting mix, leaving about an inch or two of space at the top.
4. Planting Seedlings:
* Gently remove the seedling from its nursery pot.
* Loosen the roots slightly.
* Dig a hole in the potting mix that’s large enough to accommodate the root ball.
* Place the seedling in the hole and backfill with potting mix.
* Gently pat down the soil around the base of the plant.
5. Planting Seeds:
* Follow the instructions on the seed packet for planting depth and spacing.
* Sow the seeds directly into the potting mix.
* Gently cover the seeds with potting mix.
* Water gently.
6. Water Thoroughly: Water the newly planted seedlings or seeds thoroughly until water drains out of the drainage holes.
7. Label Your Plants: Trust me, you’ll thank yourself later! Label each container with the name of the vegetable and the date you planted it.
Caring for Your Container Garden
Now that your vegetables are planted, it’s time to nurture them!
1. Watering: This is the most important aspect of container gardening. Containers dry out much faster than in-ground gardens, so you’ll need to water frequently, especially during hot, sunny weather.
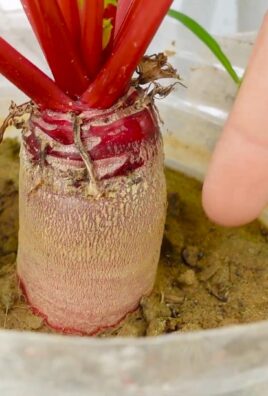
* Check the Soil: Stick your finger into the soil to check the moisture level. If the top inch or two feels dry, it’s time to water.
* Water Deeply: Water until water drains out of the drainage holes.
* Watering Time: Water in the morning or evening to avoid evaporation.
* Avoid Overwatering: Soggy soil can lead to root rot.
2. Fertilizing: Container plants need regular feeding because the nutrients in the potting mix are quickly depleted.
* Liquid Fertilizer: Use a balanced liquid fertilizer every 2-4 weeks. Follow the instructions on the fertilizer label.
* Slow-Release Fertilizer: If you added slow-release fertilizer to your potting mix at planting time, you may not need to fertilize as frequently.
* Organic Options: Fish emulsion and seaweed extract are great organic fertilizer options.
3. Sunlight: Most vegetables need at least 6-8 hours of sunlight per day. Place your containers in a sunny location. If you don’t have enough sunlight, you can supplement with grow lights.
4. Pest Control: Keep an eye out for pests like aphids, whiteflies, and spider mites.
* Inspect Regularly: Check your plants regularly for signs of pests.
* Handpicking: Pick off any pests you see.
* Insecticidal Soap: Spray your plants with insecticidal soap to control pests.
* Neem Oil: Neem oil is another effective organic pest control option.
5. Support: Some vegetables, like tomatoes and cucumbers, need support to grow properly.
* Stakes: Use stakes to support tomato plants.
* Trellises: Use trellises for cucumbers and other vining vegetables.
* Cages: Tomato cages are another option for supporting tomato plants.
6. Pruning: Prune your plants regularly to remove dead or diseased leaves and to encourage bushier growth.
7. Mulching: Add a layer of mulch to the top of the soil to help retain moisture and suppress weeds. Straw, wood chips, and shredded leaves are all good mulch options.
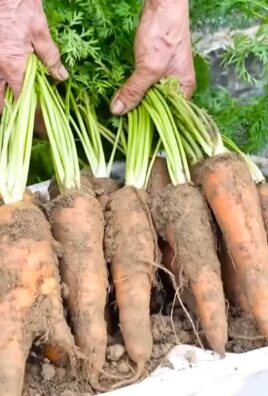
Harvesting Your Vegetables
The best part of container gardening is harvesting your own fresh, homegrown vegetables!
1. Harvest at the Right Time: Each vegetable has its own ideal harvesting time. Do some research to find out when your
Conclusion
So, there you have it! Vegetable gardening without a garden isn’t just a whimsical idea; it’s a practical, accessible, and incredibly rewarding way to bring fresh, homegrown produce to your table, regardless of your living situation. We’ve explored the ins and outs of container gardening, vertical gardening, and even hydroponics, proving that a lack of traditional garden space is no barrier to cultivating your own delicious vegetables.
Why is this DIY trick a must-try? Because it empowers you to take control of your food source, connect with nature, and enjoy the unparalleled flavor of freshly picked vegetables, all from the comfort of your balcony, patio, or even a sunny windowsill. Imagine the satisfaction of harvesting your own juicy tomatoes for a summer salad, snipping fresh herbs to season your favorite dishes, or enjoying crisp lettuce grown just steps from your kitchen. This isn’t just about growing vegetables; it’s about cultivating a healthier lifestyle, reducing your carbon footprint, and adding a touch of green to your urban landscape.
But the beauty of vegetable gardening without a garden lies in its adaptability. Feel free to experiment with different containers – from repurposed buckets and crates to stylish terracotta pots. Try different growing mediums, such as coco coir or perlite, to optimize drainage and aeration. Explore the vast array of vegetable varieties that thrive in containers, from compact bush beans and dwarf tomatoes to colorful peppers and leafy greens.
Consider these variations to personalize your garden:
* **Vertical Herb Garden:** Create a stunning vertical display of herbs using a pallet or hanging planters. This is perfect for small spaces and adds a fragrant touch to your outdoor area.
* **Salad Table:** Build a raised bed specifically for growing salad greens. This makes harvesting easy and keeps your greens clean and pest-free.
* **Hydroponic Tower:** If you’re feeling adventurous, try building a small-scale hydroponic tower for growing leafy greens and herbs. This is a highly efficient and space-saving method.
* **Succession Planting:** Extend your harvest season by planting new crops every few weeks. This ensures a continuous supply of fresh vegetables throughout the growing season.
Ultimately, the key to successful vegetable gardening without a garden is to start small, learn as you go, and most importantly, have fun! Don’t be afraid to experiment and find what works best for you and your space. The rewards of fresh, homegrown vegetables are well worth the effort.
We wholeheartedly encourage you to give this DIY trick a try. Embrace the challenge, get your hands dirty, and experience the joy of growing your own food. And most importantly, share your experiences with us! We’d love to hear about your successes, your challenges, and any tips or tricks you’ve discovered along the way. Share your photos and stories on our social media channels using #GardenWithoutAGarden. Let’s inspire each other to create thriving vegetable gardens, no matter where we live. Remember, even a small container garden can make a big difference in your health, your happiness, and your connection to the natural world. So, grab your seeds, your soil, and your containers, and let’s get growing! This **vegetable gardening without a garden** method will change the way you think about fresh produce.
Frequently Asked Questions (FAQ)
What vegetables grow best in containers?
Many vegetables thrive in containers, but some are particularly well-suited for this type of gardening. Compact or dwarf varieties are generally a good choice, as they don’t require as much space as their larger counterparts. Some excellent options include:
* **Tomatoes:** Bush or determinate varieties like ‘Patio’ or ‘Roma’ are ideal.
* **Peppers:** Bell peppers, chili peppers, and sweet peppers all do well in containers.
* **Lettuce and other leafy greens:** These are easy to grow and can be harvested continuously.
* **Herbs:** Basil, mint, rosemary, thyme, and oregano are all great choices for container gardening.
* **Beans:** Bush beans are more suitable than pole beans.
* **Radishes:** These fast-growing vegetables are perfect for containers.
* **Carrots:** Choose shorter, round varieties like ‘Thumbelina’.
* **Strawberries:** These can be grown in hanging baskets or containers.
* **Eggplant:** Dwarf varieties are best for container growing.
* **Zucchini:** Select bush varieties to avoid overcrowding.
How much sunlight do my container vegetables need?
Most vegetables require at least 6-8 hours of direct sunlight per day to thrive. However, some leafy greens and herbs can tolerate partial shade (4-6 hours of sunlight). Observe your plants carefully and adjust their location as needed to ensure they are getting enough light. If you don’t have enough natural sunlight, you can supplement with grow lights.
What type of soil should I use for container gardening?
Avoid using garden soil in containers, as it can become compacted and poorly drained. Instead, use a high-quality potting mix specifically formulated for containers. These mixes are typically lighter and better aerated, which promotes healthy root growth. You can also amend your potting mix with compost or other organic matter to improve its fertility and water-holding capacity.
How often should I water my container vegetables?
Container vegetables tend to dry out more quickly than those grown in the ground, so it’s important to water them regularly. The frequency of watering will depend on factors such as the weather, the size of the container, and the type of vegetable. Check the soil moisture regularly by sticking your finger into the soil. If the top inch or two feels dry, it’s time to water. Water deeply until water drains out of the bottom of the container. Avoid overwatering, as this can lead to root rot.
How often should I fertilize my container vegetables?
Container vegetables need regular fertilization to provide them with the nutrients they need to grow and produce. Use a balanced fertilizer specifically formulated for vegetables. You can use a slow-release fertilizer at planting time or a liquid fertilizer every few weeks. Follow the instructions on the fertilizer label carefully.
How do I protect my container vegetables from pests and diseases?
Regularly inspect your plants for signs of pests or diseases. Handpick any pests you find or use organic pest control methods such as insecticidal soap or neem oil. To prevent diseases, ensure good air circulation around your plants and avoid overwatering. Remove any diseased leaves or plants promptly.
Can I grow vegetables indoors?
Yes, you can grow vegetables indoors, but you’ll need to provide them with adequate light. A sunny windowsill may be sufficient for some leafy greens and herbs, but most vegetables will require supplemental grow lights. Choose compact or dwarf varieties that are well-suited for indoor growing.
What are some tips for successful vegetable gardening without a garden?
Here are a few additional tips to help you succeed:
* **Choose the right containers:** Select containers that are large enough for the vegetables you want to grow and have drainage holes.
* **Start with healthy seedlings:** If you’re new to gardening, it’s often easier to start with seedlings from a nursery rather than starting from seed.
* **Provide support for climbing vegetables:** If you’re growing tomatoes, cucumbers, or other climbing vegetables, provide them with a trellis or other support structure.
* **Mulch your containers:** Mulching helps to retain moisture, suppress weeds, and regulate soil temperature.
* **Rotate your crops:** If possible, rotate your crops each year to prevent soilborne diseases.
* **Don’t be afraid to experiment:** Gardening is a learning process, so don’t be afraid to try new things and see what works best for you.
How to deal with Aphids in my container garden?
Aphids are common pests that can infest container gardens. Here are several ways to deal with them:
* **Water Blast:** A strong stream of water from a hose can dislodge aphids from plants. Repeat this every few days.
* **Insecticidal Soap:** This is a safe and effective treatment. Spray all parts of the plant, including undersides of leaves, where aphids like to hide.
* **Neem Oil:** Neem oil is a natural insecticide that disrupts the aphid’s life cycle. Apply according to the product instructions.
* **Introduce Beneficial Insects:** Ladybugs and lacewings are natural predators of aphids. You can purchase them online or at garden centers.
* **Homemade Garlic or Onion Spray:** Boil garlic or onion in water, let it cool, strain, and spray on the affected plants.
* **Aluminum Foil Mulch:** Reflective mulch can deter aphids from landing on plants.
* **Regular Inspection:** Check your plants regularly for aphids and take action as soon as you spot them to prevent a large infestation.
What are the best practices for watering during hot weather?
During hot weather, container gardens require extra attention to watering. Here are some best practices:
* **Water deeply and thoroughly:** Ensure the water reaches the roots by watering slowly until it drains from the bottom of the container.
* **Water early in the morning:** This allows the plants to absorb the water before the heat of the day causes excessive evaporation.
* **Check soil moisture frequently:** Stick your finger into the soil to check moisture levels. Water when the top inch feels dry.
* **Consider using a moisture meter:** This tool can help you accurately
Leave a Comment