

Toilet cleaning hacks – we all need them, right? Let’s be honest, tackling the throne isn’t exactly anyone’s favorite chore. But what if I told you there were simple, DIY tricks that could make this dreaded task quicker, easier, and even…dare I say…satisfying?
For centuries, maintaining a clean and sanitary toilet has been a concern, evolving from rudimentary methods to the modern marvels we have today. While the technology has advanced, the fundamental need for effective cleaning remains constant. Think about it – a sparkling clean toilet not only boosts your bathroom’s overall appeal but also contributes significantly to your home’s hygiene and your family’s well-being.
That’s where these toilet cleaning hacks come in! I’m going to share some of my favorite DIY solutions that use everyday household items to banish stains, eliminate odors, and keep your toilet bowl gleaming. Forget spending a fortune on harsh chemicals; these tips are budget-friendly, eco-conscious, and surprisingly effective. So, grab your gloves, and let’s dive into the world of toilet cleaning transformations!
DIY Toilet Cleaning Power-Up: From Grime to Gleam!
Okay, let’s face it: cleaning the toilet isn’t exactly anyone’s favorite chore. But a sparkling clean toilet bowl? That’s a victory we can all appreciate! I’m going to share some of my favorite DIY toilet cleaning hacks that are not only effective but also use ingredients you probably already have in your pantry. Get ready to ditch those harsh chemicals and embrace a cleaner, fresher bathroom!
The Ultimate DIY Toilet Bomb Recipe
These little fizzing wonders are a game-changer. They’re easy to make, smell amazing, and do a fantastic job of loosening grime and deodorizing your toilet.
What you’ll need:
* 1 cup Baking Soda
* 1/2 cup Citric Acid (This is what makes them fizz! You can find it online or in the canning section of some grocery stores.)
* 1/2 cup Cornstarch (Helps bind everything together)
* 2-3 tablespoons Water (Use a spray bottle for best results)
* 15-20 drops Essential Oil (Lemon, tea tree, eucalyptus, or lavender are great choices for their antibacterial and deodorizing properties)
* Optional: Food Coloring (Just a few drops, if you want to add some color!)
* Silicone Molds (Ice cube trays, candy molds, or even small muffin tins work perfectly)
* Spray Bottle
Step-by-step instructions:
1. Combine the dry ingredients: In a large bowl, whisk together the baking soda, citric acid, and cornstarch until everything is evenly distributed. This is important to ensure the bombs fizz properly.
2. Add the essential oils: Drizzle the essential oils over the dry mixture. I like to use a combination of lemon and tea tree for a powerful cleaning boost.
3. Slowly add the water: This is the trickiest part! You want to add the water *very* slowly, using a spray bottle. Spritz a little water into the bowl and immediately mix it in with your hands. Continue spritzing and mixing until the mixture feels like damp sand. It should clump together when you squeeze it in your hand, but it shouldn’t be too wet or start fizzing prematurely. If it starts fizzing, you’ve added too much water! Add a little more baking soda and cornstarch to absorb the excess moisture.
4. Add food coloring (optional): If you’re using food coloring, add a few drops to the mixture and mix well until the color is evenly distributed.
5. Pack the mixture into molds: Firmly press the mixture into your silicone molds. Make sure to pack it in tightly so the bombs hold their shape.
6. Let them dry: Allow the toilet bombs to dry completely for at least 24 hours, or even longer if you live in a humid climate. You’ll know they’re ready when they’re hard and solid.
7. Remove from molds: Gently pop the toilet bombs out of the molds.
8. Store them properly: Store your toilet bombs in an airtight container in a cool, dry place. This will prevent them from absorbing moisture and fizzing prematurely.
How to use your toilet bombs:
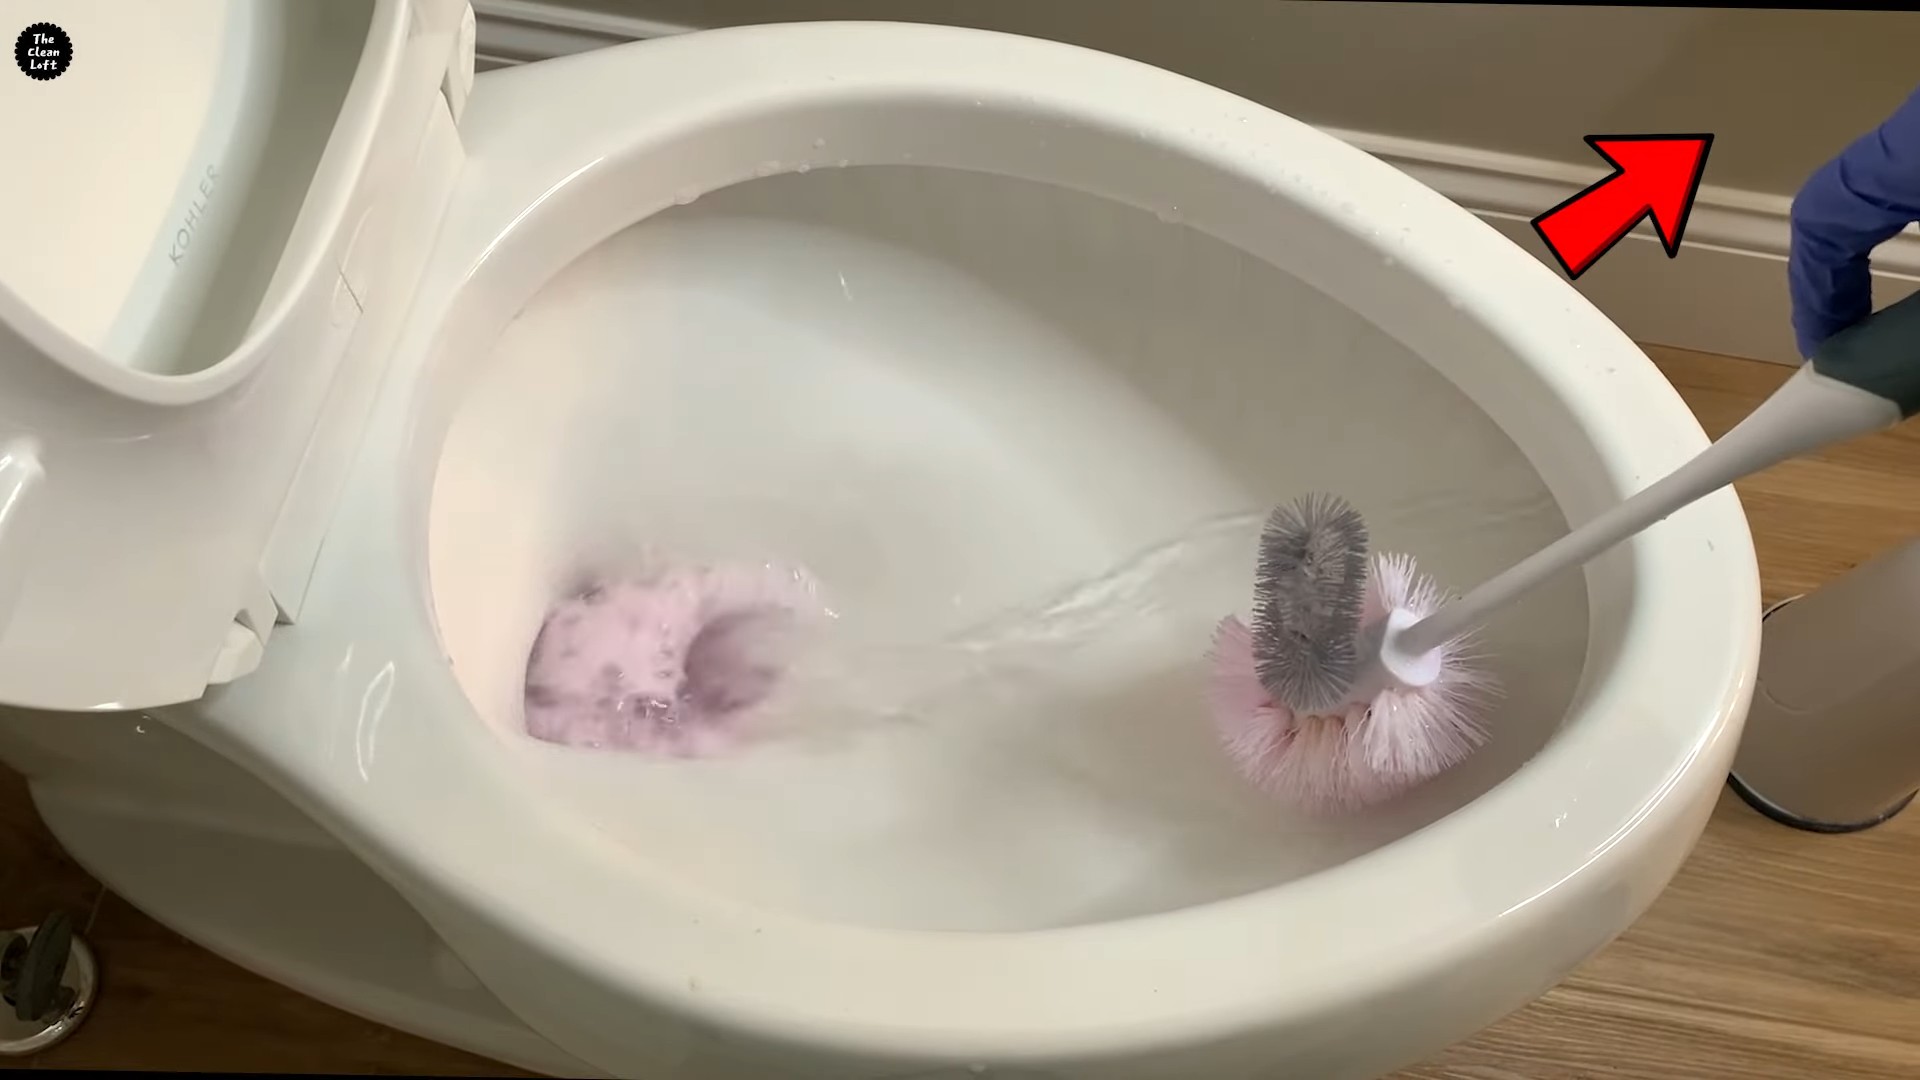
Simply drop one toilet bomb into the toilet bowl and let it fizz. Once the fizzing has subsided (usually after about 10-15 minutes), scrub the bowl with a toilet brush and flush. Voila! A cleaner, fresher toilet.
Vinegar and Baking Soda Power Clean
This is a classic combination for a reason! The vinegar and baking soda react to create a fizzing action that helps loosen stains and grime.
What you’ll need:
* 1 cup Baking Soda
* 2 cups White Vinegar
* Toilet Brush
Step-by-step instructions:
1. Pour in the baking soda: Pour one cup of baking soda into the toilet bowl, making sure to coat the sides as much as possible.
2. Add the vinegar: Slowly pour two cups of white vinegar into the toilet bowl. Get ready for the fizz!
3. Let it fizz: Allow the mixture to fizz for at least 30 minutes, or even longer for tougher stains. The longer it sits, the more effective it will be. I sometimes let it sit overnight.
4. Scrub and flush: After the fizzing has subsided, scrub the toilet bowl thoroughly with a toilet brush. Pay extra attention to any stains or buildup.
5. Flush: Flush the toilet to rinse away the vinegar and baking soda.
The Borax Boost
Borax is a natural mineral that’s a great cleaner and deodorizer. It’s particularly effective at removing hard water stains.
What you’ll need:
* 1/2 cup Borax
* Toilet Brush
Step-by-step instructions:
1. Sprinkle Borax: Sprinkle 1/2 cup of Borax into the toilet bowl.
2. Let it sit: Allow the Borax to sit in the toilet bowl for at least an hour, or even overnight for stubborn stains.
3. Scrub and flush: Scrub the toilet bowl thoroughly with a toilet brush.
4. Flush: Flush the toilet to rinse away the Borax.
Coca-Cola Cleaning Hack (Yes, Really!)
This one might sound strange, but Coca-Cola contains phosphoric acid, which can help break down stains and grime.
What you’ll need:
* 1 can (12 oz) Coca-Cola
* Toilet Brush
Step-by-step instructions:
1. Pour in the Coke: Pour the entire can of Coca-Cola into the toilet bowl, making sure to coat the sides.
2. Let it sit: Allow the Coca-Cola to sit in the toilet bowl for at least an hour, or even overnight for tough stains.
3. Scrub and flush: Scrub the toilet bowl thoroughly with a toilet brush.
4. Flush: Flush the toilet to rinse away the Coca-Cola.
Lemon Juice Power
Lemon juice is a natural acid that can help remove stains and deodorize your toilet. Plus, it leaves a fresh, clean scent!
What you’ll need:
* 1 cup Lemon Juice
* Toilet Brush
Step-by-step instructions:
1. Pour in the lemon juice: Pour one cup of lemon juice into the toilet bowl.
2. Let it sit: Allow the lemon juice to sit in the toilet bowl for at least an hour, or even overnight for stubborn stains.
3. Scrub and flush: Scrub the toilet bowl thoroughly with a toilet brush.
4. Flush: Flush the toilet to rinse away the lemon juice.
Preventative Measures: Keeping Your Toilet Sparkling
Okay, so cleaning is important, but preventing buildup in the first place is even better! Here are a few things I do to keep my toilet cleaner for longer:
* Flush after every use: This seems obvious, but it’s crucial for preventing stains and buildup.
* Regularly clean with a toilet brush: Give your toilet a quick scrub with a toilet brush every few days to prevent grime from accumulating.
* Use a toilet bowl cleaner regularly: Even if you’re using DIY methods, a regular toilet bowl cleaner can help keep things fresh.
* Consider a toilet bowl clip-on: These release cleaning agents with each flush, helping to prevent buildup.
* Address hard water issues: If you have hard water, consider using a water softener or a toilet bowl cleaner specifically designed for hard water stains.
Dealing with Stubborn Stains
Sometimes, you’ll encounter stains that just won’t budge. Here are a few tips for tackling those stubborn spots:
* Pumice Stone: A pumice stone can be surprisingly effective at removing hard water stains and mineral deposits. Wet the pumice stone and gently rub it on the stain. Be careful not to scratch the porcelain!
* Baking Soda Paste: Make a paste of baking soda and water and apply it to the stain. Let it sit for a few hours, then scrub and flush.
* CLR (Calcium, Lime, Rust Remover): This is a stronger chemical cleaner, so use it sparingly and follow the instructions on the bottle carefully.
Safety First!
While these DIY cleaning methods are generally safe, it’s always a good idea to take a few precautions:
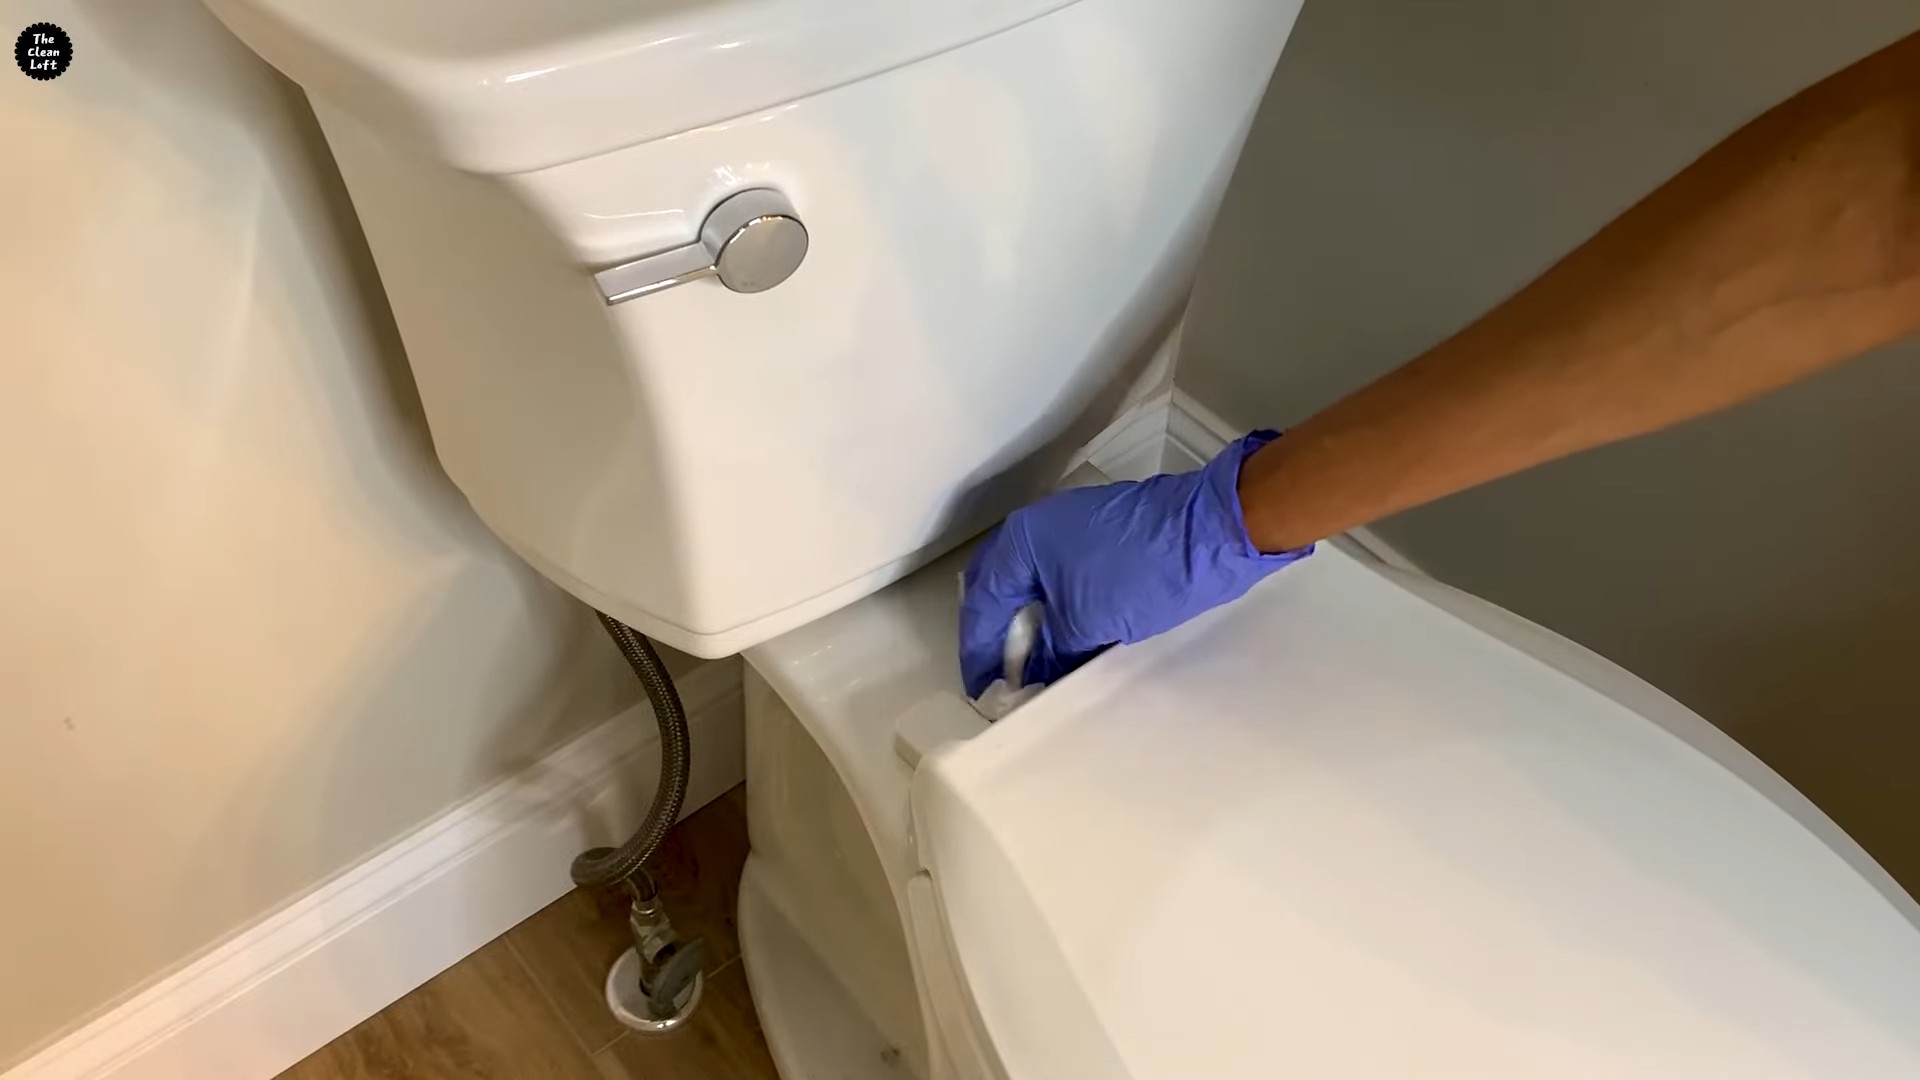
* Wear gloves: Protect your hands from harsh chemicals and bacteria.
* Ventilate the bathroom: Open a window or turn on the exhaust fan to ensure proper ventilation.
* Never mix bleach with other cleaners: Mixing bleach with ammonia or other chemicals can create dangerous fumes.
* Keep cleaning products out of reach of children and pets: Store all cleaning products in a safe place where children and pets cannot access them.
I hope these DIY toilet cleaning hacks help
Conclusion
So, there you have it! This simple yet incredibly effective DIY toilet cleaning hack is a game-changer for anyone looking to maintain a sparkling clean and fresh-smelling bathroom without resorting to harsh chemicals or expensive commercial cleaners. We’ve shown you how to harness the power of readily available ingredients to create a potent cleaning solution that tackles stains, eliminates odors, and leaves your toilet bowl gleaming.
Why is this a must-try? Because it’s cost-effective, eco-friendly, and genuinely works! Think about the money you’ll save on those pricey toilet bowl cleaners. Consider the positive impact on the environment by reducing your reliance on chemical-laden products. And, most importantly, revel in the satisfaction of knowing you’re using a safe and effective method to keep your bathroom clean.
But the beauty of this DIY toilet cleaning hack lies in its adaptability. Feel free to experiment with variations to suit your specific needs and preferences. For instance, if you’re dealing with particularly stubborn stains, you might consider adding a tablespoon of borax to the mixture for an extra boost of cleaning power. Or, if you prefer a different scent, you can swap out the essential oil for your favorite fragrance – lavender, tea tree, or eucalyptus are all excellent choices for a fresh and clean aroma. You can also try using different types of vinegar, such as apple cider vinegar, although white vinegar is generally the most effective for cleaning.
Another variation involves creating toilet cleaning bombs. Simply mix the ingredients together, mold them into small balls or tablets, and let them dry completely. Then, drop one into the toilet bowl whenever you need a quick refresh. This is a convenient and fun way to maintain a clean toilet with minimal effort.
Don’t just take our word for it – try this DIY toilet cleaning hack yourself! We’re confident that you’ll be amazed by the results. It’s a simple, effective, and affordable way to keep your toilet sparkling clean and your bathroom smelling fresh.
We encourage you to share your experiences with us! Let us know how this DIY toilet cleaning hack worked for you. Did you try any variations? What were your results? Share your tips and tricks in the comments below – we’d love to hear from you! Your feedback will not only help us improve this guide but also inspire others to embrace the power of DIY cleaning. Together, we can create a cleaner, healthier, and more sustainable home environment. So go ahead, give it a try, and let us know what you think!
Frequently Asked Questions (FAQs)
What exactly makes this DIY toilet cleaning hack so effective?
The effectiveness of this DIY toilet cleaning hack stems from the synergistic action of its ingredients. Vinegar, a mild acid, is a natural disinfectant and descaler. It effectively breaks down mineral deposits, hard water stains, and soap scum that accumulate in the toilet bowl. Baking soda, an alkali, acts as a gentle abrasive, helping to scrub away dirt and grime without scratching the porcelain. When combined, vinegar and baking soda create a fizzing action that helps to loosen stubborn stains and deodorize the toilet bowl. The addition of essential oils not only provides a pleasant fragrance but also offers antibacterial and antifungal properties, further enhancing the cleaning power of the solution. This combination provides a powerful, yet safe and natural, cleaning solution.
Is this DIY toilet cleaning hack safe for septic systems?
Yes, this DIY toilet cleaning hack is generally considered safe for septic systems. The ingredients used – vinegar, baking soda, and essential oils – are all biodegradable and do not contain harsh chemicals that can harm the beneficial bacteria in your septic tank. However, it’s always a good idea to use these cleaning solutions in moderation. Avoid pouring large quantities of vinegar or baking soda down the drain at once, as this could potentially disrupt the balance of your septic system. As a general rule, if you’re concerned about the impact of any cleaning product on your septic system, it’s best to consult with a septic system professional.
How often should I use this DIY toilet cleaning hack?
The frequency of use depends on how often your toilet is used and how quickly it gets dirty. For regular maintenance, cleaning your toilet with this DIY solution once or twice a week should be sufficient. If you notice stains or odors developing more frequently, you may need to clean it more often. You can also use this solution as a spot treatment for stubborn stains as needed. Remember, regular cleaning is key to preventing the buildup of dirt and grime, making it easier to maintain a clean and fresh-smelling toilet.
Can I use this DIY toilet cleaning hack on other bathroom surfaces?
While this DIY toilet cleaning hack is primarily designed for cleaning toilet bowls, it can also be used on other bathroom surfaces, such as sinks, tiles, and shower doors. However, it’s important to test the solution on a small, inconspicuous area first to ensure that it doesn’t damage the surface. Avoid using this solution on natural stone surfaces, such as marble or granite, as the vinegar can etch and damage these materials. When using this solution on other bathroom surfaces, be sure to rinse thoroughly with water after cleaning.
What if I don’t have essential oils? Can I still use this DIY toilet cleaning hack?
Yes, you can still use this DIY toilet cleaning hack without essential oils. The vinegar and baking soda combination is the primary cleaning agent, and it will still be effective at removing stains and odors. Essential oils are primarily added for fragrance and their antibacterial properties, but they are not essential for the cleaning process. If you don’t have essential oils, you can simply omit them from the recipe. Alternatively, you can add a few drops of your favorite fragrance oil or a squeeze of lemon juice for a fresh scent.
The fizzing action is minimal. Is that normal?
The fizzing action between baking soda and vinegar is a chemical reaction that produces carbon dioxide. The intensity of the fizzing depends on several factors, including the concentration of the vinegar, the amount of baking soda used, and the temperature of the ingredients. If the fizzing is minimal, it could be due to using old baking soda, which may have lost some of its potency. You can also try using a higher concentration of vinegar or adding a little more baking soda. However, be careful not to add too much baking soda, as this can create a mess. Even if the fizzing is minimal, the solution will still be effective at cleaning your toilet bowl.
How do I store leftover DIY toilet cleaning solution?
If you have leftover DIY toilet cleaning solution, you can store it in a sealed container in a cool, dark place. Be sure to label the container clearly to avoid confusion. The solution should be good for several weeks, but it’s best to use it within a month for optimal effectiveness. Avoid storing the solution in direct sunlight or in a warm environment, as this can cause the ingredients to degrade.
Can I use this DIY toilet cleaning hack on a colored toilet bowl?
Yes, this DIY toilet cleaning hack is generally safe to use on colored toilet bowls. However, it’s always a good idea to test the solution on a small, inconspicuous area first to ensure that it doesn’t cause any discoloration or damage. If you’re concerned about the potential for damage, you can dilute the solution with water before using it. Also, avoid leaving the solution on the surface for an extended period of time, as this could increase the risk of discoloration.
What if I have hard water stains that are difficult to remove?
Hard water stains can be particularly stubborn to remove. For tough hard water stains, you can try soaking a paper towel in vinegar and applying it directly to the stain. Let it sit for several hours or overnight, then scrub with a toilet brush and flush. You can also try using a pumice stone to gently scrub away the stains. Be careful not to scratch the porcelain surface. In severe cases, you may need to use a commercial hard water stain remover, but be sure to follow the manufacturer’s instructions carefully.
Is there a way to prevent toilet bowl stains from forming in the first place?
Yes, there are several things you can do to prevent toilet bowl stains from forming in the first place. Regular cleaning is key. Flush the toilet after each use to prevent waste from sitting in the bowl. You can also add a toilet bowl cleaner tablet or liquid to the tank to help keep the bowl clean between cleanings. If you have hard water, consider installing a water softener to reduce the mineral content of your water. Finally, avoid using harsh chemicals or abrasive cleaners, as these can damage the porcelain surface and make it more susceptible to staining.

Leave a Comment