

Baking Soda Grout Cleaner: Is your grout looking a little worse for wear? Are you tired of those dingy, discolored lines between your tiles making your kitchen or bathroom look older than it is? I know I’ve been there! Let’s face it, nobody enjoys scrubbing grout, and the harsh chemicals in many commercial cleaners can be both expensive and unpleasant to use. But what if I told you there’s a simple, effective, and budget-friendly solution hiding in your pantry?
For generations, baking soda has been a go-to cleaning agent, a testament to its versatility and gentle yet powerful cleaning properties. From ancient Egyptians using natron (a naturally occurring form of baking soda) for cleaning to our grandmothers relying on it for countless household tasks, baking soda has a rich history as a trusted cleaning staple.
In this DIY guide, I’m going to show you how to create a powerful baking soda grout cleaner that will have your tiles sparkling in no time. This isn’t just about aesthetics; clean grout also helps prevent the growth of mold and mildew, contributing to a healthier home environment. So, ditch the harsh chemicals and get ready to discover the magic of baking soda! I’ll walk you through the process step-by-step, with easy-to-follow instructions and helpful tips to achieve professional-looking results without breaking the bank. Let’s get cleaning!
DIY Baking Soda Grout Cleaner: Revive Your Tiles!
Okay, let’s face it, grimy grout is the bane of every homeowner’s existence. It’s unsightly, it’s a breeding ground for bacteria, and it just makes your beautiful tiles look… well, not so beautiful. But don’t despair! You don’t need harsh chemicals or expensive professional cleaning services to get your grout sparkling again. I’m going to show you how to make a super effective grout cleaner using baking soda – a natural, affordable, and readily available ingredient that works wonders.
This DIY grout cleaner is a game-changer. It’s safe for your family and pets, it’s environmentally friendly, and most importantly, it really works! So, grab your supplies, and let’s get started on transforming your grout from drab to fab!
What You’ll Need:
Before we dive in, let’s gather all the necessary supplies. This will make the whole process smoother and more efficient.
* Baking Soda: The star of the show! This acts as a mild abrasive to scrub away dirt and grime.
* White Vinegar: This reacts with the baking soda to create a fizzing action that helps loosen stubborn stains.
* Dish Soap (Optional): A few drops of dish soap can help cut through grease and grime, especially in kitchen areas. I usually use Dawn.
* Water: For creating a paste and rinsing.
* Spray Bottle: For applying the vinegar solution.
* Old Toothbrush or Grout Brush: For scrubbing the grout lines. An old toothbrush works great for smaller areas, but a grout brush with a longer handle will save your back on larger surfaces.
* Sponge or Cloth: For wiping away the cleaner and rinsing.
* Gloves: To protect your hands from the cleaning solution and any potential irritants.
* Eye Protection (Optional): While not always necessary, eye protection can be a good idea, especially if you’re working on vertical surfaces where splashes are more likely.
* Small Bowl or Container: For mixing the baking soda paste.
* Paper Towels: For drying the grout after cleaning.
Making the Baking Soda Grout Cleaning Paste
This is where the magic begins! We’re going to create a powerful cleaning paste that will lift away years of built-up grime.
1. Combine Baking Soda and Water: In your small bowl, mix baking soda with a small amount of water. Start with about ½ cup of baking soda and add water a teaspoon at a time.
2. Mix to a Paste Consistency: Stir the mixture until it forms a thick, spreadable paste. You want it to be thick enough to stick to the grout lines without running. If it’s too watery, add more baking soda. If it’s too dry, add a little more water.
3. Add Dish Soap (Optional): If you’re dealing with greasy grout, add a few drops (about ½ teaspoon) of dish soap to the paste and mix well.
Applying and Scrubbing the Grout
Now comes the fun part – applying the paste and scrubbing away the dirt!
1. Apply the Baking Soda Paste: Using your fingers or a small spatula, apply the baking soda paste liberally to the grout lines. Make sure to cover all the grout thoroughly.
2. Let it Sit (Optional): For heavily soiled grout, let the paste sit for 5-10 minutes. This will give the baking soda time to penetrate the grime and loosen it up.
3. Spray with Vinegar: Fill your spray bottle with white vinegar. Spray the vinegar directly onto the baking soda paste-covered grout. You’ll see it start to fizz – that’s the chemical reaction working its magic!
4. Scrub the Grout: Using your old toothbrush or grout brush, scrub the grout lines vigorously. Focus on areas with stubborn stains. The fizzing action of the vinegar and baking soda will help lift the dirt and grime. Don’t be afraid to put some elbow grease into it!
5. Rinse with Water: Once you’ve scrubbed all the grout lines, rinse the area thoroughly with clean water. Use a sponge or cloth to wipe away the baking soda residue.
6. Repeat if Necessary: For particularly stubborn stains, you may need to repeat the process. Don’t get discouraged! Sometimes it takes a couple of tries to get the grout completely clean.
Alternative Method: Baking Soda and Vinegar Paste
If you prefer a more direct approach, you can create a paste using baking soda and vinegar directly. This method is particularly effective for tackling tough stains.
1. Combine Baking Soda and Vinegar: In a small bowl, mix baking soda and white vinegar to form a paste. Start with about ½ cup of baking soda and add vinegar slowly, a tablespoon at a time, until you get a thick, foamy paste. Be careful, as the mixture will fizz up quite a bit.
2. Apply the Paste: Apply the paste to the grout lines, making sure to cover them completely.
3. Let it Sit: Allow the paste to sit on the grout for 15-20 minutes. This will give the mixture time to penetrate the stains and loosen the grime.
4. Scrub the Grout: Using your toothbrush or grout brush, scrub the grout lines thoroughly.
5. Rinse with Water: Rinse the area with clean water and wipe away any remaining residue with a sponge or cloth.
Dealing with Stubborn Stains
Sometimes, you’ll encounter grout stains that just won’t budge with the basic baking soda and vinegar method. Don’t worry, I’ve got a few tricks up my sleeve!
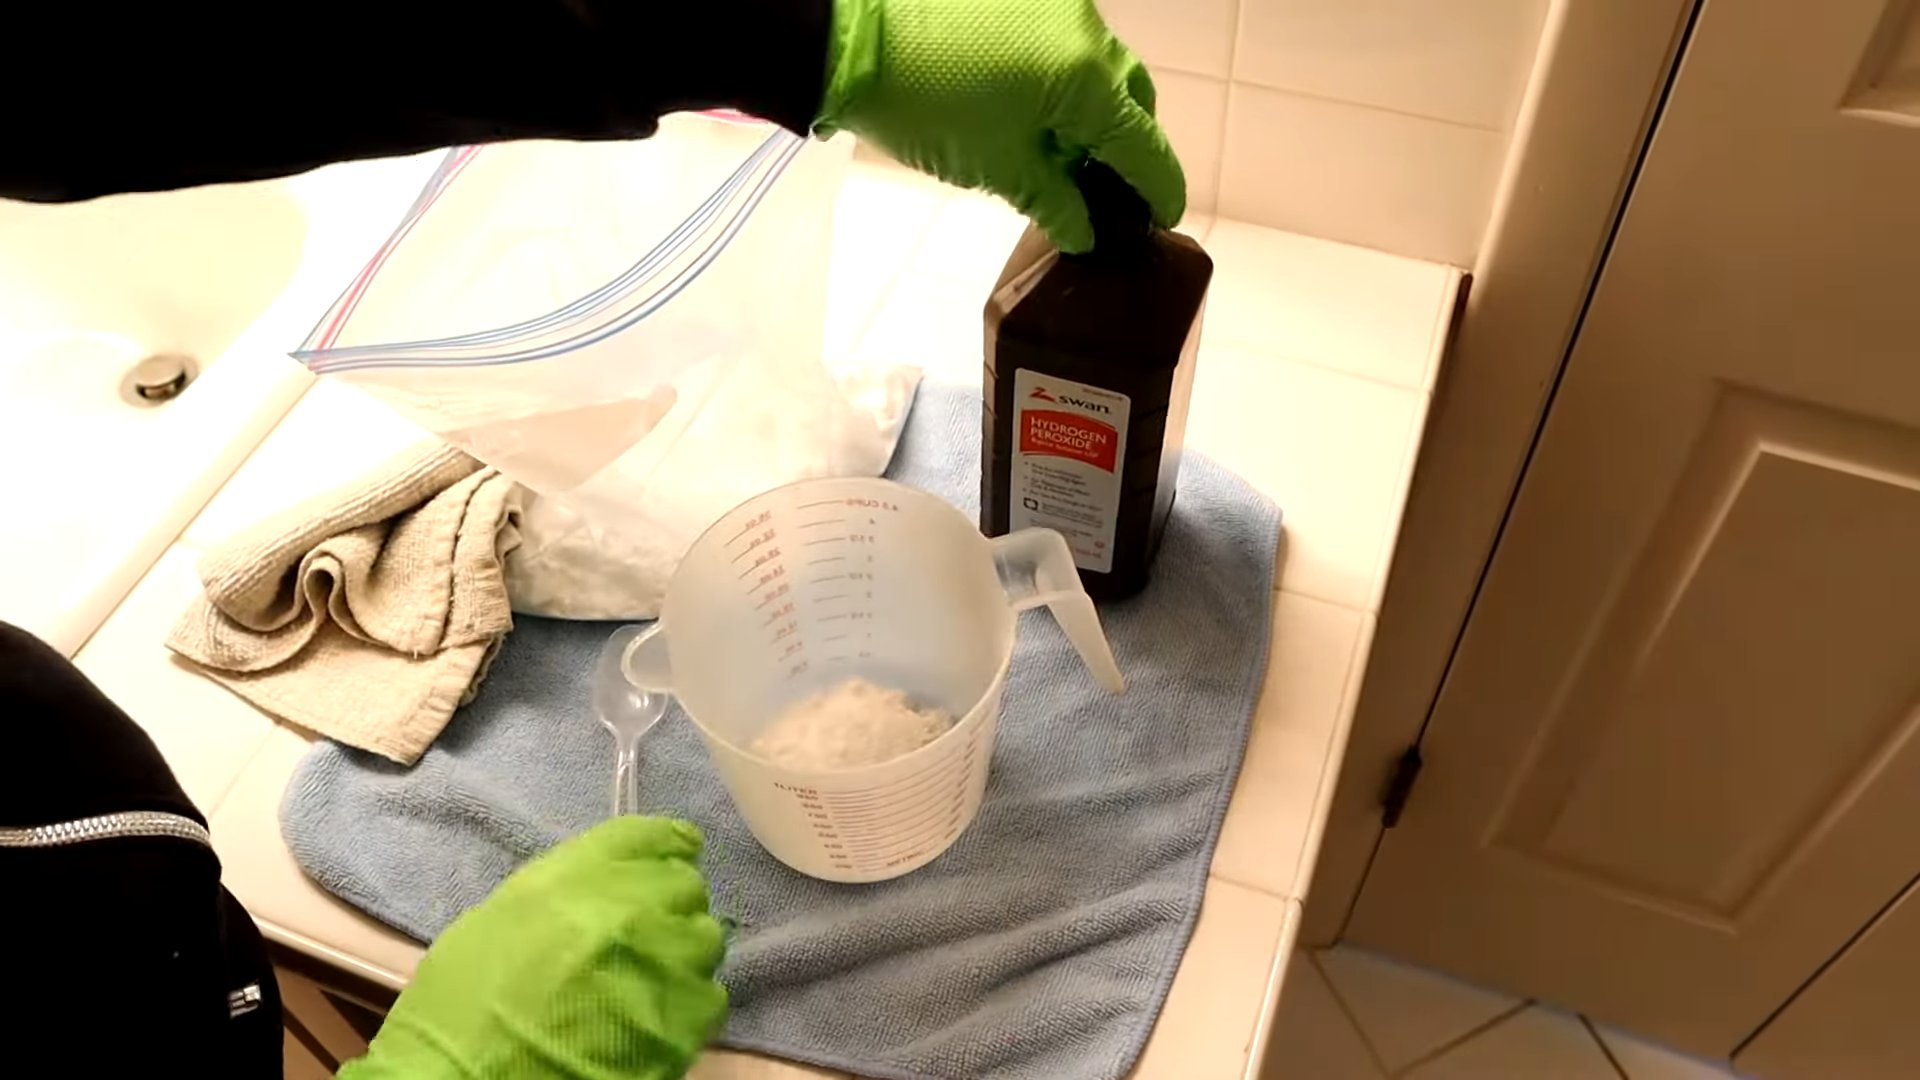
* Baking Soda and Hydrogen Peroxide: For particularly stubborn stains, especially those caused by mold or mildew, try mixing baking soda with hydrogen peroxide to form a paste. Apply the paste to the grout, let it sit for 10-15 minutes, and then scrub with a brush. Rinse thoroughly with water.
* Baking Soda and Lemon Juice: Lemon juice is a natural bleaching agent that can help lighten dark stains. Mix baking soda with lemon juice to form a paste, apply it to the grout, let it sit for 10-15 minutes, and then scrub with a brush. Rinse thoroughly with water. Be careful when using lemon juice on colored grout, as it may cause fading.
* Steam Cleaning: A steam cleaner can be a powerful tool for cleaning grout. The hot steam helps to loosen dirt and grime, making it easier to scrub away. If you have a steam cleaner, try using it after applying the baking soda paste for even better results.
Tips for Preventing Grout Stains
Prevention is always better than cure! Here are a few tips to help keep your grout clean and prevent stains from forming in the first place:
* Wipe Up Spills Immediately: The sooner you wipe up spills, the less likely they are to stain the grout.
* Ventilate Your Bathroom: Proper ventilation helps to prevent mold and mildew growth, which can stain grout. Run the exhaust fan during and after showers.
* Seal Your Grout: Applying a grout sealer can help protect the grout from stains and make it easier to clean. Reapply the sealer every 6-12 months, or as recommended by the manufacturer.
* Regular Cleaning: Clean your grout regularly, even if it doesn’t look dirty. A quick wipe-down with a damp cloth or sponge can help prevent grime from building up.
* Use a Squeegee: After showering, use a squeegee to remove excess water from the tiles and grout. This will help prevent water stains and mold growth.
Important Considerations
Before you start cleaning, keep these points in mind:
* Test in an Inconspicuous Area: Before applying any cleaning solution to your entire grout surface, test it in a small, inconspicuous area to make sure it doesn’t damage or discolor the grout.
* Protect Your Eyes and Skin: Wear gloves and eye protection to protect yourself from the cleaning solutions and any potential irritants.
* Work in a Well-Ventilated Area: Make sure the area you’re working in is well-ventilated, especially when using vinegar or hydrogen peroxide.
* Be Patient: Cleaning grout can be a time-consuming process, especially if the grout is heavily soiled. Don’t get discouraged if it takes a few tries to get the grout completely clean.
* Avoid Harsh Chemicals: While harsh chemicals may seem like a quick fix, they can damage your grout and release harmful fumes. Stick to natural cleaning solutions like baking soda and vinegar for a safer and more effective clean.
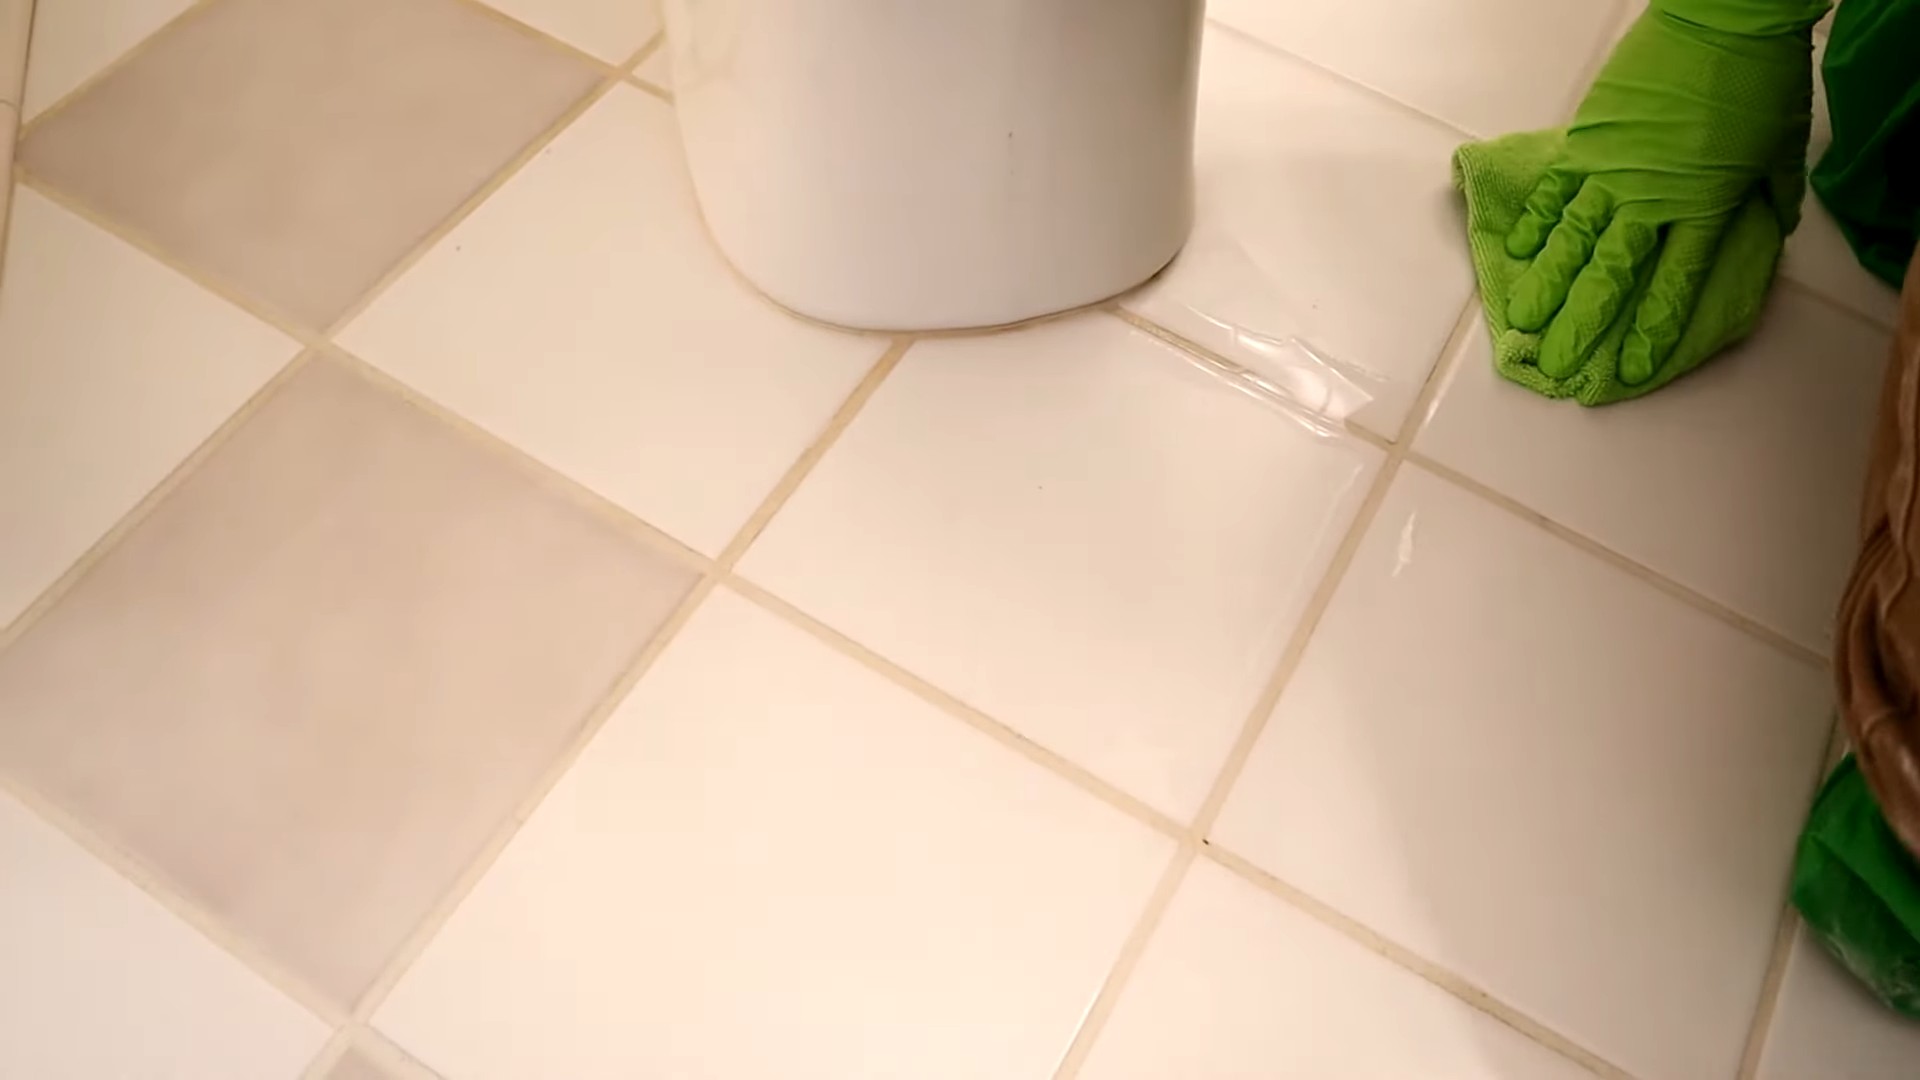
Final Touches
Once you’ve finished cleaning your grout, take a moment to admire your handiwork! Your tiles will look brighter, cleaner, and more inviting.
1. Dry the Grout: Use paper towels or a clean cloth to dry the grout thoroughly. This will help prevent water stains and mold growth.
Conclusion
So, there you have it! This simple baking soda grout cleaner method is a game-changer for anyone battling dingy, stained grout. Forget expensive, harsh chemicals that fill your home with unpleasant fumes. This DIY approach is not only incredibly effective but also environmentally friendly and budget-conscious. The power of baking soda, combined with a little elbow grease, can truly transform your tiled surfaces, bringing them back to their former glory.
Why is this a must-try? Because it works! You’ll be amazed at how easily grime and discoloration lift away, revealing the clean, bright grout you forgot was even there. Plus, it’s safe for your family and pets, unlike many commercial cleaners. The satisfaction of seeing the immediate results is incredibly rewarding.
But don’t stop there! Feel free to experiment with variations to tailor the cleaning power to your specific needs. For particularly stubborn stains, try adding a few drops of tea tree oil to the paste for its natural antibacterial and antifungal properties. Or, if you prefer a more liquid solution, mix baking soda with vinegar and water in a spray bottle for easier application on vertical surfaces like shower walls. Remember to always test any new cleaning solution in an inconspicuous area first to ensure it doesn’t damage your grout or tiles.
Consider using an old toothbrush for precision cleaning in tight corners and around fixtures. For larger areas, a grout brush with a long handle can save your back and knees. And, if you’re dealing with colored grout, be extra cautious and test the baking soda paste in a hidden area to ensure it doesn’t fade the color.
We are confident that this baking soda grout cleaner will become your go-to solution for tackling dirty grout. It’s simple, effective, and affordable – what’s not to love?
Now it’s your turn! We encourage you to give this DIY trick a try and experience the difference for yourself. Don’t be shy – share your results and any variations you discover in the comments below. We’d love to hear about your success stories and any tips you have to share with the community. Let’s banish dirty grout together, one baking soda scrub at a time! Your sparkling clean tiles are just a baking soda paste away.
Frequently Asked Questions (FAQs)
1. Is baking soda grout cleaner safe for all types of grout?
Generally, yes, baking soda is safe for most types of grout, including cementitious and epoxy grout. However, it’s always a good idea to test the baking soda paste in an inconspicuous area first, especially if you have colored grout. Some colored grouts may be more susceptible to fading, although this is rare with baking soda. If you notice any color change, dilute the baking soda paste with more water or reduce the scrubbing time. For very delicate or antique tiles and grout, consult with a professional cleaner before using any DIY cleaning method.
2. How often should I clean my grout with baking soda?
The frequency of cleaning depends on the amount of traffic and exposure to dirt and moisture in the area. For high-traffic areas like kitchens and bathrooms, cleaning your grout with baking soda every 1-2 weeks can help prevent buildup and keep it looking its best. For less frequently used areas, cleaning every month or two may be sufficient. Regular maintenance is key to preventing stubborn stains and keeping your grout looking fresh.
3. What if the baking soda paste doesn’t remove all the stains?
If the baking soda paste isn’t completely removing stubborn stains, there are a few things you can try. First, let the paste sit on the grout for a longer period of time, up to 30 minutes, to allow it to penetrate the stain. Second, try adding a small amount of hydrogen peroxide to the baking soda paste. Hydrogen peroxide is a mild bleaching agent that can help lift stubborn stains. Be sure to test this mixture in an inconspicuous area first, as it may lighten colored grout. Finally, for extremely stubborn stains, you may need to use a commercial grout cleaner specifically designed for tough stains. Always follow the manufacturer’s instructions and wear appropriate safety gear when using commercial cleaners.
4. Can I use baking soda grout cleaner on other surfaces besides tile?
While baking soda is generally safe for most surfaces, it’s best to avoid using it on delicate or porous materials like marble or natural stone. These materials can be easily scratched or damaged by abrasive cleaners like baking soda. For these surfaces, use a cleaner specifically designed for natural stone or marble. Baking soda can be used on porcelain, ceramic, and glass tiles, as well as stainless steel fixtures. Always test in an inconspicuous area first to ensure compatibility.
5. What kind of brush should I use to scrub the grout?
The best type of brush to use for scrubbing grout depends on the size of the area and the severity of the stains. For small areas and tight corners, an old toothbrush is an excellent choice. For larger areas, a grout brush with a long handle will save your back and knees. Look for a brush with stiff bristles that can effectively scrub away dirt and grime. Avoid using metal brushes, as they can scratch the tile and grout.
6. How do I prevent grout from getting dirty in the first place?
Prevention is key to keeping your grout clean and avoiding the need for frequent deep cleaning. Here are a few tips to help prevent grout from getting dirty:
* **Seal your grout:** Applying a grout sealer after cleaning will help protect it from stains and moisture. Reapply sealer every 6-12 months, or as recommended by the manufacturer.
* **Wipe up spills immediately:** Don’t let spills sit on your grout, as they can quickly stain. Wipe up spills as soon as they happen with a damp cloth.
* **Use doormats and rugs:** Place doormats at entrances to trap dirt and debris before they get tracked onto your floors. Use rugs in high-traffic areas to protect your grout from wear and tear.
* **Ventilate your bathroom:** Proper ventilation in your bathroom will help prevent moisture buildup, which can lead to mold and mildew growth in your grout.
* **Regularly sweep and mop:** Sweep or vacuum your floors regularly to remove loose dirt and debris. Mop your floors with a mild detergent and water to keep them clean.
7. Can I use baking soda and vinegar together to clean grout? I’ve heard that’s a good combination.
While baking soda and vinegar can create a fizzing reaction that can help loosen dirt and grime, it’s not always the best combination for cleaning grout. The fizzing action is temporary and doesn’t necessarily provide any extra cleaning power. Additionally, vinegar is acidic and can potentially damage grout over time, especially if it’s not properly diluted. It’s generally better to use baking soda alone or with a small amount of water or hydrogen peroxide for cleaning grout. If you do choose to use baking soda and vinegar together, be sure to rinse the area thoroughly with water afterward to remove any residue.
8. Is there a specific type of baking soda that works best for cleaning grout?
No, there isn’t a specific type of baking soda that works best for cleaning grout. Regular baking soda, also known as sodium bicarbonate, is effective for cleaning grout. You can find it in the baking aisle of most grocery stores. Just make sure it’s fresh and hasn’t expired.
9. My grout is really old and stained. Will baking soda grout cleaner still work?
Baking soda grout cleaner can still be effective on old and stained grout, but it may require more effort and multiple applications. For particularly stubborn stains, you may need to let the baking soda paste sit on the grout for a longer period of time, up to an hour or even overnight. You may also need to scrub the grout more vigorously. If the stains are extremely deep-seated, you may need to consider using a commercial grout cleaner or hiring a professional grout cleaning service. However, it’s always worth trying the baking soda method first, as it’s a safe and affordable option.
10. How do I make sure I rinse the baking soda grout cleaner off completely?
Rinsing the baking soda grout cleaner off completely is important to prevent any residue from remaining on your grout. After scrubbing the grout with the baking soda paste, use a clean, damp cloth or sponge to wipe away the paste. Rinse the cloth or sponge frequently in clean water. You may need to repeat this process several times to remove all traces of the baking soda. You can also use a spray bottle filled with clean water to rinse the grout. After rinsing, dry the grout with a clean towel to prevent water spots.


Leave a Comment