

Grow Chives in a Pot: Unleash your inner gardener and bring a burst of fresh, oniony flavor right to your kitchen windowsill! Have you ever found yourself needing just a snip of chives to elevate a dish, only to realize you’re out? I know I have! That’s where this simple, yet incredibly rewarding, DIY project comes in.
Chives, with their delicate green stalks and mild taste, have been cultivated for centuries. Originating in Asia, they’ve made their way into cuisines worldwide, adding a subtle zest to everything from soups and salads to omelets and dips. Beyond their culinary appeal, chives are also believed to bring good luck in some cultures – a little extra charm for your home, perhaps?
But why should you bother learning to grow chives in a pot yourself? Well, think about it: no more last-minute grocery store runs, no more wilted herbs in the fridge. With this easy DIY guide, you’ll have a constant supply of fresh, organic chives at your fingertips. Plus, it’s a fantastic way to add a touch of greenery to your home, even if you don’t have a sprawling garden. I’m going to show you how to easily grow chives in a pot, so you can enjoy fresh herbs all year long!
Growing Chives in a Pot: A Beginner’s Guide
Hey there, fellow plant enthusiasts! I’m so excited to share my experience with growing chives in a pot. It’s seriously one of the easiest and most rewarding gardening projects you can undertake, even if you’re a complete newbie like I was at first. Fresh chives are a game-changer in the kitchen, adding a delicate oniony flavor to everything from scrambled eggs to baked potatoes. Plus, they’re super low-maintenance and thrive in containers, making them perfect for small spaces like balconies or patios. Let’s dive in!
Choosing the Right Pot and Soil
Before we get our hands dirty, let’s talk about the essentials: the pot and the soil. These are the foundation for happy, healthy chives.
* Pot Size: Chives don’t need a huge amount of space, but they do appreciate room to spread out. I recommend a pot that’s at least 6 inches in diameter and 6 inches deep. This will give the chives’ roots enough space to grow without becoming root-bound. You can always go bigger, but don’t overwhelm them with a massive container.
* Drainage: This is crucial! Chives hate sitting in soggy soil. Make sure your pot has drainage holes at the bottom to allow excess water to escape. If your pot doesn’t have drainage, you can drill some holes yourself (carefully, of course!).
* Material: The material of the pot is less important than size and drainage. Terracotta, plastic, ceramic – they all work. Terracotta pots tend to dry out faster, which can be a good thing if you’re prone to overwatering. Plastic pots retain moisture better, which can be helpful if you live in a hot, dry climate.
* Soil: Forget using garden soil straight from the ground. It’s often too heavy and doesn’t drain well enough for container gardening. Instead, opt for a good-quality potting mix. These mixes are specifically formulated for containers and provide the right balance of drainage, aeration, and nutrients. I personally like to use a mix that contains peat moss, perlite, and vermiculite. You can also add some compost to the mix for an extra boost of nutrients.
Planting Your Chives
Now for the fun part: planting! You have a couple of options here: starting from seeds or transplanting established chives. I’ve done both, and I’ll walk you through each method.
Starting from Seeds
This is the most economical way to grow chives, but it requires a little more patience.
1. Sowing the Seeds: Fill your pot with potting mix, leaving about an inch of space at the top. Moisten the soil thoroughly. Sprinkle the chive seeds evenly over the surface of the soil. You don’t need to bury them too deep; just gently press them into the soil with your fingers.
2. Covering the Seeds: Lightly cover the seeds with a thin layer of potting mix or vermiculite. This will help retain moisture and protect the seeds from drying out.
3. Watering: Gently water the soil using a spray bottle or a watering can with a gentle rose attachment. You want to keep the soil consistently moist but not waterlogged.
4. Creating a Greenhouse Effect: To speed up germination, you can cover the pot with a plastic bag or a clear plastic dome. This will create a humid environment that the seeds will love. Just make sure to remove the cover for a few hours each day to allow for air circulation and prevent mold growth.
5. Finding the Right Spot: Place the pot in a warm, sunny location. Chives need at least 6 hours of sunlight per day to thrive. A south-facing window or a sunny balcony is ideal.
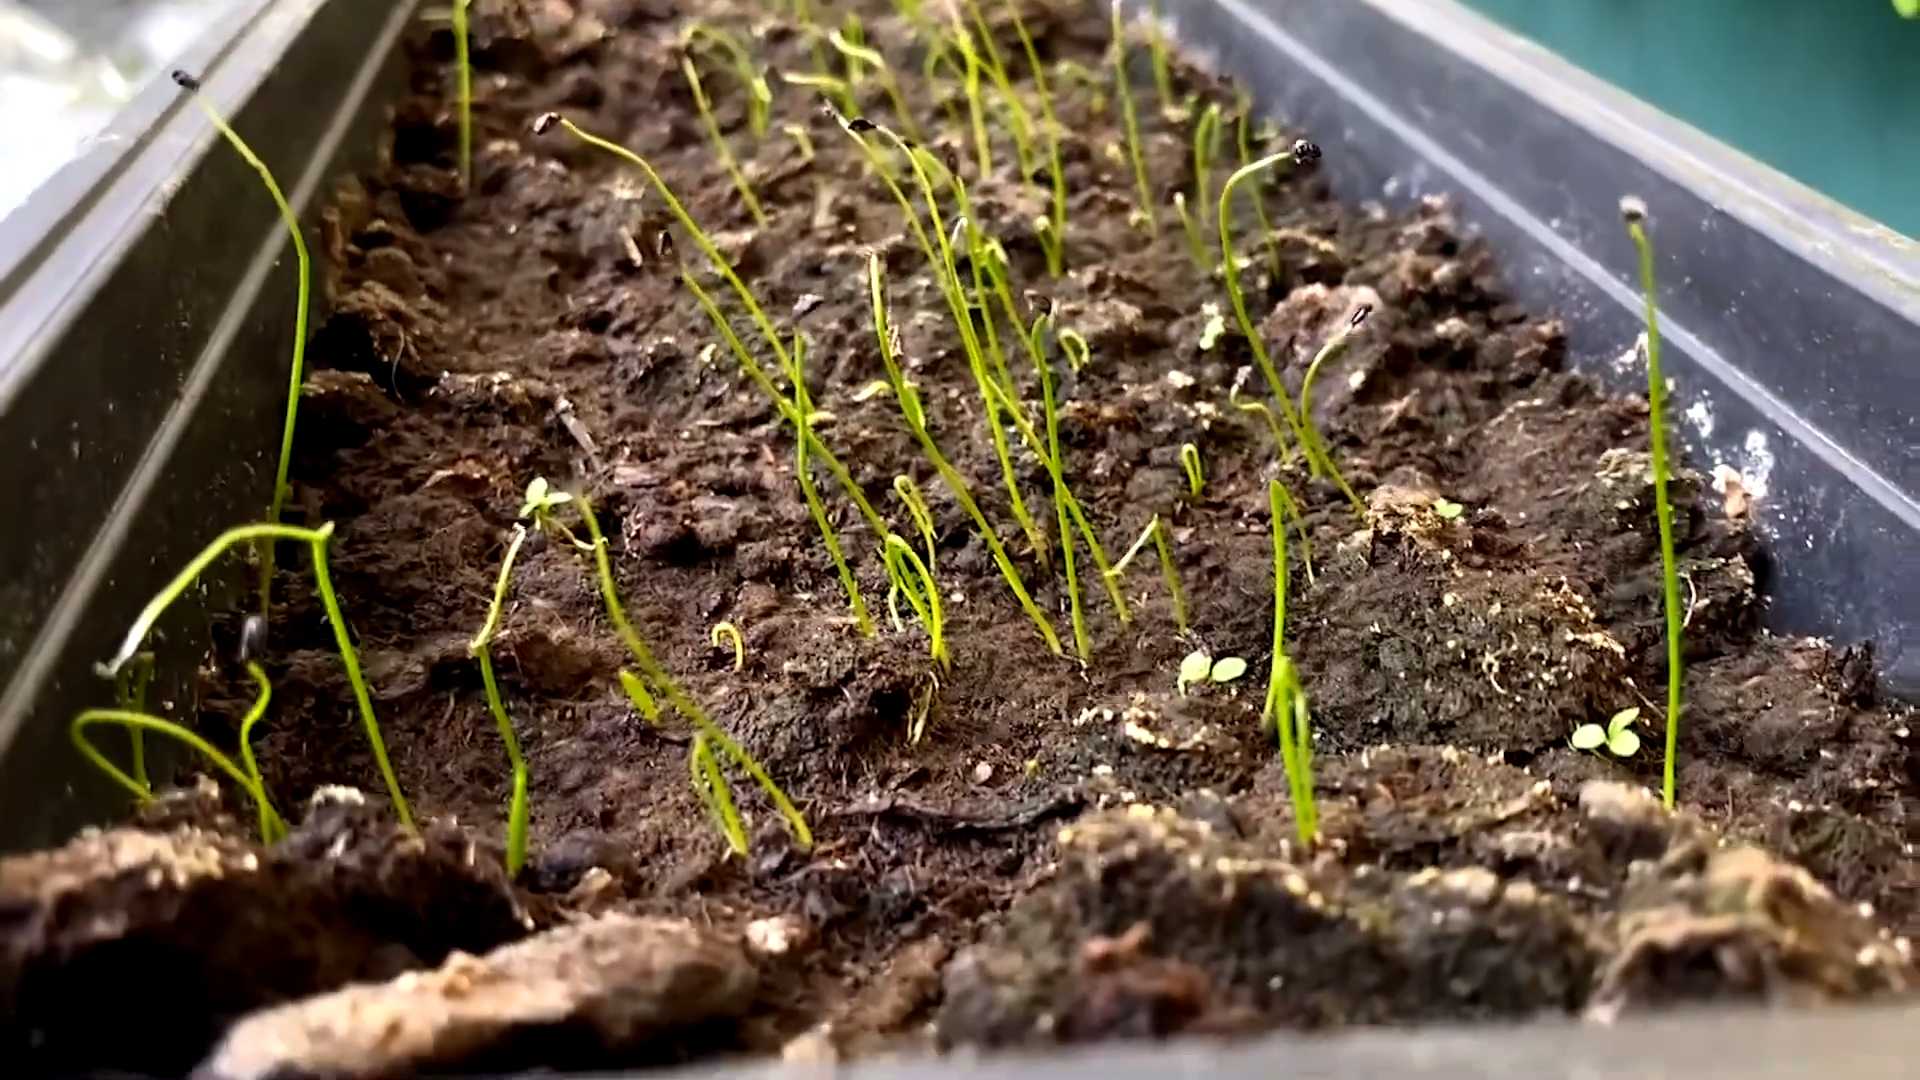
6. Germination: Be patient! Chive seeds can take anywhere from 7 to 21 days to germinate. Keep the soil consistently moist during this time.
7. Thinning the Seedlings: Once the seedlings emerge, you may need to thin them out if they’re too crowded. This will give each plant enough space to grow. Simply snip off the weaker seedlings at the base with a pair of scissors.
Transplanting Established Chives
This is the quicker and easier option, especially if you’re impatient like me! You can purchase established chive plants from your local garden center or nursery.
1. Preparing the Pot: Fill your pot with potting mix, leaving about an inch of space at the top. Moisten the soil thoroughly.
2. Removing the Chives from Their Container: Gently remove the chive plant from its original container. If the roots are tightly bound, gently loosen them with your fingers.
3. Planting the Chives: Dig a hole in the center of the pot that’s large enough to accommodate the chive plant’s root ball. Place the plant in the hole and backfill with potting mix. Gently press the soil around the base of the plant to secure it.
4. Watering: Water the chives thoroughly after planting.
Caring for Your Chives
Once your chives are planted, it’s time to provide them with the care they need to flourish.
* Watering: Chives like consistently moist soil, but they don’t like to be waterlogged. Water them whenever the top inch of soil feels dry to the touch. During hot, dry weather, you may need to water them more frequently.
* Sunlight: As I mentioned earlier, chives need at least 6 hours of sunlight per day. If you don’t have a sunny spot, you can supplement with a grow light.
* Fertilizing: Chives are not heavy feeders, but they will benefit from occasional fertilization. I like to use a balanced liquid fertilizer diluted to half strength every few weeks during the growing season. You can also add some compost to the soil every few months.
* Pruning: Regular pruning is essential for keeping your chives healthy and productive. Snip off the flower stalks as soon as they appear. This will encourage the plant to produce more leaves. You can also trim the leaves back to about 2 inches tall every few weeks to promote new growth.
* Pest Control: Chives are relatively pest-resistant, but they can occasionally be bothered by aphids or spider mites. If you notice any pests, you can try spraying them with a strong stream of water or using an insecticidal soap.
* Overwintering: Chives are perennial, which means they will come back year after year. In colder climates, the leaves will die back in the winter, but the roots will survive. You can either bring the pot indoors for the winter or leave it outdoors in a sheltered location. If you leave it outdoors, be sure to protect it from frost by covering it with a layer of mulch.
Harvesting Your Chives
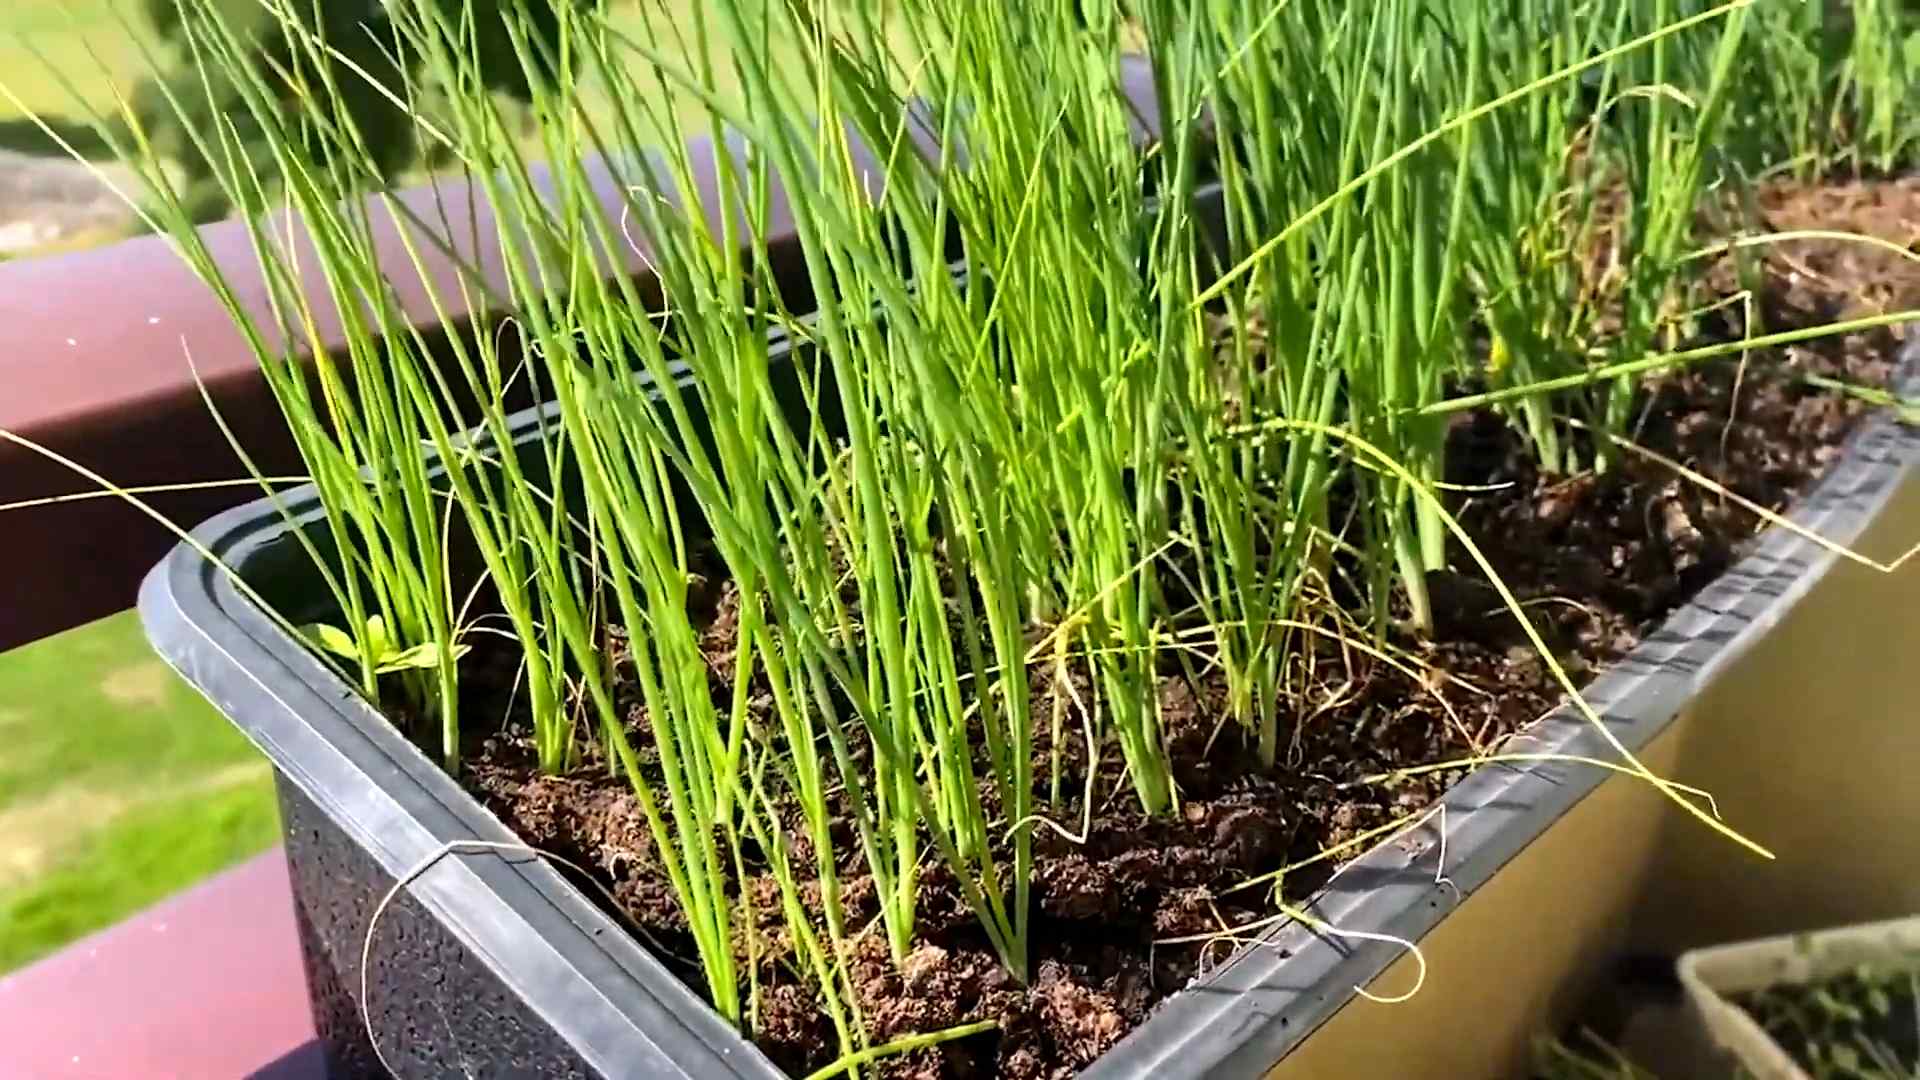
The best part of growing chives is, of course, harvesting them! You can start harvesting chives as soon as the leaves are about 6 inches tall.
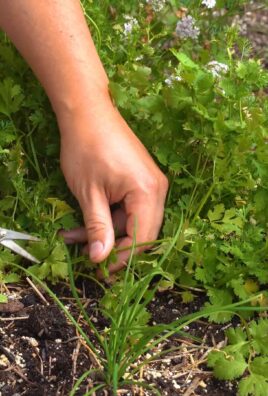
1. Cutting the Chives: Use a pair of scissors or kitchen shears to cut the chives near the base of the plant. Avoid cutting off more than one-third of the plant at a time.
2. Using the Chives: Freshly harvested chives are best, but you can also store them in the refrigerator for a few days. To store them, wrap them in a damp paper towel and place them in a plastic bag.
3. Enjoying Your Harvest: Add your freshly harvested chives to salads, soups, omelets, baked potatoes, or any other dish that could use a little oniony flavor.
Troubleshooting
Even with the best care, you might encounter a few problems along the way. Here are some common issues and how to fix them:
* Yellowing Leaves: This can be caused by overwatering, underwatering, or nutrient deficiencies. Check the soil moisture and adjust your watering accordingly. If the soil is dry, water more frequently. If the soil is soggy, water less frequently. You can also try fertilizing the chives with a balanced liquid fertilizer.
* Leggy Growth: This is usually caused by insufficient sunlight. Move the chives to a sunnier location or supplement with a grow light.
* Slow Growth: This can be caused by a number of factors, including poor soil, insufficient sunlight, or nutrient deficiencies. Make sure you’re using a good-quality potting mix, providing enough sunlight, and fertilizing regularly.
* Pests: As mentioned earlier, chives can occasionally be bothered by aphids or spider mites. Spray them with a strong stream of water or use an insecticidal soap.
Propagating Chives
Once your chives are established, you can easily propagate them to create more plants. The easiest way to propagate chives is by division.
1. Digging Up the Chives: In the spring or fall, carefully dig up the chive plant.
2. Dividing the Plant: Gently separate the plant into several smaller clumps, making sure each
Conclusion
So, there you have it! Growing chives in a pot is not just a simple gardening task; it’s a gateway to fresher, more flavorful meals and a deeper connection with the food you consume. This DIY trick is a must-try for anyone, regardless of their gardening experience. Whether you’re a seasoned green thumb or a complete beginner, the ease and rewards of cultivating your own chives are undeniable. Imagine snipping fresh, vibrant chives directly from your windowsill to garnish your omelets, salads, soups, or baked potatoes. The difference in taste between store-bought dried chives and freshly grown ones is truly remarkable. You’ll be amazed at the burst of oniony flavor that these little green spears can add to your culinary creations.
But the benefits extend beyond just taste. Growing your own chives is also a sustainable and cost-effective way to add fresh herbs to your diet. No more buying expensive bunches of chives that wilt away in your refrigerator before you have a chance to use them. With a pot of chives on hand, you’ll always have a fresh supply at your fingertips. Plus, you’ll be reducing your reliance on commercially grown herbs, which often travel long distances and contribute to carbon emissions.
Why is this DIY trick a must-try? Because it’s easy, rewarding, sustainable, and delicious! It’s a small investment of time and effort that yields a big return in terms of flavor, convenience, and environmental responsibility.
Looking for variations? Consider planting different varieties of chives to experiment with different flavors and textures. Garlic chives, for example, offer a milder garlic flavor that complements Asian-inspired dishes beautifully. You can also try planting your chives in decorative pots to add a touch of greenery and style to your kitchen or balcony. Another fun variation is to companion plant your chives with other herbs and vegetables. Chives are known to repel certain pests, making them a valuable addition to any garden. They work particularly well alongside tomatoes, carrots, and cabbage.
Don’t be afraid to experiment with different potting mixes and fertilizers to find what works best for your chives. Some gardeners prefer to use organic potting mixes and fertilizers, while others opt for synthetic options. The key is to provide your chives with the nutrients they need to thrive.
We wholeheartedly encourage you to try this DIY trick and experience the joy of growing your own chives. It’s a simple yet profound way to connect with nature and enhance your culinary experiences. Once you’ve harvested your first batch of homegrown chives, we’d love to hear about your experience! Share your photos, recipes, and tips in the comments section below. Let’s create a community of chive-loving gardeners and inspire others to embrace the joys of growing their own food. What are you waiting for? Grab a pot, some soil, and some chive seeds or seedlings, and get growing! You’ll be amazed at how easy and rewarding it is to cultivate your own fresh, flavorful chives. This simple project will bring a touch of green to your space and a burst of flavor to your plate. So, go ahead and give it a try – you won’t regret it!
Frequently Asked Questions (FAQ)
What kind of pot should I use for growing chives?
The best pot for growing chives is one that is at least 6 inches in diameter and has drainage holes. This allows for adequate root growth and prevents waterlogging, which can lead to root rot. You can use terracotta, plastic, or ceramic pots, but terracotta pots tend to dry out faster, so you may need to water more frequently. Consider the aesthetic of your space when choosing a pot, but prioritize functionality first. A slightly larger pot (8-10 inches) will give the chives more room to spread and thrive, especially if you plan on growing them for an extended period.
What type of soil is best for chives?
Chives prefer well-draining soil that is rich in organic matter. A good potting mix specifically formulated for herbs or vegetables is ideal. You can also amend regular potting soil with compost or aged manure to improve its fertility and drainage. Avoid using heavy clay soil, as it can become waterlogged and suffocate the roots. A slightly acidic to neutral pH (around 6.0-7.0) is optimal for chive growth.
How much sunlight do chives need?
Chives thrive in full sun, which means they need at least 6 hours of direct sunlight per day. However, they can also tolerate partial shade, especially in hotter climates. If you’re growing chives indoors, place them near a sunny window or supplement with a grow light. Insufficient sunlight can result in leggy growth and reduced flavor. Rotate the pot regularly to ensure even exposure to sunlight.
How often should I water my chives?
Water your chives regularly, keeping the soil consistently moist but not waterlogged. Check the soil moisture by sticking your finger about an inch deep. If the soil feels dry, it’s time to water. Water deeply, allowing the excess water to drain out of the drainage holes. Reduce watering during the winter months when the chives are not actively growing. Overwatering can lead to root rot, so it’s important to find the right balance.
How often should I fertilize my chives?
Fertilize your chives every 4-6 weeks during the growing season (spring and summer) with a balanced liquid fertilizer diluted to half strength. Avoid over-fertilizing, as this can burn the roots. You can also use a slow-release fertilizer at the beginning of the growing season. Organic fertilizers, such as compost tea or fish emulsion, are also excellent options.
How do I harvest chives?
Harvest chives by snipping the leaves close to the base of the plant with scissors or kitchen shears. Avoid cutting off more than one-third of the plant at a time, as this can weaken it. Regular harvesting encourages new growth and keeps the plant productive. You can harvest chives throughout the growing season.
Will chives grow back after cutting?
Yes, chives are perennial plants, which means they will grow back year after year. After harvesting, the plant will quickly regenerate new leaves. In colder climates, the chives may die back in the winter, but they will re-emerge in the spring.
How do I prevent chives from flowering?
While chive flowers are edible and attractive, they can also divert energy away from leaf production. To prevent flowering, regularly snip off the flower buds as they appear. If you do allow the chives to flower, you can collect the seeds and use them to propagate new plants.
Can I grow chives indoors year-round?
Yes, you can grow chives indoors year-round, provided you give them enough light and water. Place the pot near a sunny window or supplement with a grow light. Maintain a consistent watering schedule and fertilize regularly. Indoor chives may not grow as vigorously as outdoor chives, but they will still provide you with a steady supply of fresh herbs.
Are there any pests or diseases that affect chives?
Chives are generally pest-resistant, but they can occasionally be affected by aphids, spider mites, or onion thrips. These pests can be controlled with insecticidal soap or neem oil. Root rot can also be a problem if the soil is poorly drained or the chives are overwatered. To prevent root rot, ensure that the pot has drainage holes and avoid overwatering.
Can I propagate chives from seed?
Yes, you can propagate chives from seed. Sow the seeds indoors 6-8 weeks before the last frost or directly outdoors after the last frost. Keep the soil moist and warm until the seeds germinate. Once the seedlings are large enough to handle, transplant them into individual pots or directly into the garden.
Can I divide chives?
Yes, dividing chives is a great way to propagate new plants and rejuvenate older ones. Divide the chives in the spring or fall by carefully digging up the clump and separating it into smaller sections. Each section should have several healthy shoots and roots. Replant the divisions in individual pots or directly into the garden.
How do I store harvested chives?
Freshly harvested chives can be stored in the refrigerator for up to a week. Wrap them in a damp paper towel and place them in a plastic bag or container. You can also freeze chives for longer storage. Chop the chives and place them in ice cube trays with water or olive oil. Once frozen, transfer the cubes to a freezer bag.
Are chive blossoms edible?
Yes, chive blossoms are edible and have a mild onion flavor. They can be used as a garnish in salads, soups, and other dishes. The blossoms also attract beneficial insects to the garden.
What are some creative ways to use fresh chives?
Fresh chives can be used in a variety of dishes, including omelets, salads, soups, baked potatoes, dips, and sauces. They can also be used as a garnish for grilled meats and vegetables. Get creative and experiment with different ways to incorporate fresh chives into your cooking. You can even make chive butter or chive oil for added flavor.

Leave a Comment