

Coffee grounds fridge odor – just the phrase sends shivers down my spine! We’ve all been there: you open the refrigerator, expecting a refreshing blast of cool air, and instead, you’re greeted by a funky, lingering smell that makes you question everything you’ve ever stored inside. It’s a common problem, and thankfully, a surprisingly simple solution exists, one that involves something you probably already have in your kitchen: coffee grounds!
For centuries, coffee has been more than just a morning pick-me-up. In many cultures, it’s a symbol of hospitality, community, and even a natural remedy. While we often think of its stimulating effects, coffee grounds possess incredible odor-absorbing properties. Think of it as a natural, eco-friendly alternative to those chemical-laden fridge deodorizers.
Why do you need this DIY trick? Because nobody wants their food tasting like the lingering remnants of last week’s leftovers! A smelly fridge can not only affect the taste of your food but also indicate the presence of bacteria and mold. Learning how to effectively use coffee grounds fridge odor eliminator is a game-changer for maintaining a fresh, clean, and healthy kitchen. I’m going to show you how to banish those unwanted smells for good, using this simple, cost-effective, and all-natural method. Let’s get started!
DIY Fridge Deodorizer: Banish Bad Smells with Coffee Grounds!
Okay, let’s face it, nobody likes opening their fridge to be greeted by a funky, unidentifiable odor. It’s a common problem, and those store-bought deodorizers can be expensive and sometimes not even that effective. But don’t worry, I’ve got a super simple and incredibly effective solution for you: coffee grounds! Yes, that’s right, the same stuff that perks you up in the morning can also work wonders at absorbing those nasty fridge smells. This DIY fridge deodorizer is cheap, eco-friendly, and actually works!
What You’ll Need
Before we dive in, let’s gather our supplies. The beauty of this project is that you probably already have most of these things lying around:
* Used coffee grounds (freshly used is best, but even older ones will work)
* A small, breathable container (a small bowl, a jar with holes in the lid, or even a cut-off plastic bottle with holes poked in it)
* Optional: Activated charcoal (for extra odor-absorbing power)
* Optional: Essential oils (for a subtle, pleasant scent)
Why Coffee Grounds Work
You might be wondering, “Why coffee grounds?” Well, coffee grounds are naturally porous, which means they have tons of tiny little holes that can trap odor molecules. They’re also great at absorbing moisture, which can contribute to those fridge smells. Plus, they’re a natural and sustainable alternative to chemical-laden deodorizers.
Step-by-Step Instructions
Alright, let’s get started! Here’s how to make your own coffee ground fridge deodorizer:
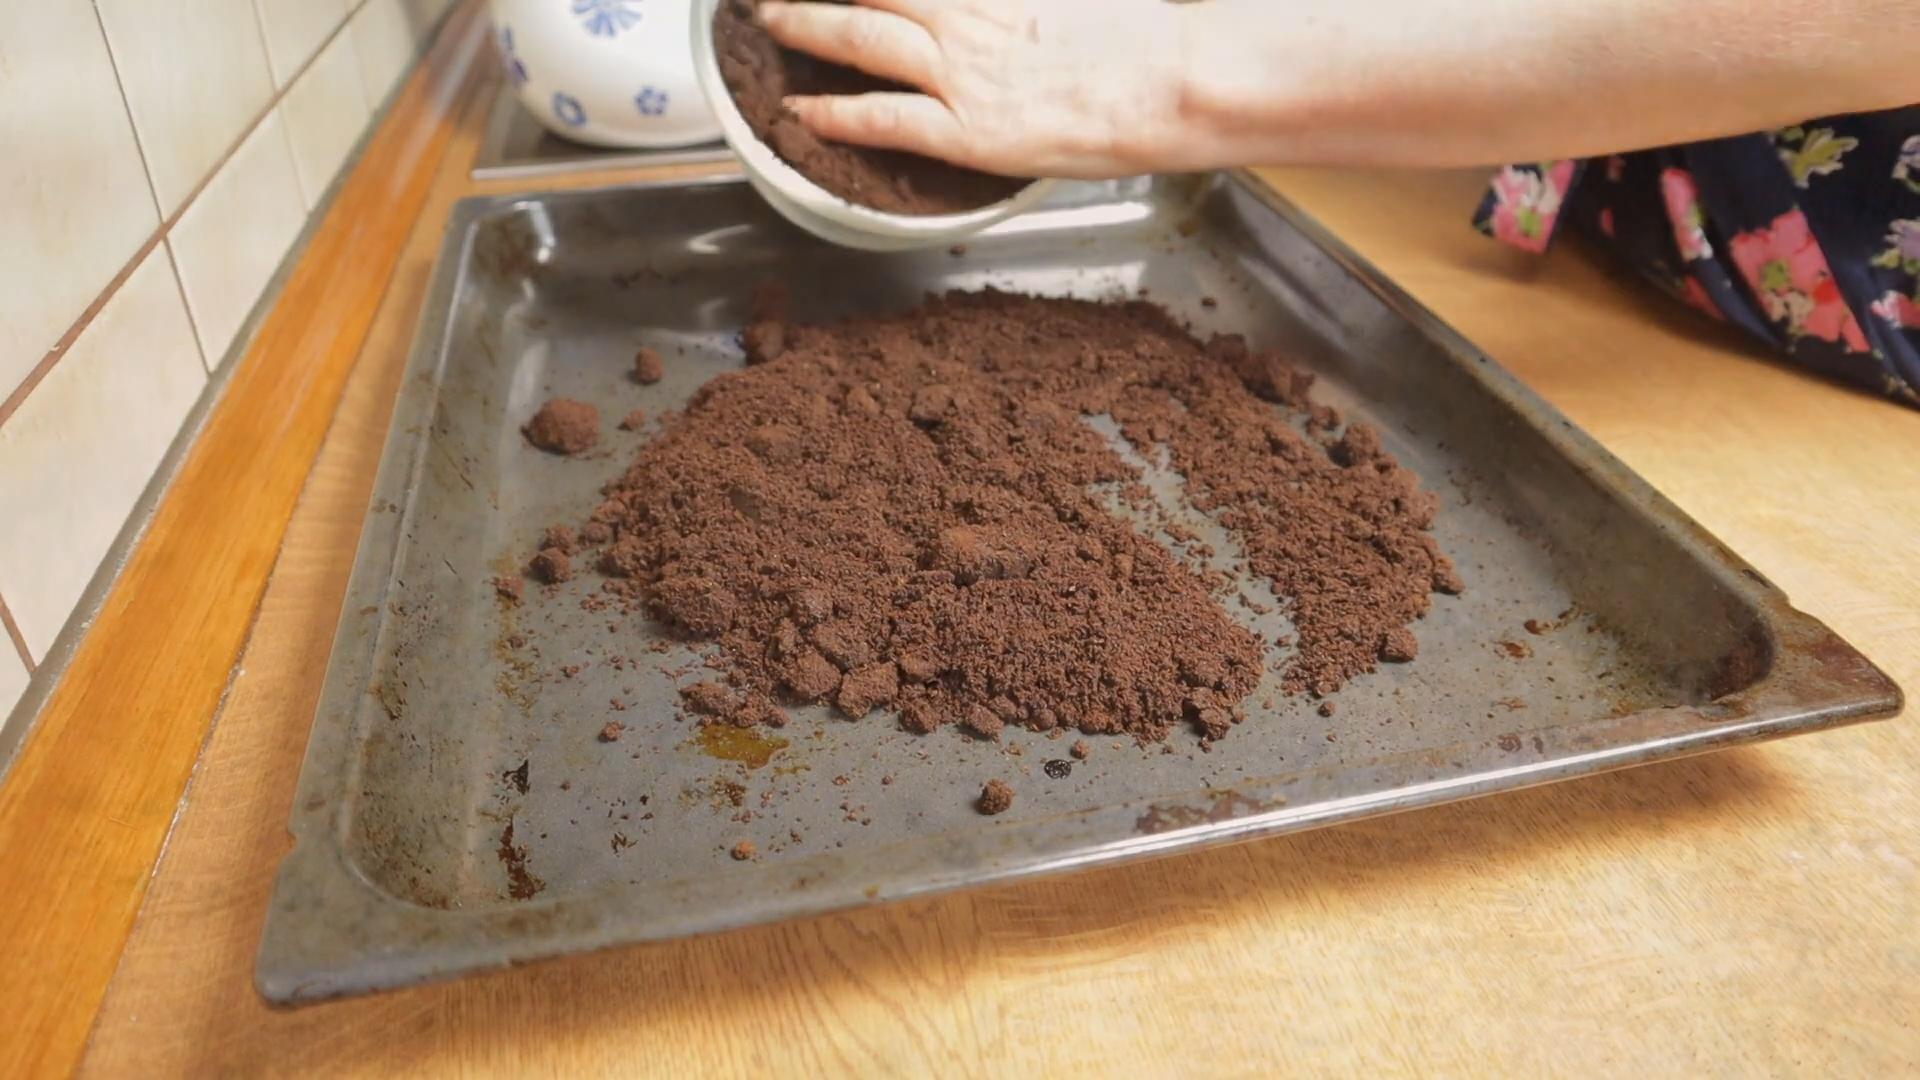
1. Gather Your Coffee Grounds: The first step is to collect your used coffee grounds. After you brew your coffee, don’t throw them away! Instead, set them aside to cool. I usually keep a small container on my counter specifically for collecting coffee grounds for this purpose.
2. Dry the Coffee Grounds (Important!): This is a crucial step. You need to dry the coffee grounds to prevent mold growth. Moldy coffee grounds in your fridge are definitely not what we’re going for! There are a few ways to do this:
* Oven Drying: Spread the coffee grounds in a thin layer on a baking sheet lined with parchment paper. Bake at a very low temperature (around 170-200°F or 75-95°C) for about an hour, or until the grounds are completely dry. Keep a close eye on them to make sure they don’t burn.
* Air Drying: Spread the coffee grounds in a thin layer on a baking sheet or a large plate. Place them in a well-ventilated area, like near a window or outside on a sunny day. This method takes longer, usually a few days, but it’s the most energy-efficient. Make sure to stir the grounds occasionally to ensure they dry evenly.
* Microwave Drying (Use with Caution): Spread the coffee grounds in a thin layer on a microwave-safe plate. Microwave in short bursts (30 seconds at a time), stirring in between, until the grounds are dry. Be very careful not to burn them! This method requires close supervision.
3. Prepare Your Container: While the coffee grounds are drying, prepare your container. If you’re using a bowl, you’re all set. If you’re using a jar, make sure to poke some holes in the lid for ventilation. You can use a nail, a screwdriver, or even a drill. If you’re using a cut-off plastic bottle, poke holes all around the sides and bottom. The key is to allow air to circulate through the coffee grounds.
4. Add Activated Charcoal (Optional): For an extra boost of odor-absorbing power, you can add a layer of activated charcoal to the bottom of your container. Activated charcoal is incredibly porous and effective at trapping odors. You can find it at most pet stores (it’s often used in aquarium filters) or online.
5. Mix in Essential Oils (Optional): If you want to add a subtle, pleasant scent to your fridge, you can mix in a few drops of your favorite essential oil. I like to use lemon, grapefruit, or tea tree oil, as they have natural antibacterial properties. Just be careful not to use too much, as you don’t want the scent to be overpowering. A few drops are all you need.
6. Fill the Container with Dried Coffee Grounds: Once the coffee grounds are completely dry, fill your container. Don’t pack them too tightly, as you want to allow air to circulate.
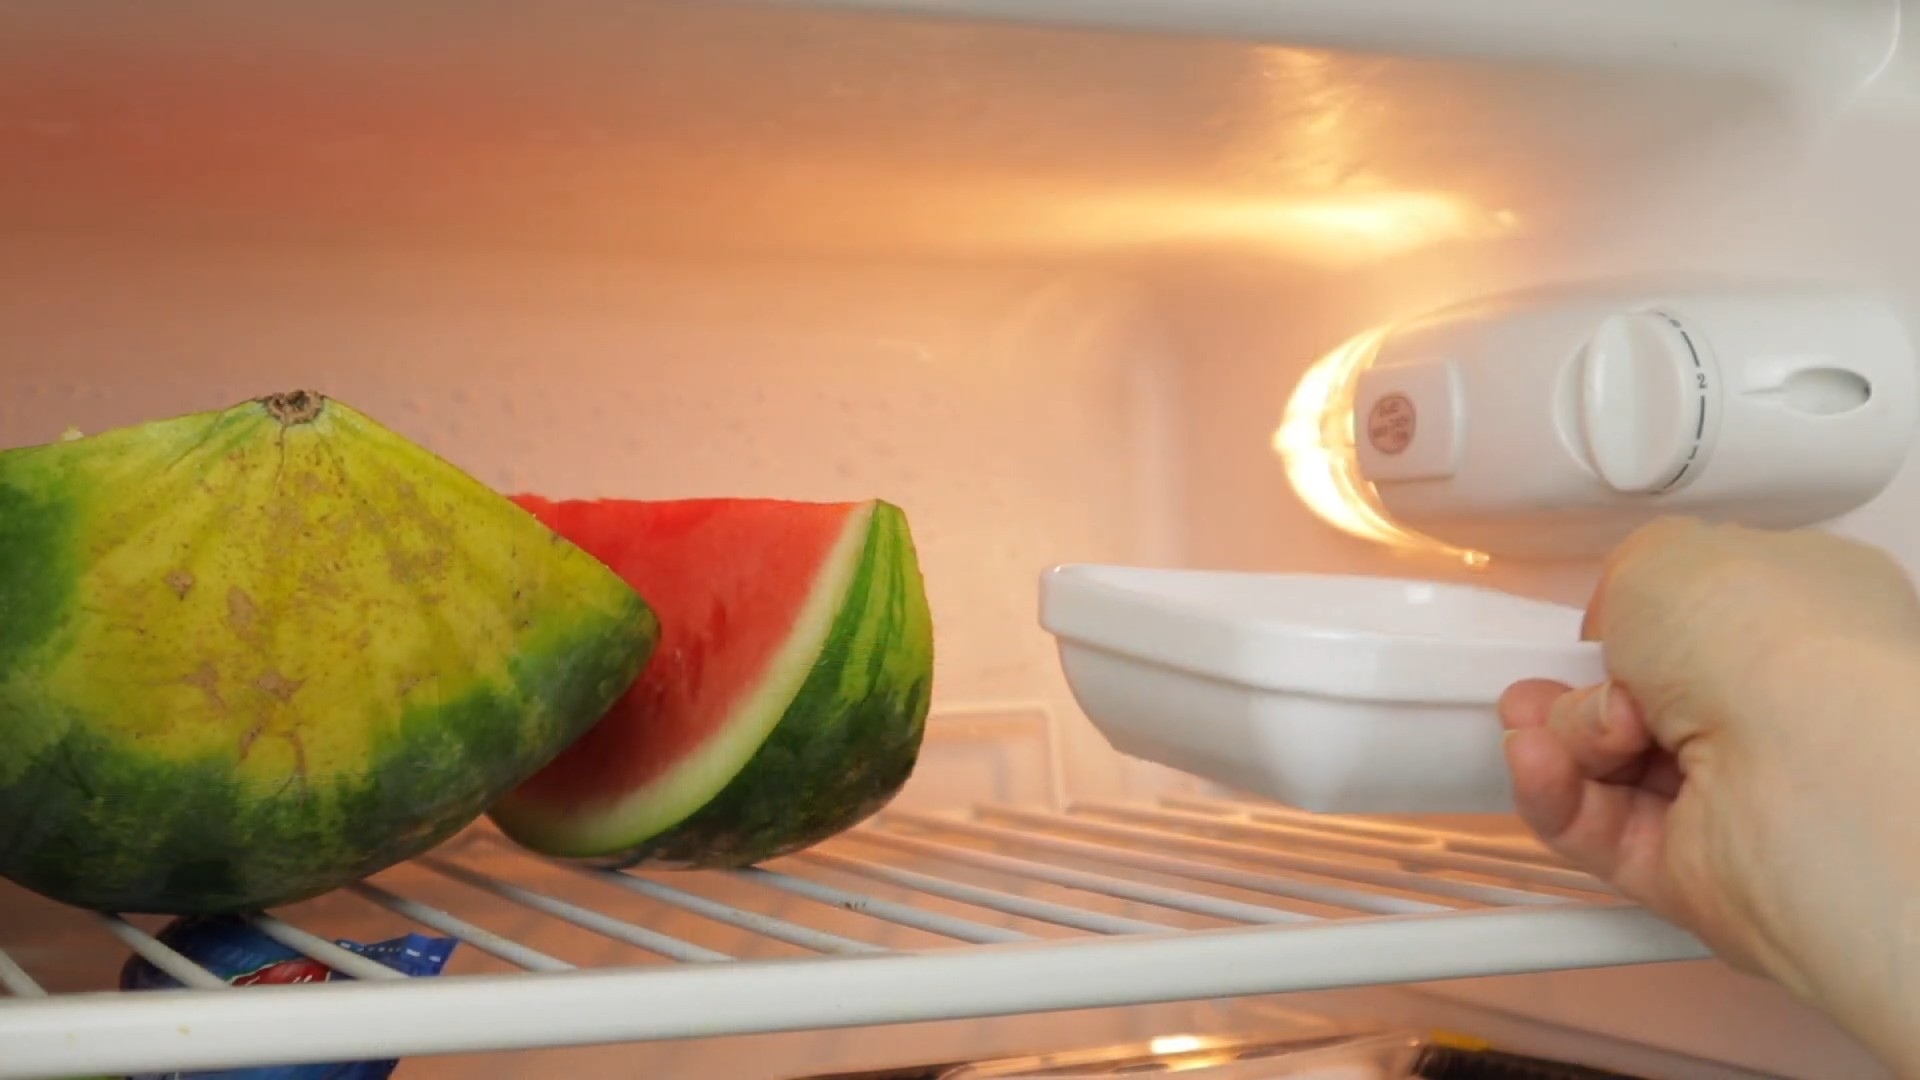
7. Place the Deodorizer in Your Fridge: Now, the moment of truth! Place your coffee ground deodorizer in your fridge. I usually put mine on a shelf near the back, where it’s less likely to be disturbed.
8. Replace the Coffee Grounds Regularly: The coffee grounds will eventually become saturated with odors, so you’ll need to replace them regularly. I usually replace mine every 2-3 weeks, or sooner if I notice the odors returning. You can compost the used coffee grounds or use them to fertilize your plants!
Troubleshooting and Tips
* Mold Growth: If you notice any mold growing on the coffee grounds, discard them immediately and start over. Make sure you’re drying the coffee grounds thoroughly before using them.
* Strong Odors: For particularly strong odors, you may need to use multiple containers of coffee grounds or replace them more frequently.
* Preventing Spills: If you’re worried about spills, you can place the container on a small plate or tray.
* Experiment with Containers: Get creative with your containers! You can use anything that’s breathable and won’t spill. I’ve even used old spice jars with holes poked in the lids.
* Coffee Ground Alternatives: While coffee grounds are my go-to, you can also use baking soda, vinegar, or even a cut lemon to deodorize your fridge.
Section: Deeper Dive into Drying Methods
Let’s talk a little more about drying those coffee grounds, because this is really the key to preventing mold and making your deodorizer last.
Oven Drying: The Speedy Solution
As I mentioned before, oven drying is the fastest method. But it’s also the one that requires the most attention. You really need to keep an eye on those grounds to make sure they don’t burn. Burnt coffee grounds won’t smell very pleasant in your fridge!
* Temperature is Key: Don’t be tempted to crank up the heat to speed things up. A low temperature is essential to prevent burning.
* Thin Layer is Best: Spreading the grounds in a thin layer ensures that they dry evenly.
* Stirring Helps: Even with a thin layer, it’s a good idea to stir the grounds occasionally to ensure they dry uniformly.
* Parchment Paper is Your Friend: Lining your baking sheet with parchment paper makes cleanup a breeze and prevents the coffee grounds from sticking.
Air Drying: The Patient Approach
Air drying is the most energy-efficient method, but it requires patience. It can take several days for the coffee grounds to dry completely, depending on the humidity and temperature.
* Ventilation is Crucial: Make sure you’re drying the grounds in a well-ventilated area. This will help them dry faster and prevent mold growth.
* Sunlight Helps: If possible, place the grounds in direct sunlight. The sun’s heat will help to evaporate the moisture.
* Stirring is Essential: Stir the grounds frequently to ensure they dry evenly. This is especially important if you’re drying them in a humid environment.
* Check for Mold: Keep a close eye on the grounds for any signs of mold growth. If you see any mold, discard the grounds immediately.
Microwave Drying: The Risky Business
Microwave drying is the quickest method, but it’s also the riskiest. It’s very easy to burn the coffee grounds in the microwave, so you need to be extremely careful.
* Short Bursts are Key: Microwave the grounds in short bursts (30 seconds at a time) to prevent burning.
* Stirring is Essential: Stir the grounds after each burst to ensure they dry evenly.
* Watch Closely: Keep a close eye on the grounds while they’re microwaving. If you see any smoke, stop immediately.
* Use a Microwave-Safe Plate: Make sure you’re using a microwave-safe plate to dry the grounds.
Section: Beyond the Basics – Enhancing Your Deodorizer
Want to take your coffee ground fridge deodorizer to the next level? Here are a few ideas:
Activated Charcoal Power-Up
As I mentioned earlier, activated charcoal is a fantastic addition to your deodorizer. It’s incredibly porous and effective at trapping odors. You can find it at most pet stores (it’s often used in aquarium filters)
Conclusion
So, there you have it! This simple yet incredibly effective DIY trick using coffee grounds to eliminate fridge odor is a game-changer for any home. We’ve explored how the natural properties of coffee, specifically its ability to absorb and neutralize smells, can transform your refrigerator from a smelly storage space into a fresh and inviting haven for your food.
Why is this a must-try? Because it’s natural, cost-effective, and readily available. Forget about expensive chemical-laden air fresheners that only mask the problem. Coffee grounds tackle the root cause of the odor, leaving your fridge smelling clean and neutral. Think about it: no more opening the fridge door to be greeted by a funky, unidentifiable smell. Instead, you’ll be met with the subtle, comforting aroma of coffee, a welcome change that will make accessing your food a much more pleasant experience.
Beyond the basic method, there are several variations you can explore to tailor this DIY trick to your specific needs and preferences. For example, if you’re particularly sensitive to the smell of coffee, you can try using activated charcoal instead. While not quite as readily available as coffee grounds, activated charcoal is another excellent odor absorber. You could also experiment with adding a few drops of essential oils, like lemon or grapefruit, to the coffee grounds for an extra burst of freshness. Just be sure to use food-safe essential oils and only add a small amount to avoid overpowering the fridge with fragrance. Another variation is to use a breathable container other than a bowl. A small muslin bag or even a repurposed tea bag can work wonders, especially in smaller fridges.
The key takeaway here is that eliminating fridge odor doesn’t have to be a complicated or expensive endeavor. With a little ingenuity and the power of coffee grounds, you can achieve a fresh-smelling fridge that enhances your overall kitchen experience.
We wholeheartedly encourage you to try this DIY trick and experience the difference for yourself. It’s a small change that can make a big impact on the freshness of your food and the overall ambiance of your kitchen. And once you’ve tried it, we’d love to hear about your experience! Share your results, variations, and any tips you’ve discovered in the comments below. Let’s create a community of fridge-odor-fighting experts! Don’t hesitate to share pictures of your coffee ground creations or any other odor-busting solutions you’ve found effective. Your insights could help others achieve a fresher, cleaner fridge and a happier kitchen. So go ahead, give it a try, and let us know what you think! Let’s banish those unwanted fridge smells together, one coffee ground at a time. This simple solution for coffee grounds fridge odor is waiting for you.
FAQ
Q: How long do coffee grounds last as a fridge odor absorber?
A: Typically, coffee grounds will remain effective at absorbing odors for about two weeks to one month. The lifespan depends on the severity of the odors in your fridge and the amount of coffee grounds you use. If you notice the coffee grounds starting to smell like the odors they’re absorbing, or if the fridge starts to smell again, it’s time to replace them with fresh grounds. Regularly checking and replacing the grounds will ensure continuous odor control.
Q: Can I use any type of coffee grounds?
A: Yes, you can use any type of coffee grounds, whether they are fresh, used, or even instant coffee grounds. However, used coffee grounds are generally preferred because they are a sustainable way to repurpose waste. If you’re using fresh grounds, you might want to lightly dampen them to help release their odor-absorbing properties. Just be sure not to make them too wet, as this could lead to mold growth.
Q: Will the coffee grounds make my fridge smell like coffee?
A: While there might be a subtle coffee aroma initially, the primary purpose of the coffee grounds is to absorb and neutralize odors, not to perfume the fridge. The coffee scent will typically dissipate within a few days, leaving your fridge smelling fresh and neutral. If you’re concerned about the coffee smell, you can try using a smaller amount of coffee grounds or placing them in a container with a lid that has small ventilation holes.
Q: What if I don’t have coffee grounds? What are some alternatives?
A: If you don’t have coffee grounds, there are several other effective alternatives you can use to absorb fridge odors. Baking soda is a classic choice and works similarly to coffee grounds by absorbing odors. You can place an open box of baking soda in the fridge and replace it every month. Activated charcoal is another excellent option, known for its high absorption capacity. You can find activated charcoal in powder or briquette form and place it in a container in the fridge. Other alternatives include lemon halves, apple slices, or even a bowl of uncooked oatmeal.
Q: How much coffee grounds should I use?
A: The amount of coffee grounds you use will depend on the size of your fridge and the severity of the odors. A good starting point is about half a cup to one cup of coffee grounds. You can adjust the amount as needed based on your experience. For smaller fridges or mild odors, half a cup might be sufficient. For larger fridges or stronger odors, you might need to use a full cup or even two.
Q: Where should I place the coffee grounds in the fridge?
A: The best place to put the coffee grounds is in an open container on one of the shelves in your fridge. Placing it in the middle shelf is often a good choice, as it allows the coffee grounds to absorb odors from all areas of the fridge. Avoid placing the coffee grounds near foods that might absorb the coffee aroma, such as dairy products or delicate fruits. You can also place multiple containers of coffee grounds in different areas of the fridge for more comprehensive odor control.
Q: Can I reuse the coffee grounds after they’ve been in the fridge?
A: Once the coffee grounds have been used to absorb odors in the fridge, it’s best not to reuse them for other purposes, such as composting or gardening. The coffee grounds will have absorbed various odors and bacteria from the fridge, which could contaminate your compost or garden soil. It’s best to dispose of the used coffee grounds properly after they’ve served their purpose in the fridge.
Q: What if the coffee grounds don’t completely eliminate the fridge odor?
A: If the coffee grounds don’t completely eliminate the fridge odor, there are a few things you can try. First, make sure you’re using enough coffee grounds and that they are fresh. Second, thoroughly clean your fridge to remove any lingering sources of odor. Check for expired food, spills, or mold growth. You can also try using a combination of odor absorbers, such as coffee grounds and baking soda, for more comprehensive odor control. If the odor persists, it might be necessary to consult a professional appliance repair technician to check for any underlying issues with your fridge.
Q: Is it safe to use coffee grounds in the fridge around children and pets?
A: Yes, it is generally safe to use coffee grounds in the fridge around children and pets, as long as they are not ingested. Keep the coffee grounds in a container that is out of reach of children and pets to prevent them from accidentally eating them. While coffee grounds are not highly toxic, they can cause stomach upset if ingested in large quantities. If you’re concerned about your children or pets getting into the coffee grounds, you can use a container with a lid that has small ventilation holes to prevent access.

Leave a Comment