

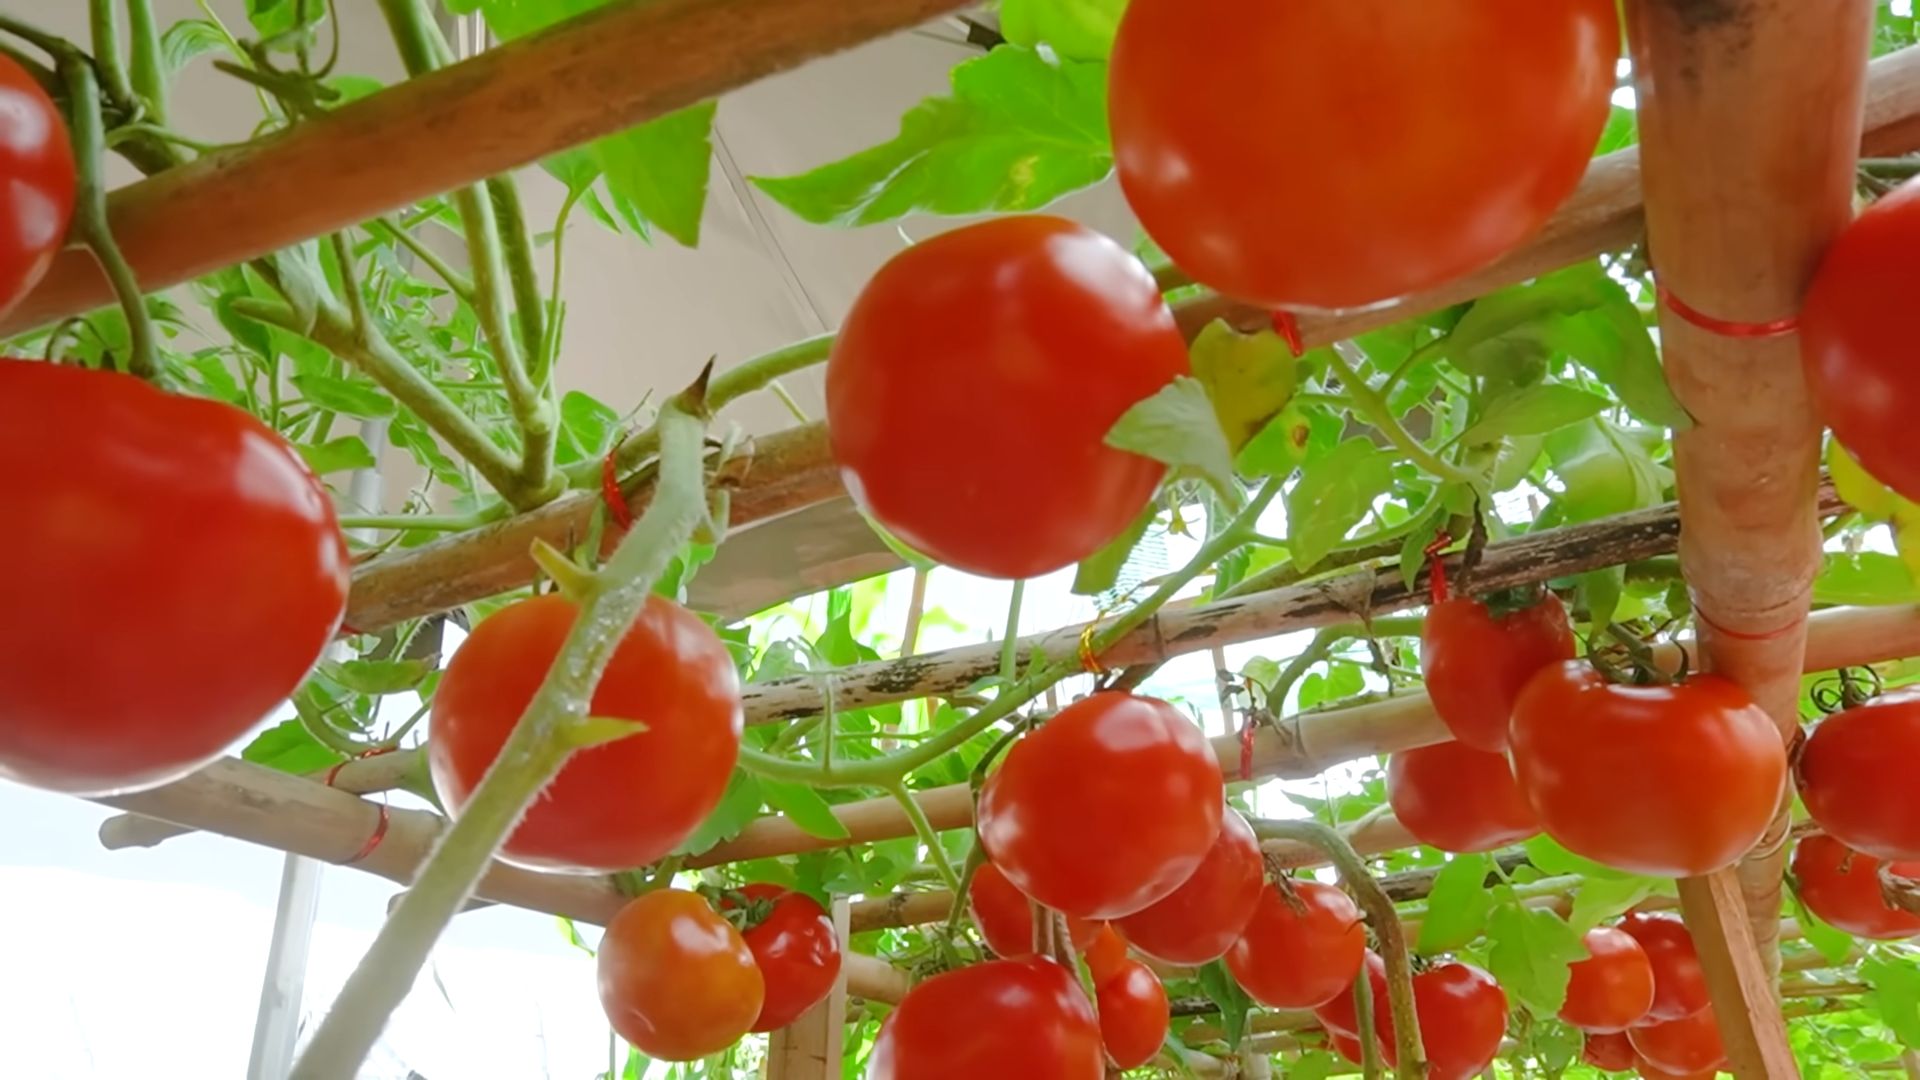
Growing Tomatoes from Seed can seem daunting, but trust me, it’s one of the most rewarding experiences a home gardener can have! Imagine biting into a juicy, sun-ripened tomato that you nurtured from a tiny seed – the flavor is simply unmatched. For centuries, tomatoes have been a staple in cuisines worldwide, originating in South America and gradually making their way into our gardens and hearts. From the vibrant sauces of Italy to the fresh salsas of Mexico, the tomato’s versatility is undeniable.
But why bother starting from seed when you can just buy seedlings? Well, for starters, you gain access to a much wider variety of tomato types. Forget the limited selection at your local nursery; with seeds, you can explore heirloom varieties with unique flavors and colors. More importantly, growing tomatoes from seed gives you complete control over the growing process, ensuring your plants are healthy and strong from the very beginning. Plus, it’s incredibly cost-effective! Think of all the delicious tomatoes you’ll harvest for just a fraction of the price of buying them at the store. In this article, I’ll share my favorite DIY tricks and hacks to make starting tomatoes from seed easy, fun, and successful, even if you’re a complete beginner. Get ready to transform your garden and your taste buds!
Growing Tomatoes From Seed: A Comprehensive DIY Guide
Okay, tomato lovers, let’s get our hands dirty! Growing tomatoes from seed is seriously rewarding. There’s nothing quite like biting into a juicy, homegrown tomato that you nurtured from a tiny seed. It might seem daunting at first, but trust me, it’s totally doable, and I’m here to guide you through every step.
Choosing Your Tomato Varieties
Before we even think about soil, let’s talk tomatoes! The world of tomatoes is vast and exciting. Consider these factors when choosing your varieties:
* Your Climate: Some tomatoes thrive in hot climates, while others prefer cooler conditions. Check your local growing zone and choose varieties accordingly.
* Available Space: Determinate tomatoes are bush-type plants that grow to a certain size and then stop, making them great for containers or smaller gardens. Indeterminate tomatoes, on the other hand, keep growing and producing fruit throughout the season, requiring staking or caging.
* Desired Use: Are you dreaming of slicing tomatoes for sandwiches, sauce tomatoes for pasta, or cherry tomatoes for snacking? Different varieties excel in different areas.
* Disease Resistance: Look for varieties labeled with letters like V, F, N, T, or A, which indicate resistance to common tomato diseases like Verticillium wilt, Fusarium wilt, nematodes, tobacco mosaic virus, and Alternaria.
Some popular and reliable choices include:
* ‘Early Girl’: A classic early-season variety, perfect for cooler climates.
* ‘Roma’: Ideal for making sauces and pastes.
* ‘Beefsteak’: Large and meaty, perfect for slicing.
* ‘Sungold’: Incredibly sweet and flavorful cherry tomato.
* ‘San Marzano’: Another excellent choice for sauces, known for its rich flavor.
Gathering Your Supplies
Alright, time to assemble our tomato-growing arsenal! Here’s what you’ll need:
* Tomato Seeds: Obviously! Purchase from a reputable source to ensure good germination rates.
* Seed Starting Trays or Pots: I prefer seed starting trays with individual cells, but small pots work just as well.
* Seed Starting Mix: This is crucial! Don’t use garden soil, as it’s too heavy and can harbor diseases. Seed starting mix is light, sterile, and well-draining.
* Watering Can or Spray Bottle: For gentle watering.
* Heat Mat (Optional but Recommended): Tomato seeds germinate best in warm soil.
* Grow Lights (Optional but Recommended): Provide consistent light, especially if you don’t have a sunny windowsill.
* Plant Labels: To keep track of your different varieties.
* Small Trowel or Spoon: For transplanting seedlings.
* Fertilizer: A balanced liquid fertilizer diluted to half strength.
* Larger Pots (for transplanting): Once your seedlings outgrow their starting containers.
Starting Your Seeds Indoors
This is where the magic begins! Starting seeds indoors gives your tomatoes a head start, especially in regions with short growing seasons.
1. Prepare Your Seed Starting Trays: Fill each cell or pot with seed starting mix. Gently tap the tray to settle the mix, but don’t pack it down too tightly.
2. Sow the Seeds: Make a small indentation (about 1/4 inch deep) in the center of each cell. Place 2-3 seeds in each indentation. This increases your chances of at least one seed germinating.
3. Cover the Seeds: Gently cover the seeds with seed starting mix.
4. Water Thoroughly: Use a watering can or spray bottle to thoroughly moisten the soil. Be gentle to avoid dislodging the seeds.
5. Provide Warmth: Place the seed starting tray on a heat mat, if using. The ideal soil temperature for tomato seed germination is between 75-85°F (24-29°C).
6. Provide Light: Place the tray under grow lights or on a sunny windowsill. If using a windowsill, rotate the tray regularly to ensure even light exposure.
7. Maintain Moisture: Keep the soil consistently moist, but not soggy. Check the soil daily and water as needed.
8. Wait Patiently: Tomato seeds typically germinate in 5-10 days.
Caring for Your Seedlings
Once your seedlings emerge, it’s time to provide them with the care they need to thrive.
1. Remove the Heat Mat: Once the seeds have germinated, remove the heat mat.
2. Provide Adequate Light: Ensure your seedlings are getting at least 14-16 hours of light per day. If using grow lights, position them a few inches above the seedlings.
3. Thin the Seedlings: Once the seedlings have their first true leaves (the second set of leaves that appear after the initial seed leaves), thin them to one seedling per cell. Choose the strongest, healthiest-looking seedling and snip off the others at the soil line with scissors. Don’t pull them out, as this can disturb the roots of the remaining seedling.
4. Water Regularly: Continue to keep the soil consistently moist, but not soggy.
5. Fertilize: Start fertilizing your seedlings with a diluted liquid fertilizer (half strength) about once a week.
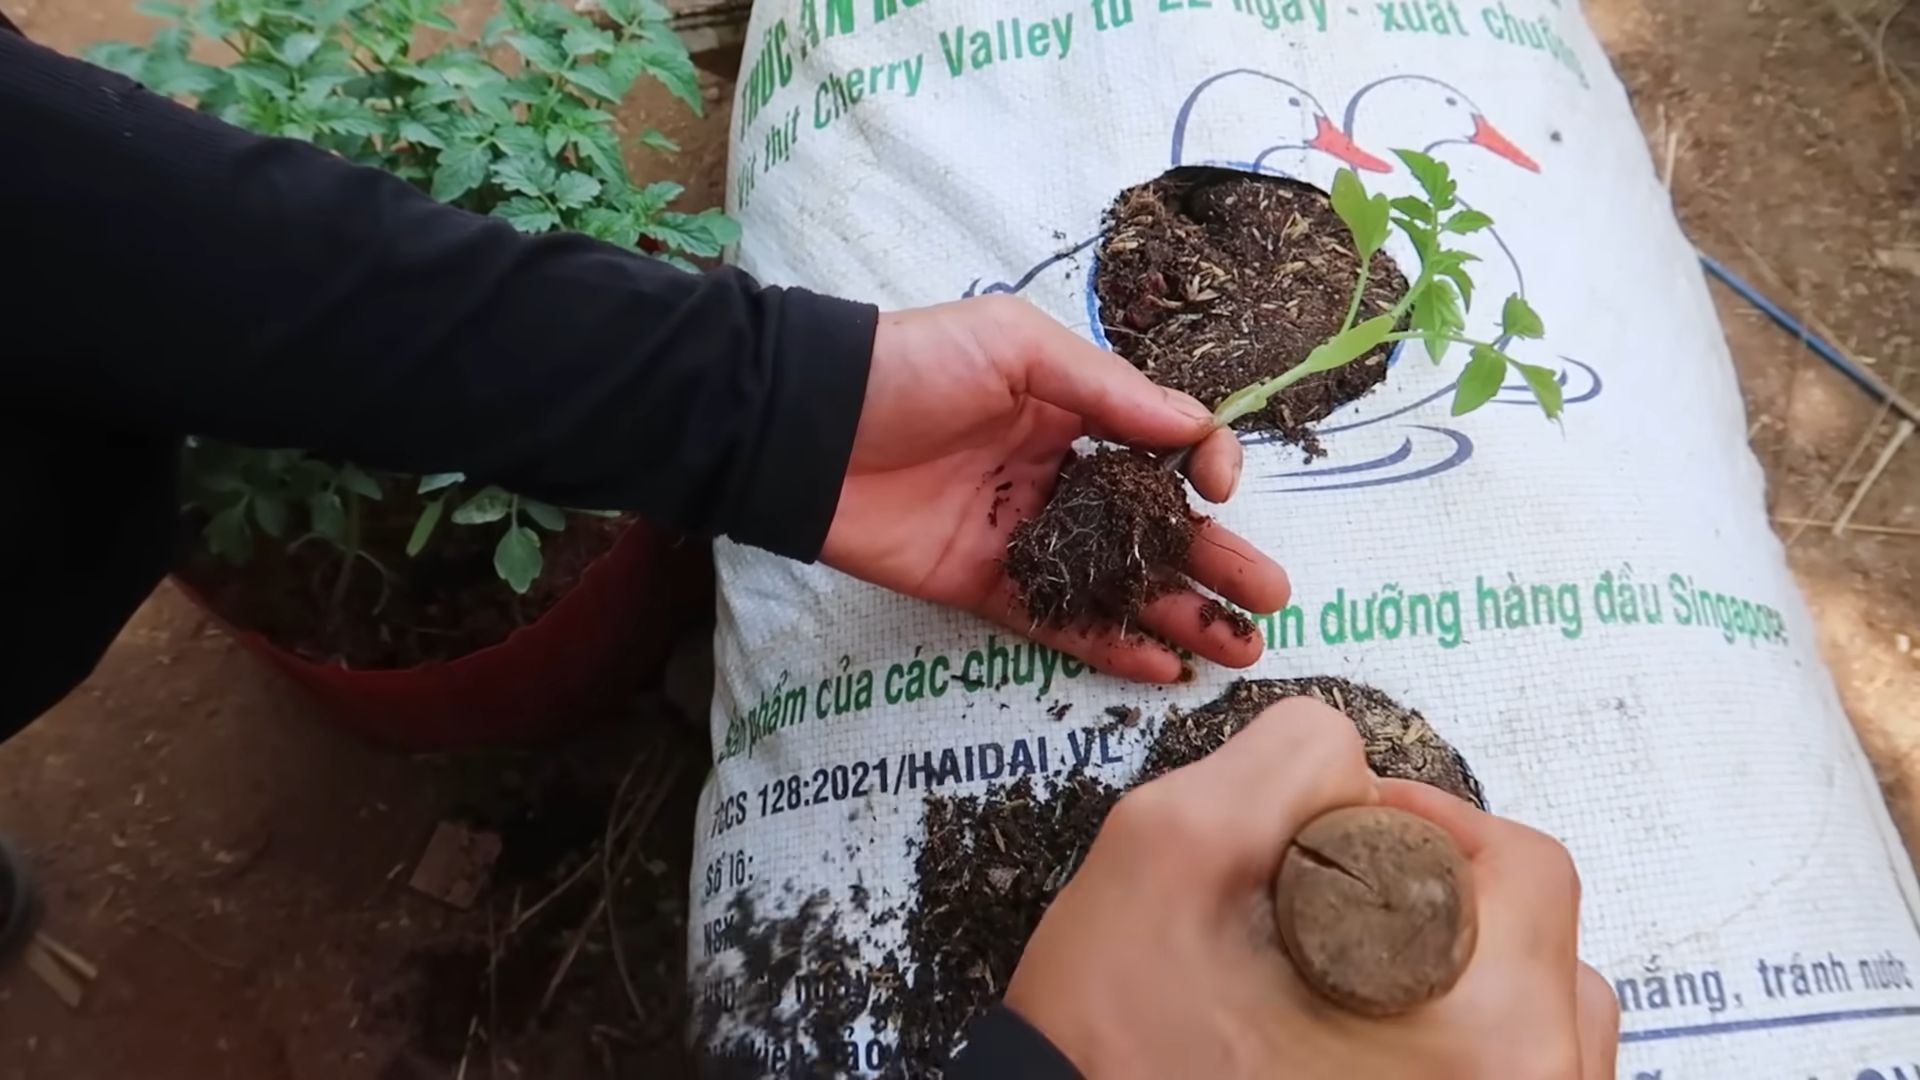
6. Transplant to Larger Pots: Once the seedlings have outgrown their starting containers (usually when they are a few inches tall and have several sets of true leaves), transplant them to larger pots (about 3-4 inches in diameter). Gently remove the seedlings from their cells, being careful not to damage the roots. Plant them in the larger pots, burying the stem up to the first set of leaves. This will encourage the development of a strong root system.
Hardening Off Your Seedlings
Before transplanting your tomato seedlings outdoors, you need to “harden them off.” This process gradually acclimates them to the outdoor environment, reducing the risk of shock.
1. Start Slowly: Begin by placing your seedlings outdoors in a sheltered location (e.g., a porch or patio) for just a few hours each day.
2. Gradually Increase Exposure: Over the course of a week or two, gradually increase the amount of time the seedlings spend outdoors, as well as their exposure to direct sunlight and wind.
3. Monitor the Weather: Avoid exposing your seedlings to frost or extreme temperatures.
4. Water Regularly: Continue to water your seedlings regularly during the hardening-off process.
Transplanting Your Seedlings Outdoors
The moment we’ve been waiting for! Once your seedlings are hardened off and the danger of frost has passed, it’s time to transplant them into your garden.
1. Choose a Sunny Location: Tomatoes need at least 6-8 hours of sunlight per day.
2. Prepare the Soil: Amend the soil with compost or other organic matter to improve drainage and fertility.
3. Dig Holes: Dig holes that are slightly larger than the root balls of your seedlings. Space the holes according to the mature size of the tomato variety you are planting (check the seed packet for recommendations).
4. Plant the Seedlings: Gently remove the seedlings from their pots and place them in the holes. Again, bury the stem up to the first set of leaves.
5. Water Thoroughly: Water the seedlings thoroughly after planting.
6. Add Support: Install stakes or cages to support the tomato plants as they grow. This is especially important for indeterminate varieties.
7. Mulch: Apply a layer of mulch around the base of the plants to help retain moisture, suppress weeds, and regulate soil temperature.
Caring for Your Tomato Plants
Now that your tomato plants are in the ground, it’s time to provide them with ongoing care.
1. Water Regularly: Water deeply and regularly, especially during dry periods. Aim to water at the base of the plants to avoid wetting the foliage, which can increase the risk of disease.
2. Fertilize: Fertilize your tomato plants every few weeks with a balanced fertilizer. Follow the instructions on the fertilizer package.
3. Prune: Prune your tomato plants to improve air circulation and encourage fruit production. Remove suckers (the small shoots that grow between the main stem and the branches) from indeterminate varieties.
4. Monitor for Pests and Diseases: Regularly inspect your tomato plants for pests and diseases. Take action promptly if you notice any problems. Common tomato pests include aphids, tomato hornworms, and whiteflies. Common tomato diseases include early blight, late blight, and blossom end rot.
5. Harvest: Harvest your tomatoes when they are fully ripe and have reached their desired color. Gently twist the tomatoes off the vine.
Troubleshooting Common Problems
Even with the best care, you may encounter some problems along the way. Here are some common issues and how to address them:
* Bloss
Conclusion
So, there you have it! Growing tomatoes from seed might seem daunting at first, but with a little patience and these simple steps, you’ll be harvesting juicy, flavorful tomatoes from your own garden in no time. This DIY approach isn’t just about saving money; it’s about connecting with the food you eat, understanding the growing process, and experiencing the immense satisfaction of nurturing life from a tiny seed.
Think about it: you’re in complete control. You get to choose the exact tomato varieties you want to grow, from heirloom treasures bursting with unique flavors to disease-resistant hybrids perfect for your local climate. No more settling for bland, store-bought tomatoes!
Beyond the basic method outlined, there’s plenty of room for experimentation. Try different seed starting mixes to see which works best for you. Consider using grow lights to give your seedlings an extra boost, especially if you live in a region with shorter days. And don’t be afraid to get creative with your containers – recycled yogurt cups, egg cartons, or even repurposed plastic bottles can all work wonders.
For a fun variation, try succession planting. Start a new batch of seeds every few weeks to extend your harvest season and enjoy fresh tomatoes for even longer. You can also experiment with different hardening-off techniques to see what works best for your seedlings and your local weather conditions. Some gardeners swear by gradually increasing the amount of direct sunlight the seedlings receive, while others focus on exposing them to gentle breezes.
The key takeaway here is that growing tomatoes from seed is a rewarding journey, not just a destination. It’s about learning, adapting, and enjoying the process. The taste of a homegrown tomato, warmed by the sun and bursting with flavor, is an experience that simply can’t be replicated.
We wholeheartedly encourage you to give this DIY trick a try. Don’t be intimidated by the perceived complexity – it’s much easier than you think! Start small, be patient, and remember that even experienced gardeners encounter challenges along the way. The important thing is to learn from your mistakes and keep experimenting.
And most importantly, we want to hear about your experiences! Share your photos, tips, and stories in the comments below. What tomato varieties are you growing? What challenges have you faced, and how did you overcome them? What are your favorite tips for successful seed starting? Let’s create a community of tomato-growing enthusiasts and learn from each other. Your insights could be invaluable to other gardeners just starting out. So, grab your seeds, get your hands dirty, and get ready to enjoy the delicious rewards of growing your own tomatoes from seed! Happy gardening!
Frequently Asked Questions (FAQs)
Q: What is the best time to start tomato seeds indoors?
A: The ideal time to start tomato seeds indoors is typically 6-8 weeks before the last expected frost in your area. This allows the seedlings enough time to develop into strong, healthy plants before they’re transplanted outdoors. To determine the last frost date for your region, consult your local weather service or agricultural extension office. You can also use online resources that provide historical frost data for specific locations. Starting too early can result in leggy, weak seedlings that struggle to adapt to outdoor conditions, while starting too late can shorten your growing season and reduce your overall yield.
Q: What kind of soil should I use for starting tomato seeds?
A: It’s crucial to use a seed starting mix, not garden soil, for starting tomato seeds. Seed starting mixes are specifically formulated to be lightweight, well-draining, and sterile. This helps prevent damping-off, a fungal disease that can quickly kill young seedlings. Look for mixes that contain ingredients like peat moss, vermiculite, and perlite. These materials provide excellent aeration and drainage, which are essential for healthy root development. Avoid using garden soil, as it can be too heavy, compacted, and may contain pathogens that can harm your seedlings. You can also make your own seed starting mix by combining equal parts peat moss, vermiculite, and perlite.
Q: How often should I water my tomato seedlings?
A: Tomato seedlings need consistent moisture, but it’s important to avoid overwatering. Water when the top inch of the soil feels dry to the touch. Use a gentle watering can or spray bottle to avoid disturbing the delicate seedlings. Overwatering can lead to root rot and other fungal diseases, while underwatering can cause the seedlings to wilt and stunt their growth. A good rule of thumb is to water thoroughly until the water drains out of the bottom of the container, then allow the soil to dry slightly before watering again. Monitor your seedlings closely and adjust your watering schedule as needed based on their individual needs and the environmental conditions.
Q: How much light do tomato seedlings need?
A: Tomato seedlings need plenty of light to grow strong and healthy. Ideally, they should receive 14-16 hours of light per day. If you don’t have a sunny windowsill that provides enough light, consider using grow lights. Fluorescent or LED grow lights are a great option for providing consistent, even light to your seedlings. Position the lights a few inches above the seedlings and adjust the height as they grow. Insufficient light can cause the seedlings to become leggy and weak, making them more susceptible to pests and diseases.
Q: When and how should I transplant my tomato seedlings outdoors?
A: Transplant your tomato seedlings outdoors after the last expected frost and when the soil has warmed up to at least 60°F (15°C). Before transplanting, it’s essential to harden off the seedlings, which means gradually acclimating them to outdoor conditions. Start by placing the seedlings outdoors in a sheltered location for a few hours each day, gradually increasing the amount of time they spend outside over the course of a week or two. This helps them adjust to the sun, wind, and temperature fluctuations. When transplanting, choose a sunny location with well-drained soil. Dig a hole slightly larger than the root ball and gently remove the seedling from its container. Plant the seedling deep, burying the stem up to the first set of leaves. This encourages the development of a strong root system. Water thoroughly after transplanting and provide support with stakes or cages.
Q: What are some common problems when growing tomatoes from seed, and how can I prevent them?
A: Several common problems can arise when growing tomatoes from seed, including damping-off, leggy seedlings, and nutrient deficiencies. Damping-off can be prevented by using a sterile seed starting mix and avoiding overwatering. Leggy seedlings can be prevented by providing adequate light. Nutrient deficiencies can be addressed by using a balanced fertilizer specifically formulated for seedlings. Other potential problems include pests like aphids and whiteflies, which can be controlled with insecticidal soap or neem oil. Regularly inspect your seedlings for signs of pests or diseases and take action promptly to prevent them from spreading.
Q: Can I grow tomatoes from seed directly in the garden?
A: While it’s possible to grow tomatoes from seed directly in the garden, it’s generally not recommended, especially in regions with short growing seasons. Starting seeds indoors gives you a head start and allows the seedlings to develop into strong, healthy plants before they’re exposed to the challenges of the outdoor environment. Direct sowing can also be less reliable, as the seeds may not germinate properly due to unfavorable weather conditions or pest pressure. However, if you live in a region with a long growing season and mild climate, you can try direct sowing tomato seeds after the last frost. Prepare the soil well, sow the seeds thinly, and keep the soil consistently moist until they germinate.
Q: What are some good tomato varieties to grow from seed?
A: The best tomato varieties to grow from seed depend on your personal preferences and your local climate. Some popular and reliable varieties include ‘Early Girl’ (early-maturing), ‘Beefsteak’ (large, meaty fruits), ‘Roma’ (paste tomatoes for sauce), ‘Cherry’ (small, sweet fruits), and ‘Brandywine’ (heirloom with excellent flavor). Consider your intended use for the tomatoes (e.g., salads, sandwiches, sauces) and choose varieties that are well-suited for those purposes. Also, research which varieties are known to perform well in your region and are resistant to common diseases. Your local garden center or agricultural extension office can provide valuable recommendations.


Leave a Comment