

Bathroom cleaning hacks – who doesn’t need them? Let’s be honest, cleaning the bathroom is nobody’s favorite chore. It’s right up there with doing taxes and visiting the dentist! But what if I told you that tackling that grimy grout and stubborn soap scum could be quicker, easier, and even… dare I say… a little bit fun?
For centuries, people have been searching for the ultimate shortcuts to a sparkling clean bathroom. From ancient Roman bathhouses meticulously maintained by slaves (okay, maybe not *exactly* what we’re aiming for!), to the Victorian era’s obsession with hygiene, the quest for a pristine porcelain throne is a timeless pursuit. But thankfully, we’ve moved beyond harsh chemicals and back-breaking scrubbing.
In today’s busy world, time is precious. We’re all juggling work, family, and trying to squeeze in a little self-care. Spending hours scrubbing the bathroom just isn’t an option. That’s where these ingenious bathroom cleaning hacks come in. I’m going to share some of my favorite DIY tricks that will save you time, money, and a whole lot of elbow grease. Get ready to transform your bathroom from a dreaded chore zone into a sparkling sanctuary with these simple, effective, and surprisingly satisfying solutions!

DIY Bathroom Cleaning Hacks: Sparkling Clean on a Budget!
Okay, let’s face it, cleaning the bathroom is nobody’s favorite chore. But a sparkling clean bathroom? That’s something we can all get behind! I’m going to share some of my favorite DIY bathroom cleaning hacks that are not only effective but also super budget-friendly. Get ready to ditch those harsh chemicals and embrace the power of natural ingredients!
Hack #1: The Mighty Vinegar Showerhead Soak
Hard water deposits can wreak havoc on your showerhead, reducing water pressure and making it look, well, gross. This hack is a game-changer!
* **The Goal:** Remove mineral buildup and restore optimal water flow.
* **What You’ll Need:**
* White vinegar
* A plastic bag (gallon-sized works best)
* Rubber band or twist tie
* **Why it Works:** Vinegar’s acidity dissolves calcium and lime deposits.
**Step-by-Step Instructions:**
1. **Prepare the Vinegar Bath:** Pour enough white vinegar into the plastic bag to fully submerge your showerhead. You might need a cup or two, depending on the size of your showerhead.
2. **Secure the Bag:** Carefully position the bag over the showerhead, ensuring the entire head is immersed in the vinegar. Use a rubber band or twist tie to tightly secure the bag to the shower arm. Make sure it’s snug to prevent leaks!
3. **Soak Overnight (or at least a few hours):** The longer you soak, the better the results. I usually leave it overnight for maximum cleaning power.
4. **Remove and Rinse:** Carefully remove the bag and discard the vinegar. Turn on the shower and let the water run for a few minutes to flush out any remaining vinegar and loosened deposits.
5. **Wipe Clean:** Use a clean cloth or sponge to wipe down the showerhead. You might need to gently scrub any stubborn areas with an old toothbrush.
6. **Admire Your Work:** Enjoy your newly cleaned showerhead and the improved water pressure!
Hack #2: Baking Soda and Vinegar Toilet Bowl Cleaner
Forget those expensive toilet bowl cleaners filled with harsh chemicals. This simple DIY solution is just as effective and much gentler on the environment.
* **The Goal:** Clean and deodorize the toilet bowl.
* **What You’ll Need:**
* 1 cup baking soda
* 2 cups white vinegar
* **Why it Works:** The baking soda and vinegar create a fizzing action that helps to loosen stains and grime.
**Step-by-Step Instructions:**
1. **Pour in the Baking Soda:** Sprinkle one cup of baking soda into the toilet bowl, making sure to coat the sides as much as possible.
2. **Add the Vinegar:** Slowly pour two cups of white vinegar into the bowl. Get ready for some fizzing action!
3. **Let it Fizz:** Allow the mixture to fizz and bubble for about 30 minutes. This gives the baking soda and vinegar time to work their magic.
4. **Scrub-a-dub-dub:** After 30 minutes, use a toilet brush to thoroughly scrub the bowl, paying attention to any stains or rings.
5. **Flush Away:** Flush the toilet to rinse away the cleaning solution and any loosened grime.
6. **Repeat if Necessary:** For stubborn stains, you might need to repeat the process.
Hack #3: The Magic of Lemon for Faucets and Fixtures
Lemon juice is a natural cleaner and disinfectant, and it works wonders on faucets and fixtures. Plus, it leaves a fresh, citrusy scent!
* **The Goal:** Remove water spots and polish faucets and fixtures.
* **What You’ll Need:**
* Lemon (cut in half)
* Soft cloth
* **Why it Works:** The citric acid in lemon juice helps to dissolve mineral deposits and leave a shiny finish.
**Step-by-Step Instructions:**
1. **Cut the Lemon:** Cut a lemon in half.
2. **Rub the Lemon:** Rub the cut side of the lemon directly onto your faucets and fixtures, focusing on areas with water spots or buildup.
3. **Let it Sit:** Allow the lemon juice to sit on the surface for a few minutes (5-10 minutes should do the trick).
4. **Wipe Clean:** Use a soft, damp cloth to wipe away the lemon juice and any loosened grime.
5. **Buff to Shine:** Use a dry cloth to buff the faucets and fixtures to a sparkling shine.
Hack #4: Steam Cleaning the Shower with Vinegar
This hack is perfect for tackling soap scum and mildew in your shower without harsh scrubbing.
* **The Goal:** Loosen soap scum and mildew for easier cleaning.
* **What You’ll Need:**
* White vinegar
* Spray bottle
* Hot water
* **Why it Works:** The steam helps to loosen grime, and the vinegar disinfects and deodorizes.
**Step-by-Step Instructions:**
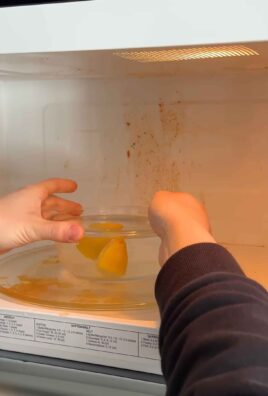
1. **Heat the Vinegar:** Heat one cup of white vinegar in the microwave until it’s hot, but not boiling. Be careful!
2. **Mix with Water:** Pour the hot vinegar into a spray bottle and add an equal amount of hot water.
3. **Spray the Shower:** Close the shower door or curtain and spray the entire shower area with the vinegar solution, focusing on areas with soap scum and mildew.
4. **Let it Steam:** Let the solution sit for about 30 minutes. The steam will help to loosen the grime.
5. **Wipe Down:** After 30 minutes, use a sponge or cloth to wipe down the shower walls, floor, and fixtures. You should find that the soap scum and mildew come off much easier.
6. **Rinse Thoroughly:** Rinse the entire shower area with hot water to remove any remaining vinegar solution.
7. **Ventilate:** Open a window or turn on the exhaust fan to ventilate the bathroom and allow it to dry completely.
Hack #5: Cleaning Grout with Baking Soda Paste
Dirty grout can make even the cleanest bathroom look dingy. This baking soda paste is a simple and effective way to brighten up your grout lines.
* **The Goal:** Clean and brighten grout lines.
* **What You’ll Need:**
* Baking soda
* Water
* Old toothbrush
* **Why it Works:** Baking soda is a mild abrasive that helps to scrub away dirt and grime.
**Step-by-Step Instructions:**
1. **Make the Paste:** Mix baking soda with a small amount of water to create a thick paste.
2. **Apply the Paste:** Apply the baking soda paste to the grout lines, making sure to cover them completely.
3. **Let it Sit:** Allow the paste to sit on the grout lines for about 10-15 minutes.
4. **Scrub with Toothbrush:** Use an old toothbrush to scrub the grout lines, working in small circular motions.
5. **Rinse Thoroughly:** Rinse the grout lines with water to remove the baking soda paste and any loosened grime.
6. **Dry with a Towel:** Dry the grout lines with a clean towel.
Hack #6: Freshening Up the Toilet Tank
A clean toilet tank means a cleaner flush! This hack helps to keep your toilet tank fresh and free of mineral buildup.
* **The Goal:** Clean and deodorize the toilet tank.
* **What You’ll Need:**
* White vinegar
* **Why it Works:** Vinegar helps to dissolve mineral deposits and prevent the growth of mold and mildew.
**Step-by-Step Instructions:**
1. **Turn Off the Water:** Turn off the water supply to the toilet. You’ll usually find a valve behind the toilet.
2. **Flush the Toilet:** Flush the toilet to empty the tank as much as possible.
3. **Pour in the Vinegar:** Pour about 2-3 cups of white vinegar into the toilet tank.
4. **Let it Sit:** Let the vinegar sit in the tank for at least 12 hours, or even overnight.
5. **Turn On the Water:** Turn the water supply back on.
6. **Flush a Few Times:** Flush the toilet a few times to rinse out the vinegar and any loosened deposits.
Hack #7: DIY Glass Cleaner for Mirrors and Shower Doors
Streak-free mirrors and shower doors are a must! This DIY glass cleaner is simple, effective, and much cheaper than store-bought versions.
* **The Goal:** Clean mirrors and shower doors without streaks.
* **What You’ll Need:**
* 1/4 cup white vinegar
* 1/2 teaspoon liquid dish soap
* 2 cups water
* Spray bottle
* Microfiber cloth
* **Why it Works:** Vinegar cuts through grime, and dish soap helps to lift dirt. The microfiber cloth prevents streaks.
**Step-by-Step Instructions:**
1.
Conclusion
So, there you have it! These bathroom cleaning hacks are more than just quick fixes; they’re a pathway to a consistently sparkling and hygienic bathroom, achieved with minimal effort and maximum impact. We’ve explored how to tackle common bathroom woes using readily available ingredients and simple techniques, transforming your cleaning routine from a dreaded chore into a manageable task.
The beauty of these DIY solutions lies in their versatility and cost-effectiveness. Forget expensive, chemical-laden cleaners that often come with harsh fumes and questionable environmental impact. With these hacks, you’re harnessing the power of natural ingredients like vinegar, baking soda, and lemon juice, creating a safer and healthier environment for yourself and your family.
But why are these bathroom cleaning hacks a must-try? Because they offer a trifecta of benefits: they save you time, money, and effort. Imagine spending just a few minutes each week maintaining a pristine bathroom, instead of dedicating hours to a deep clean every month. Think of the money you’ll save by ditching those pricey commercial cleaners. And consider the peace of mind knowing you’re using safe, natural ingredients that won’t harm your health or the environment.
Ready to take your bathroom cleaning to the next level?
Don’t be afraid to experiment and personalize these hacks to suit your specific needs and preferences. For instance, if you’re not a fan of the vinegar smell, add a few drops of your favorite essential oil to the cleaning solution. Lavender, tea tree, and eucalyptus are all excellent choices for their antibacterial and refreshing properties.
Another variation you might consider is using a microfiber cloth instead of paper towels for cleaning surfaces. Microfiber cloths are more absorbent, reusable, and leave surfaces streak-free. They’re also a more sustainable option, reducing your reliance on disposable paper products.
For stubborn stains or mildew, you can create a paste of baking soda and water and apply it directly to the affected area. Let it sit for a few minutes before scrubbing gently with a brush or sponge. This is particularly effective for cleaning grout and removing soap scum.
Don’t just take our word for it – try these bathroom cleaning hacks for yourself!
We’re confident that you’ll be amazed by the results. And once you’ve experienced the joy of a sparkling clean bathroom without the hassle, we encourage you to share your experience with us. Let us know which hacks worked best for you, any variations you tried, and any tips you have to offer. Your feedback will help us refine these techniques and share them with even more people.
So, grab your supplies, roll up your sleeves, and get ready to transform your bathroom into a sanctuary of cleanliness and freshness. You’ll be amazed at how easy and rewarding it is to achieve a sparkling clean bathroom with these simple, effective, and eco-friendly bathroom cleaning hacks. We can’t wait to hear about your success!
Frequently Asked Questions (FAQ)
1. Are these bathroom cleaning hacks safe for all bathroom surfaces?
Generally, yes, these hacks are safe for most common bathroom surfaces like tile, porcelain, glass, and stainless steel. However, it’s always a good idea to test any cleaning solution on a small, inconspicuous area first, especially if you have delicate or unusual surfaces like natural stone (marble, granite) or antique fixtures. Vinegar, in particular, can etch some natural stone surfaces, so use it with caution or opt for a milder alternative like baking soda paste. For gold-plated fixtures, avoid abrasive cleaners and stick to gentle soap and water.
2. How often should I use these bathroom cleaning hacks?
The frequency depends on your bathroom usage and personal preferences. For general maintenance, wiping down surfaces with a vinegar and water solution once or twice a week can prevent the buildup of soap scum and mildew. A deeper clean, including scrubbing the toilet, cleaning the shower, and mopping the floor, can be done every one to two weeks. For high-traffic bathrooms, you may need to clean more frequently. The key is to establish a routine that works for you and prevents dirt and grime from accumulating.
3. Can I use these bathroom cleaning hacks to remove stubborn stains?
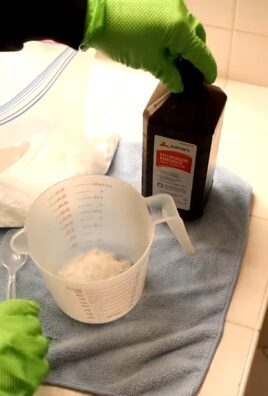
Yes, many of these hacks are effective for removing stubborn stains. For hard water stains, vinegar is your best friend. Soak a paper towel in vinegar and apply it to the stain, letting it sit for several minutes before scrubbing. For mildew stains, a paste of baking soda and water or a solution of hydrogen peroxide can work wonders. For rust stains, try lemon juice or a commercial rust remover specifically designed for bathroom surfaces. Remember to always test the cleaning solution on a small, inconspicuous area first to ensure it doesn’t damage the surface.
4. What if I don’t like the smell of vinegar?
The smell of vinegar can be off-putting to some people. Fortunately, there are several ways to mitigate it. First, you can dilute the vinegar with water to reduce the intensity of the smell. Second, you can add a few drops of your favorite essential oil to the cleaning solution. Lavender, lemon, and eucalyptus are all great choices for their refreshing and antibacterial properties. Finally, you can simply open a window or turn on the exhaust fan to ventilate the bathroom while you’re cleaning. The vinegar smell will dissipate quickly once the area is dry.
5. Are these bathroom cleaning hacks environmentally friendly?
Yes, these hacks are generally more environmentally friendly than using commercial cleaners. They rely on natural ingredients like vinegar, baking soda, and lemon juice, which are biodegradable and less harmful to the environment. By using these DIY solutions, you’re reducing your reliance on chemical-laden cleaners that can pollute waterways and contribute to air pollution. Additionally, using reusable microfiber cloths instead of disposable paper towels further reduces your environmental impact.
6. Can I use these hacks on my shower door to remove soap scum?
Absolutely! Soap scum on shower doors is a common problem, and these hacks are perfect for tackling it. A vinegar and water solution is highly effective at dissolving soap scum. You can spray the solution on the shower door, let it sit for a few minutes, and then scrub with a sponge or microfiber cloth. For stubborn soap scum, you can create a paste of baking soda and water and apply it to the affected area. Let it sit for a few minutes before scrubbing gently. Rinse thoroughly with water and dry with a clean cloth to prevent water spots.
7. What’s the best way to clean grout using these hacks?
Grout can be a breeding ground for mold and mildew, so it’s important to clean it regularly. A paste of baking soda and water is an excellent grout cleaner. Apply the paste to the grout lines, let it sit for a few minutes, and then scrub with a grout brush or an old toothbrush. For tougher stains, you can add a few drops of hydrogen peroxide to the paste. Alternatively, you can spray the grout lines with a vinegar and water solution, let it sit for a few minutes, and then scrub with a brush. Rinse thoroughly with water after cleaning.
8. Can I use these hacks to clean my toilet bowl?
Yes, these hacks can be used to clean your toilet bowl effectively. Pour a cup of vinegar into the toilet bowl and let it sit for at least 30 minutes, or even overnight for stubborn stains. Then, sprinkle baking soda into the bowl and scrub with a toilet brush. The combination of vinegar and baking soda creates a fizzing action that helps to loosen dirt and grime. For extra cleaning power, you can add a few drops of tea tree oil to the bowl. Flush the toilet to rinse.
9. How can I prevent mold and mildew from growing in my bathroom?
Preventing mold and mildew is key to maintaining a clean and healthy bathroom. The most important thing is to ensure proper ventilation. Open a window or turn on the exhaust fan after showering or bathing to remove excess moisture. Wipe down wet surfaces, such as shower walls and doors, with a towel after each use. Regularly clean your bathroom with a vinegar and water solution, which helps to kill mold and mildew spores. Fix any leaks promptly to prevent water damage. Consider using a dehumidifier in your bathroom if you live in a humid climate.
Leave a Comment