

Busy schedule cleaning tips are a lifesaver, aren’t they? I know how it feels – juggling work, family, and everything else life throws your way, leaving little time for keeping your home sparkling. It’s easy to feel overwhelmed by the mess, but trust me, you don’t need to spend hours scrubbing to have a clean and comfortable space.
Historically, cleanliness has been valued across cultures, not just for aesthetic reasons, but also for health and well-being. Think about the ancient Roman bathhouses or the meticulous cleaning rituals in many Eastern traditions. While we might not have the time for such elaborate practices, the underlying principle remains: a clean environment contributes to a healthier and happier life.
That’s why I’ve put together this collection of DIY cleaning tricks and hacks specifically designed for those of us with packed schedules. These aren’t your grandma’s all-day cleaning routines! We’re talking about quick, effective strategies that fit seamlessly into your busy life. Imagine coming home after a long day to a tidy and inviting space, without having spent your entire weekend cleaning. These busy schedule cleaning tips will help you reclaim your time and enjoy a cleaner, more organized home with minimal effort. Let’s dive in and discover how to make cleaning less of a chore and more of a manageable part of your daily routine!

DIY Speed Cleaning Hacks for the Super Busy!
Okay, let’s face it. Life gets hectic. Between work, family, social commitments, and trying to squeeze in some semblance of self-care, cleaning often falls to the bottom of the priority list. But a messy house can lead to a messy mind, right? So, I’m going to share my go-to speed cleaning hacks that help me maintain a relatively tidy home, even when I’m running on fumes. These aren’t about deep cleaning; they’re about damage control and making your space feel instantly fresher.
The 15-Minute Blitz: Your Emergency Cleaning Plan
Sometimes, you only have a sliver of time before guests arrive or you simply can’t stand the chaos any longer. This 15-minute blitz is your lifesaver.
* Goal: Surface-level tidiness and a quick refresh.
* Tools: A basket or bag, a microfiber cloth, all-purpose cleaner, and a timer.
**Step-by-Step Instructions:**
1. Set the Timer: Seriously, this is crucial. Knowing you only have 15 minutes keeps you focused. Set your timer on your phone or kitchen timer.
2. The Quick Declutter: Grab your basket or bag and race through each room, picking up anything that’s out of place. Don’t get bogged down in deciding where things go; just toss them in the basket. You can sort it later. Think: stray toys, mail, clothes, books, etc.
3. Surface Wipe-Down: Spritz your all-purpose cleaner onto your microfiber cloth and quickly wipe down the most visible surfaces: kitchen counters, coffee table, bathroom sink. Focus on removing spills and obvious grime.
4. Fluff and Arrange: Quickly fluff pillows on the sofa and chairs. Straighten any rugs that are askew. This small step makes a big difference in the overall appearance.
5. Bathroom Sanity Check: Give the toilet seat a quick wipe with a disinfecting wipe. Hang up any stray towels.
6. Empty the Trash: If any trash cans are overflowing, quickly empty them.
7. Stash the Basket: Hide the basket of clutter in a closet or spare room. Out of sight, out of mind (for now!).
8. Take a Deep Breath: You did it! Your home is instantly more presentable.
The One-Task-a-Day Strategy: Consistent Maintenance
This is my secret weapon for preventing cleaning overwhelm. Instead of dedicating an entire day to cleaning, I tackle one small task each day.
* Goal: Prevent dirt and clutter from accumulating.
* Tools: Depends on the task (see below).
**Step-by-Step Instructions:**
1. Create a Schedule: Decide which task you’ll do on each day of the week. Here’s an example:
* Monday: Wipe down kitchen appliances (inside and out).
* Tuesday: Clean the bathroom mirror and sink.
* Wednesday: Vacuum high-traffic areas.
* Thursday: Dust furniture.
* Friday: Clean out the refrigerator.
* Saturday: Change bed linens.
* Sunday: Relax! (Or catch up on any missed tasks).
2. Stick to the Schedule: The key is consistency. Even if you only spend 10-15 minutes on each task, it adds up over time.
3. Adapt as Needed: If your schedule isn’t working for you, don’t be afraid to adjust it. Maybe you need to swap tasks around or add new ones.
**Detailed Task Breakdown:**
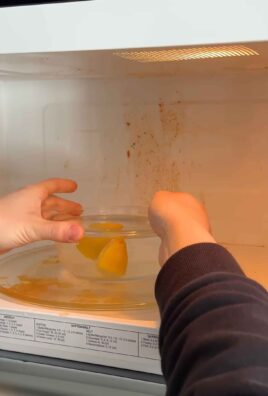
* Wipe Down Kitchen Appliances: Use a damp cloth and a mild detergent to wipe down the exterior of your refrigerator, oven, dishwasher, and microwave. Don’t forget the handles! For the inside of the microwave, heat a cup of water with a tablespoon of vinegar for a few minutes, then easily wipe away the grime.
* Clean the Bathroom Mirror and Sink: Use glass cleaner to clean the mirror. For the sink, use an all-purpose cleaner and scrub away any toothpaste or soap scum. Don’t forget to wipe down the faucet and handles.
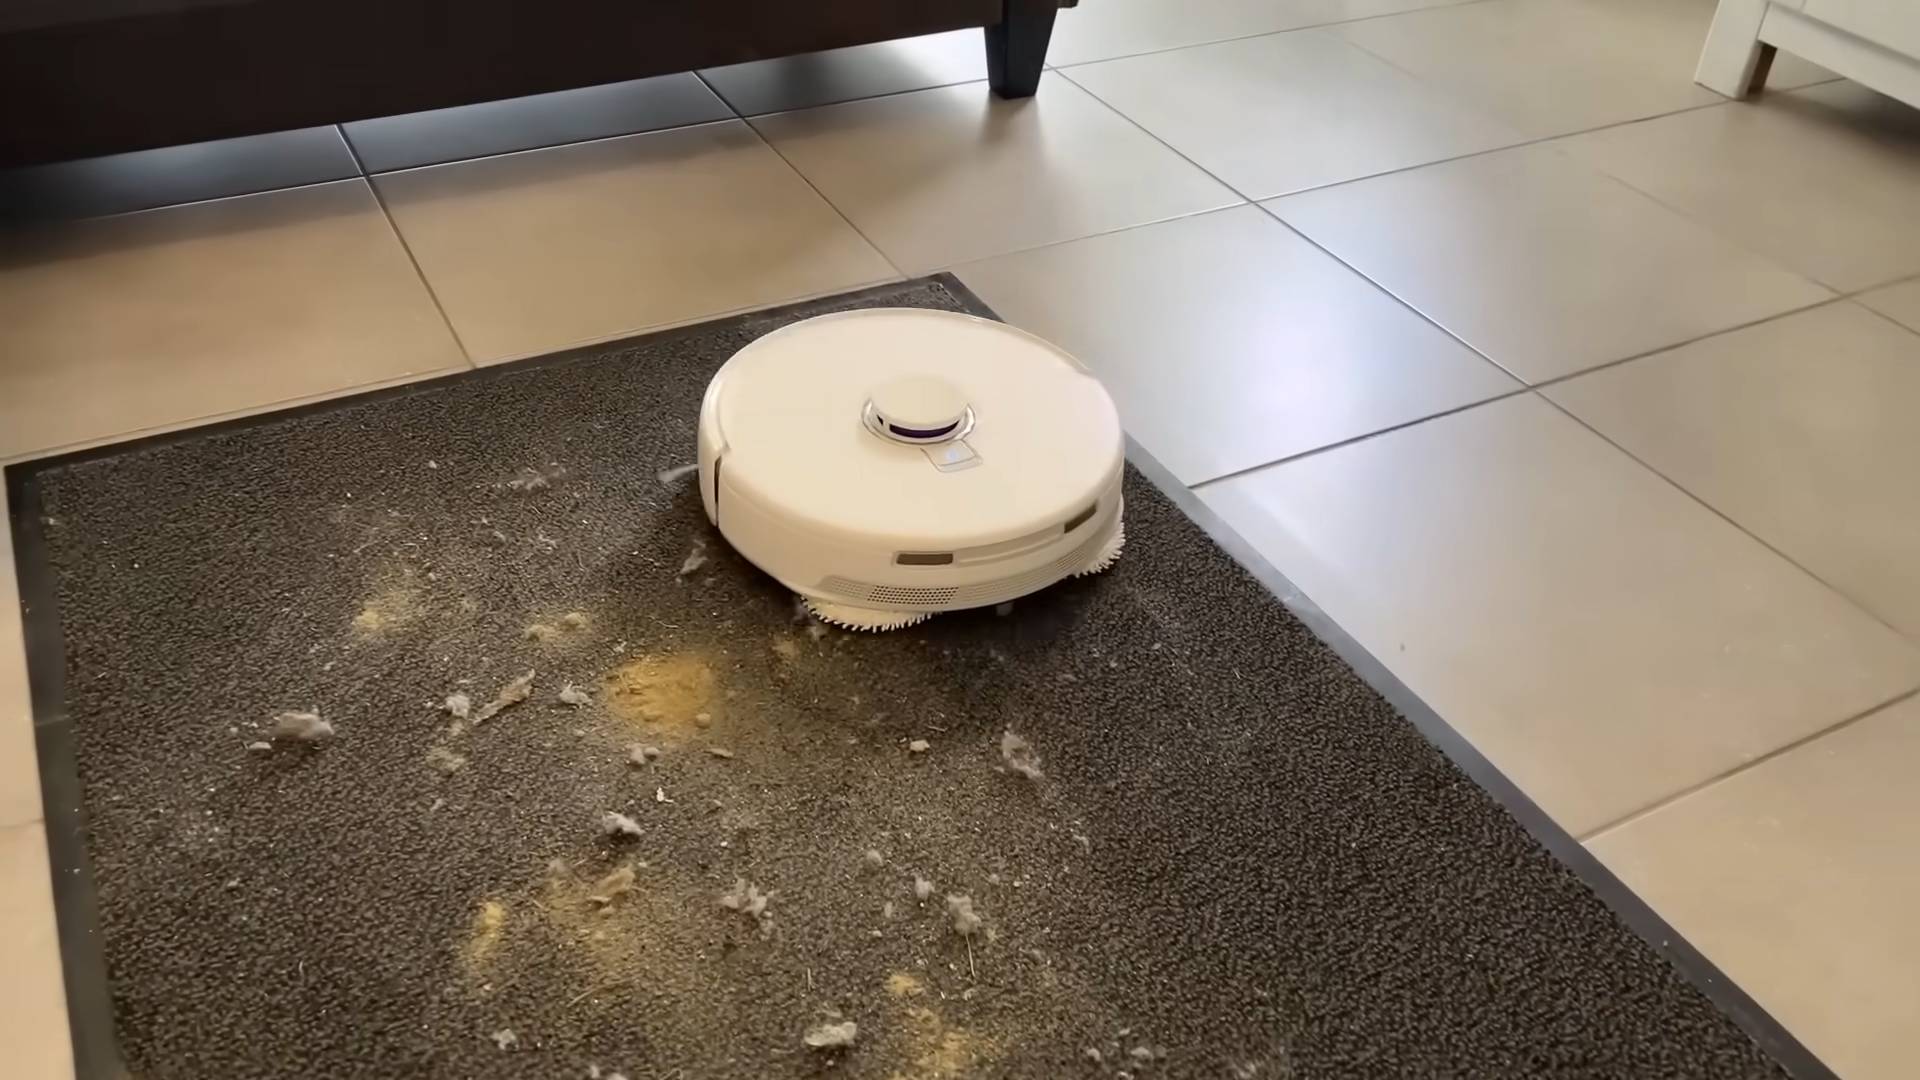
* Vacuum High-Traffic Areas: Focus on areas where dirt and debris tend to accumulate, such as entryways, hallways, and around furniture. A quick vacuum can instantly freshen up your home.
* Dust Furniture: Use a microfiber duster or a damp cloth to remove dust from furniture surfaces. Don’t forget to dust shelves, picture frames, and lamps.
* Clean Out the Refrigerator: Toss out any expired food or leftovers. Wipe down shelves and drawers with a damp cloth. This prevents unpleasant odors and keeps your fridge organized.
* Change Bed Linens: Fresh sheets are a simple luxury that can improve your sleep quality. Make it a weekly habit to change your bed linens.
The “While You Wait” Cleaning Method: Maximizing Downtime
This is all about multitasking. Use those little pockets of time you already have to squeeze in some cleaning.
* Goal: Sneak in cleaning tasks during existing routines.
* Tools: Depends on the task.
**Step-by-Step Instructions:**
1. Identify Downtime: Think about times when you’re already waiting for something: waiting for water to boil, waiting for the coffee to brew, waiting for the oven to preheat.
2. Assign Tasks: Match small cleaning tasks to those downtime periods. Here are some examples:
* While waiting for water to boil: Load the dishwasher.
* While waiting for coffee to brew: Wipe down the kitchen counter.
* While waiting for the oven to preheat: Sweep the kitchen floor.
* While watching TV commercials: Fold laundry.
3. Keep Supplies Handy: Keep cleaning supplies readily available in convenient locations. This makes it easier to tackle tasks on the spur of the moment.
The “Clean as You Go” Philosophy: Preventing Messes in the First Place
This is the most effective long-term strategy. By cleaning up messes as they happen, you prevent them from becoming overwhelming.
* Goal: Minimize the need for major cleaning sessions.
* Tools: None (just your awareness!).
**Step-by-Step Instructions:**
1. Wipe Up Spills Immediately: Don’t let spills sit and dry. Wipe them up as soon as they happen to prevent stains and sticky messes.
2. Put Things Away After Use: Make it a habit to put things back where they belong after you’re finished using them. This prevents clutter from accumulating.
3. Wash Dishes After Meals: Don’t let dishes pile up in the sink. Wash them or load them into the dishwasher after each meal.
4. Make Your Bed Every Morning: This simple act can instantly make your bedroom feel tidier.
5. Take Out the Trash Regularly: Don’t let trash cans overflow. Take out the trash regularly to prevent odors and maintain a clean environment.
DIY Cleaning Solutions: Save Money and Reduce Chemicals
I love making my own cleaning solutions. They’re cheaper, more environmentally friendly, and often just as effective as store-bought products.
* Goal: Create effective cleaning solutions using common household ingredients.
* Tools: Spray bottles, measuring cups, mixing bowls.
**Recipes:**
1. All-Purpose Cleaner: Mix equal parts white vinegar and water in a spray bottle. Add a few drops of your favorite essential oil for fragrance (optional). This cleaner is great for wiping down counters, sinks, and other surfaces.
2. Glass Cleaner: Mix 1/4 cup white vinegar, 1/4 cup rubbing alcohol, and 2 cups water in a spray bottle. This cleaner will leave your windows and mirrors streak-free.
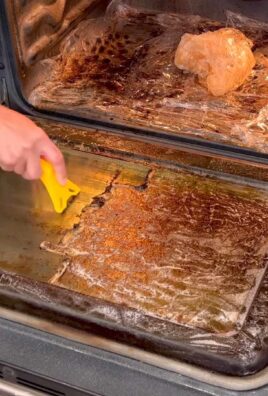
3. Oven Cleaner: Make a paste of baking soda and water. Spread the paste inside your oven and let it sit overnight. The next day, scrub away the grime with a damp sponge.
4. Drain Cleaner: Pour 1/2 cup baking soda down the drain, followed by 1/2 cup white vinegar. Let it fizz for 30 minutes, then flush with hot water.
5. Furniture Polish: Mix 1/4 cup olive oil, 1/4 cup white vinegar, and a few drops of lemon essential oil in a spray bottle. Spray onto a cloth and wipe down your furniture.
The Power of Delegation: Don’t Be Afraid to Ask for Help
If you’re truly overwhelmed, don’t be afraid to ask for help.
* Goal: Share the cleaning burden.
* Tools: Your voice!
**Strategies:**
1. Involve Your Family: Assign age-appropriate chores to your children. Even young children can help with simple tasks like putting away toys or wiping down tables.
2. Hire a Cleaning Service:
Conclusion
So, there you have it! This simple yet incredibly effective DIY cleaning trick is a game-changer for anyone juggling a busy schedule. Forget spending hours scrubbing and stressing over stubborn messes. This method streamlines your cleaning routine, allowing you to reclaim precious time and energy. The beauty of this approach lies in its simplicity and adaptability. You’re not locked into a rigid process; instead, you’re empowered to customize it to fit your specific needs and preferences.
Think about it: no more dreading weekend cleaning sprees. Instead, you can tackle small cleaning tasks efficiently throughout the week, preventing grime from building up and making your home consistently feel fresh and inviting. This isn’t just about cleaning; it’s about creating a more peaceful and manageable living environment.
But the benefits extend beyond just saving time. This DIY cleaning trick is also incredibly cost-effective. By using readily available household ingredients, you’re reducing your reliance on expensive commercial cleaning products, many of which contain harsh chemicals. This is not only better for your wallet but also better for your health and the environment.
Variations and Suggestions:
Don’t be afraid to experiment with different essential oils to personalize the scent of your cleaning solution. Lavender, lemon, tea tree, and eucalyptus are all excellent choices, each offering unique aromatherapy benefits. For tougher stains, consider adding a small amount of baking soda to your cleaning paste for extra scrubbing power. And remember, consistency is key. Incorporating this DIY cleaning trick into your regular routine will yield the best results over time.
For those with sensitive skin, always test the cleaning solution on a small, inconspicuous area first to ensure there are no adverse reactions. You can also wear gloves to protect your hands during the cleaning process.
This DIY cleaning trick is particularly effective on surfaces like countertops, sinks, stovetops, and bathroom tiles. However, always check the manufacturer’s instructions for specific cleaning recommendations for delicate materials like marble or granite.
We’re confident that once you try this DIY cleaning trick, you’ll wonder how you ever lived without it. It’s a simple, effective, and eco-friendly way to maintain a clean and comfortable home, even with the busiest of schedules.
So, what are you waiting for? Give it a try today! We’re eager to hear about your experiences. Share your tips, variations, and before-and-after photos in the comments below. Let’s create a community of busy individuals who are mastering the art of efficient and effective cleaning. Let us know how this **DIY cleaning trick** has helped you reclaim your time and enjoy a cleaner, more organized home. Your feedback is invaluable and will help others discover the transformative power of this simple cleaning solution.
Frequently Asked Questions (FAQ)
Q: What exactly is this DIY cleaning trick, and what does it involve?
A: This DIY cleaning trick focuses on creating a simple, effective, and eco-friendly cleaning solution using common household ingredients. It typically involves combining ingredients like vinegar, baking soda, dish soap, and water to create a versatile cleaner that can be used on various surfaces. The specific recipe and application method will vary depending on the intended use, but the core principle remains the same: leveraging readily available ingredients to achieve a sparkling clean home without harsh chemicals or expensive products.
Q: What are the main benefits of using this DIY cleaning trick compared to commercial cleaning products?
A: The benefits are numerous! First and foremost, it’s cost-effective. You’re using ingredients you likely already have in your pantry, saving you money on expensive store-bought cleaners. Secondly, it’s environmentally friendly. You’re reducing your reliance on products that often contain harmful chemicals and contribute to plastic waste. Thirdly, it’s healthier for you and your family. You’re avoiding exposure to potentially irritating or toxic chemicals found in many commercial cleaners. Finally, it’s customizable. You can adjust the ingredients and scents to suit your specific needs and preferences.
Q: What surfaces can I safely use this DIY cleaning trick on?
A: This depends on the specific recipe you’re using. Generally, solutions containing vinegar are safe for use on most non-porous surfaces like countertops, sinks, stovetops, and bathroom tiles. However, avoid using vinegar on natural stone surfaces like marble or granite, as it can etch and damage them. Baking soda is a gentle abrasive that can be used on a variety of surfaces, but always test it in an inconspicuous area first. When in doubt, consult the manufacturer’s instructions for your specific surfaces.
Q: How do I store the DIY cleaning solution, and how long will it last?
A: Store your DIY cleaning solution in a clean, airtight spray bottle or container. Label it clearly with the ingredients and date. Most DIY cleaning solutions will last for several weeks to a few months, depending on the ingredients. Solutions containing essential oils may have a longer shelf life due to their antibacterial properties. If you notice any changes in color, odor, or consistency, discard the solution and make a fresh batch.
Q: Can I add essential oils to the DIY cleaning solution? If so, which ones are recommended?
A: Absolutely! Adding essential oils is a great way to personalize the scent of your cleaning solution and add extra cleaning power. Some popular choices include:
* Lavender: Known for its calming and relaxing properties, as well as its antibacterial and antifungal benefits.
* Lemon: A natural degreaser and disinfectant with a refreshing citrus scent.
* Tea Tree: A powerful antiseptic and antifungal agent, ideal for cleaning bathrooms and kitchens.
* Eucalyptus: Has antibacterial and antiviral properties and a refreshing, invigorating scent.
* Peppermint: Provides a refreshing scent and can help deter pests.
When adding essential oils, start with a few drops and adjust to your preference. Always use pure, high-quality essential oils for the best results.
Q: What if I have sensitive skin? Are there any precautions I should take?
A: If you have sensitive skin, it’s always a good idea to take precautions when using any cleaning product, including DIY solutions. Test the cleaning solution on a small, inconspicuous area of your skin before using it on larger surfaces. Wear gloves to protect your hands during the cleaning process. You can also dilute the cleaning solution with more water to reduce its concentration. If you experience any irritation, discontinue use immediately.
Q: I’m allergic to vinegar. Can I still use this DIY cleaning trick?
A: If you’re allergic to vinegar, you can substitute it with other ingredients like lemon juice or citric acid. Both have similar acidic properties and can be used as effective cleaning agents. However, be sure to test the solution on a small, inconspicuous area first to ensure it doesn’t damage the surface.
Q: What are some common mistakes to avoid when making and using DIY cleaning solutions?
A: Some common mistakes include:
* Mixing incompatible ingredients: Never mix bleach with vinegar or ammonia, as this can create toxic fumes.
* Using too much of one ingredient: Follow the recipe carefully and avoid adding excessive amounts of any ingredient, as this can damage surfaces or cause irritation.
* Not labeling the cleaning solution: Always label your DIY cleaning solutions clearly to avoid confusion and accidental misuse.
* Not testing the solution on a small area first: Always test the cleaning solution on a small, inconspicuous area before using it on larger surfaces to ensure it doesn’t damage the material.
* Using the wrong type of container: Avoid storing DIY cleaning solutions in metal containers, as some ingredients can react with the metal.
Q: How can I adapt this DIY cleaning trick for specific cleaning tasks, like cleaning the oven or removing hard water stains?
A: For specific cleaning tasks, you can adjust the ingredients and application method. For example, to clean the oven, you can make a paste of baking soda and water and apply it to the oven walls. Let it sit overnight and then scrub it clean. To remove hard water stains, you can soak the affected area with vinegar for a few hours and then scrub it clean. There are many variations and recipes available online for specific cleaning tasks, so do some research and find what works best for you.

Leave a Comment