

Clean Ceiling Fan Easily? Yes, you read that right! Are you tired of staring up at your ceiling fan and seeing a thick layer of dust clinging to the blades? I know I am! It’s a common household problem, and let’s be honest, cleaning ceiling fans is often a dreaded chore. But what if I told you there’s a way to make this task quick, easy, and even (dare I say) enjoyable?
For generations, keeping our homes clean has been a sign of pride and well-being. While the tools and methods have evolved, the desire for a dust-free environment remains constant. In many cultures, a clean home is associated with good health and positive energy flow. So, tackling that dusty ceiling fan isn’t just about aesthetics; it’s about creating a healthier and more harmonious living space.
Let’s face it, nobody wants to breathe in dust particles every time they turn on their ceiling fan. It can aggravate allergies, worsen asthma, and simply make your home feel less fresh. That’s why I’m so excited to share these simple yet effective DIY tricks to clean ceiling fan easily. These hacks will not only save you time and effort but also help you maintain a cleaner, healthier, and more comfortable home. Get ready to say goodbye to dusty blades and hello to fresh, clean air!
DIY: Sparkling Clean Ceiling Fan in Minutes (No More Dust Bunnies!)
Okay, let’s be honest, cleaning the ceiling fan is one of those chores we all dread. It’s high up, awkward, and those dust bunnies seem to multiply overnight! But fear not, my friends! I’ve got a super simple, effective, and almost effortless DIY hack that will leave your ceiling fan sparkling clean in just minutes. Say goodbye to dust showers and hello to fresh, clean air!
What You’ll Need:
* Pillowcase (an old one you don’t mind getting dusty)
* Step stool or ladder (safety first!)
* All-purpose cleaner (optional, for extra stubborn grime)
* Microfiber cloth (for a final polish, optional)
Why This Works So Well:
The pillowcase method is genius because it traps the dust inside as you clean, preventing it from raining down on you and your furniture. It’s like a little dust-catching cocoon for each fan blade! Plus, it’s incredibly quick and easy.
Step-by-Step Instructions:
1. Safety First! Before you even think about grabbing that pillowcase, make sure your ceiling fan is turned OFF. I know it seems obvious, but trust me, you don’t want to accidentally turn it on while you’re cleaning. Unplugging the fan or turning off the breaker is even better for extra safety.
2. Prepare Your Pillowcase: If your fan is particularly dusty or greasy, you might want to lightly spray the inside of your pillowcase with an all-purpose cleaner. This will help loosen the grime and make it easier to wipe away. I usually skip this step unless I know it’s been a while since the last cleaning.
3. Position Your Ladder/Step Stool: Carefully position your ladder or step stool directly beneath the first fan blade you’re going to clean. Make sure it’s stable and secure before you climb up. I always double-check to make sure my ladder isn’t wobbly.
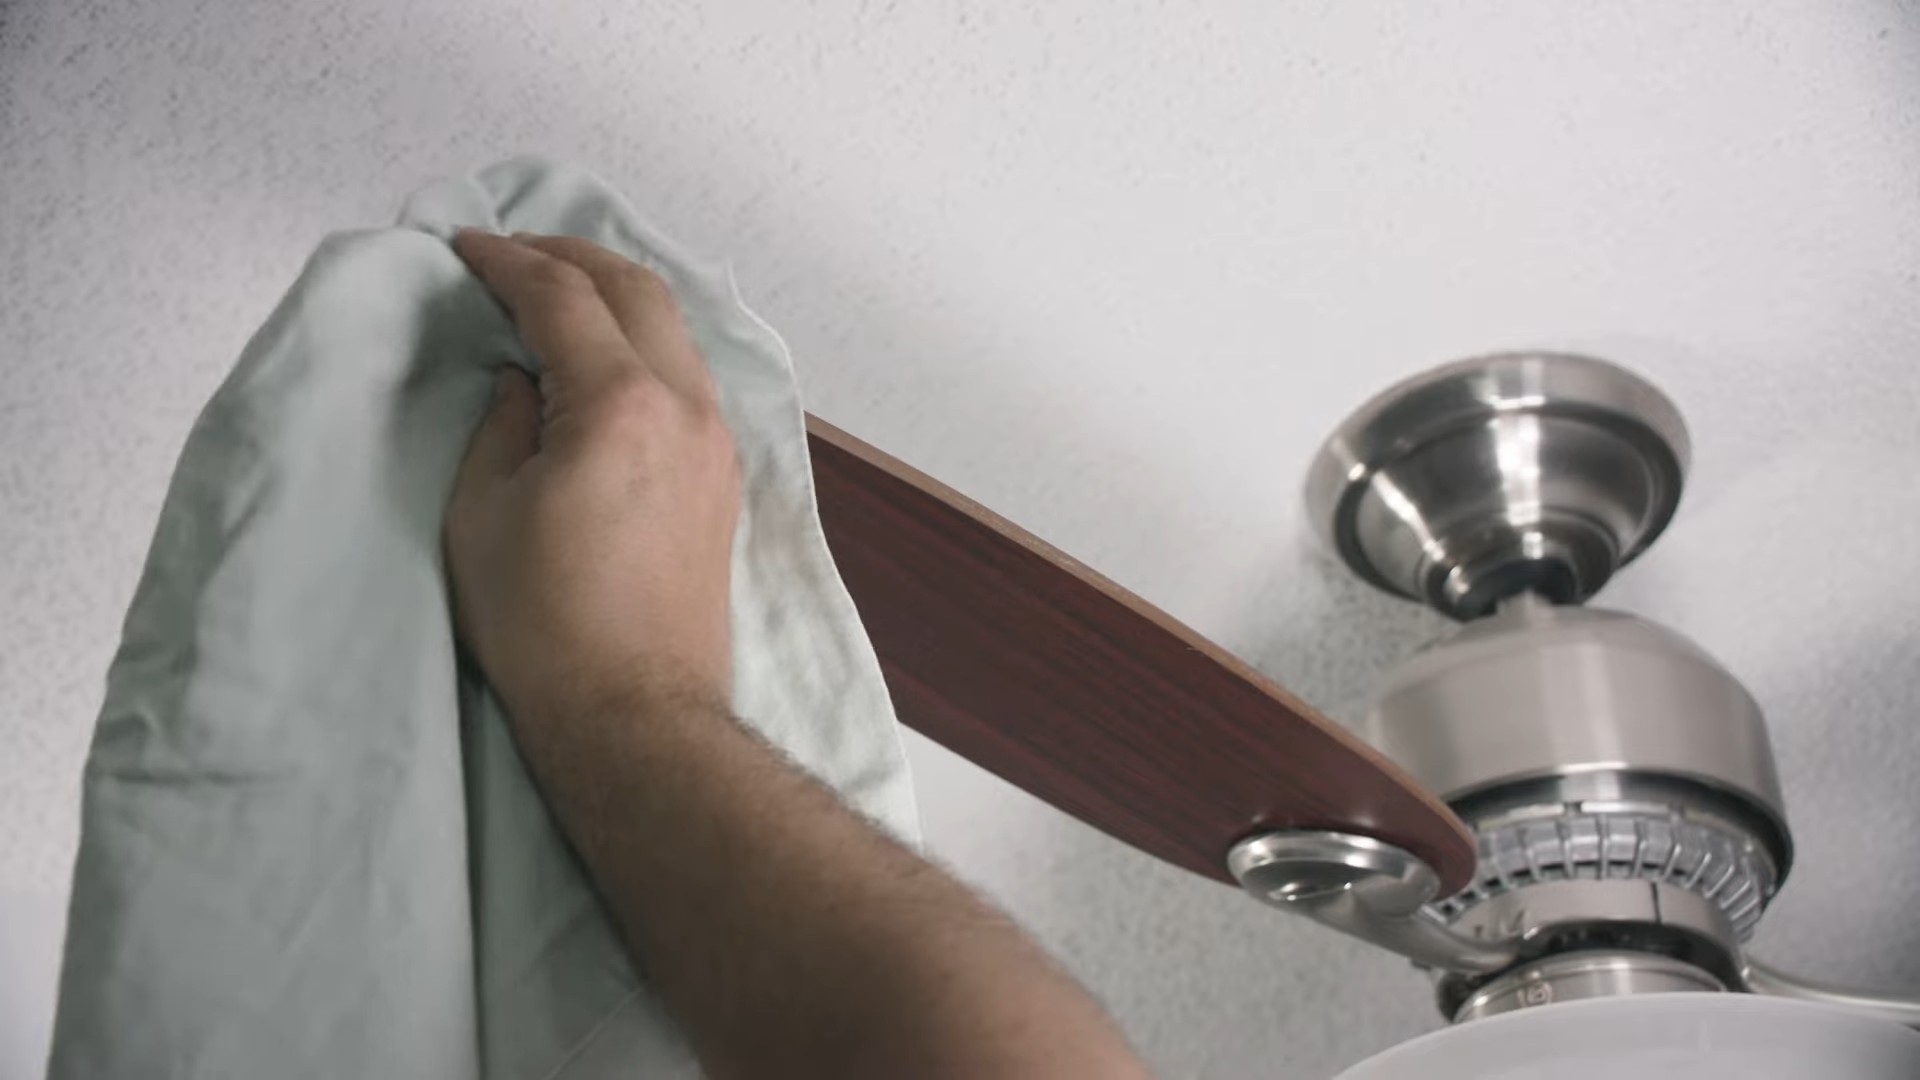
4. Encase the Blade: This is the magic step! Gently slide the pillowcase over one of the fan blades, encasing it completely. Make sure the blade is snug inside the pillowcase.
5. Wipe and Trap: With the blade inside the pillowcase, apply gentle pressure and slowly slide the pillowcase along the length of the blade, from the base to the tip. The pillowcase will trap all the dust and grime inside.
6. Repeat for Each Blade: Remove the pillowcase from the cleaned blade and repeat steps 4 and 5 for each remaining blade on the fan.
7. Empty the Pillowcase: Once you’ve cleaned all the blades, carefully remove the pillowcase and take it outside or to a trash can. Turn it inside out and shake out all the accumulated dust and debris. You’ll be amazed (and maybe a little disgusted) at how much dust it collected!
8. Optional: Final Polish: If you want to give your fan blades an extra shine, you can use a clean microfiber cloth to wipe them down. This will remove any lingering dust or streaks.
9. Clean the Fan Motor Housing: Don’t forget the fan motor housing! This area can also accumulate dust. Use a damp cloth or a duster to wipe it clean.
10. Admire Your Sparkling Clean Fan! Step back and admire your handiwork! Your ceiling fan is now dust-free and ready to circulate clean air.
Dealing with Stubborn Grime:
Sometimes, especially in kitchens, ceiling fans can accumulate a layer of greasy grime. If the pillowcase method alone isn’t cutting it, here’s what I do:
1. Pre-Treat with Cleaner: Before using the pillowcase, spray the fan blades with a degreasing cleaner or a mixture of warm water and dish soap. Let it sit for a few minutes to loosen the grime.
2. Pillowcase Cleaning: Follow the pillowcase cleaning method as described above.
3. Scrub if Needed: If there are still stubborn spots, use a soft sponge or cloth to gently scrub them away. Be careful not to scratch the fan blades.
4. Rinse and Dry: Wipe the blades with a damp cloth to remove any cleaner residue, and then dry them with a clean microfiber cloth.
Maintaining Your Clean Fan:
To keep your ceiling fan clean and dust-free, I recommend cleaning it regularly, about once a month. This will prevent dust from building up and make the cleaning process much easier.
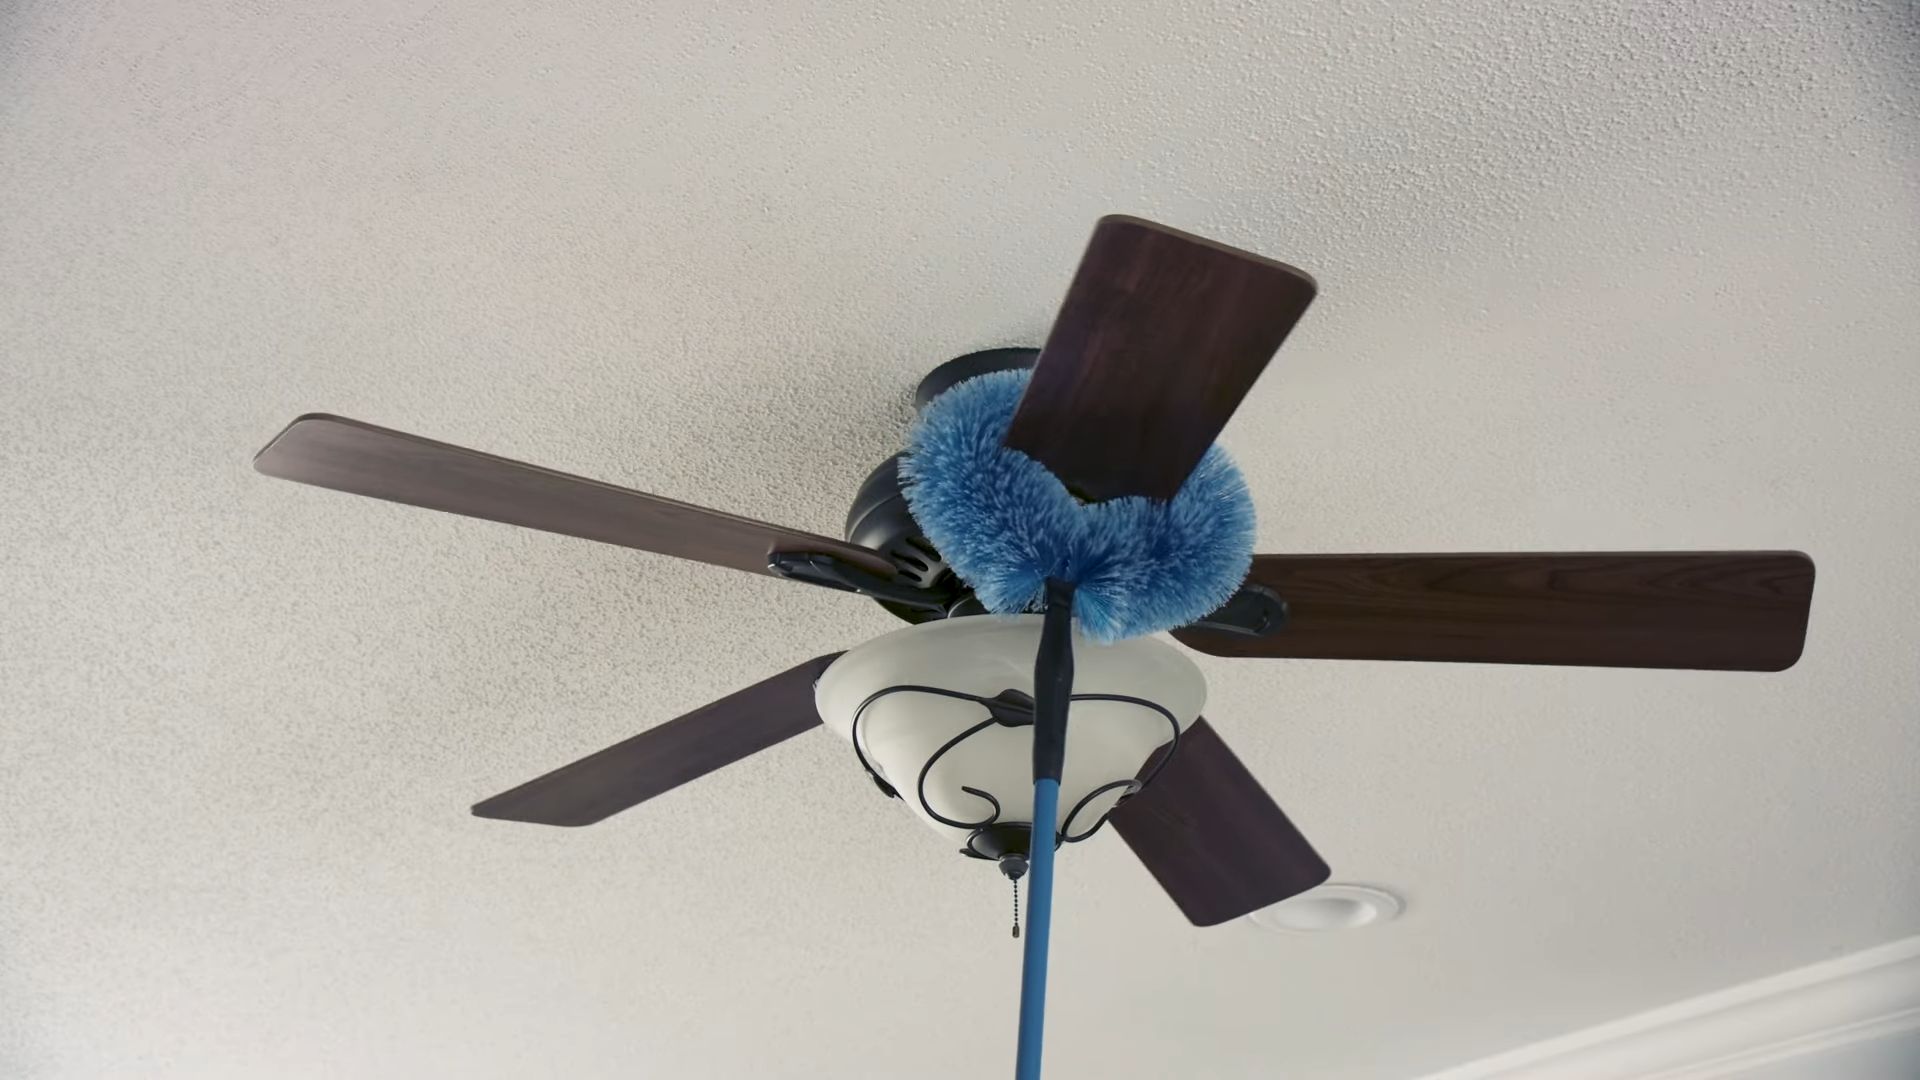
* Regular Dusting: Even if you don’t do a full pillowcase cleaning every month, you can use a duster or a long-handled brush to remove loose dust from the fan blades.
* Consider a Fan Blade Duster: There are special fan blade dusters available that are designed to easily reach and clean the blades. These can be a great investment if you have high ceilings or multiple ceiling fans.
Troubleshooting:
* Pillowcase Too Small? If your pillowcase is too small to completely encase the fan blade, you can use a larger pillowcase or even a small trash bag. Just make sure it’s clean and doesn’t have any holes.
* Dust Still Falling? If you’re still getting dust falling while you clean, try spraying the inside of the pillowcase with a little bit of water. This will help the dust cling to the fabric.
* Fan Blades are Sticky? If your fan blades are sticky, it’s likely due to grease or grime. Use a degreasing cleaner and a soft sponge to scrub them clean.
Extra Tips and Tricks:
* Use a Vacuum with a Brush Attachment: For a quick and easy way to remove loose dust, you can use a vacuum cleaner with a brush attachment. Just be careful not to scratch the fan blades.
* Clean from Top to Bottom: When cleaning any room, it’s always best to start at the top and work your way down. This will prevent dust and debris from falling onto surfaces you’ve already cleaned.
* Wear a Mask: If you’re sensitive to dust, consider wearing a mask while you clean your ceiling fan. This will help protect you from inhaling dust particles.
* Get a Helper: If you have trouble reaching the ceiling fan, ask a friend or family member to help you. It’s always safer to have someone spot you while you’re on a ladder.
Why a Clean Ceiling Fan Matters:
Beyond just aesthetics, a clean ceiling fan actually improves your indoor air quality. Dust and allergens can accumulate on the fan blades and circulate throughout your home, triggering allergies and respiratory problems. By keeping your ceiling fan clean, you’re creating a healthier and more comfortable living environment.
* Improved Air Quality: Removing dust and allergens from your ceiling fan can significantly improve your indoor air quality.
* Better Air Circulation: A clean fan can circulate air more efficiently, helping to keep your home cooler in the summer and warmer in the winter.
* Reduced Allergies: If you suffer from allergies, keeping your ceiling fan clean can help reduce your symptoms.
* Energy Savings: A clean fan can operate more efficiently, which can save you money on your energy bills.
So there you have it! My super simple and effective DIY hack for cleaning your ceiling fan. I hope this helps you keep your home clean, healthy, and dust-bunny-free! Happy cleaning!
Conclusion
So, there you have it! Cleaning your ceiling fan doesn’t have to be a dreaded chore. This simple, DIY pillowcase trick transforms a dusty, grimy task into a quick, efficient, and surprisingly satisfying experience. Forget precariously balancing on ladders with spray bottles and cloths, only to have dust raining down on you. This method traps the dust, keeping it contained within the pillowcase and preventing it from spreading throughout your home.
Why is this a must-try? Because it saves you time, effort, and potentially a whole lot of sneezing! It’s a game-changer for anyone who values a clean home but doesn’t want to spend hours achieving it. Plus, it’s incredibly cost-effective. You likely already have everything you need – a pillowcase and a stable step stool or ladder.
But don’t just take our word for it. We encourage you to give this clean ceiling fan hack a try. You might be surprised at how much dust accumulates on those blades and how much easier this method makes the cleaning process.
Looking for variations? Consider these options:
* Scented Pillowcase: Add a few drops of your favorite essential oil to the inside of the pillowcase before cleaning. As you wipe the blades, the gentle friction will release the scent, leaving your room smelling fresh and clean. Lavender, lemon, or eucalyptus are excellent choices.
* Microfiber Pillowcase: For an even more effective clean, use a microfiber pillowcase. The tightly woven fibers will trap even the finest dust particles.
* Dampen the Pillowcase (Slightly): For particularly stubborn grime, lightly dampen the inside of the pillowcase with a mixture of water and a mild cleaning solution. Be sure to wring out any excess liquid to avoid dripping.
* Extendable Duster: If you have high ceilings, consider using an extendable duster with a microfiber head after using the pillowcase method. This will help you reach any remaining dust or cobwebs.
* Frequency is Key: Aim to clean your ceiling fan at least once a month, or more frequently if you live in a dusty environment or have pets. Regular cleaning will prevent dust buildup and make the task even easier.
We’re confident that this DIY trick will become a staple in your cleaning routine. It’s a simple yet effective way to maintain a clean and healthy home environment.
Now, it’s your turn! Try this method and let us know what you think. Share your experiences, tips, and variations in the comments below. We’re eager to hear how this trick works for you and any creative ways you’ve adapted it to suit your needs. Happy cleaning!
FAQ
Why is cleaning my ceiling fan so important?
Cleaning your ceiling fan is more than just an aesthetic concern; it’s crucial for maintaining a healthy and comfortable home environment. Dust and allergens accumulate on the blades over time, and when the fan is turned on, these particles are circulated throughout the room, potentially triggering allergies, asthma, and other respiratory issues. A clean ceiling fan also operates more efficiently, reducing energy consumption and saving you money on your electricity bill. Furthermore, a buildup of dust can weigh down the blades, causing the motor to work harder and potentially shortening the lifespan of your fan. Regular cleaning, therefore, is an investment in your health, comfort, and the longevity of your appliance.
How often should I clean my ceiling fan?
The frequency with which you should clean your ceiling fan depends on several factors, including your living environment, the presence of pets, and the season. As a general guideline, aim to clean your ceiling fan at least once a month. However, if you live in a dusty area, have pets that shed a lot, or experience seasonal allergies, you may need to clean it more frequently, perhaps every two weeks. During the spring and fall, when pollen counts are high, more frequent cleaning can help reduce allergens in your home. Similarly, if you use your ceiling fan frequently, especially during the summer months, dust and debris will accumulate more quickly, necessitating more regular cleaning. Observing the amount of dust buildup on the blades will give you a good indication of how often you need to clean your fan.
What if the dust is really caked on and hard to remove?
If you’ve neglected your ceiling fan for a while and the dust has become caked on and difficult to remove, don’t despair! The pillowcase method can still be effective, but you may need to take a few extra steps. First, try slightly dampening the inside of the pillowcase with a mixture of warm water and a mild dish soap or all-purpose cleaner. Be sure to wring out any excess liquid to prevent dripping. The moisture will help loosen the hardened dust. Second, apply gentle pressure as you wipe the blades, and repeat the process several times if necessary. For particularly stubborn areas, you can use an old toothbrush or a soft-bristled brush to gently scrub the dust before wiping with the pillowcase. In extreme cases, you may need to carefully remove the blades and soak them in warm, soapy water before scrubbing and rinsing. Always ensure the blades are completely dry before reattaching them to the fan.
Is it safe to use cleaning products on my ceiling fan blades?
Yes, it is generally safe to use cleaning products on your ceiling fan blades, but it’s important to choose the right products and use them correctly. Avoid harsh chemicals or abrasive cleaners, as these can damage the finish of the blades. Instead, opt for mild dish soap, all-purpose cleaner, or a specialized cleaning solution designed for ceiling fans. When using any cleaning product, always dilute it according to the manufacturer’s instructions. Apply the cleaner to a cloth or the inside of the pillowcase, rather than spraying it directly onto the blades, to prevent dripping and potential damage to the motor. Before using any new cleaning product, test it on an inconspicuous area of the blade to ensure it doesn’t cause discoloration or damage. Always unplug the ceiling fan before cleaning and allow the blades to dry completely before turning it back on.
Can I use this method on other types of fans?
While the pillowcase method is primarily designed for cleaning ceiling fans, it can also be adapted for use on other types of fans, such as standing fans and box fans. For standing fans, you can use a smaller pillowcase or a microfiber cloth to wipe the blades. If the fan has a grill, you may need to remove it to access the blades more easily. For box fans, you can use a damp cloth or sponge to wipe the blades, being careful not to get the motor wet. In both cases, unplug the fan before cleaning and allow the blades to dry completely before turning it back on. The key is to adapt the method to the specific type of fan you are cleaning, ensuring that you can safely and effectively remove dust and debris without damaging the appliance.

Leave a Comment