

Clean Fridge Coils Easily – it’s a chore we all dread, but trust me, it’s the secret weapon to a happier fridge and a lighter electricity bill! Have you ever noticed your fridge working overtime, humming louder than usual, or maybe even struggling to keep your groceries cool? The culprit might just be hiding behind (or underneath!) your appliance: dirty coils.
While cleaning fridge coils might not have the same historical significance as, say, preserving ancient artifacts, it’s a practice rooted in practicality and resourcefulness. Think about it – our grandparents knew the value of making things last. They understood that a little maintenance could prevent big problems down the road. This DIY trick is a modern extension of that wisdom, helping us extend the life of our appliances and save money in the process.
Why is this DIY hack so essential? Well, dusty coils force your fridge to work harder to maintain the desired temperature. This extra effort translates to increased energy consumption, meaning higher electricity bills. Plus, an overworked fridge is more likely to break down prematurely. By learning how to clean fridge coils easily, you’re not just tidying up; you’re investing in the longevity of your appliance and saving yourself money in the long run. I’m here to guide you through a simple, step-by-step process that will have your fridge running smoothly in no time!
DIY: Breathe New Life into Your Fridge by Cleaning the Coils!
Okay, let’s be honest, cleaning fridge coils isn’t exactly glamorous. But trust me, it’s one of those small maintenance tasks that can make a HUGE difference in your fridge’s performance and lifespan. A fridge with dirty coils has to work harder to stay cool, which means higher energy bills and a potential early demise for your beloved appliance. So, grab your tools, and let’s get started! I promise, it’s easier than you think.
Why Clean Your Fridge Coils?
Before we dive in, let’s quickly cover why this is so important. Think of your fridge coils like the lungs of your appliance. They release heat, and when they’re covered in dust and grime, they can’t breathe properly. This leads to:
* Increased Energy Consumption: Your fridge has to work overtime to maintain the desired temperature, resulting in higher electricity bills.
* Reduced Lifespan: The extra strain on the compressor can shorten the life of your fridge.
* Food Spoilage: Inefficient cooling can lead to inconsistent temperatures, potentially causing food to spoil faster.
* Noisy Operation: A struggling compressor can make your fridge louder than usual.
What You’ll Need
Here’s a list of the supplies you’ll need to tackle this project. Don’t worry, most of these are probably already in your cleaning arsenal:
* Screwdriver (Phillips or Flathead): Depending on how your fridge’s access panel is secured.
* Vacuum Cleaner with Hose Attachment: A must-have for sucking up all that dust.
* Soft Brush Attachment (for Vacuum): This will help loosen stubborn dirt without damaging the coils. If you don’t have one, a paintbrush with soft bristles will do.
* Coil Cleaning Brush (Optional but Recommended): These are specifically designed for cleaning fridge coils and can reach tight spaces. You can find them at most hardware stores or online.
* Damp Cloth or Sponge: For wiping down any remaining dirt or grime.
* Work Gloves (Optional): To keep your hands clean.
* Flashlight or Headlamp: To help you see clearly in those dark corners.
* Appliance Dolly or Furniture Sliders (Optional): If your fridge is difficult to move.
* Safety Glasses (Recommended): To protect your eyes from dust and debris.
Safety First!
Before you even think about touching your fridge, make sure you unplug it! This is crucial for your safety. We don’t want any electrical shocks ruining our cleaning fun. Also, if you’re moving the fridge, be careful not to strain your back. Get help if needed!
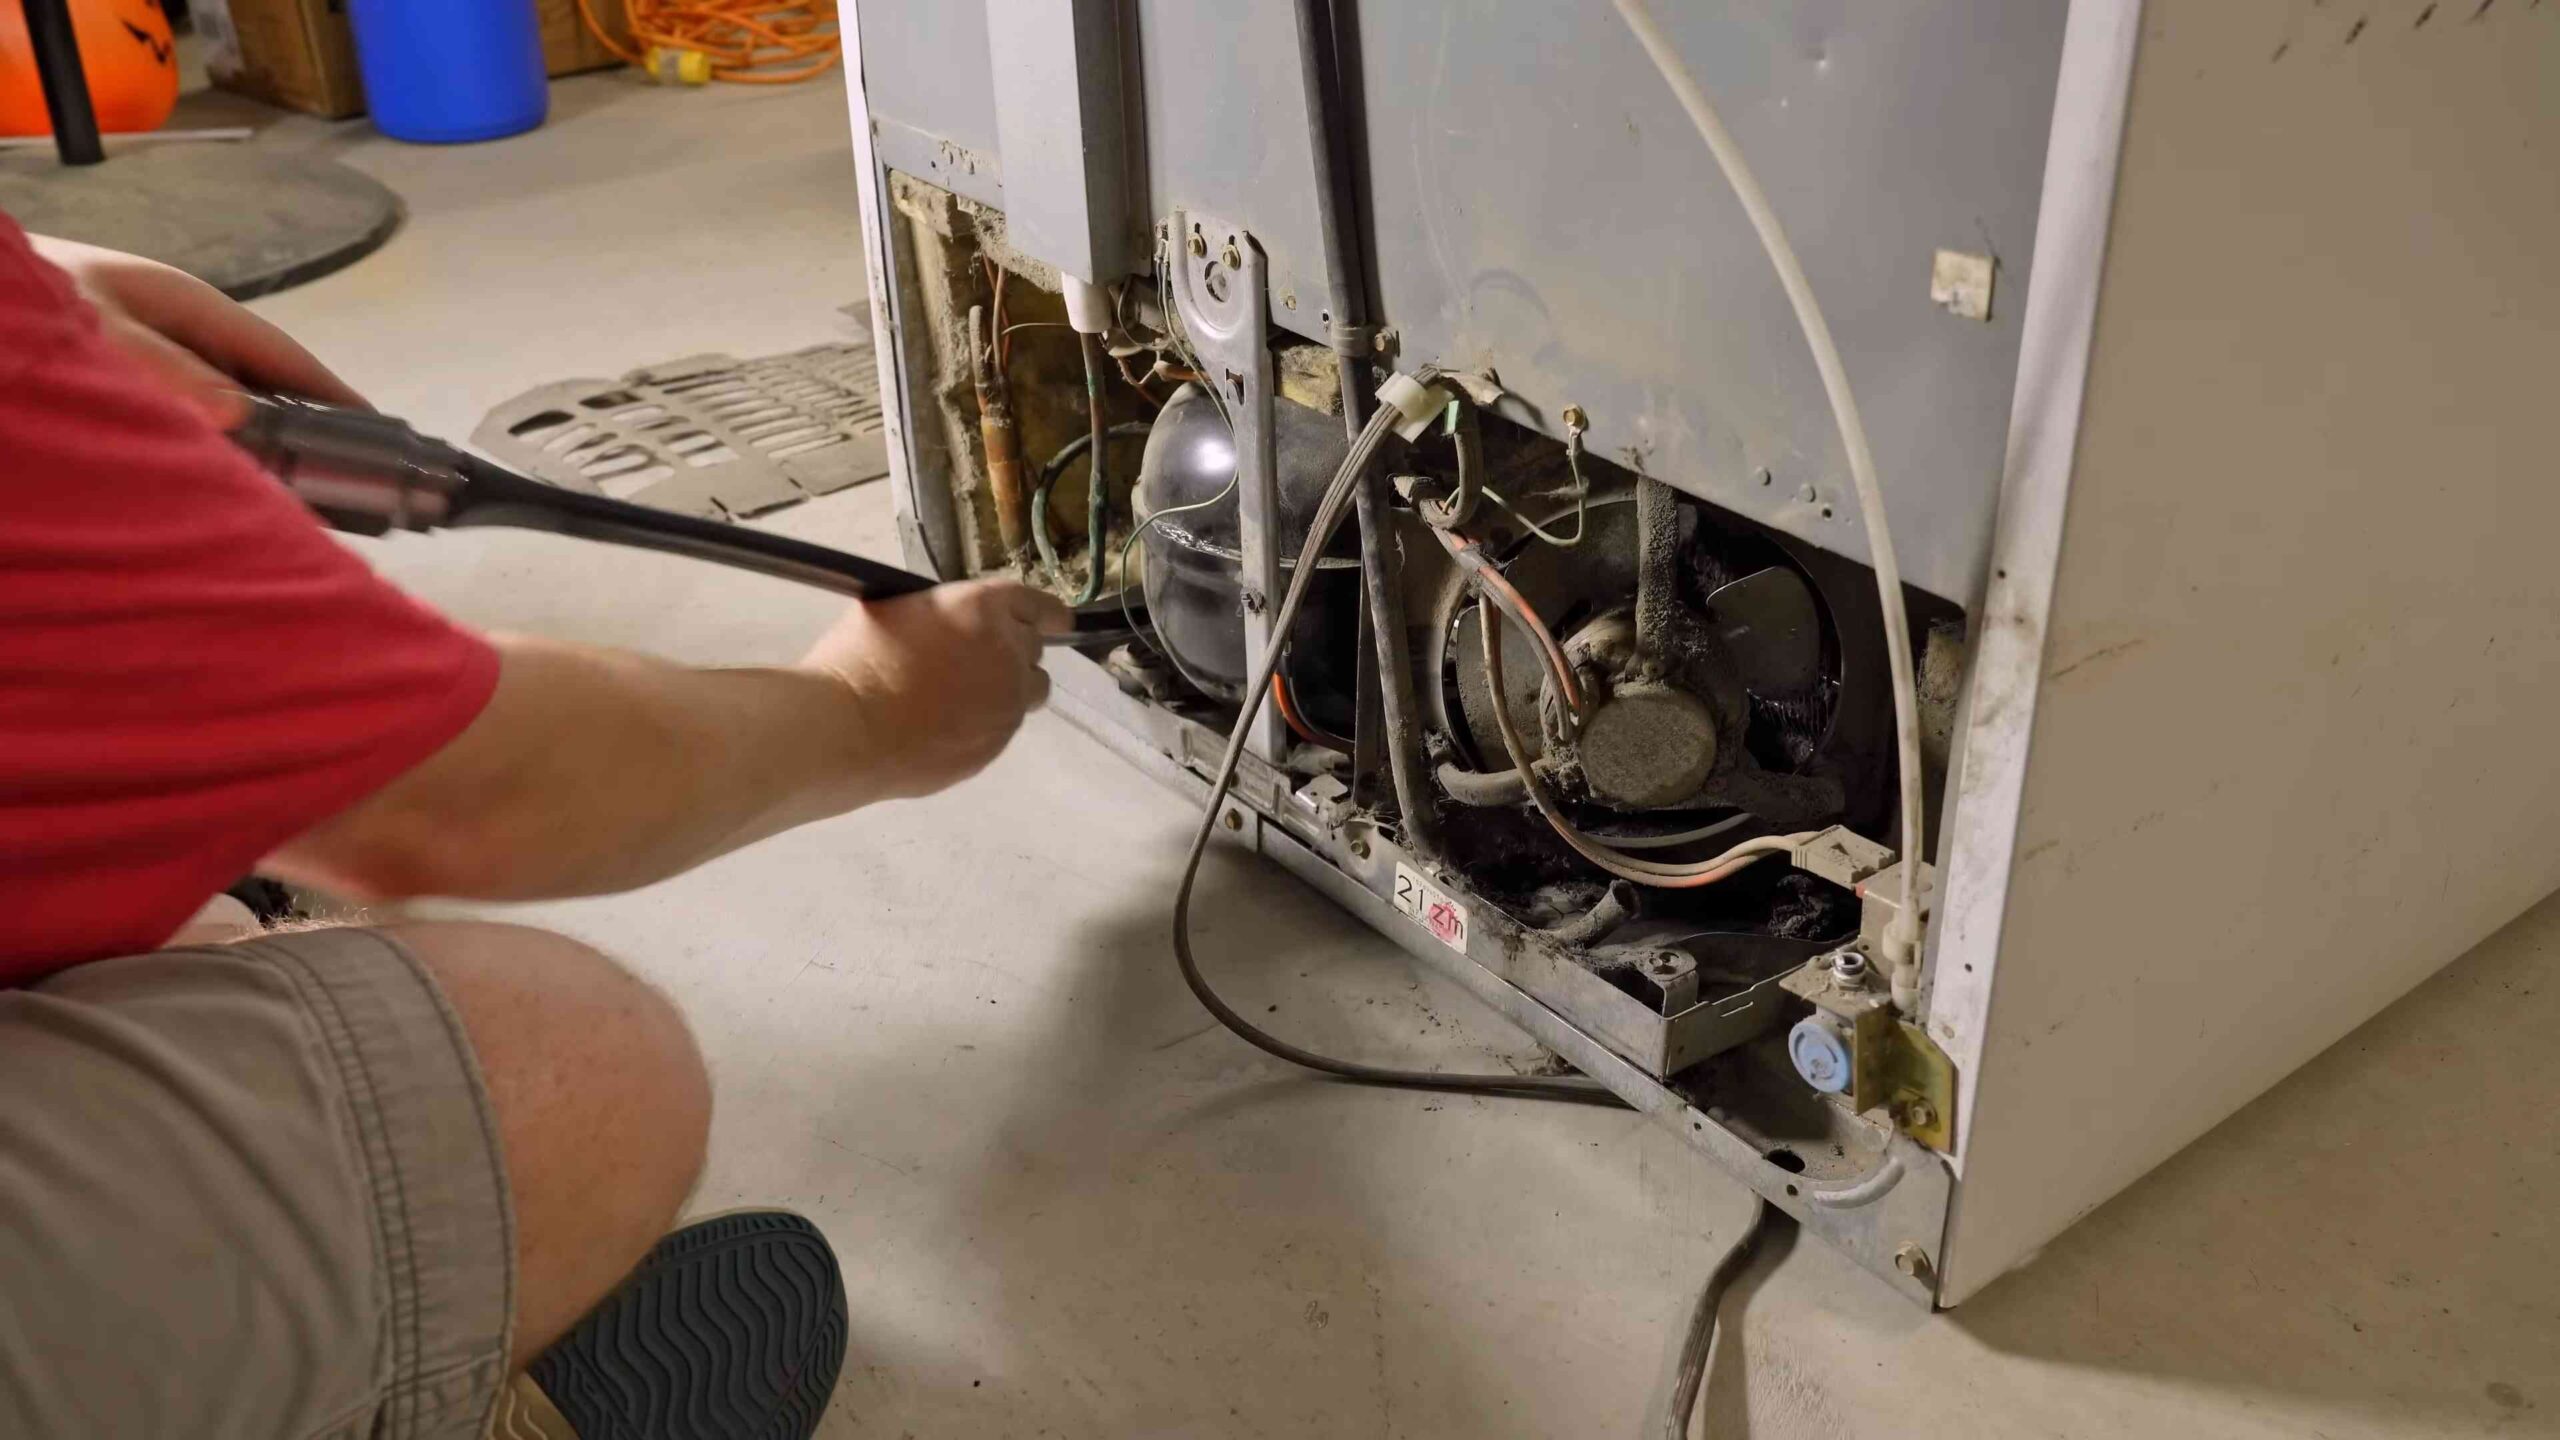
Locating Your Fridge Coils
The location of your fridge coils depends on the model. They’re usually located in one of two places:
* On the Back of the Fridge: These are typically exposed or covered by a cardboard or metal panel.
* At the Bottom of the Fridge: Behind a kick plate or grill.
If you’re not sure where your coils are, consult your fridge’s owner’s manual. If you can’t find the manual, a quick Google search with your fridge’s model number should do the trick.
Step-by-Step Guide to Cleaning Your Fridge Coils
Alright, let’s get down to business! Here’s a detailed guide to cleaning your fridge coils:
1. Unplug the Fridge
I can’t stress this enough! Unplug your fridge from the electrical outlet. Safety first, always!
2. Prepare the Area
Clear the area around your fridge. If possible, move the fridge away from the wall to give yourself more room to work. If you can’t move it easily, use furniture sliders or an appliance dolly. Protect your flooring with a drop cloth or old towels.
3. Locate and Access the Coils
This is where you’ll need your screwdriver.
* For Coils on the Back: If there’s a panel covering the coils, remove it by unscrewing the screws holding it in place. Carefully set the panel aside.
* For Coils at the Bottom: Locate the kick plate or grill at the bottom front of the fridge. It usually snaps off or is held in place by screws. Remove it carefully.
4. Vacuum the Coils
This is the main event! Attach the hose and soft brush attachment to your vacuum cleaner.
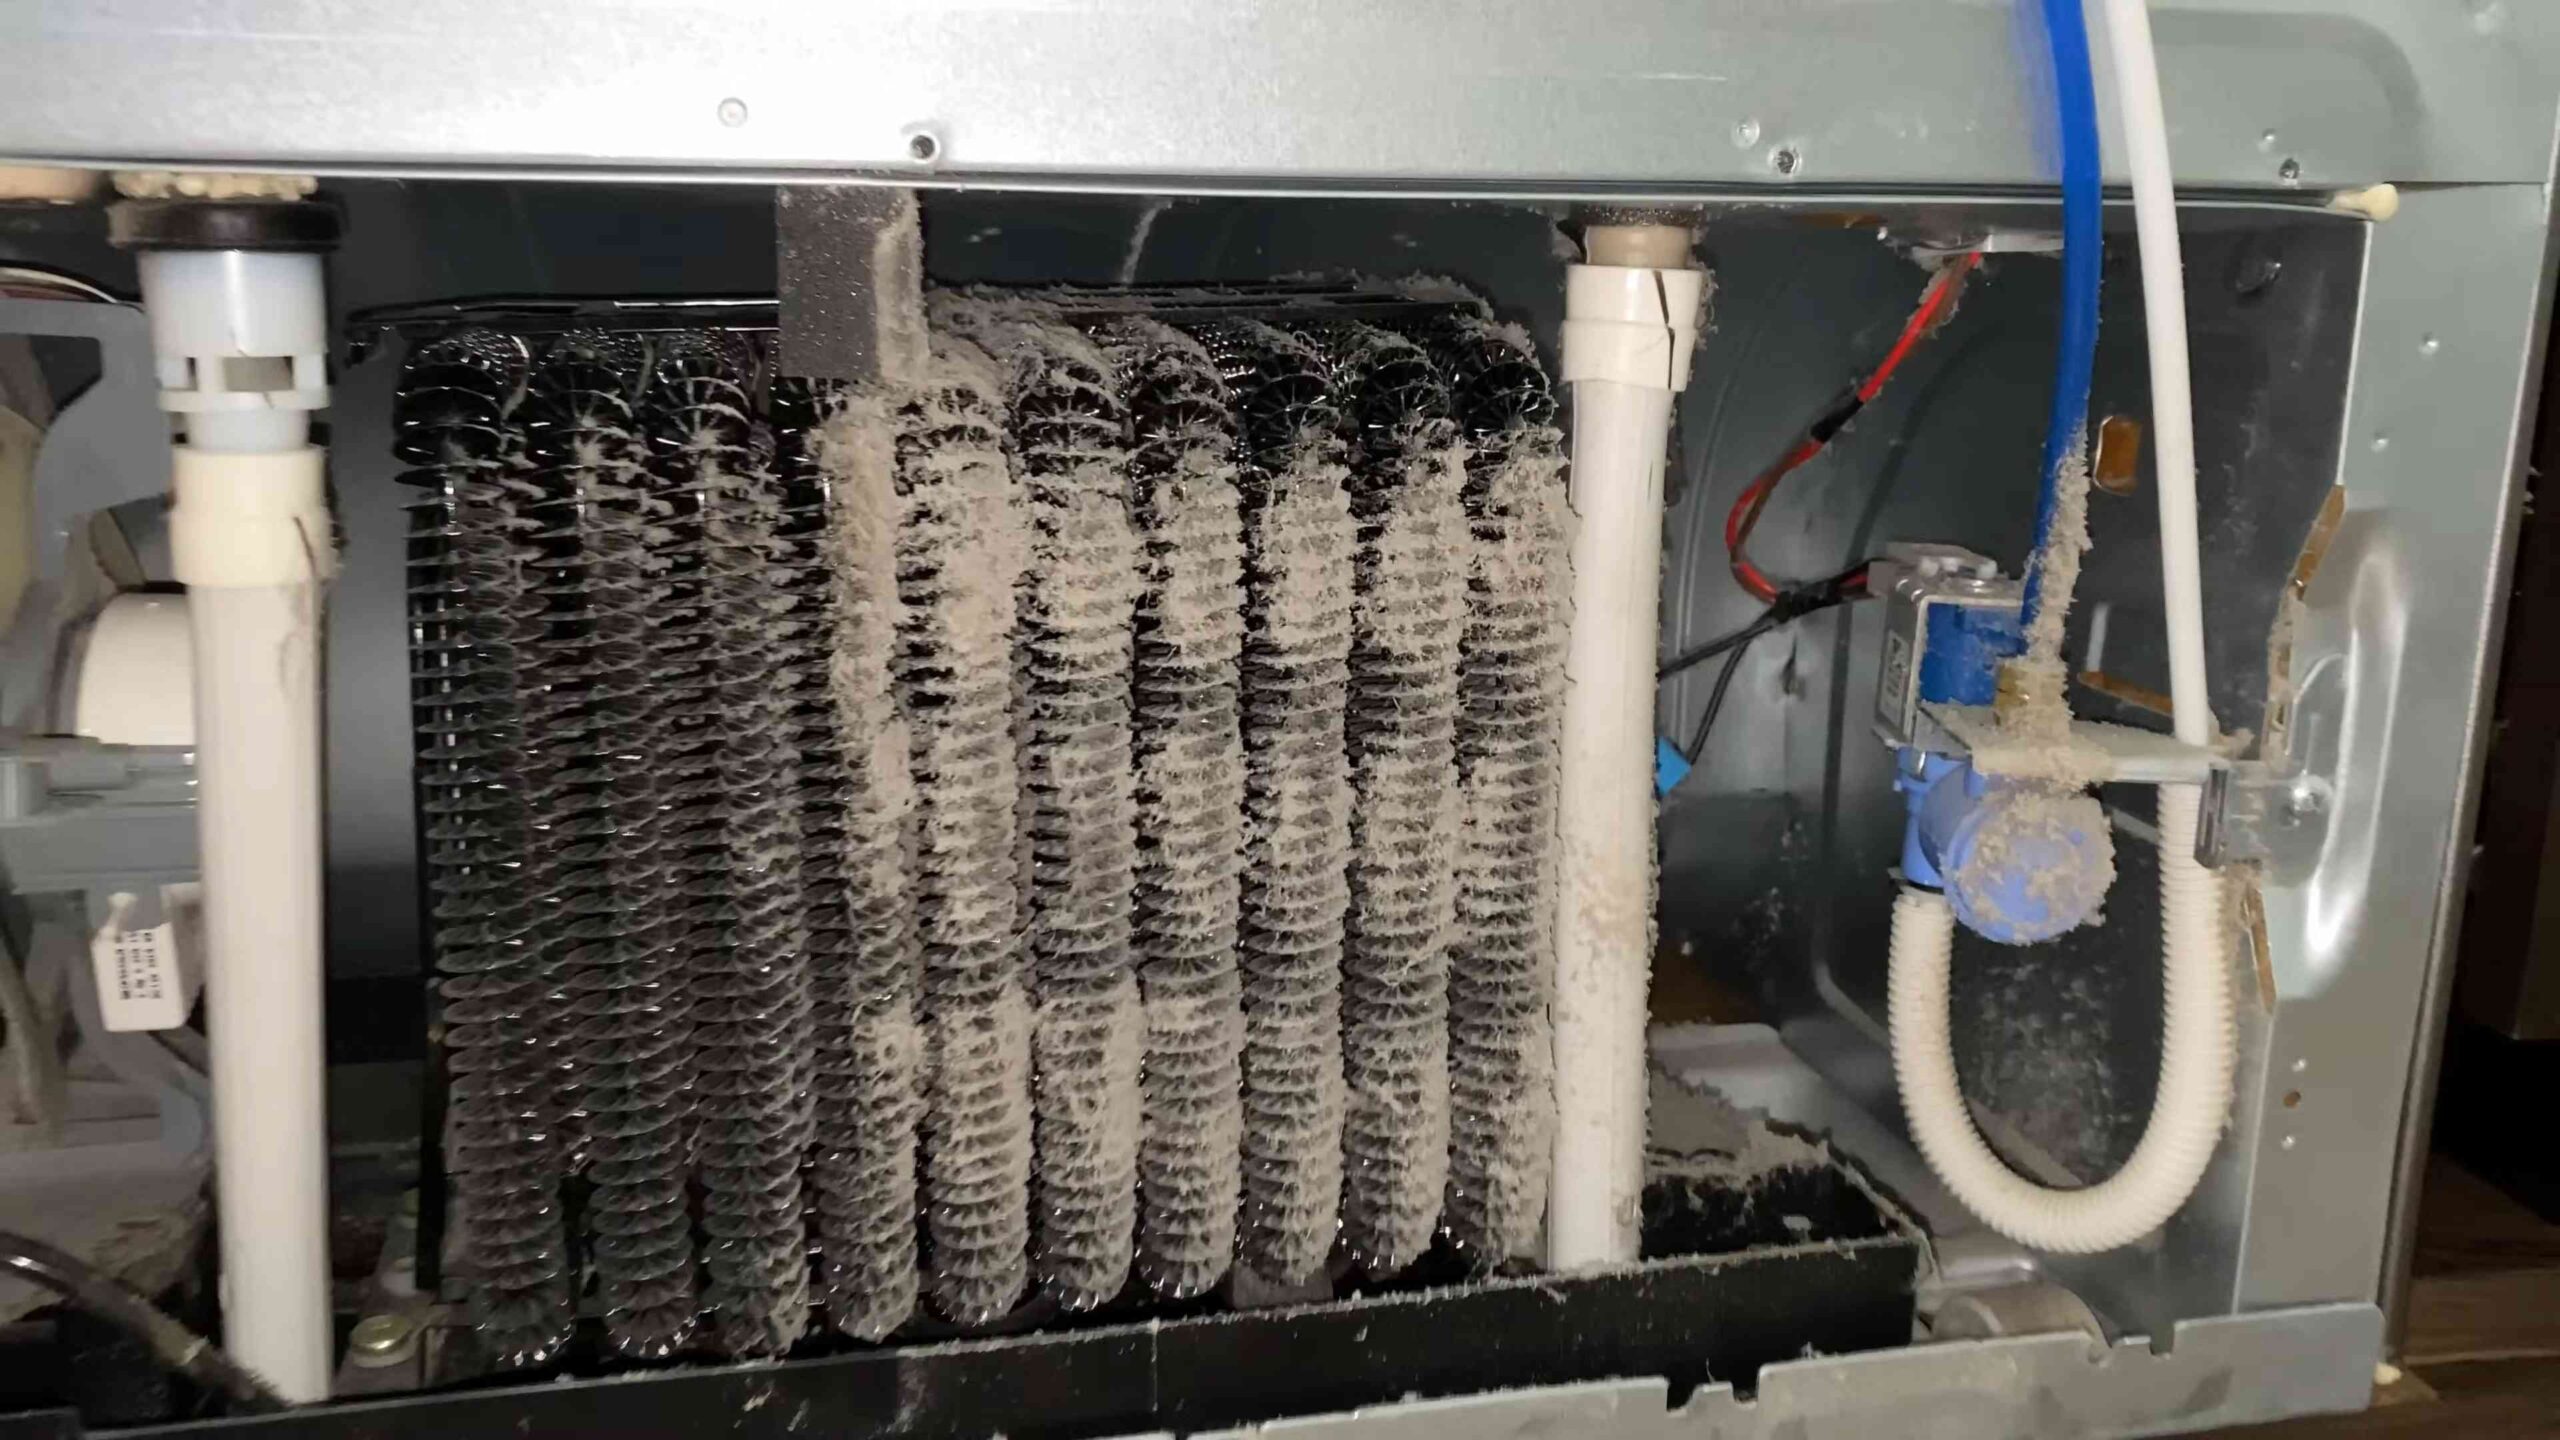
* Gently vacuum the coils, using the brush to loosen any stubborn dirt and dust. Work from top to bottom, making sure to get into all the nooks and crannies.
* Pay special attention to areas with heavy dust buildup. You might need to go over these areas several times.
* If you’re using a coil cleaning brush, gently slide it between the coils to remove any remaining debris. Be careful not to bend or damage the coils.
5. Wipe Down the Coils (Optional)
If the coils are still dirty after vacuuming, dampen a cloth or sponge with water (make sure it’s not dripping wet!) and gently wipe them down. Be careful not to get any water on the electrical components.
6. Clean the Surrounding Area
While you’re at it, take a moment to clean the area around the coils. Vacuum up any dust or debris that has accumulated on the floor or walls.
7. Reassemble the Fridge
Once the coils are clean and dry, it’s time to put everything back together.
* Reattach the access panel or kick plate. Make sure the screws are tightened securely.
* Carefully move the fridge back into place.
* Plug the fridge back into the electrical outlet.
8. Monitor the Fridge
After plugging the fridge back in, monitor its performance for the next few hours. You should notice that it’s running more efficiently and quietly.
Tips and Tricks for Sparkling Coils
Here are a few extra tips to help you get the most out of your coil cleaning session:
* Clean Regularly: Aim to clean your fridge coils every 6-12 months, depending on how dusty your environment is.
* Use a Coil Cleaning Brush: These brushes are specifically designed for cleaning fridge coils and can reach tight spaces.
* Don’t Use Harsh Chemicals: Avoid using harsh chemicals or abrasive cleaners on the coils, as they can damage them.
* Check the Condenser Fan: If your fridge has a condenser fan, make sure it’s clean and free of debris. This fan helps to circulate air around the coils.
* Consider a Professional Cleaning: If you’re not comfortable cleaning the coils yourself, or if they’re heavily soiled, consider hiring a professional appliance repair technician.
Troubleshooting
* Coils Still Dirty After Cleaning: If the coils are still dirty after vacuuming and wiping them down, you may need to use a coil cleaning brush to remove stubborn debris. You can also try using a can of compressed air to blow out any remaining dust.
* Fridge Not Cooling Properly After Cleaning: If your fridge is not cooling properly after cleaning the coils, make sure the condenser fan is working properly. Also, check the door seals to make sure they’re airtight.
* Damaged Coils: If you accidentally damage the coils while cleaning them, contact a professional appliance repair technician for assistance.
Maintaining a Clean Fridge Beyond the Coils
Cleaning the coils is a great start, but let’s not forget the rest of the fridge! Here are some quick tips for keeping your entire fridge clean and fresh:
* Wipe up spills immediately. Don’t let them sit and become sticky messes.
* Regularly check for expired food. Toss anything that’s past its prime.
* Use airtight containers to store food. This helps prevent odors and spills.
* Clean the interior of the fridge regularly. Use a mild soap and water solution.
* Replace the baking soda box every few months. This helps absorb odors.
By following these simple tips, you can keep your fridge running efficiently and your food fresh for longer. Happy cleaning!
Conclusion
So, there you have it! Cleaning your fridge coils might seem like a daunting task, but with this simple DIY trick, it becomes a breeze. We’ve shown you how to bypass expensive professional services and achieve sparkling clean coils with minimal effort and maximum impact. Why is this a must-try? Because clean fridge coils translate directly into a more efficient refrigerator, lower energy bills, and a longer lifespan for your appliance. Think of it as a small investment in the overall health of your kitchen and your wallet.
Beyond the basic method we’ve outlined, feel free to experiment with variations to suit your specific needs and preferences. For instance, if you have particularly stubborn dust buildup, consider using a slightly damp cloth to wipe down the coils after vacuuming. Just be sure to unplug your refrigerator first for safety! You could also use a soft-bristled brush attachment on your vacuum cleaner for a more thorough clean, especially in hard-to-reach areas. Another variation involves using a coil cleaning brush specifically designed for this purpose. These brushes are often flexible and can easily navigate the tight spaces behind your fridge.
Remember, consistency is key. Aim to clean your fridge coils at least twice a year, or even quarterly if you have pets or live in a dusty environment. Regular cleaning prevents excessive buildup and ensures your refrigerator operates at peak performance.
We are confident that this DIY trick will revolutionize your fridge maintenance routine. It’s cost-effective, time-saving, and yields impressive results. Don’t just take our word for it, though. We urge you to try this method for cleaning fridge coils and experience the difference firsthand.
Once you’ve given it a go, we’d love to hear about your experience! Share your tips, tricks, and any variations you’ve discovered in the comments section below. Did you notice a difference in your refrigerator’s performance? Did you find any particularly effective tools or techniques? Your feedback will not only help other readers but also contribute to a collective knowledge base on efficient fridge maintenance. Let’s work together to keep our refrigerators running smoothly and our energy bills low! So, grab your vacuum cleaner, unplug your fridge, and get ready to unleash the power of clean coils!
Frequently Asked Questions (FAQ)
Why is it so important to clean my fridge coils?
Cleaning your fridge coils is crucial for several reasons, all contributing to the overall efficiency and longevity of your refrigerator. First and foremost, dust and debris accumulate on the coils over time, acting as insulation and preventing the efficient release of heat. This forces your refrigerator to work harder to maintain the desired temperature, leading to increased energy consumption and higher electricity bills. Think of it like running a marathon with weights on your ankles – your fridge is expending unnecessary energy just to keep up.
Secondly, an overworked refrigerator is more prone to breakdowns and repairs. The compressor, the heart of your cooling system, has to work overtime to compensate for the reduced heat transfer, which can significantly shorten its lifespan. Regular coil cleaning helps prevent premature wear and tear, saving you money on costly repairs or even a complete refrigerator replacement.
Finally, clean coils contribute to a more consistent and stable temperature inside your refrigerator. This helps preserve your food for longer, reducing spoilage and waste. So, by cleaning your fridge coils, you’re not only saving money on energy bills and repairs but also minimizing food waste and contributing to a more sustainable lifestyle.
How often should I clean my fridge coils?
The frequency of cleaning your fridge coils depends on several factors, including your environment and lifestyle. As a general rule of thumb, aim to clean them at least twice a year. However, if you have pets, live in a dusty area, or notice your refrigerator running more frequently than usual, you might need to clean them more often, perhaps quarterly.
Pets shed hair and dander, which can quickly accumulate on the coils. Dusty environments, whether due to construction, nearby roads, or simply dry weather, can also contribute to faster buildup. If you notice your refrigerator running constantly or feeling warmer than usual, it’s a clear sign that the coils are likely clogged and need cleaning.
Setting a reminder on your calendar or phone can help you stay on track with your coil cleaning schedule. Consider incorporating it into your spring and fall cleaning routines. A little preventative maintenance can go a long way in extending the life of your refrigerator and saving you money in the long run.
What tools do I need to clean my fridge coils?
The good news is that you don’t need any specialized or expensive equipment to clean your fridge coils. The most essential tool is a vacuum cleaner with a hose attachment. This will allow you to effectively remove the dust and debris that have accumulated on the coils.
A soft-bristled brush attachment for your vacuum cleaner can also be helpful, especially for reaching tight spaces and dislodging stubborn dirt. If you don’t have a brush attachment, a long, thin brush, such as a radiator brush or a bottle brush, can also work well.
In addition to the vacuum cleaner and brush, you’ll also need a screwdriver to remove the access panel that covers the coils. Make sure to use the correct size screwdriver to avoid stripping the screws. Finally, a damp cloth can be useful for wiping down the coils after vacuuming, but be sure to unplug your refrigerator first for safety.
Is it safe to clean my fridge coils myself?
Yes, cleaning your fridge coils yourself is generally safe, as long as you take a few basic precautions. The most important safety measure is to unplug your refrigerator before you begin. This will prevent any risk of electric shock.
Before removing the access panel, make sure to turn off the refrigerator’s power switch, if it has one. This will further reduce the risk of electrical hazards. When vacuuming the coils, be careful not to damage any of the components. Use gentle suction and avoid applying excessive pressure.
If you’re using a damp cloth to wipe down the coils, make sure it’s only slightly damp and not dripping wet. Water can damage the electrical components of your refrigerator. Finally, after cleaning the coils, make sure to reattach the access panel securely before plugging the refrigerator back in.
If you’re uncomfortable working with electrical appliances, or if you’re unsure about any of the steps involved, it’s always best to consult a qualified appliance repair technician.
What if I can’t reach the coils behind my fridge?
Accessing the fridge coils can be tricky depending on your refrigerator model and kitchen layout. If your refrigerator is built-in or difficult to move, you might have limited access to the coils. In this case, there are a few things you can try.
First, try using a long, flexible coil cleaning brush. These brushes are specifically designed to reach into tight spaces and clean the coils without having to move the refrigerator. You can find them at most appliance stores or online retailers.
If you still can’t reach the coils, you might need to enlist the help of a friend or family member to carefully move the refrigerator. Before moving it, make sure to empty the contents and disconnect the water line, if applicable. Place a protective sheet or blanket on the floor to prevent scratches.
If you’re unable to move the refrigerator yourself, consider hiring a professional appliance repair technician. They have the tools and expertise to safely access and clean the coils, even in difficult-to-reach locations.


Leave a Comment