

Clean Gas Stove Tops – are you tired of battling stubborn grease and burnt food on your gas stove top? I know I was! It felt like no matter how hard I scrubbed, those pesky stains just wouldn’t budge. But don’t worry, you’re not alone, and I’m here to share some amazing DIY tricks that will have your gas stove top sparkling like new in no time!
For generations, the heart of the home has been the kitchen, and the stove is its fiery center. From ancient hearths to modern gas ranges, the ability to cook and nourish ourselves has always been a cornerstone of human culture. But let’s be honest, keeping that fiery center clean can be a real chore! We all know the frustration of spills and splatters that seem to bake themselves onto the surface, making it look less than inviting.
That’s why I’m so excited to share these simple, effective, and budget-friendly DIY methods for keeping your clean gas stove tops. These aren’t just cleaning tips; they’re time-savers and sanity-preservers! Imagine a kitchen where you can actually enjoy cooking without dreading the cleanup afterward. These hacks will not only make your stove look fantastic but also extend its lifespan and improve its overall performance. So, let’s dive in and discover the secrets to a sparkling clean gas stove top!
DIY Guide: Sparkling Clean Gas Stove Tops – The Easy Way!
Hey everyone! I know, I know, cleaning the gas stove top is probably nobody’s favorite chore. But trust me, with this method, it’ll be a whole lot easier and you’ll be amazed at the results. I’ve tried countless cleaning products and techniques, and this one is by far the most effective and budget-friendly. Get ready to say goodbye to stubborn grease and burnt-on food!
What You’ll Need:
Before we dive in, let’s gather our supplies. Here’s what you’ll need to make your gas stove top shine:
* Baking Soda: This is our main cleaning agent. It’s a natural abrasive that’s gentle enough not to scratch your stove top.
* White Vinegar: The acid in vinegar helps to dissolve grease and grime. Plus, it’s a great disinfectant!
* Dish Soap: A little dish soap helps to cut through grease and lift away dirt.
* Spray Bottle: For easy application of the vinegar solution.
* Microfiber Cloths: These are perfect for wiping down surfaces without leaving streaks or lint.
* Non-Scratch Scrub Sponge: For tackling those really stubborn spots. Make sure it’s non-scratch to avoid damaging your stove top.
* Old Toothbrush: Ideal for cleaning around the burners and in tight spaces.
* Paper Towels: For soaking up excess liquid and drying surfaces.
* Large Ziploc Bags (Optional): For soaking the burner grates.
* Ammonia (Optional, for heavily soiled grates): Use with caution and proper ventilation.
* Rubber Gloves: To protect your hands from the cleaning solutions.
* Small Bowl or Container: For mixing the baking soda paste.
* Spatula or Scraper (Plastic): To help loosen stuck-on food.
Safety First!
Before we start, let’s talk safety.
* Make sure the stove is completely cool. Never attempt to clean a hot stove top!
* Turn off the gas supply to the stove. This is a crucial step to prevent any accidents.
* Wear rubber gloves to protect your hands from the cleaning solutions.
* If using ammonia, ensure proper ventilation. Open windows and doors to avoid inhaling the fumes.
Cleaning the Burner Grates
The burner grates are usually the dirtiest part of the stove top. Here’s how to clean them effectively:
1. Remove the burner grates from the stove top. Carefully lift them off and set them aside.
2. Prepare the soaking solution. There are two options here, depending on how dirty your grates are:
* Option 1 (Mildly Soiled): Fill a large Ziploc bag with hot, soapy water. Add a few tablespoons of baking soda.
* Option 2 (Heavily Soiled): Fill a large Ziploc bag with 1/4 cup of ammonia. Seal the bag tightly and place it in another bag to prevent leaks. Important: Do this in a well-ventilated area and avoid direct contact with the ammonia.
3. Soak the grates. Place the burner grates in the Ziploc bag and seal it tightly. Let them soak for at least 2-3 hours, or even overnight for really stubborn grime.
4. Scrub the grates. After soaking, remove the grates from the bag and scrub them with a non-scratch scrub sponge. The soaked grime should come off much easier now. Use an old toothbrush to get into the hard-to-reach areas.
5. Rinse and dry. Rinse the grates thoroughly with clean water and dry them with a paper towel or microfiber cloth. Make sure they are completely dry before placing them back on the stove top.
Cleaning the Burner Caps
The burner caps are the small, removable pieces that sit on top of the burners. They can also get quite dirty.
1. Remove the burner caps. Carefully lift them off the burners.
2. Wash with soapy water. Wash the burner caps with hot, soapy water and a non-scratch scrub sponge. Use an old toothbrush to clean any clogged holes.
3. Rinse and dry. Rinse the burner caps thoroughly with clean water and dry them completely before placing them back on the burners.
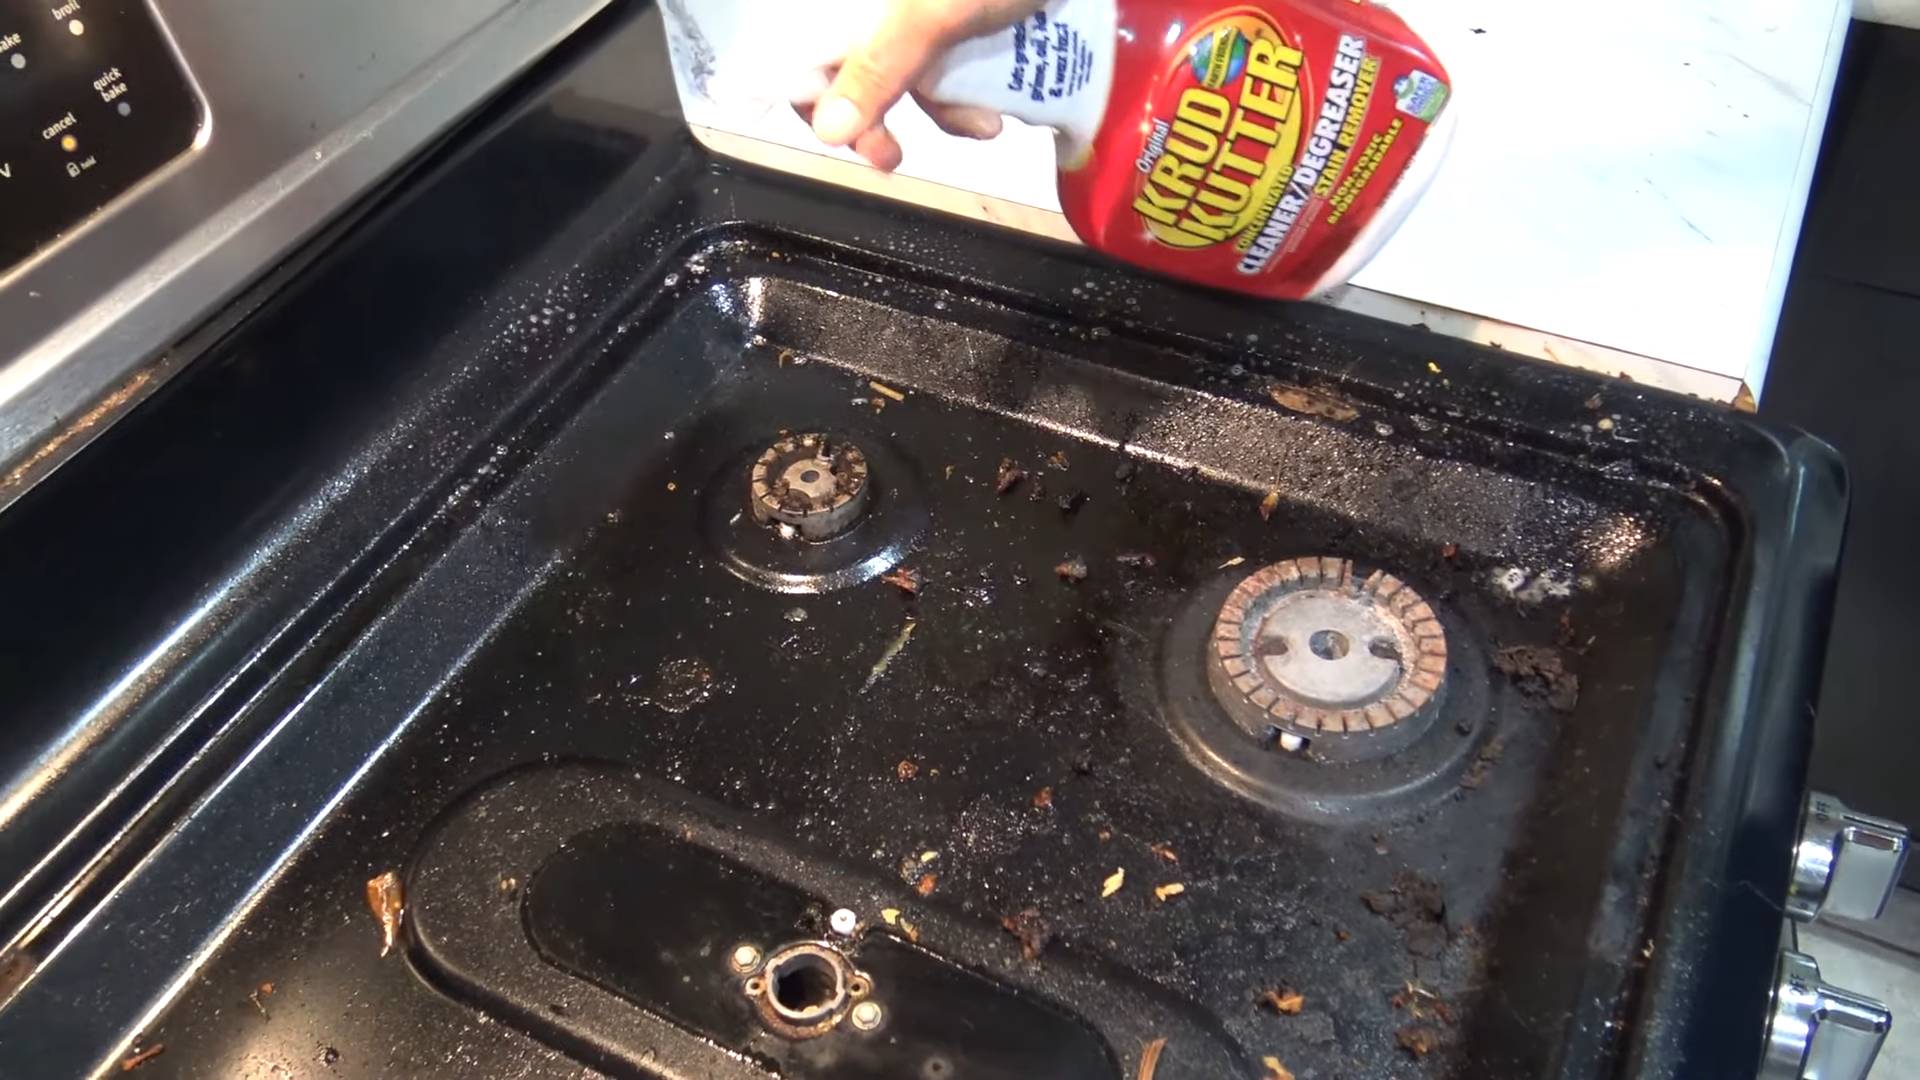
Cleaning the Stove Top Surface
Now for the main event – cleaning the stove top surface!
1. Remove any loose debris. Use a paper towel or cloth to wipe away any loose crumbs or food particles from the stove top.
2. Make a baking soda paste. In a small bowl, mix baking soda with a little water to form a thick paste. The consistency should be similar to toothpaste.
3. Apply the baking soda paste. Spread the baking soda paste generously over the entire stove top surface, focusing on areas with stubborn stains or grease.
4. Let it sit. Allow the baking soda paste to sit for at least 15-20 minutes. This will give it time to loosen the grime. For really tough stains, you can let it sit for up to an hour.
5. Spray with vinegar. Fill a spray bottle with white vinegar. Lightly spray the vinegar over the baking soda paste. The vinegar will react with the baking soda, creating a fizzing action that helps to lift away the dirt.
6. Scrub gently. Using a non-scratch scrub sponge, gently scrub the stove top surface. The baking soda and vinegar mixture should help to loosen the grime, making it easier to remove. For really stubborn spots, use a plastic spatula or scraper to gently loosen the stuck-on food.
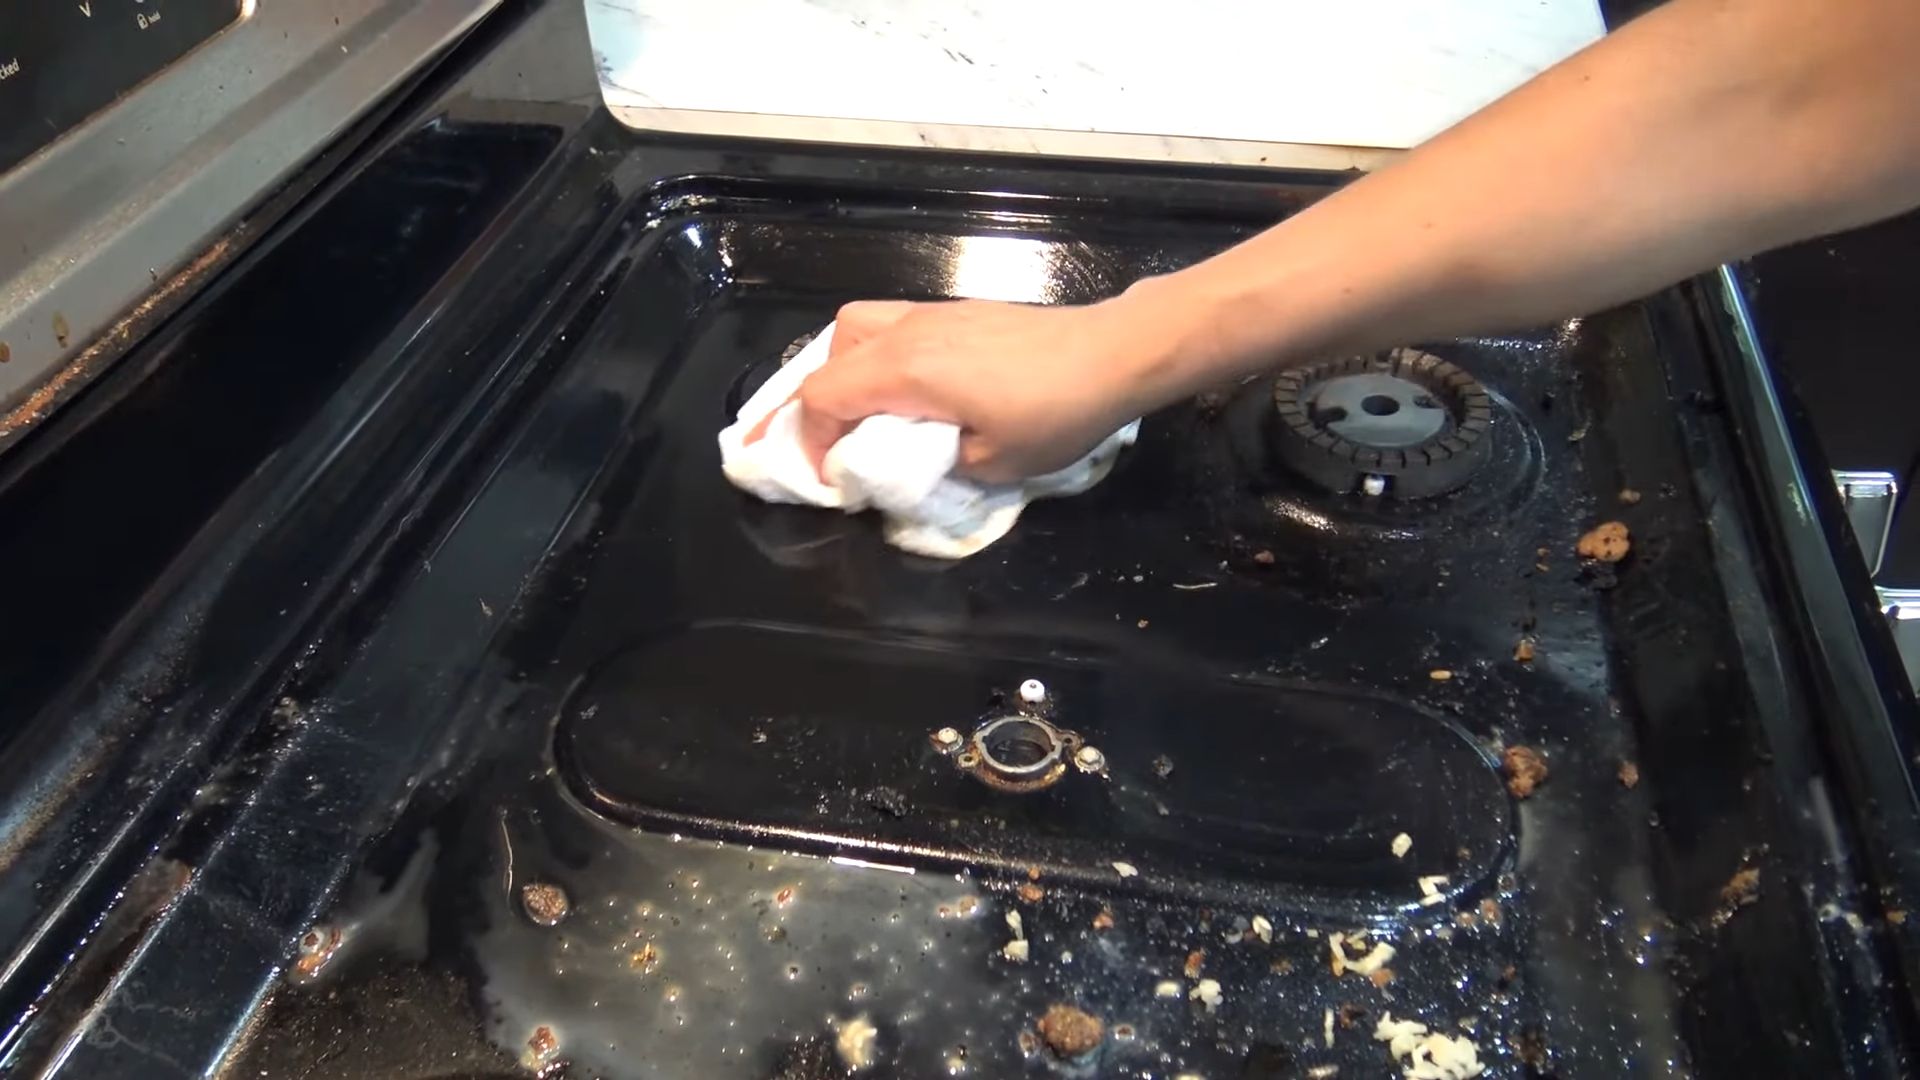
7. Wipe clean. Use a damp microfiber cloth to wipe away the baking soda and vinegar mixture. Rinse the cloth frequently to remove the dirt and grime.
8. Dry the surface. Use a clean, dry microfiber cloth to dry the stove top surface. This will help to prevent streaks and leave your stove top sparkling clean.
Cleaning Around the Burners
Cleaning around the burners can be tricky, but it’s important to remove any grease or food particles that can clog the burner openings.
1. Use an old toothbrush. Dip an old toothbrush in a mixture of dish soap and water.
2. Scrub around the burners. Gently scrub around the burners with the toothbrush to remove any dirt or grime. Pay close attention to the burner openings.
3. Wipe clean. Use a damp microfiber cloth to wipe away the soapy water.
4. Dry the area. Use a clean, dry microfiber cloth to dry the area around the burners.
Putting It All Back Together
Once everything is clean and dry, it’s time to put your stove top back together.
1. Replace the burner caps. Carefully place the burner caps back on top of the burners. Make sure they are properly aligned.
2. Replace the burner grates. Carefully place the burner grates back on the stove top. Make sure they are securely in place.
Tips for Maintaining a Clean Stove Top
Here are a few tips to help you keep your stove top clean and prevent future build-up:
* Wipe up spills immediately. The sooner you wipe up spills, the easier they will be to remove.
* Clean your stove top regularly. Aim to clean your stove top at least once a week, or more often if needed.
* Use a stove top cleaner. Consider using a stove top cleaner specifically designed for gas stoves.
* Protect your stove top. Use a stove top protector to prevent spills and splatters from reaching the surface.
And that’s it! With a little elbow grease and these simple steps, you can keep your gas stove top sparkling clean and looking its best. Happy cleaning!
Conclusion
So, there you have it! This simple, yet incredibly effective DIY trick for cleaning gas stove tops is a game-changer. Forget spending hours scrubbing away at stubborn grease and grime with harsh chemicals. This method is not only easier and faster, but it’s also gentler on your stove top and the environment. We’ve shown you how to achieve a sparkling clean surface with ingredients you likely already have in your pantry.
Why is this a must-try? Because it saves you time, money, and effort. Imagine reclaiming those precious weekend hours you used to spend battling baked-on messes. Think of the money you’ll save by ditching expensive, specialized cleaners. And consider the peace of mind knowing you’re using a safer, more natural solution in your kitchen.
But the beauty of this DIY method is its adaptability. Feel free to experiment with variations to suit your specific needs and preferences. For instance, if you’re dealing with particularly stubborn stains, you could try adding a tablespoon of baking soda to your cleaning paste for extra scrubbing power. Alternatively, for a more fragrant clean, infuse your vinegar solution with a few drops of your favorite essential oil, like lemon or lavender. Just be sure to test any new ingredients on a small, inconspicuous area of your stove top first to ensure they don’t cause any discoloration or damage.
Another variation involves the soaking time. While we recommend a minimum of 30 minutes, you can extend this to an hour or even overnight for heavily soiled stove tops. The longer the solution sits, the more effectively it will loosen the grime, making it easier to wipe away.
This DIY approach to clean gas stove tops is more than just a cleaning hack; it’s a sustainable and cost-effective solution for maintaining a clean and healthy kitchen. It’s about taking control of the cleaning process and using natural ingredients to achieve professional-level results.
We are confident that once you try this method, you’ll never go back to your old cleaning routine. It’s a simple, effective, and eco-friendly way to keep your gas stove top looking its best.
So, what are you waiting for? Gather your supplies, follow the steps outlined in this article, and prepare to be amazed by the results. We encourage you to try this DIY trick and share your experience with us in the comments below. Let us know what variations you tried, what worked best for you, and any tips you have to share with other readers. We can’t wait to hear your success stories! Let’s revolutionize the way we clean gas stove tops, one sparkling surface at a time!
Frequently Asked Questions (FAQ)
Q: What if I don’t have all the ingredients listed?
A: While the specific combination of ingredients we recommend provides the best results, you can make substitutions in a pinch. For example, if you don’t have white vinegar, you can use apple cider vinegar or even lemon juice as a substitute. If you don’t have dish soap, a mild all-purpose cleaner can work, but be sure to rinse thoroughly afterward. The key is to use ingredients that are effective at cutting through grease and grime. However, avoid using harsh chemicals like bleach or ammonia, as these can damage your stove top.
Q: How often should I clean my gas stove top using this method?
A: The frequency of cleaning depends on how often you cook and how messy your cooking habits are. For most households, a weekly cleaning is sufficient to keep the stove top looking its best. However, if you tend to make a lot of messy meals, you may need to clean it more frequently, perhaps every few days. It’s also a good idea to wipe up spills as soon as they happen to prevent them from baking onto the surface and becoming more difficult to remove later.
Q: Can I use this method on other parts of my stove, like the grates and burner caps?
A: Yes, absolutely! This method is also effective for cleaning the grates and burner caps of your gas stove. Simply soak them in the same solution of hot water, vinegar, and dish soap for a longer period of time, perhaps an hour or even overnight. For stubborn grime, you can use a scrub brush or sponge to gently scrub the grates and burner caps after soaking. Be sure to rinse them thoroughly with clean water and dry them completely before placing them back on the stove.
Q: Is this method safe for all types of gas stove tops?
A: While this method is generally safe for most gas stove tops, it’s always a good idea to test it on a small, inconspicuous area first to ensure it doesn’t cause any discoloration or damage. This is especially important if you have a stove top made of a delicate material, such as stainless steel or glass. Avoid using abrasive scrubbers or harsh chemicals, as these can scratch or damage the surface.
Q: What if I have a gas stove top with sealed burners?
A: This method works well for gas stove tops with sealed burners. The key is to avoid getting any liquid inside the sealed burner area. When cleaning around the burners, use a damp cloth or sponge to wipe away the cleaning solution, being careful not to saturate the area. If any liquid does get inside the sealed burner area, allow it to dry completely before using the stove.
Q: The grime is really baked on. What can I do?
A: For extremely stubborn, baked-on grime, you may need to take a few extra steps. First, try applying a paste of baking soda and water to the affected areas and letting it sit for several hours or even overnight. The baking soda will help to loosen the grime, making it easier to scrub away. You can also try using a plastic scraper or a non-abrasive scrubbing pad to gently scrape away the grime. Avoid using metal scrapers or abrasive cleaners, as these can scratch the surface of your stove top.
Q: How do I prevent grime from building up on my gas stove top in the first place?
A: Prevention is key to keeping your gas stove top clean and grime-free. Here are a few tips to help you prevent grime buildup:
* Wipe up spills immediately: Don’t let spills sit and bake onto the surface. Wipe them up as soon as they happen.
* Use splatter screens: Splatter screens can help to prevent grease and food particles from splattering onto your stove top while you’re cooking.
* Clean your stove top regularly: A weekly cleaning will help to prevent grime from building up and becoming more difficult to remove.
* Avoid using excessive oil or grease: Using too much oil or grease can lead to more splattering and grime buildup.
* Consider using stove top protectors: These are heat-resistant mats that you can place on your stove top to protect it from spills and splatters.
Q: Can I use a magic eraser on my gas stove top?
A: While magic erasers can be effective for cleaning some surfaces, they can be abrasive and may scratch or damage certain types of gas stove tops, especially those made of stainless steel or glass. It’s best to test a magic eraser on a small, inconspicuous area first to see if it causes any damage. If you do decide to use a magic eraser, use it gently and avoid applying too much pressure.
Q: What is the best way to dry my gas stove top after cleaning?
A: After cleaning your gas stove top, it’s important to dry it thoroughly to prevent water spots and streaks. The best way to dry it is to use a clean, dry microfiber cloth. Microfiber cloths are absorbent and lint-free, making them ideal for drying delicate surfaces. You can also use a paper towel, but be sure to use a fresh one to avoid spreading any dirt or grime.

Leave a Comment