

Clean Window Tracks Easily? Yes, you read that right! Are you tired of those grimy, dusty window tracks that seem impossible to clean? You’re not alone! For generations, homeowners have battled the build-up of dirt, debris, and even the occasional insect graveyard lurking in those narrow crevices. Think of it – our grandmothers probably used toothbrushes and elbow grease, while our parents might have resorted to harsh chemicals. But fear not, my friend, because I’m here to share some game-changing DIY tricks that will make cleaning your window tracks a breeze!
Why is this so important? Well, beyond the obvious aesthetic improvement, clean window tracks actually contribute to a healthier home. Dirty tracks can harbor mold and allergens, impacting air quality. Plus, clean tracks allow your windows to open and close smoothly, preventing damage and saving you money on potential repairs. So, ditch the frustration and embrace these simple, effective methods to clean window tracks easily and reclaim your sparkling clean windows!
Clean Window Tracks Easily: A DIY Guide
Okay, let’s face it, cleaning window tracks is one of those chores we all dread. They’re grimy, dusty, and just plain unpleasant. But fear not! I’m going to show you a super effective and surprisingly easy way to get those window tracks sparkling clean. This method uses common household items, so you probably already have everything you need. Get ready to say goodbye to that stubborn dirt and hello to fresh, clean windows!
What You’ll Need: The Arsenal of Clean
Before we dive in, let’s gather our supplies. Having everything ready will make the process much smoother.
* Vacuum Cleaner with a Hose Attachment: This is crucial for sucking up loose debris and dust. A brush attachment is a bonus!
* Old Toothbrush or Small Scrub Brush: Perfect for getting into those tight corners and scrubbing away stubborn grime.
* Baking Soda: Our secret weapon for loosening dirt and deodorizing.
* White Vinegar: The magic ingredient that reacts with baking soda to create a powerful cleaning fizz.
* Dish Soap: For extra cleaning power and grease removal.
* Spray Bottle: To easily apply the vinegar solution.
* Paper Towels or Cleaning Rags: For wiping away the mess.
* Q-tips: Ideal for cleaning those super narrow crevices.
* Butter Knife or Putty Knife (Optional): Wrapped in a cloth, this can help reach and scrub hard-to-reach areas. Be careful not to scratch the window frame!
* Safety Glasses (Optional): To protect your eyes from splashes.
* Gloves (Optional): To protect your hands, especially if you have sensitive skin.
Step-by-Step Cleaning Process: Let’s Get Started!
Now that we’re armed with our cleaning supplies, let’s get down to business. Follow these steps, and you’ll be amazed at the transformation.
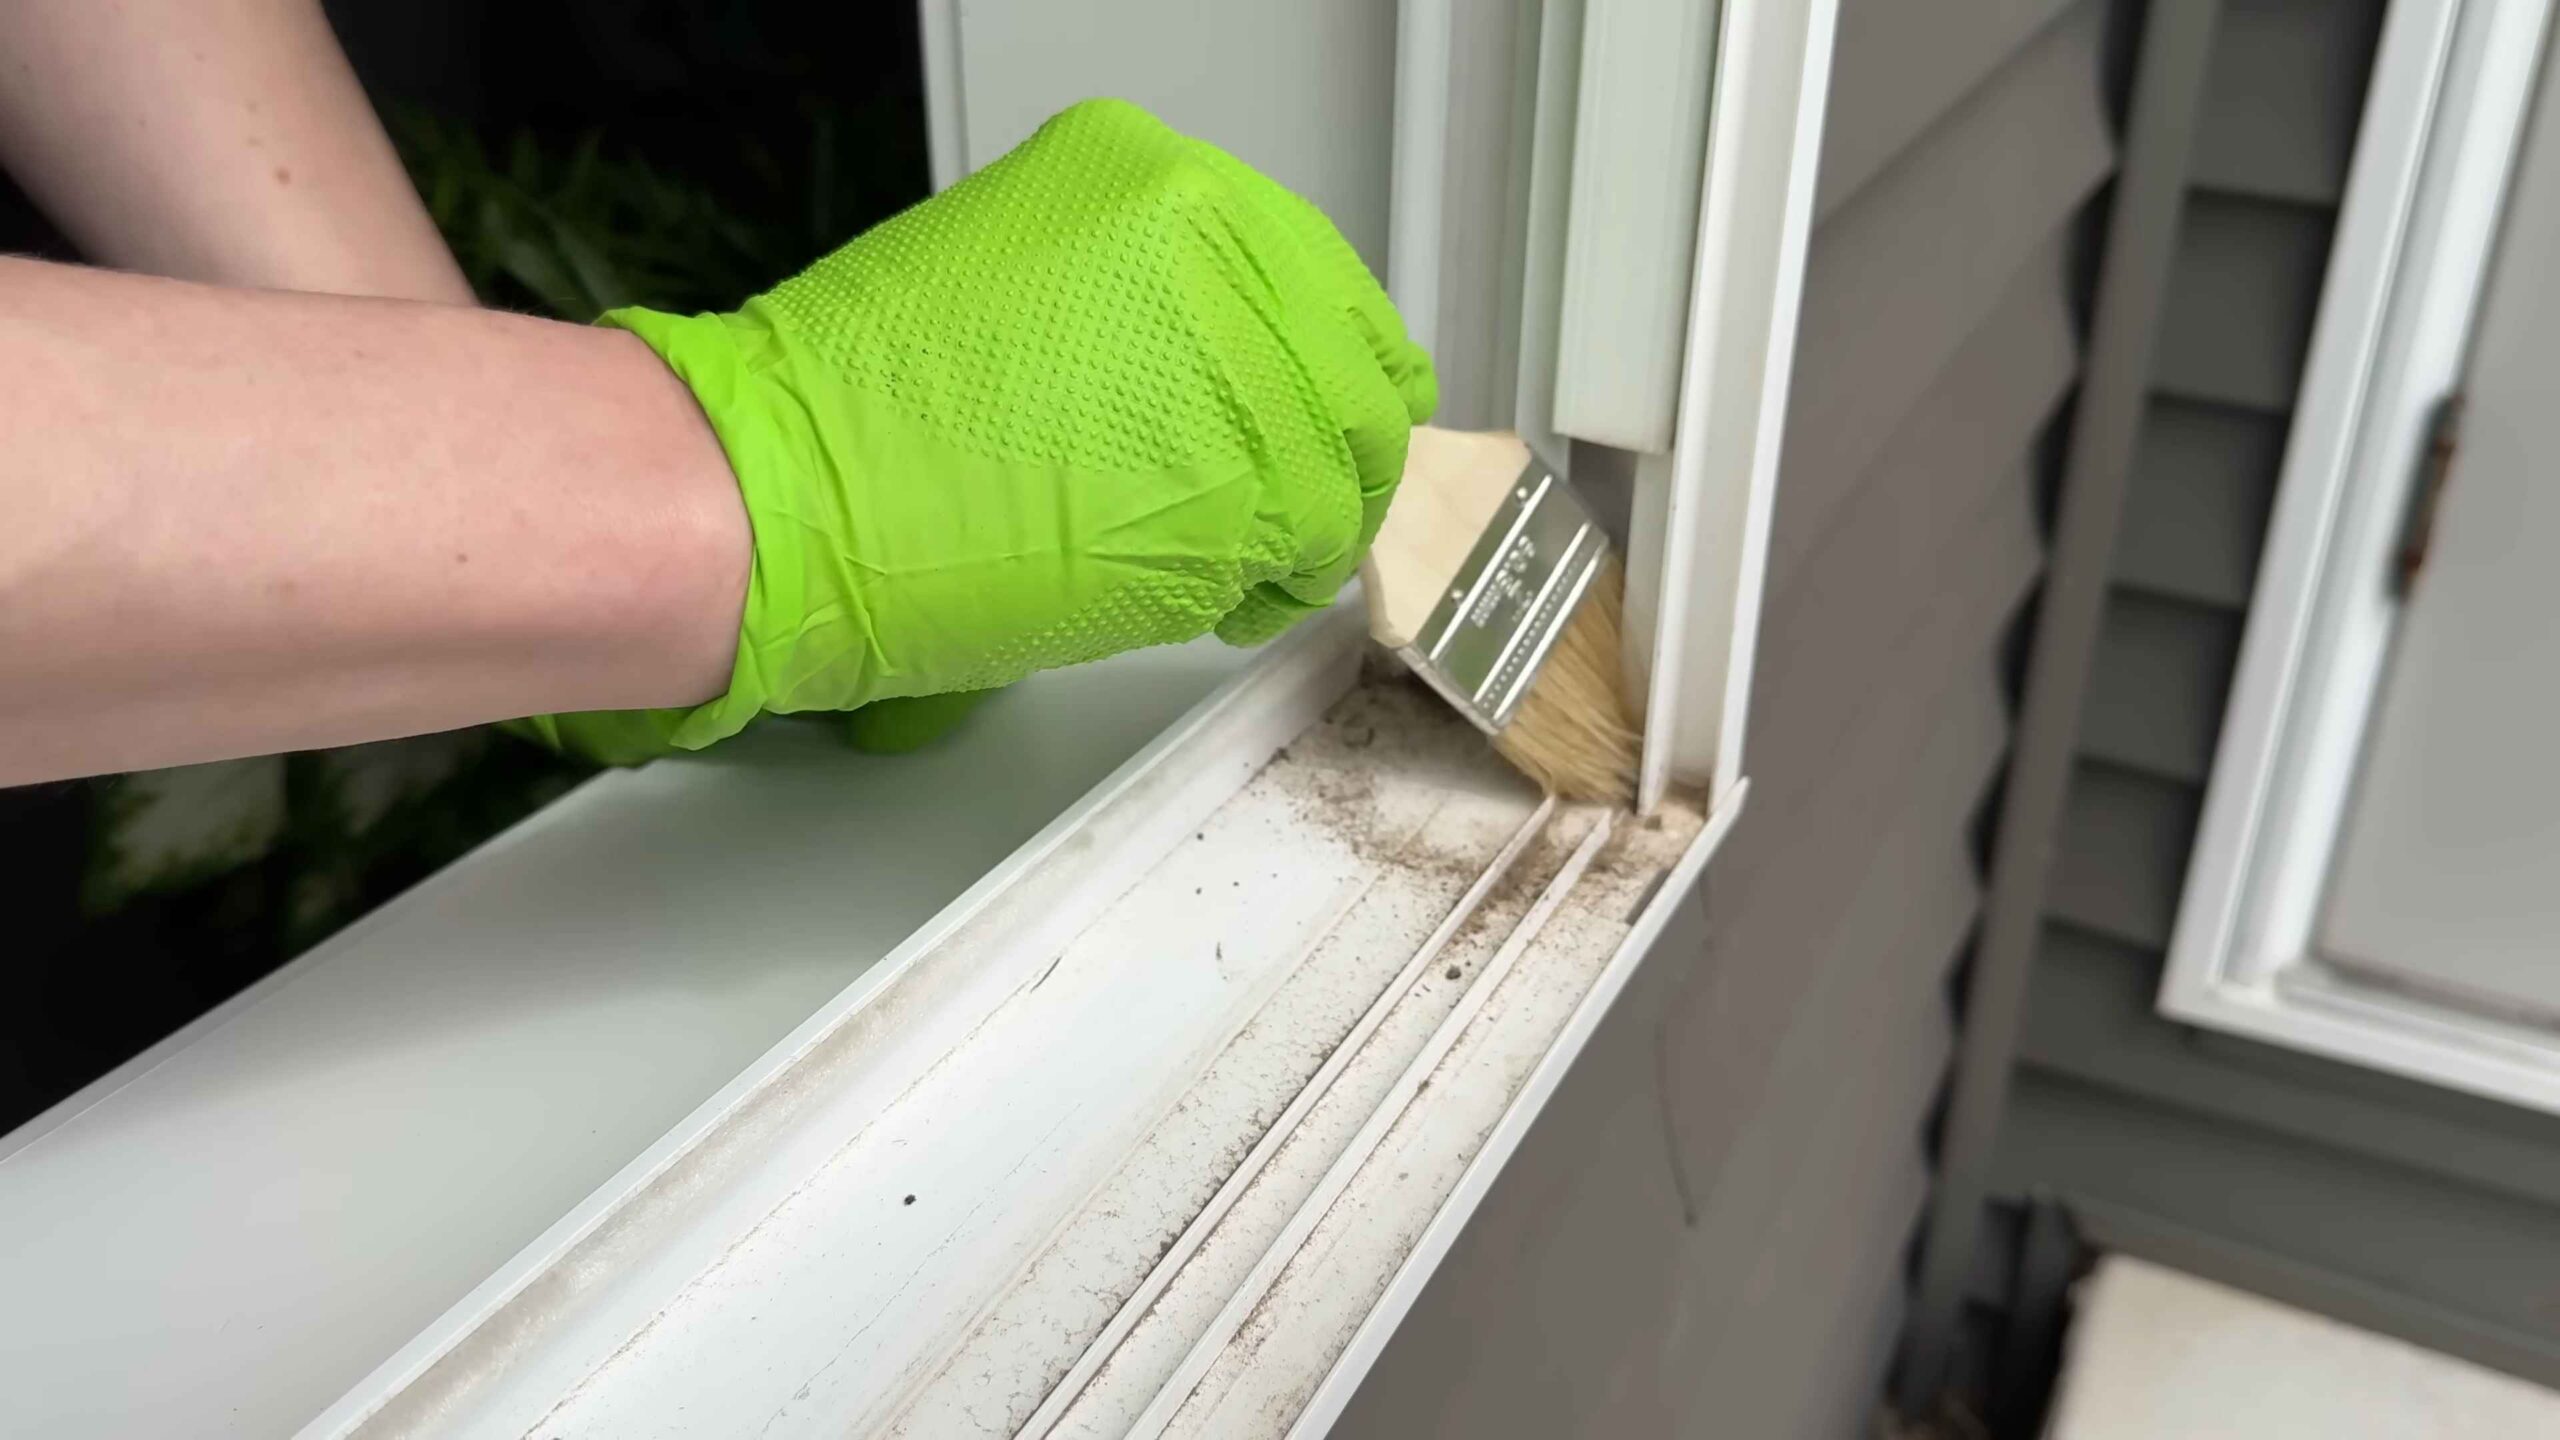
1. Vacuum Away Loose Debris: This is the first and most important step. Use your vacuum cleaner with the hose attachment to thoroughly vacuum out all the loose dirt, dust, crumbs, and dead bugs from the window tracks. Pay close attention to the corners and edges. If you have a brush attachment, use it to loosen any stubborn debris before vacuuming. This step alone makes a huge difference!
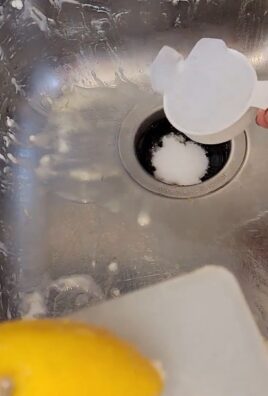
2. Baking Soda Application: Generously sprinkle baking soda all along the window tracks. Don’t be shy! The baking soda will act as a mild abrasive and help to loosen the grime. Make sure to cover all the dirty areas.
3. Vinegar Power: The Fizzing Fun Begins: Fill your spray bottle with white vinegar. Now, carefully spray the vinegar onto the baking soda-covered window tracks. You’ll see it start to fizz and bubble – that’s the magic happening! The chemical reaction between the baking soda and vinegar helps to break down the dirt and grime. Let the mixture fizz for about 5-10 minutes. This gives it time to really work its magic.
4. Scrub-a-Dub-Dub: Time to Scrub: After the fizzing has subsided, it’s time to scrub! Use your old toothbrush or small scrub brush to scrub the window tracks thoroughly. Pay extra attention to the corners and any areas with stubborn grime. The baking soda and vinegar mixture should have loosened the dirt, making it easier to scrub away. If you encounter particularly tough spots, you can add a drop or two of dish soap to your brush for extra cleaning power.
5. Wipe Away the Mess: Now, using paper towels or cleaning rags, wipe away the dirty residue. You might need to use several paper towels or rags, depending on how dirty your window tracks were. Keep wiping until you’ve removed all the baking soda and vinegar mixture and the tracks are looking cleaner.
6. Q-tip Detailing: The Final Touches: For those super narrow crevices and hard-to-reach areas, grab your Q-tips. Dip them in a little bit of vinegar or dish soap solution and use them to clean out any remaining dirt and grime. This is where you can really get into the details and make sure everything is sparkling clean.
7. The Butter Knife Trick (Optional): If you have some really stubborn grime in a hard-to-reach area, try wrapping a butter knife or putty knife in a clean cloth. This will give you a longer reach and a bit more leverage for scrubbing. Be very careful not to scratch the window frame!
8. Final Wipe Down: Once you’ve scrubbed and detailed, give the window tracks one final wipe down with clean paper towels or a damp cloth. This will remove any remaining residue and leave your window tracks looking their best.
Dealing with Stubborn Grime: When the Going Gets Tough
Sometimes, you’ll encounter window tracks that are just incredibly dirty and grimy. Don’t despair! Here are a few tips for dealing with stubborn grime:
* Repeat the Process: If the first cleaning doesn’t completely remove all the grime, simply repeat the process. Sometimes, it takes a couple of rounds of baking soda, vinegar, and scrubbing to really get those tracks clean.
* Soak it Longer: For particularly stubborn grime, let the baking soda and vinegar mixture sit for a longer period of time – even up to 30 minutes. This will give it more time to break down the dirt.
* Dish Soap Power: Add a bit more dish soap to your cleaning solution. Dish soap is great for cutting through grease and grime.
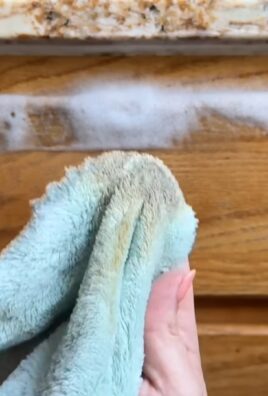
* Paste Power: Make a paste of baking soda and water (or vinegar). Apply the paste to the stubborn areas and let it sit for a while before scrubbing. The thicker consistency of the paste can help to lift the grime.
* Steam Cleaning: If you have a steam cleaner, you can use it to blast away stubborn grime. The steam will loosen the dirt, making it easier to wipe away. Be careful not to damage the window frame with excessive heat.
Maintaining Clean Window Tracks: Keeping the Sparkle
Now that you’ve put in all that effort to clean your window tracks, you’ll want to keep them clean! Here are a few tips for maintaining clean window tracks:
* Regular Vacuuming: Vacuum your window tracks regularly – at least once a month – to remove loose dirt and debris. This will prevent the grime from building up.
* Quick Wipe Downs: Give your window tracks a quick wipe down with a damp cloth whenever you notice them getting dirty.
* Lubricate the Tracks: After cleaning, you can lubricate the window tracks with a silicone-based lubricant. This will help the windows slide smoothly and prevent dirt from sticking.
* Address Issues Promptly: If you notice any problems with your windows, such as leaks or drafts, address them promptly. This will prevent water damage and the buildup of mold and mildew in the window tracks.
Safety First: A Few Precautions
While cleaning window tracks is generally a safe activity, it’s always a good idea to take a few precautions:
* Protect Your Eyes: Wear safety glasses to protect your eyes from splashes of vinegar or cleaning solution.
* Protect Your Hands: Wear gloves to protect your hands, especially if you have sensitive skin.
* Ventilation: Make sure the area is well-ventilated, especially if you’re using strong cleaning products.
* Be Careful with Sharp Objects: If you’re using a butter knife or putty knife to scrub, be very careful not to scratch the window frame.
* Test Cleaning Solutions: Before using any new cleaning solution, test it on a small, inconspicuous area of the window frame to make sure it doesn’t cause any damage.
Enjoy Your Sparkling Clean Windows!
And there you have it! With a little bit of effort and these simple steps, you can easily clean your window tracks and enjoy sparkling clean windows. It’s a chore that’s definitely worth doing, as it can make a big difference in the overall appearance of your home. So, grab your supplies and get cleaning! You’ll be amazed at the results. Happy cleaning!

Conclusion
So, there you have it! Cleaning window tracks can often feel like a Herculean task, a chore we perpetually put off. But with this simple, effective DIY trick, you can transform those grimy, dust-filled crevices into sparkling clean channels in a matter of minutes. Forget expensive cleaning solutions and specialized tools; this method leverages common household items to deliver professional-level results.
Why is this DIY window track cleaning method a must-try? Because it’s not just about aesthetics, although the visual improvement is undeniably satisfying. Clean window tracks ensure smooth window operation, preventing sticking and reducing wear and tear on your window mechanisms. This, in turn, can save you money on repairs and replacements down the line. Furthermore, clean tracks prevent the build-up of mold and mildew, contributing to a healthier indoor environment. Dust and debris accumulating in window tracks can trigger allergies and respiratory issues, so keeping them clean is an investment in your well-being.
Beyond the basic method, there are several variations you can explore to tailor the cleaning process to your specific needs. For instance, if you’re dealing with particularly stubborn grime, consider letting the baking soda paste sit for a longer period, perhaps even overnight. For narrow tracks, a cotton swab or a thin brush can be invaluable for reaching those hard-to-access areas. And if you prefer a more natural approach, you can substitute the vinegar with lemon juice for a fresh, citrusy scent. Another variation is to use an old toothbrush to scrub the tracks after applying the cleaning paste. This will help loosen any stubborn dirt and grime. You can also use a vacuum cleaner with a brush attachment to remove loose debris before applying the cleaning paste. This will make the cleaning process more efficient.
This DIY window track cleaning method is a game-changer. It’s efficient, cost-effective, and environmentally friendly. It’s a simple solution to a common household problem, and the results are truly remarkable.
We wholeheartedly encourage you to try this DIY trick and experience the satisfaction of effortlessly clean window tracks. Don’t let those grimy tracks continue to be an eyesore. Take a few minutes, gather your supplies, and transform your windows today.
But the real magic happens when you share your experiences. We’d love to hear about your results, any variations you tried, and any tips you discovered along the way. Share your before-and-after photos, your cleaning hacks, and your success stories in the comments below. Let’s create a community of clean window enthusiasts and inspire others to tackle this often-dreaded chore with confidence and ease. Your feedback will not only help others but also contribute to refining and improving this DIY method for everyone. So, go ahead, give it a try, and let us know how it goes! We are confident that you will be amazed by the results. Remember, a clean home is a happy home, and it all starts with the details, like sparkling clean window tracks.
Frequently Asked Questions (FAQ)
What kind of baking soda should I use?
Plain, regular baking soda (sodium bicarbonate) is all you need for this cleaning trick. There’s no need to buy any special or expensive type of baking soda. The key is the chemical reaction between the baking soda and vinegar, which creates a fizzing action that helps to loosen dirt and grime.
Can I use something other than vinegar?
While vinegar is highly effective due to its acidity, you can try lemon juice as a natural alternative. Lemon juice also has acidic properties that can help to break down grime. However, vinegar is generally more potent and may yield better results, especially for heavily soiled tracks. Avoid using harsh chemicals like bleach, as they can damage the window tracks and pose health risks.
How often should I clean my window tracks?
The frequency of cleaning depends on your environment. If you live in a dusty area or have pets, you may need to clean your window tracks more often, perhaps once a month. In general, cleaning them every three to six months is a good practice to prevent excessive build-up of dirt and grime. Regular cleaning will also make the task easier each time.
What if the grime is really stuck on?
For stubborn grime, let the baking soda paste sit for a longer period, even overnight. You can also use a stiff brush, like an old toothbrush, to scrub the tracks after applying the paste. If the grime is still persistent, try using a specialized window track cleaning brush, which is designed to reach into narrow spaces and dislodge dirt. You can also try using a steam cleaner to loosen the grime before scrubbing.
Will this method work on all types of window tracks?
This method is generally safe for most types of window tracks, including aluminum, vinyl, and wood. However, it’s always a good idea to test a small, inconspicuous area first to ensure that the cleaning solution doesn’t damage the material. Be particularly cautious with painted wood tracks, as the vinegar could potentially affect the paint.
How do I prevent window tracks from getting dirty so quickly?
Regularly vacuuming the area around your windows can help to prevent dirt and debris from accumulating in the tracks. You can also use weather stripping to seal gaps and prevent dust from entering. Consider using window track protectors, which are designed to catch dirt and debris before they reach the tracks.
Is it safe to use this method if I have pets or children?
While baking soda and vinegar are generally safe, it’s always a good idea to keep pets and children away from the area while you’re cleaning. Ensure that the area is well-ventilated and that any residue is thoroughly wiped away after cleaning. Store baking soda and vinegar out of reach of children and pets.
What if I don’t have a small brush?
If you don’t have a small brush, you can use a cotton swab, a toothpick wrapped in a cloth, or even a folded paper towel to reach into narrow spaces and dislodge dirt. You can also try using a crevice tool attachment on your vacuum cleaner to remove loose debris.
Can I use this method on sliding door tracks?
Yes, this method works equally well on sliding door tracks. The process is the same: apply the baking soda paste, spray with vinegar, let it fizz, and then wipe away the grime. Sliding door tracks often accumulate more dirt and debris than window tracks, so you may need to repeat the process a few times for optimal results.
What should I do if the vinegar smell lingers?
The vinegar smell should dissipate quickly. However, if it lingers, you can open the windows to ventilate the area. You can also wipe the tracks with a damp cloth and a few drops of essential oil, such as lemon or lavender, to neutralize the vinegar smell.
Leave a Comment