

Deep cleaning hacks that work are like secret weapons in the battle against grime and clutter! Let’s face it, nobody *loves* deep cleaning, but the feeling of a sparkling, fresh home is undeniably satisfying. Have you ever wondered why we feel so good after a thorough clean? Some historians believe the urge to tidy and purify our living spaces dates back to ancient civilizations, where cleanliness was often linked to spiritual well-being and warding off illness.
But in today’s busy world, who has time for endless scrubbing? That’s where these DIY deep cleaning tricks come in! I’m going to share some of my favorite, tried-and-true methods that will save you time, money, and a whole lot of elbow grease. From tackling stubborn stains to banishing hidden dust bunnies, these hacks will transform your cleaning routine.
Why do you need these deep cleaning hacks? Because a clean home is more than just aesthetically pleasing; it’s a healthier and happier home. Reducing allergens, eliminating bacteria, and creating a sense of calm are just some of the benefits. Plus, mastering these deep cleaning hacks that work will empower you to maintain a pristine living space without spending a fortune on expensive cleaning products or hiring professional help. So, grab your gloves and let’s get started!

Deep Cleaning Hacks That Actually Work (And Save You Time!)
Okay, let’s be honest, deep cleaning isn’t exactly anyone’s favorite pastime. But the feeling of a sparkling clean home? Totally worth it! I’ve compiled some of my absolute favorite deep cleaning hacks that not only work wonders but also save you precious time and energy. Get ready to transform your space!
Tackling the Kitchen: The Heart of the Home
The kitchen, often the busiest room, can quickly accumulate grime and grease. Let’s dive into some effective cleaning strategies.
Cleaning the Oven (Without Harsh Chemicals!)
Forget those overpowering oven cleaners! This method uses just two ingredients you probably already have.
What you’ll need:
* Baking soda
* White vinegar
* Spray bottle
* Sponge or scrub brush
* Rubber gloves
Step-by-step instructions:
1. Empty the Oven: Remove oven racks, pizza stones, or anything else stored inside.
2. Baking Soda Paste: In a bowl, mix ½ cup of baking soda with enough water to form a spreadable paste.
3. Coat the Oven: Wearing your gloves, spread the baking soda paste all over the inside of your oven, avoiding the heating elements. Be generous!
4. Let it Sit (Overnight is Best!): This is the key! Let the baking soda paste sit for at least 12 hours, or even better, overnight. The longer it sits, the easier the grime will lift.
5. Vinegar Time: The next day, fill a spray bottle with white vinegar. Spray the baking soda paste thoroughly. It will fizz!
6. Scrub-a-dub-dub: Use a sponge or scrub brush to scrub away the loosened grime. The vinegar and baking soda reaction will help break down the stubborn bits.
7. Wipe Clean: Wipe away the remaining paste and grime with a damp cloth. You may need to rinse and repeat a few times.
8. Reassemble: Replace the oven racks and you’re done!
Degreasing the Stovetop (Effortlessly!)
Burnt-on food and grease can make your stovetop look perpetually dirty. Here’s how to tackle it.
What you’ll need:
* Baking soda
* White vinegar
* Dish soap
* Microfiber cloth
* Spray bottle
Step-by-step instructions:
1. Sprinkle Baking Soda: Generously sprinkle baking soda over the entire stovetop surface.
2. Vinegar Power: Spray white vinegar over the baking soda. Let it fizz for a few minutes.
3. Dish Soap Boost: Add a few drops of dish soap to a damp microfiber cloth.
4. Wipe Away the Grime: Use the cloth to scrub the stovetop, focusing on areas with stubborn grease. The baking soda and vinegar will loosen the grime, and the dish soap will help cut through the grease.
5. Rinse and Shine: Rinse the stovetop with a clean, damp cloth to remove any remaining residue. Buff dry with a clean microfiber cloth for a sparkling finish.
Cleaning the Microwave (Steam Cleaning Magic!)
Microwaves can get surprisingly gross. This steam cleaning method is quick, easy, and effective.
What you’ll need:
* Microwave-safe bowl
* White vinegar
* Water
* Sponge or cloth
Step-by-step instructions:
1. Vinegar Solution: Fill the microwave-safe bowl with 1 cup of water and 2 tablespoons of white vinegar.
2. Microwave Magic: Place the bowl in the microwave and heat on high for 5 minutes. The water will boil and create steam.
3. Let it Sit (Don’t Open the Door!): After the 5 minutes, let the bowl sit in the microwave for another 5 minutes without opening the door. This allows the steam to loosen the grime.
4. Wipe Clean: Carefully remove the bowl (it will be hot!). Use a sponge or cloth to easily wipe away the loosened food splatters and grime.
5. Sparkling Clean: Your microwave should now be sparkling clean!
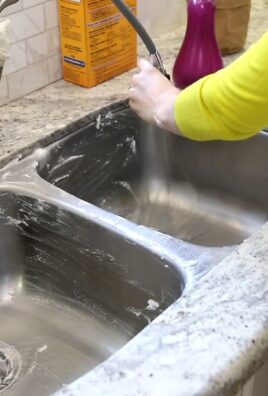
Bathroom Bliss: Sparkling Surfaces and Fresh Scents
The bathroom can be a breeding ground for bacteria and mildew. Let’s get it sparkling!
Cleaning Shower Heads (Goodbye Mineral Buildup!)
Mineral buildup can clog shower heads and reduce water pressure. This simple trick will restore your shower to its former glory.
What you’ll need:
* White vinegar
* Plastic bag (sandwich bag or larger, depending on the shower head size)
* Rubber band or twist tie
Step-by-step instructions:
1. Vinegar Bath: Fill the plastic bag with white vinegar.
2. Submerge the Shower Head: Place the bag over the shower head, ensuring the shower head is completely submerged in the vinegar.
3. Secure the Bag: Secure the bag to the shower arm with a rubber band or twist tie.
4. Soak Overnight: Let the shower head soak in the vinegar overnight.
5. Remove and Rinse: The next morning, remove the bag and discard the vinegar. Rinse the shower head thoroughly with water.
6. Shine On: Use a soft cloth to wipe away any remaining mineral deposits. Your shower head should now be clean and free of buildup!
Cleaning Grout (Brighten Those Lines!)
Dirty grout can make even the cleanest tiles look dingy. This method uses a simple paste to brighten those lines.
What you’ll need:
* Baking soda
* Water
* Old toothbrush or grout brush
* Spray bottle (optional)
Step-by-step instructions:
1. Baking Soda Paste: Mix baking soda with enough water to form a thick paste.
2. Apply to Grout: Apply the paste to the grout lines. You can use your fingers (with gloves!) or a small spatula.
3. Scrub-a-dub: Use an old toothbrush or grout brush to scrub the grout lines.
4. Spray with Vinegar (Optional): For extra cleaning power, you can spray the grout lines with white vinegar after scrubbing. The fizzing action will help lift the grime.
5. Rinse Thoroughly: Rinse the grout lines thoroughly with water.
6. Admire Your Work: Your grout should now be noticeably brighter!
Cleaning the Toilet (Inside and Out!)
Let’s face it, cleaning the toilet isn’t glamorous, but it’s essential.
What you’ll need:
* Toilet bowl cleaner
* Toilet brush
* Disinfectant wipes or spray
* Microfiber cloth
* Rubber gloves
Step-by-step instructions:
1. Apply Toilet Bowl Cleaner: Apply toilet bowl cleaner under the rim of the toilet bowl. Let it sit for the recommended time (usually 10-15 minutes).
2. Scrub-a-dub: Use a toilet brush to scrub the inside of the bowl, paying attention to any stains or buildup.
3. Flush: Flush the toilet to rinse away the cleaner and grime.
4. Disinfect the Exterior: Use disinfectant wipes or spray to clean the exterior of the toilet, including the seat, lid, tank, and base.
5. Wipe Dry: Wipe the exterior of the toilet dry with a microfiber cloth.
Living Room Love: Dust-Free and Refreshed
The living room is where we relax and unwind. Let’s make sure it’s a clean and inviting space.
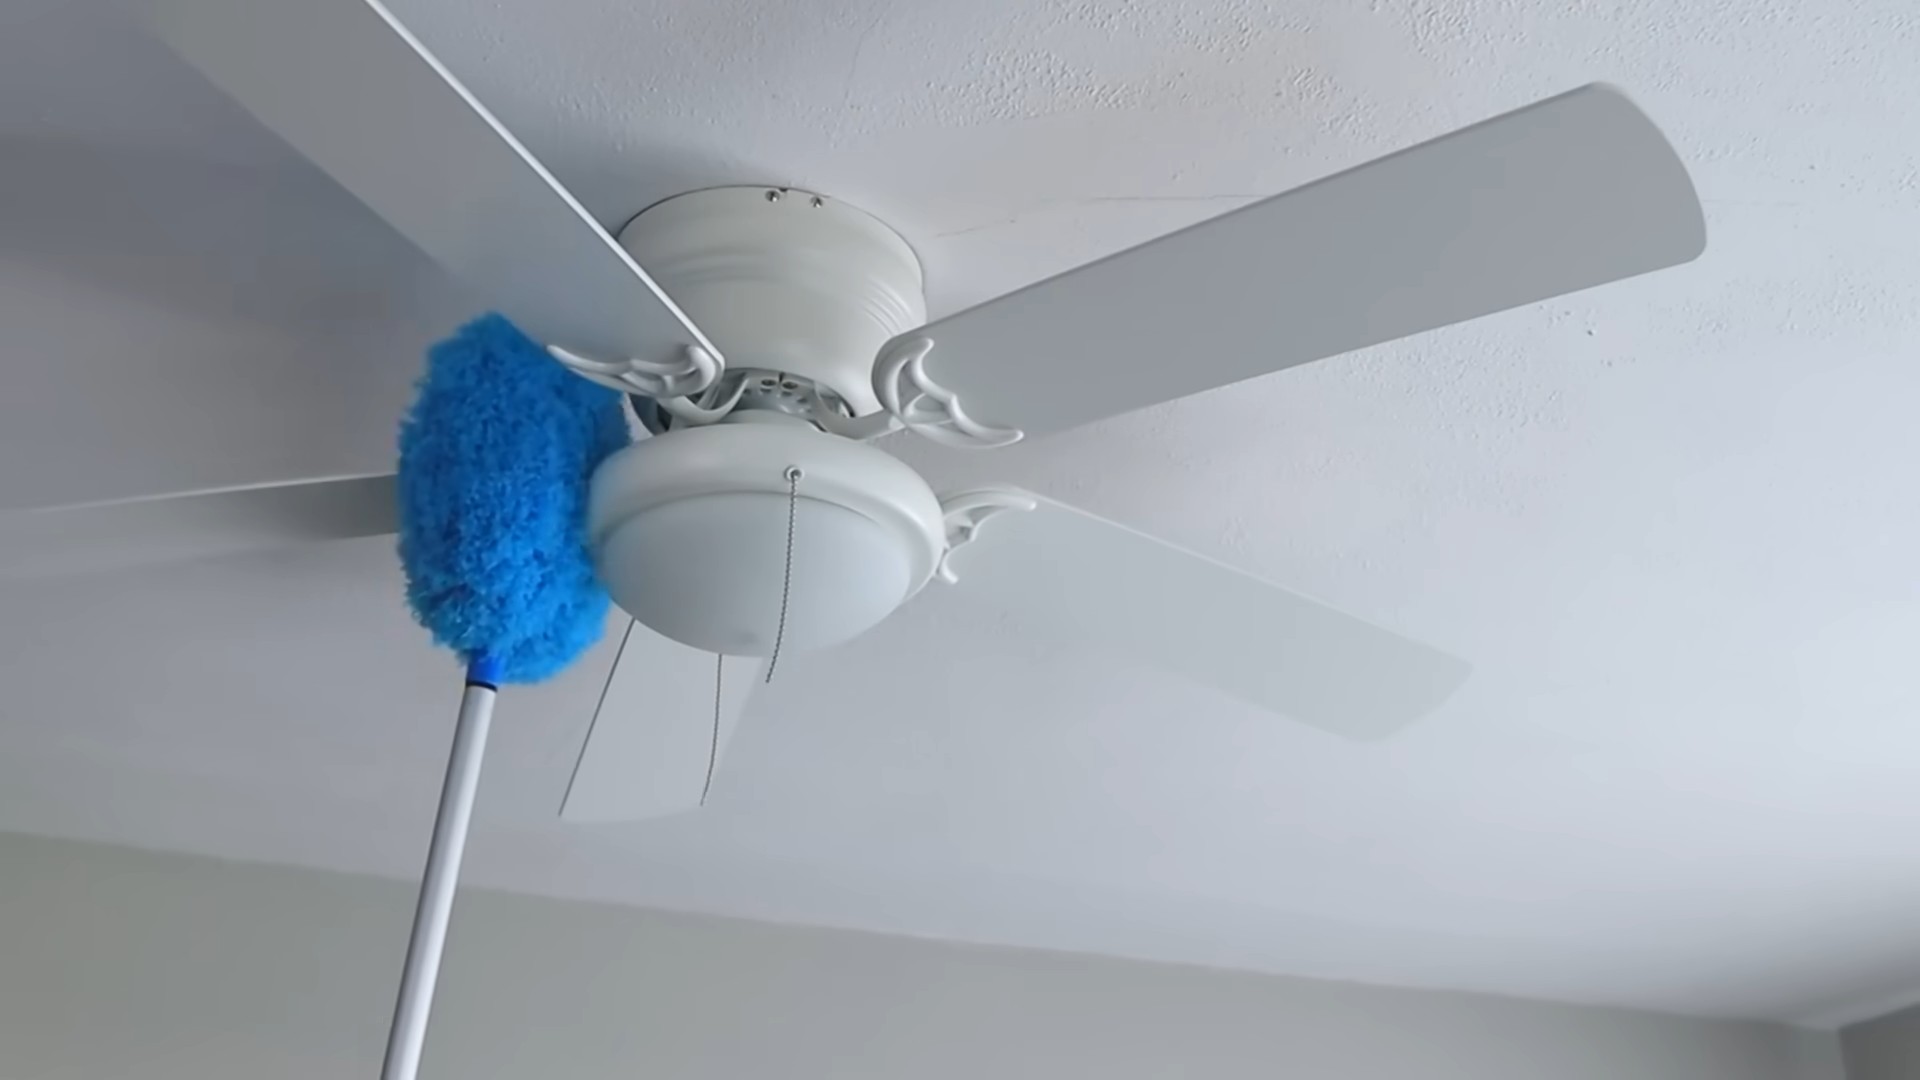
Dusting Like a Pro (Get Rid of Those Pesky Particles!)
Dust can accumulate quickly and make your living room look dull. Here’s how to dust effectively.
What you’ll need:
* Microfiber cloths
* Dusting spray (optional)
* Vacuum cleaner with attachments
* Extendable duster (for high places)
Step-by-step instructions:
1. Start High: Begin by dusting high surfaces, such as ceiling fans, light fixtures, and shelves. Use an extendable duster to reach high places.
2. Work Your Way Down: Dust lower surfaces, such as furniture, picture frames, and lamps. Use a microfiber cloth, and consider using a dusting spray for added cleaning power.
3. Don’t Forget the Details: Pay attention to details, such as baseboards, window sills, and door frames.
4. Vacuum the Floor: Vacuum the floor to remove any dust that has settled. Use attachments to clean hard-to-reach areas, such as under furniture and along baseboards.
Cleaning Upholstery (Revive Your Furniture!)
U
Conclusion
So, there you have it! This deep cleaning hack isn’t just another chore on your to-do list; it’s a game-changer for maintaining a sparkling and healthy home. We’ve walked you through a simple, effective method that utilizes readily available ingredients, saving you time and money while delivering professional-level results. The beauty of this approach lies in its versatility and adaptability.
Why is this a must-try? Because it tackles the grime and build-up that regular cleaning often misses. It’s about going beyond surface-level tidiness to truly sanitize and refresh your living spaces. Think about the peace of mind knowing that you’ve eliminated hidden bacteria and allergens, creating a healthier environment for yourself and your loved ones. This isn’t just about aesthetics; it’s about well-being.
This deep cleaning hack is a powerful tool in your arsenal against dirt and germs.
But don’t stop there! Feel free to experiment with variations to suit your specific needs and preferences. For instance, if you’re dealing with particularly stubborn stains, consider adding a tablespoon of baking soda to your cleaning solution for extra scrubbing power. For a refreshing scent boost, infuse your mixture with a few drops of your favorite essential oil, such as lemon, lavender, or eucalyptus. Remember to always test any new cleaning solution on an inconspicuous area first to ensure it doesn’t damage the surface.
Another variation involves adjusting the ratios of ingredients based on the severity of the cleaning task. For lightly soiled areas, you can reduce the concentration of vinegar or bleach (if using). For heavily soiled areas, you might need to increase the concentration or repeat the cleaning process. The key is to observe how your surfaces respond and adjust accordingly.
We also encourage you to consider the environmental impact of your cleaning choices. Opt for eco-friendly alternatives whenever possible, such as using white vinegar instead of harsh chemicals. You can also repurpose old spray bottles and cloths to reduce waste. Every small step towards sustainability makes a difference.
Now, it’s your turn to put this deep cleaning hack to the test! We’re confident that you’ll be amazed by the results. Don’t just take our word for it; experience the difference for yourself. Once you’ve tried it, we’d love to hear about your experience. Share your before-and-after photos, tips, and variations in the comments below. Let’s create a community of clean-home enthusiasts and inspire each other to maintain healthy and happy living spaces. Your insights could be invaluable to others who are just discovering the power of this simple yet effective deep cleaning hack. So, grab your supplies, roll up your sleeves, and get ready to transform your home! We can’t wait to see your sparkling results!
Frequently Asked Questions (FAQ)
What exactly is considered “deep cleaning” and why is it important?
Deep cleaning goes beyond your regular weekly or bi-weekly cleaning routine. It involves tackling areas and tasks that are often overlooked, such as cleaning grout, scrubbing baseboards, washing curtains, and sanitizing appliances. The importance of deep cleaning lies in its ability to remove accumulated dirt, grime, allergens, and bacteria that can contribute to poor indoor air quality, health problems, and an overall unpleasant living environment. Regular deep cleaning helps maintain a healthier and more hygienic home, extending the lifespan of your belongings and creating a more comfortable space for you and your family.
Is this deep cleaning hack safe for all surfaces?
While this deep cleaning hack is generally safe for most surfaces, it’s crucial to exercise caution and test the solution on an inconspicuous area first. Different materials react differently to cleaning agents, and you want to avoid any potential damage or discoloration. For example, vinegar, while a great natural cleaner, can be acidic and may not be suitable for marble or granite countertops. Similarly, bleach should be used with caution on colored fabrics or surfaces, as it can cause fading. Always read the manufacturer’s instructions for your specific surfaces and appliances before applying any cleaning solution. If you’re unsure, err on the side of caution and consult a professional cleaner.
Can I use this deep cleaning hack if I have allergies or sensitivities?
If you have allergies or sensitivities, it’s essential to be mindful of the ingredients you use in your cleaning solutions. While this deep cleaning hack aims to use readily available and relatively safe ingredients, some individuals may still be sensitive to vinegar, bleach, or certain essential oils. Consider wearing gloves and a mask while cleaning to minimize exposure. You can also explore alternative cleaning agents that are specifically designed for sensitive individuals, such as those containing plant-based ingredients or hypoallergenic formulas. Always ensure proper ventilation while cleaning to avoid inhaling fumes. If you experience any adverse reactions, discontinue use immediately and consult a healthcare professional.
How often should I perform a deep clean using this hack?
The frequency of deep cleaning depends on various factors, such as your lifestyle, the size of your home, and the number of occupants. As a general guideline, aim to deep clean your home at least twice a year, ideally in the spring and fall. However, if you have pets, children, or a high-traffic household, you may need to deep clean more frequently, perhaps every quarter. Pay attention to areas that tend to accumulate dirt and grime more quickly, such as bathrooms, kitchens, and entryways. Regular maintenance cleaning in between deep cleans will also help keep your home in good condition and reduce the need for extensive cleaning sessions.
What are some common mistakes to avoid when deep cleaning?
Several common mistakes can hinder the effectiveness of your deep cleaning efforts. One mistake is using dirty cleaning tools, such as a grimy mop or a soiled cloth. Always start with clean tools to avoid spreading dirt and bacteria. Another mistake is using too much cleaning solution, which can leave behind residue and attract more dirt. Follow the recommended ratios and use sparingly. Neglecting to ventilate the area while cleaning can also be detrimental, as it can lead to the build-up of fumes and poor air quality. Finally, rushing through the process and skipping important steps can result in an incomplete and unsatisfactory clean. Take your time, pay attention to detail, and follow the instructions carefully for optimal results.
How can I make this deep cleaning hack more eco-friendly?
Making your deep cleaning routine more eco-friendly is easier than you might think. Start by swapping out harsh chemicals for natural alternatives, such as white vinegar, baking soda, and lemon juice. These ingredients are effective cleaners and are biodegradable and non-toxic. You can also use reusable cleaning cloths instead of disposable paper towels to reduce waste. When purchasing cleaning products, look for those that are labeled as eco-friendly, biodegradable, or plant-based. Consider making your own cleaning solutions using simple recipes and readily available ingredients. Finally, be mindful of your water usage and avoid excessive rinsing. Every small step towards sustainability contributes to a healthier planet.
Leave a Comment