

DIY Cardboard Fan: Beat the heat this summer with a surprisingly effective and eco-friendly solution! Are you sweltering but dreading the electricity bill from running your AC all day? Or maybe you’re looking for a fun and engaging project to do with the kids? Well, you’re in the right place! This simple DIY project will show you how to create a functional fan using materials you probably already have lying around your house – cardboard!
While electric fans have become ubiquitous in modern life, the concept of manually powered air circulation has been around for centuries. Think of the ancient Egyptians using palm leaves to fan royalty or the elaborate punkah fans used in India, operated by servants to cool entire rooms. Our humble DIY Cardboard Fan is a modern, sustainable take on this age-old desire for a refreshing breeze.
I know what you’re thinking: “A cardboard fan? Really?” But trust me, this isn’t just a craft project; it’s a practical way to stay cool on a budget. Plus, it’s a fantastic way to repurpose cardboard boxes that would otherwise end up in the recycling bin. In this article, I’ll guide you through each step, from gathering your materials to enjoying the sweet relief of your very own homemade fan. Let’s get started and turn that cardboard into a cool breeze!
DIY Cardboard Fan: Stay Cool on a Budget!
Okay, let’s be honest, summer heat can be brutal, and sometimes you just need a little extra breeze without cranking up the AC and sending your electricity bill through the roof. That’s where this awesome DIY cardboard fan comes in! It’s a fun, eco-friendly project that’s perfect for a hot afternoon, and it’s surprisingly effective. Plus, it’s a great way to recycle those cardboard boxes you’ve been meaning to get rid of. Let’s get started!
Materials You’ll Need:
* A large piece of sturdy cardboard (think moving box size)
* A small DC motor (3-6V is ideal, you can find these online or salvage them from old toys)
* A 9V battery
* A 9V battery clip connector
* A switch (optional, but recommended for easy on/off control)
* Hot glue gun and glue sticks
* Scissors or a craft knife (adult supervision required!)
* Ruler
* Pencil
* Compass or circular object for tracing
* Wire strippers (if using a switch)
* Safety glasses (recommended when cutting cardboard)
Tools You’ll Need:
* Hot glue gun
* Scissors or craft knife
* Ruler
* Pencil
* Compass or circular object for tracing
* Wire strippers (if using a switch)
Making the Fan Blades
This is where the magic happens! We’re going to create the blades that will actually move the air.
1. Prepare the Cardboard: Lay your large piece of cardboard flat on a work surface. Make sure you have enough space to work comfortably.
2. Draw the Circle: Using your compass or a circular object (like a plate), draw a large circle on the cardboard. The diameter of the circle will determine the size of your fan blades. I recommend a diameter of around 10-12 inches for a good balance of size and performance.
3. Cut Out the Circle: Carefully cut out the circle using your scissors or craft knife. If you’re using a craft knife, always cut away from yourself and use a cutting mat to protect your work surface. Remember, safety first!
4. Divide the Circle: Now, we need to divide the circle into equal sections to create the individual blades. Use your ruler and pencil to draw lines from the center of the circle to the edge, dividing it into 6 or 8 equal sections. The more sections you have, the more blades your fan will have. I find that 6 blades work well.
5. Cut Along the Lines: Cut along the lines you just drew, stopping about 1-2 inches from the center of the circle. This will create the individual blades that are still attached to the central hub.
6. Shape the Blades: This is where you’ll give the blades their aerodynamic shape. Gently twist each blade so that it’s slightly angled. You want the blades to catch the air and push it forward. Experiment with different angles to see what works best. A slight curve in the blade can also help improve airflow.
7. Secure the Blade Shape: Once you’re happy with the shape of your blades, use a small amount of hot glue to secure them in place. Apply the glue to the base of each blade where it connects to the central hub. This will help the blades maintain their shape and prevent them from bending or breaking.
Building the Motor Mount
The motor mount is what will hold the motor in place and allow it to spin the fan blades.
1. Cut a Small Square: Cut a small square of cardboard, about 2×2 inches. This will be the base of the motor mount.
2. Cut a Strip of Cardboard: Cut a strip of cardboard that’s about 1 inch wide and long enough to wrap around the body of your DC motor.
3. Wrap the Strip Around the Motor: Wrap the strip of cardboard around the body of the motor and secure it with hot glue. This will create a cradle that will hold the motor in place. Make sure the motor shaft is exposed so it can connect to the fan blades.
4. Attach the Cradle to the Base: Attach the cardboard cradle to the small square of cardboard using hot glue. Make sure the cradle is securely attached to the base.
Assembling the Fan
Now comes the exciting part – putting everything together!
1. Attach the Motor Mount to the Fan Blades: Carefully center the motor mount on the central hub of the fan blades. Use hot glue to attach the motor mount to the hub. Make sure the motor shaft is aligned with the center of the fan blades.
2. Reinforce the Connection: To make the connection between the motor mount and the fan blades even stronger, you can add some extra cardboard supports. Cut small pieces of cardboard and glue them around the base of the motor mount, connecting it to the fan blades.
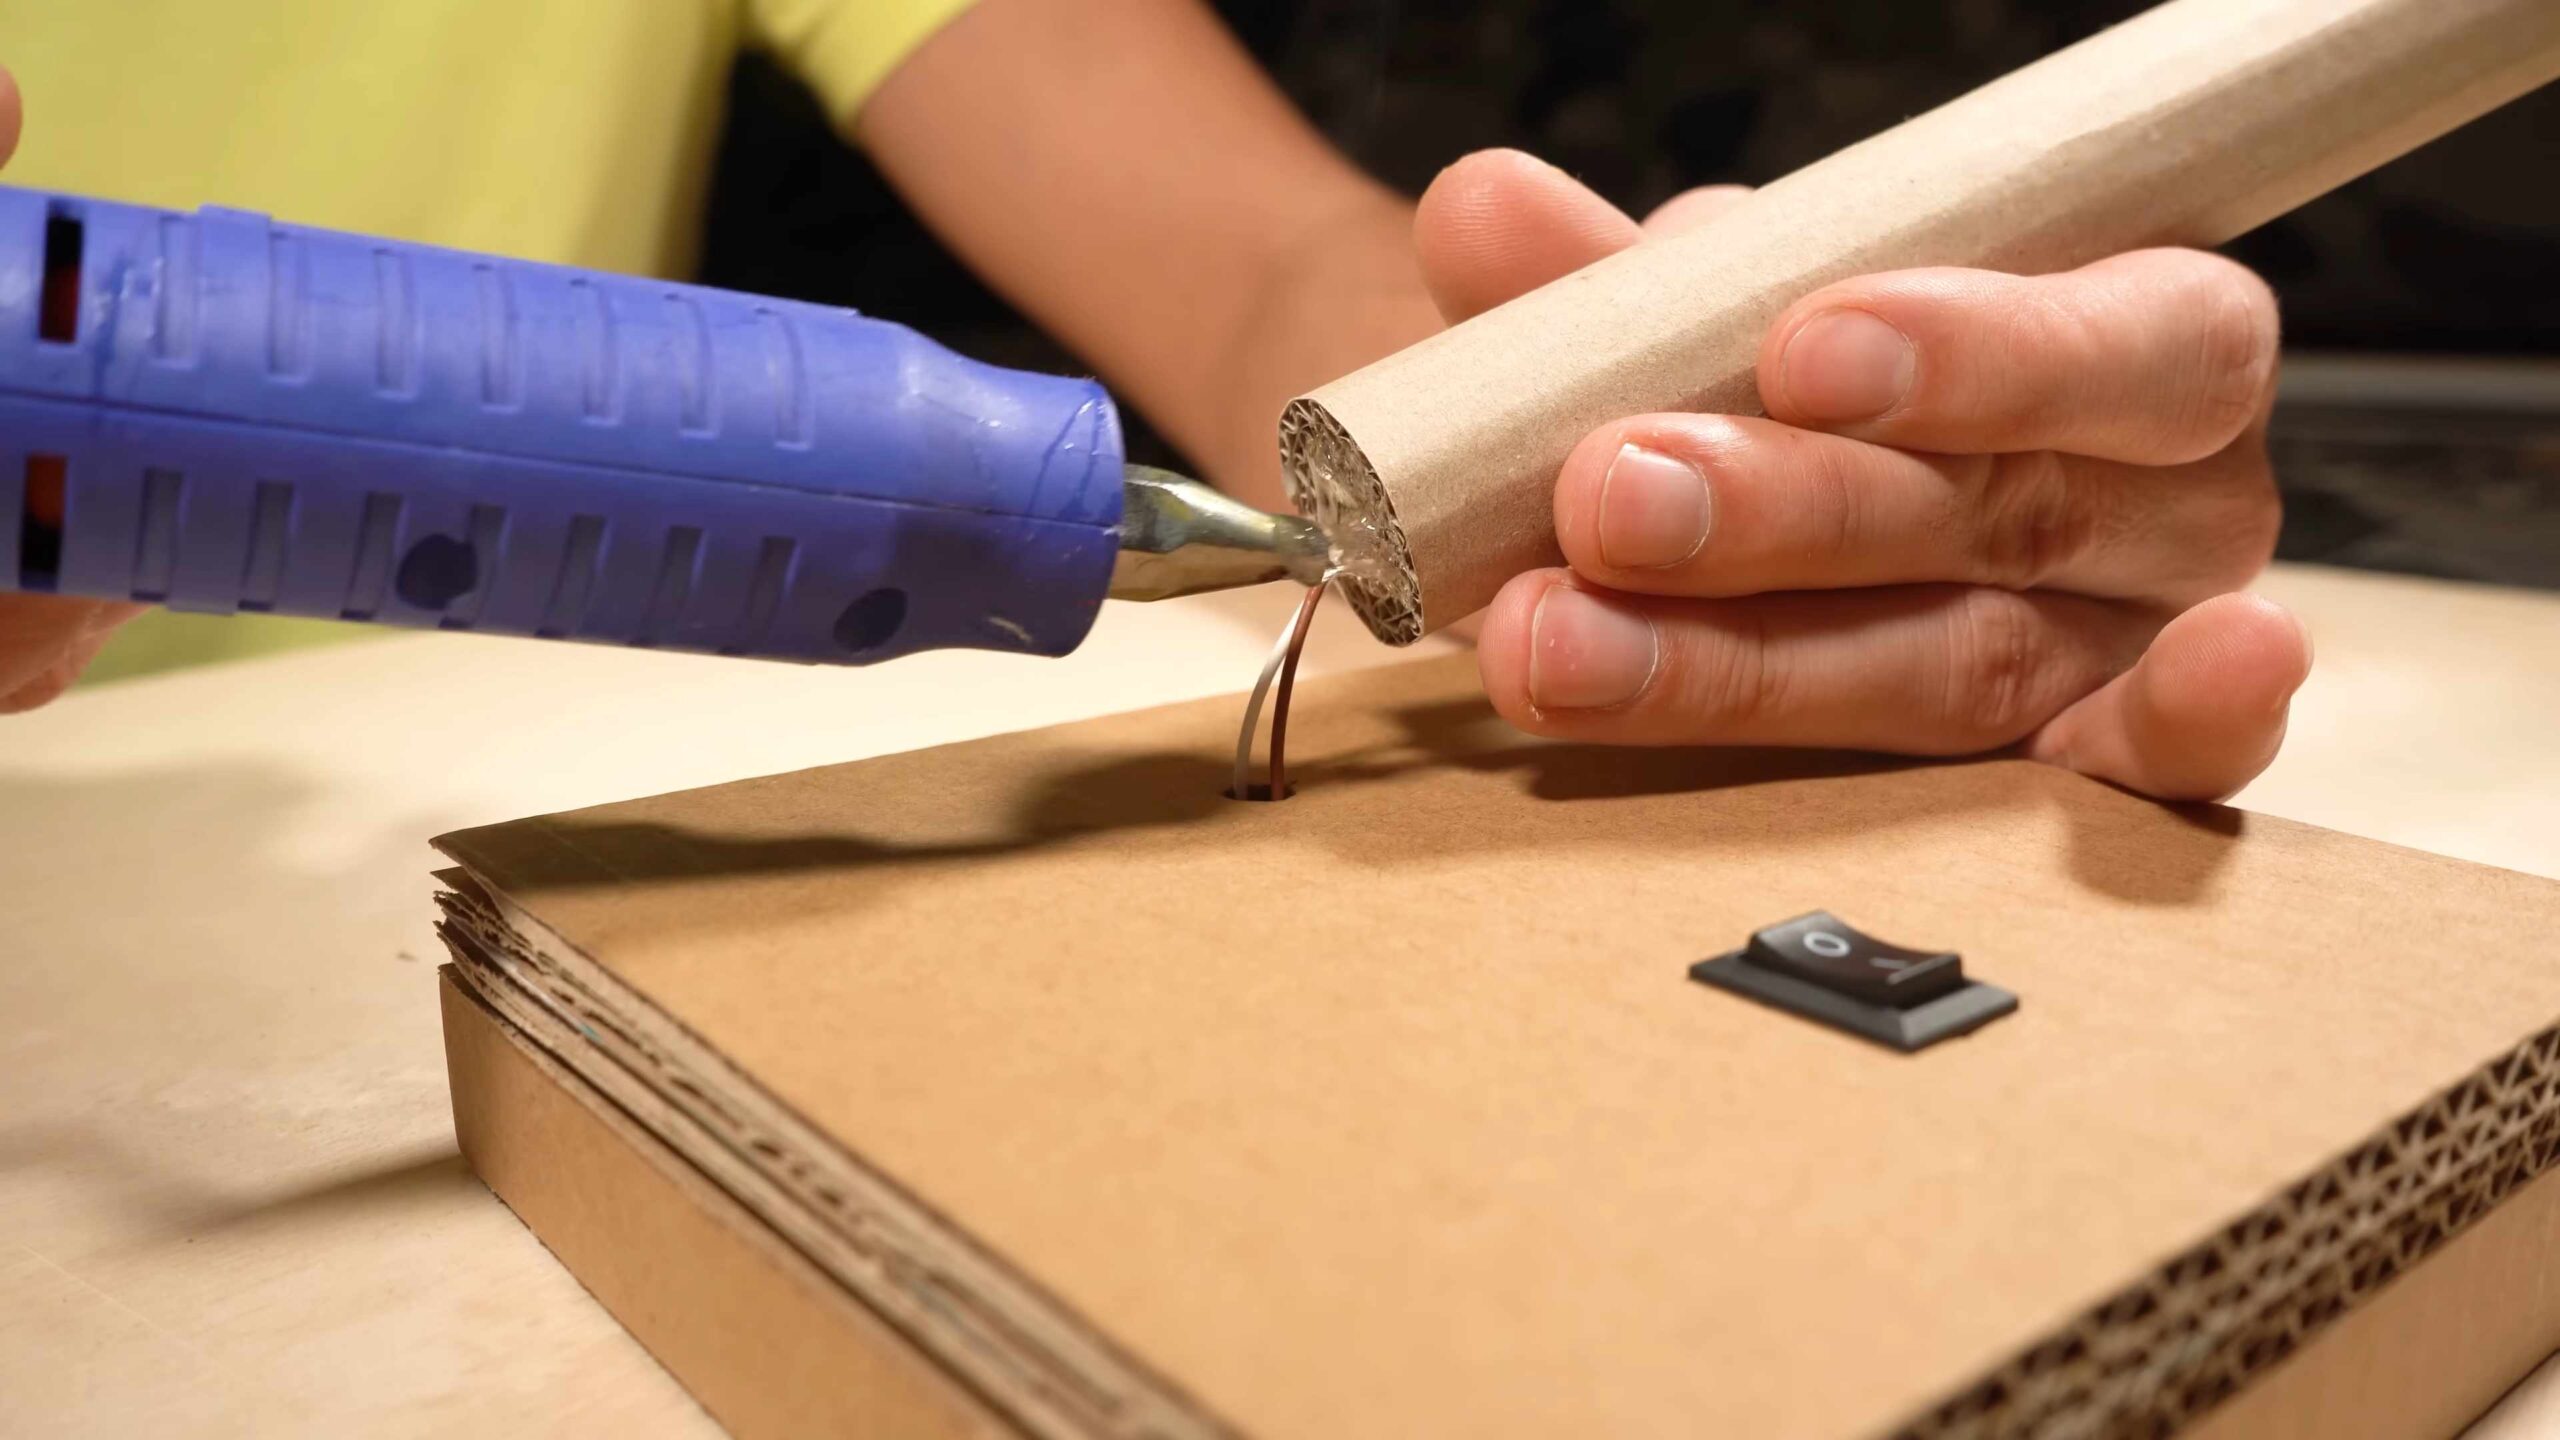
Wiring the Circuit
This part involves a little bit of electrical wiring, so pay close attention and be careful.
1. Connect the Battery Clip to the Motor: Connect the red wire from the 9V battery clip to one of the terminals on the DC motor. Connect the black wire from the battery clip to the other terminal on the motor. If the fan spins in the wrong direction, simply reverse the wires.
2. (Optional) Add a Switch: If you want to add a switch to easily turn the fan on and off, cut one of the wires (either the red or the black) from the battery clip. Use wire strippers to strip a small amount of insulation from the cut ends of the wire. Connect the stripped ends of the wire to the terminals on the switch.
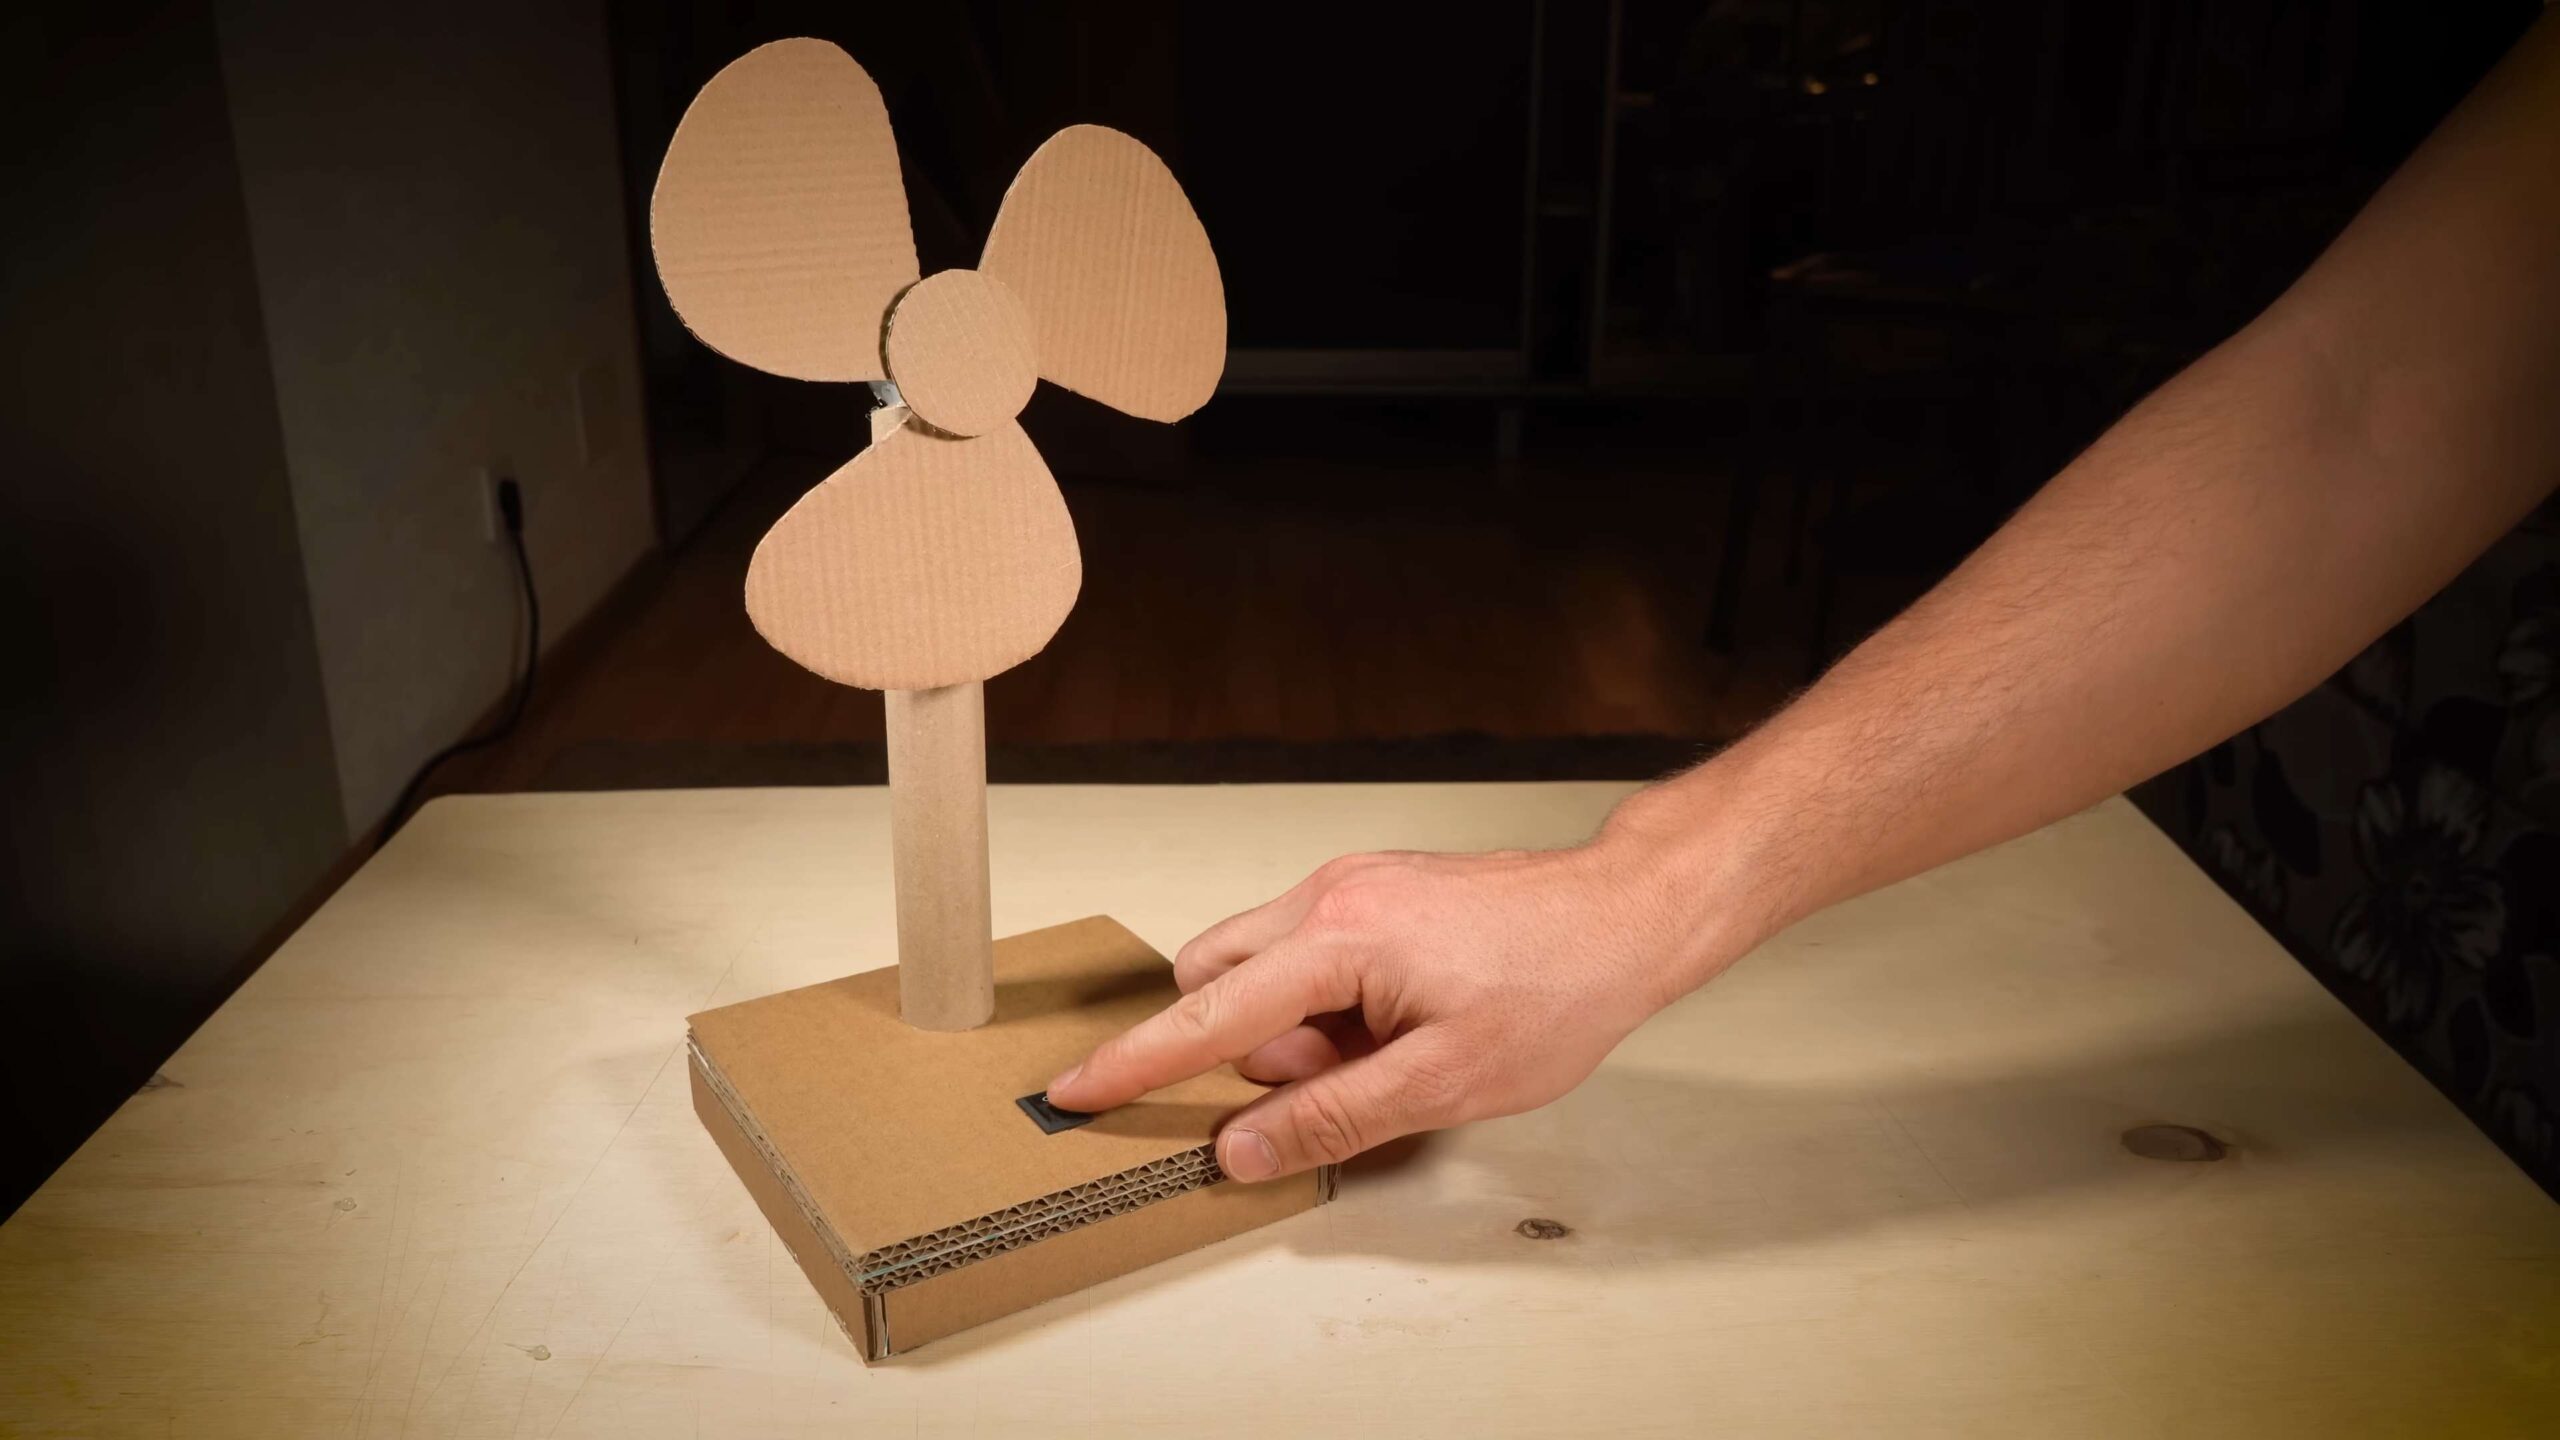
3. Test the Circuit: Connect the 9V battery to the battery clip. If you added a switch, turn it on. The fan should start spinning! If it doesn’t, double-check your wiring and make sure all the connections are secure.
Creating a Stand (Optional)
If you want your fan to stand up on its own, you can create a simple cardboard stand.
1. Cut Two Cardboard Pieces: Cut two rectangular pieces of cardboard. The size of the pieces will depend on how tall and wide you want your stand to be. I recommend pieces that are about 6 inches wide and 8 inches tall.
2. Cut a Slot in Each Piece: Cut a slot in the center of each piece of cardboard. The slots should be wide enough to allow the two pieces to slide together.
3. Assemble the Stand: Slide the two pieces of cardboard together, interlocking them at the slots. This will create a simple cross-shaped stand.
4. Attach the Fan to the Stand: Use hot glue to attach the motor mount to the top of the stand. Make sure the fan is securely attached to the stand.
Troubleshooting Tips
* Fan not spinning? Double-check your wiring. Make sure the battery is fresh and that all the connections are secure. Try reversing the wires connected to the motor.
* Fan spinning too slowly? Try using a higher voltage battery or a more powerful DC motor. Make sure the fan blades are properly shaped and angled.
* Fan blades wobbling? Make sure the motor mount is centered on the fan blades and that the blades are evenly spaced. Add extra cardboard supports to reinforce the connection between the motor mount and the fan blades.
* Motor getting hot? Don’t run the fan for extended periods of time. If the motor gets too hot, it could burn out.
Safety Precautions
* Always use caution when working with sharp objects like scissors or craft knives. Adult supervision is required for children.
* Be careful when using a hot glue gun. The glue can be very hot and can cause burns.
* Do not expose the fan to water or other liquids.
* Do not leave the fan unattended while it is running.
* Disconnect the battery when the fan is not in use.
Final Thoughts
And there you have it! Your very own DIY cardboard fan. It’s a simple, fun, and eco-friendly project that’s perfect for staying cool on a budget. Feel free to experiment with different designs and materials to create a fan that’s uniquely yours. You can paint it, decorate it with stickers, or even add some LED lights for a cool effect. Have fun and stay cool!
Conclusion
So, there you have it! Creating your own DIY cardboard fan isn’t just a fun project; it’s a surprisingly effective way to beat the heat, reduce your environmental impact, and unleash your inner maker. We’ve walked you through the steps, highlighting the simplicity and affordability of this ingenious solution. Forget expensive, energy-guzzling electric fans that contribute to rising electricity bills and environmental concerns. This DIY project offers a sustainable and cost-effective alternative, perfect for those hot summer days or stuffy indoor spaces.
Why is this DIY trick a must-try? Because it’s more than just a fan; it’s a statement. It’s a statement about resourcefulness, creativity, and a commitment to a greener lifestyle. It’s a way to repurpose materials that would otherwise end up in landfills, giving them a new lease on life and reducing waste. Plus, the satisfaction of creating something useful with your own hands is unparalleled.
But the fun doesn’t stop there! Feel free to experiment with different designs and variations to personalize your DIY cardboard fan. Consider adding decorative elements like paint, stickers, or even fabric scraps to give it a unique and stylish look. You could also explore different blade shapes and sizes to optimize airflow and efficiency. For a more robust and long-lasting fan, consider reinforcing the cardboard with additional layers or using thicker cardboard to begin with.
Another exciting variation is to incorporate a small solar panel to power a miniature electric motor, creating a self-powered, eco-friendly fan. This would require some basic electrical knowledge, but the result would be a truly innovative and sustainable cooling solution. You could also experiment with different handle designs for improved ergonomics and comfort.
Don’t be afraid to get creative and think outside the box! The possibilities are endless when it comes to customizing your DIY cardboard fan. The key is to have fun and experiment until you find a design that works best for you.
We are confident that you’ll be amazed by the effectiveness and simplicity of this DIY project. It’s a fantastic way to stay cool, save money, and reduce your environmental footprint all at the same time.
So, what are you waiting for? Gather your cardboard, grab your scissors, and get ready to create your own amazing DIY cardboard fan! We encourage you to try this project and share your experiences with us. Post photos of your creations on social media using #DIYCardboardFan and let us know what variations you came up with. We can’t wait to see your innovative designs and hear about your success stories. Let’s spread the word about this simple yet effective way to stay cool and make a positive impact on the environment. Your feedback and contributions will help us refine and improve this DIY trick for everyone. Let’s build a community of resourceful makers and create a cooler, greener future together!
FAQ
Q: What kind of cardboard is best for making a DIY cardboard fan?
A: The best type of cardboard to use is corrugated cardboard, which is the kind commonly used for shipping boxes. This type of cardboard is strong and durable, providing the necessary support for the fan blades. Avoid using thin or flimsy cardboard, as it may not be able to withstand the stress of being rotated. The thicker the cardboard, the more durable your fan will be. You can also reinforce thinner cardboard by gluing multiple layers together.
Q: How can I make my cardboard fan more durable?
A: There are several ways to make your cardboard fan more durable. First, use high-quality, thick corrugated cardboard. Second, reinforce the blades and handle with additional layers of cardboard, glued together. Third, consider using packing tape or duct tape to reinforce the edges of the blades and handle, preventing them from tearing or bending. Finally, avoid exposing your fan to moisture, as this can weaken the cardboard and cause it to warp.
Q: What are some ways to decorate my DIY cardboard fan?
A: The possibilities for decorating your DIY cardboard fan are endless! You can use paint, markers, stickers, glitter, fabric scraps, or even washi tape to personalize your fan. Consider using stencils to create intricate designs or patterns. You can also decoupage images onto the fan using Mod Podge or other adhesive sealants. For a more natural look, you can use natural dyes or stains to color the cardboard. Remember to let the decorations dry completely before using the fan to prevent smudging or smearing.
Q: How can I make my cardboard fan spin faster?
A: The speed of your cardboard fan depends on several factors, including the size and shape of the blades, the angle of the blades, and the force you apply when spinning it. To make your fan spin faster, try increasing the size of the blades or adjusting the angle of the blades to catch more air. You can also experiment with different handle designs to improve your grip and apply more force. Make sure the blades are balanced to prevent wobbling, which can slow down the fan.
Q: Is a DIY cardboard fan really effective at cooling?
A: While a DIY cardboard fan won’t provide the same level of cooling as an electric fan, it can be surprisingly effective at creating a gentle breeze and providing relief from the heat. The effectiveness of the fan depends on the size of the blades, the speed at which you spin it, and the ambient temperature. It’s perfect for personal use in small spaces or for providing a refreshing breeze on a hot day. It’s also a great alternative to electric fans for those who are looking for a more sustainable and eco-friendly cooling solution.
Q: Can I use this DIY cardboard fan outdoors?
A: Yes, you can use your DIY cardboard fan outdoors, but keep in mind that cardboard is susceptible to moisture. Avoid using the fan in wet or humid conditions, as this can weaken the cardboard and cause it to warp. If you plan to use the fan outdoors frequently, consider reinforcing it with waterproof materials or applying a sealant to protect it from the elements.
Q: How long will my DIY cardboard fan last?
A: The lifespan of your DIY cardboard fan depends on several factors, including the quality of the cardboard, the amount of use it gets, and the environmental conditions it’s exposed to. With proper care and maintenance, a well-made cardboard fan can last for several weeks or even months. To extend the lifespan of your fan, avoid exposing it to moisture, handle it gently, and store it in a dry place when not in use.
Q: Can I recycle my cardboard fan when I’m done with it?
A: Yes, you can recycle your cardboard fan when you’re done with it, as long as it’s made from recyclable cardboard and doesn’t contain any non-recyclable materials like glitter or plastic decorations. Remove any non-recyclable components before placing the fan in your recycling bin. Check with your local recycling guidelines to ensure that cardboard is accepted in your area.


Leave a Comment