

DIY Carpet Stain Remover: We’ve all been there, haven’t we? That heart-stopping moment when a rogue glass of red wine, a muddy paw print, or a splattering of spaghetti sauce threatens to permanently mar your beloved carpet. Before you resign yourself to living with the eyesore or shelling out a fortune for professional cleaning, let me tell you a secret: you can conquer those pesky stains with simple ingredients you probably already have in your home!
For generations, resourceful homeowners have relied on homemade remedies to tackle household messes. Think about it – before the age of specialized cleaning products, our grandmothers were masters of stain removal, armed with nothing more than vinegar, baking soda, and a little elbow grease. This tradition of resourcefulness is not only cost-effective but also environmentally friendly, reducing our reliance on harsh chemicals.
But why should you bother with a DIY carpet stain remover when there are so many commercial options available? Well, for starters, many store-bought cleaners contain harsh chemicals that can be harmful to your family and pets. Plus, they can be expensive! This DIY trick not only saves you money but also gives you peace of mind knowing exactly what’s going onto your carpet. I’m going to show you how to create a powerful, all-natural stain remover that will banish those blemishes and leave your carpet looking fresh and clean. Get ready to say goodbye to stubborn stains and hello to a sparkling, stain-free carpet!
DIY Carpet Stain Remover: Banish Stains Like a Pro!
Okay, let’s face it, accidents happen. Spilled coffee, muddy paw prints, rogue red wine – our carpets are constantly under attack! But before you resign yourself to living with that unsightly stain or shelling out big bucks for professional cleaning, let me share my go-to DIY carpet stain remover recipe and method. It’s surprisingly effective, uses ingredients you probably already have, and is way gentler on your wallet.
What You’ll Need: The Stain-Fighting Arsenal
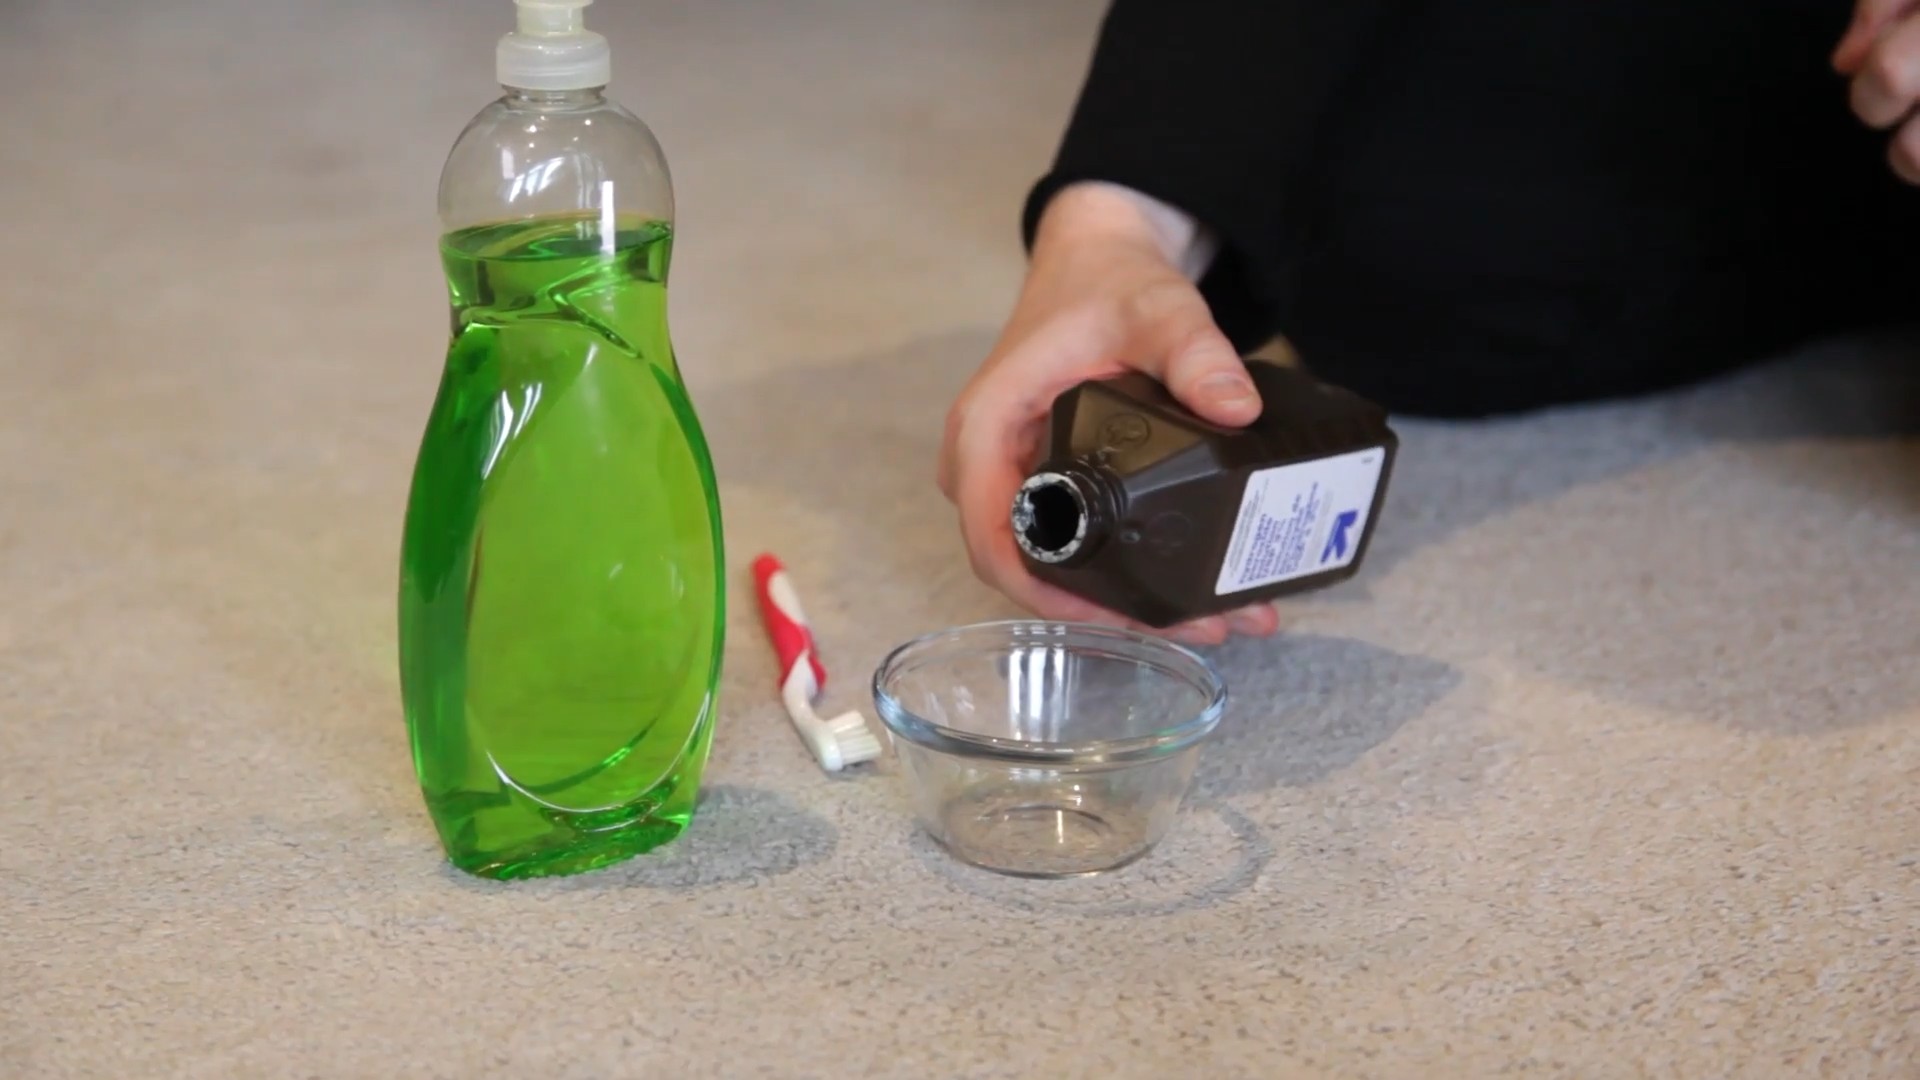
Before we dive in, gather your supplies. Having everything ready will make the process smoother and faster. Here’s what you’ll need:
* White Vinegar: This is your secret weapon! Vinegar’s acidity helps break down many common stains.
* Baking Soda: A natural deodorizer and mild abrasive, baking soda helps lift stains and absorb odors.
* Dish Soap (Clear, Non-Bleach): A gentle dish soap helps emulsify grease and lift dirt. Avoid anything with bleach, as it can damage your carpet.
* Warm Water: Warm water helps activate the cleaning agents.
* Spray Bottle: For easy application of the cleaning solution.
* Clean White Cloths or Paper Towels: Use white cloths to avoid transferring any dyes to your carpet.
* Spoon or Dull Knife: For gently scraping up any solid debris.
* Vacuum Cleaner: To remove loose dirt and debris before and after cleaning.
* Optional:
* Old Toothbrush: For scrubbing stubborn stains.
* Dry Towel: For blotting up excess moisture.
The Magic Potion: Mixing Your Stain Remover
Now, let’s whip up our stain-fighting solution. I’ve found this combination works wonders on a variety of stains.
1. Combine Ingredients: In your spray bottle, mix together:
* 1/2 cup white vinegar
* 1/4 cup baking soda
* 1 teaspoon clear dish soap
* 1 cup warm water
2. Mix Gently: Close the spray bottle tightly and gently swirl the mixture to combine. Be careful, as the baking soda and vinegar will react and create some fizz. Don’t shake it vigorously!
3. Test in an Inconspicuous Area: Before applying the solution to the stain, test it on a hidden area of your carpet (like under a piece of furniture or in a closet) to ensure it doesn’t discolor or damage the fibers. Apply a small amount, let it sit for a few minutes, and then blot it with a clean white cloth. Check for any color transfer or damage.
Tackling the Stain: Step-by-Step Cleaning Guide
Alright, now for the main event! Follow these steps to effectively remove that pesky stain.
1. Remove Solid Debris: If there are any solid pieces of the stain (like dried mud or food), gently scrape them up with a spoon or dull knife. Be careful not to rub the stain further into the carpet fibers. Vacuum up the loose debris.
2. Blot, Don’t Rub: Using a clean white cloth or paper towel, blot the stain to absorb as much of the liquid as possible. Work from the outside of the stain inward to prevent it from spreading. Avoid rubbing, as this can damage the carpet fibers and make the stain worse.
3. Apply the Cleaning Solution: Spray the stain generously with your DIY carpet stain remover. Make sure the area is thoroughly saturated, but not soaking wet.
4. Let it Sit: Allow the solution to sit on the stain for 5-10 minutes. This gives the cleaning agents time to break down the stain. For older or more stubborn stains, you can let it sit for up to 30 minutes.
5. Blot Again: After the solution has had time to work, blot the stain again with a clean white cloth or paper towel. Continue blotting until you’ve absorbed as much of the liquid as possible.
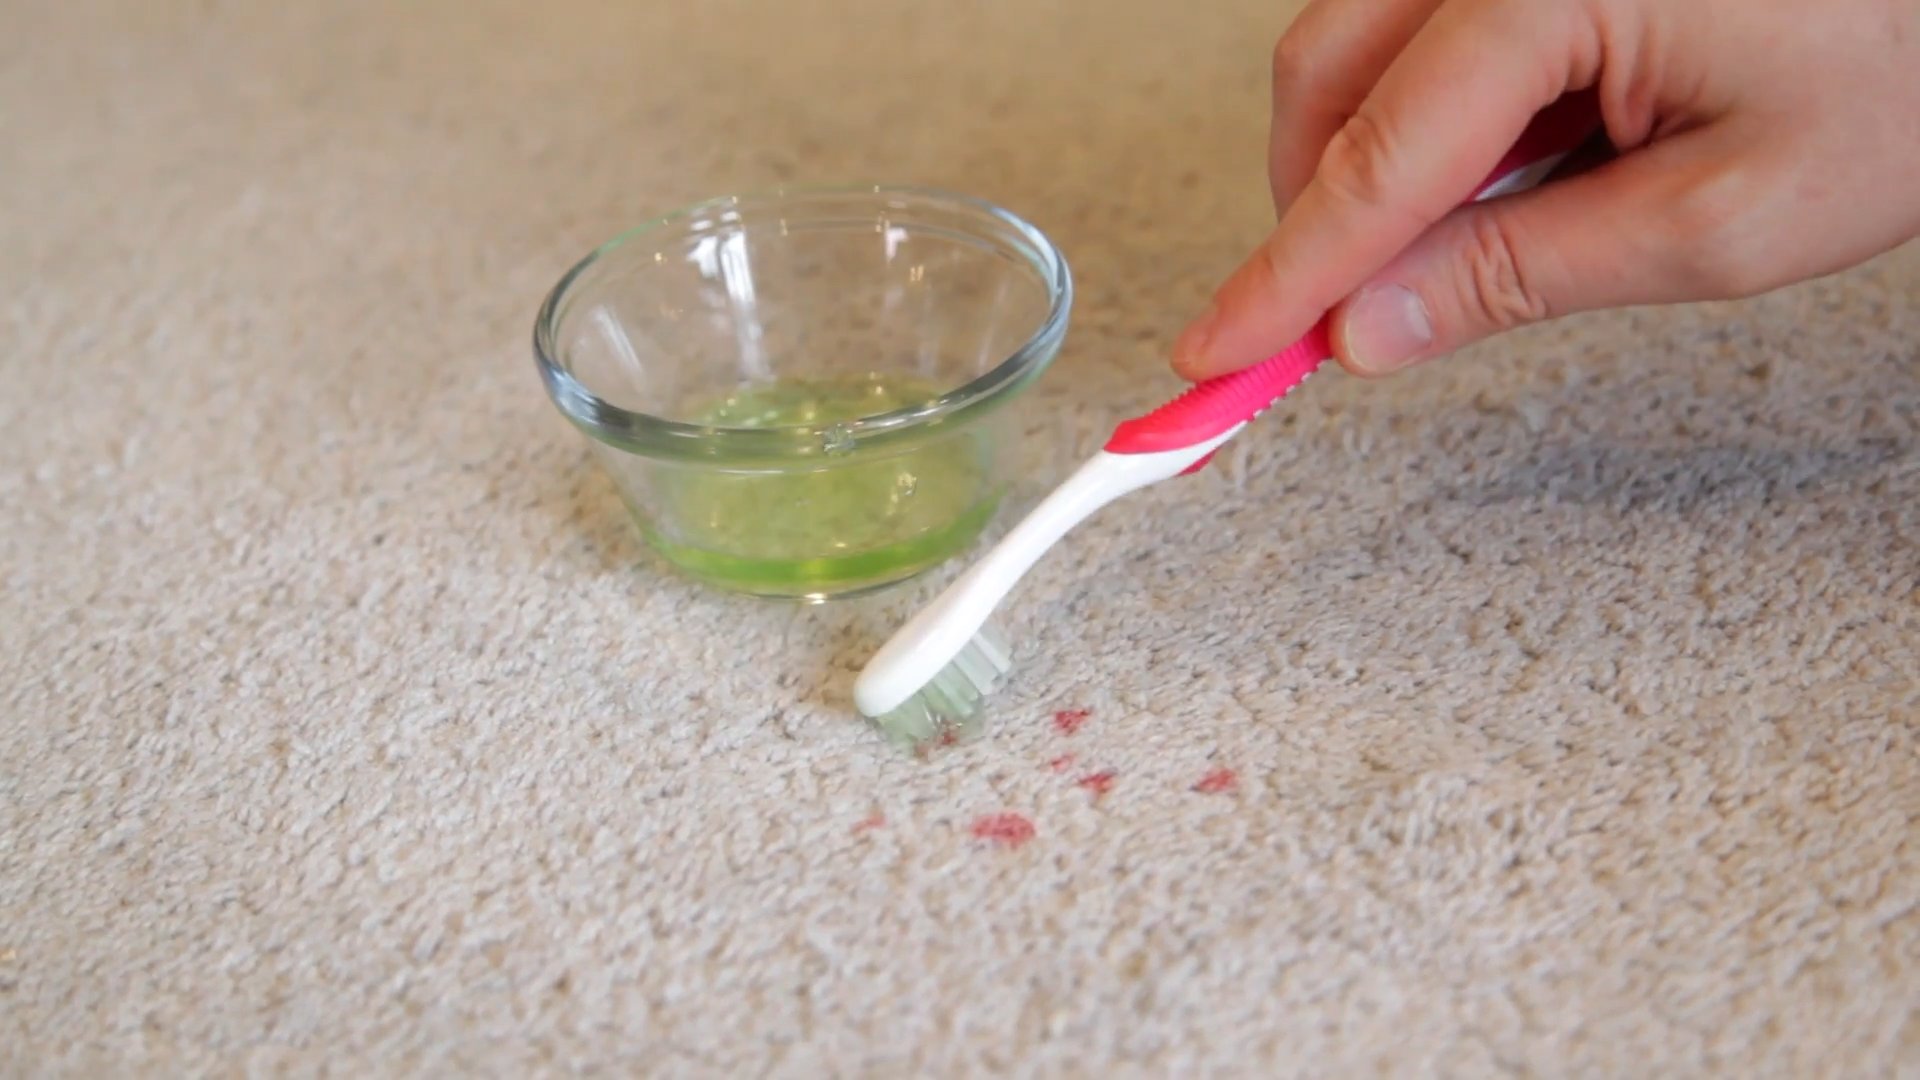
6. Scrub (Optional): If the stain is particularly stubborn, you can gently scrub it with an old toothbrush. Use a circular motion and be careful not to damage the carpet fibers.
7. Rinse (Important!): It’s crucial to rinse the area to remove any remaining cleaning solution. You can do this by spraying the area with clean, warm water and then blotting it dry with a clean white cloth. Repeat this process until you’re sure all the cleaning solution is gone. Leaving soap residue can attract dirt and make the stain reappear.
8. Dry Thoroughly: To prevent mold and mildew growth, it’s essential to dry the area thoroughly. You can use a dry towel to blot up as much moisture as possible. You can also use a fan to circulate air and speed up the drying process. Avoid walking on the area until it’s completely dry.
9. Vacuum: Once the area is completely dry, vacuum it to restore the carpet fibers and remove any remaining residue.
Dealing with Specific Stain Types: A Quick Guide
While the above method works well for many common stains, here are some specific tips for tackling different types of messes:
Coffee Stains
Coffee stains are a common culprit. The key is to act fast! Blot up as much of the spilled coffee as possible immediately. Then, follow the steps above. For older, dried-in coffee stains, you may need to repeat the process a few times.
Red Wine Stains
Red wine stains can be particularly tricky. Immediately blot up as much of the wine as possible. Then, sprinkle a generous amount of baking soda over the stain. Let it sit for several hours or overnight to absorb the remaining wine. Vacuum up the baking soda. If the stain persists, follow the steps above. Some people swear by pouring white wine on the red wine stain to dilute it before blotting.
Pet Stains
Pet stains require special attention to remove both the stain and the odor. After blotting up the urine, sprinkle a generous amount of baking soda over the stain. Let it sit for several hours or overnight. Vacuum up the baking soda. Then, follow the steps above. You can also add a few drops of essential oil (like lavender or lemon) to the cleaning solution to help neutralize the odor. Make sure the essential oil is safe for pets before using it.
Grease Stains
Grease stains can be tough to remove because grease doesn’t dissolve in water. The key is to use a dish soap that’s designed to cut through grease. Follow the steps above, making sure to use a generous amount of dish soap in the cleaning solution. You may need to repeat the process a few times.
Important Considerations and Tips
* Act Fast: The sooner you treat a stain, the easier it will be to remove. Fresh stains are much easier to tackle than old, dried-in stains.
* Don’t Over-Wet: Avoid soaking the carpet, as this can damage the backing and lead to mold and mildew growth.
* Be Patient: Some stains may require multiple treatments to be completely removed. Don’t give up after the first try!
* Professional Help: If you’ve tried everything and the stain still won’t budge, it may be time to call in a professional carpet cleaner. They have specialized equipment and cleaning solutions that can tackle even the most stubborn stains.
* Prevention is Key: Consider using a carpet protector spray to help prevent future stains. These sprays create a barrier that repels liquids and makes it easier to clean up spills.
* Always test in a hidden area first! I can’t stress this enough. You don’t want to ruin your carpet.
And there you have it! My tried-and-true DIY carpet stain remover method. I hope this helps you banish those unsightly stains and keep your carpets looking their best. Happy cleaning!
Conclusion
So, there you have it! This DIY carpet stain remover isn’t just another cleaning hack; it’s a game-changer for anyone who wants to keep their carpets looking fresh and vibrant without resorting to harsh chemicals or expensive professional services. We’ve all been there – that dreaded moment when a spill happens, and panic sets in. But with this simple, effective, and budget-friendly solution, you can tackle those stains head-on with confidence.
The beauty of this DIY carpet stain remover lies in its simplicity and accessibility. You likely already have the ingredients in your pantry or cleaning cabinet. No need for a special trip to the store or a hefty bill. Plus, you have complete control over what goes into your cleaning solution, ensuring a safer environment for your family and pets.
But the benefits extend beyond just cost and convenience. This DIY method is surprisingly powerful, capable of lifting even stubborn stains like coffee, wine, pet accidents, and more. The combination of baking soda, vinegar, and dish soap creates a synergistic effect that breaks down the stain molecules and lifts them away from the carpet fibers.
Why is this DIY carpet stain remover a must-try? Because it’s effective, affordable, eco-friendly, and readily available. It’s a practical solution for everyday messes and unexpected spills. It empowers you to take control of your carpet cleaning and maintain a clean and healthy home.
Looking to customize your stain remover? Here are a few suggestions:
* For extra stubborn stains: Pre-treat the stain with a paste of baking soda and water before applying the DIY solution. Let it sit for 30 minutes to an hour to help lift the stain.
* For pet odors: Add a few drops of your favorite essential oil (like lavender or eucalyptus) to the solution for a fresh, clean scent. Be sure the essential oil is safe for pets before using.
* For delicate carpets: Test the solution on an inconspicuous area of the carpet first to ensure it doesn’t cause any discoloration or damage. You can also dilute the solution with more water for a gentler approach.
* Vinegar Alternative: If you are sensitive to the smell of vinegar, you can substitute it with lemon juice. Lemon juice has similar stain-fighting properties and a more pleasant scent.
We’re confident that this DIY carpet stain remover will become your go-to solution for tackling carpet stains. It’s a simple yet powerful way to keep your carpets looking their best without breaking the bank or exposing your family to harsh chemicals.
Now, it’s your turn! Give this DIY carpet stain remover a try and see the amazing results for yourself. We encourage you to share your experiences, tips, and variations in the comments below. Let’s build a community of stain-fighting experts and help each other keep our carpets looking pristine! We can’t wait to hear your success stories!
Frequently Asked Questions (FAQs)
What types of stains does this DIY carpet stain remover work on?
This DIY carpet stain remover is effective on a wide range of common household stains, including:
* Coffee and tea spills
* Red wine stains
* Pet urine and feces
* Food stains (sauce, gravy, etc.)
* Mud and dirt
* Ink (depending on the type of ink)
* Grease and oil
However, it’s important to note that some stains may be more difficult to remove than others, especially if they have been left to set for a long time. For particularly stubborn stains, you may need to repeat the cleaning process or try a different stain removal method.
Is this DIY carpet stain remover safe for all types of carpets?
While this DIY carpet stain remover is generally safe for most types of carpets, it’s always a good idea to test it on an inconspicuous area first to ensure it doesn’t cause any discoloration or damage. This is especially important for delicate carpets, such as wool or silk.
If you’re concerned about the potential for damage, you can dilute the solution with more water for a gentler approach. You can also consult with a professional carpet cleaner for advice on the best stain removal methods for your specific type of carpet.
How do I test the solution on an inconspicuous area?
To test the solution, apply a small amount to a hidden area of the carpet, such as under a piece of furniture or in a closet. Let it sit for a few minutes, then blot it with a clean, white cloth. Check the cloth for any color transfer and examine the carpet for any signs of discoloration or damage. If everything looks good, you can proceed with using the solution on the stain.
What if the stain doesn’t come out completely after the first application?
If the stain is still visible after the first application, repeat the cleaning process. You may need to apply the solution several times to completely remove the stain, especially if it’s a stubborn one. Be patient and persistent, and avoid scrubbing the carpet too vigorously, as this can damage the fibers.
Can I use this DIY carpet stain remover on upholstery?
Yes, this DIY carpet stain remover can also be used on upholstery, but it’s important to test it on an inconspicuous area first, just as you would with carpet. Follow the same steps as you would for carpet cleaning, and be sure to blot the area dry thoroughly after cleaning.
How do I prevent carpet stains in the first place?
Prevention is always better than cure when it comes to carpet stains. Here are a few tips to help prevent stains from happening in the first place:
* Use rugs and mats in high-traffic areas to protect your carpets from dirt and wear.
* Clean up spills immediately before they have a chance to set.
* Avoid eating and drinking in carpeted areas.
* Regularly vacuum your carpets to remove dirt and debris that can contribute to staining.
* Consider applying a carpet protector to help repel stains and make cleaning easier.
What are the best ratios for mixing the DIY carpet stain remover?
While the exact ratios can be adjusted based on the severity of the stain, a good starting point is:
* 1/4 cup of white vinegar
* 1/4 cup of baking soda
* A few drops of dish soap
* 1/2 cup of warm water
Mix the ingredients together in a spray bottle or bowl, and use as directed in the recipe.
Is baking soda harmful to my vacuum cleaner?
While baking soda is generally safe to use on carpets, it can potentially clog your vacuum cleaner if used in large quantities. To avoid this, vacuum up the baking soda thoroughly after it has dried. You can also use a vacuum cleaner with a HEPA filter to help trap fine particles of baking soda.
Can I use a different type of dish soap?
Yes, you can use a different type of dish soap, but it’s best to use a clear, non-bleach dish soap to avoid any potential discoloration. Avoid using dish soaps that contain dyes or fragrances, as these can sometimes leave a residue on your carpet.
How long does the DIY carpet stain remover last?
It’s best to use the DIY carpet stain remover immediately after mixing it, as the ingredients can lose their effectiveness over time. If you have any leftover solution, store it in a sealed container and use it within a few days.
Leave a Comment