

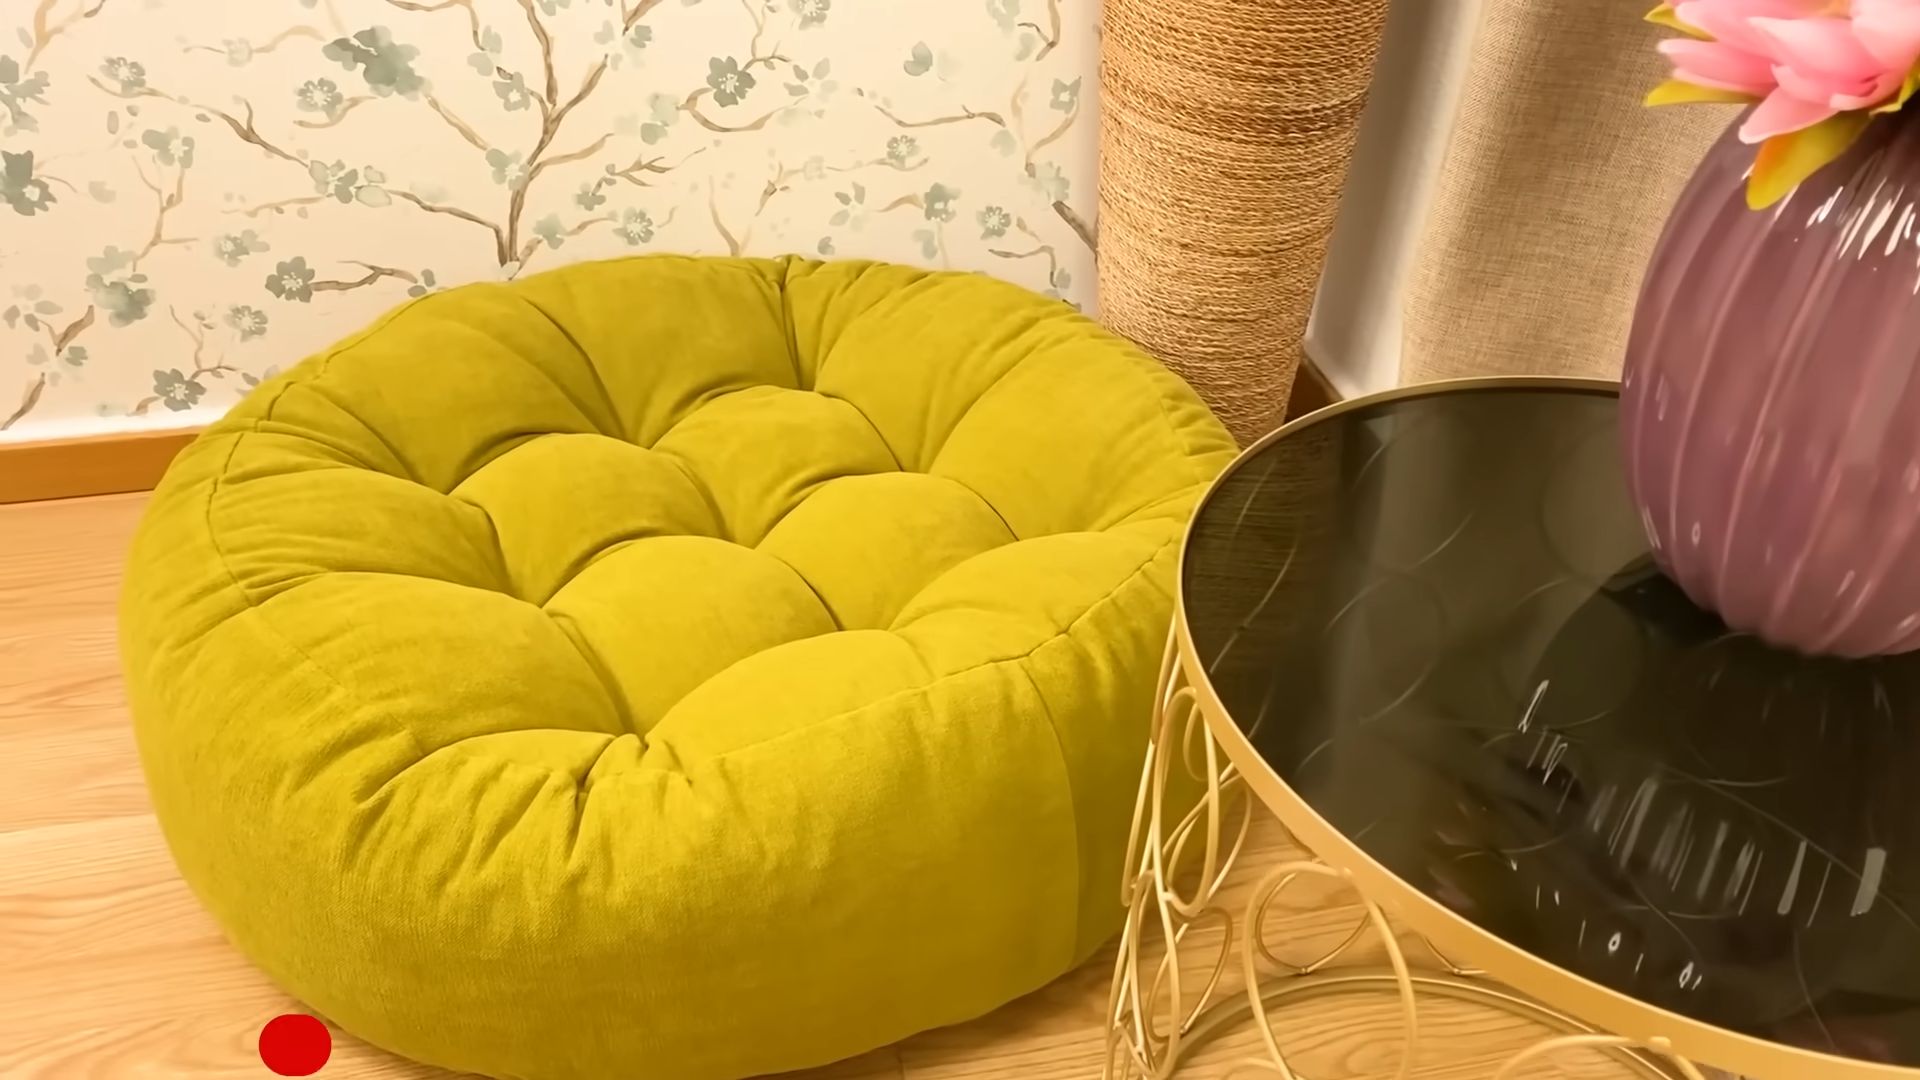
DIY Floor Puff Cushion: Imagine sinking into a cloud of comfort, right in your own living room, crafted with your own two hands. Sounds dreamy, right? Well, stop imagining and start creating! This isn’t just about adding another piece of furniture; it’s about injecting personality, comfort, and a touch of “you” into your space. For centuries, floor cushions have been a staple in cultures around the world, from the vibrant souks of Marrakech to the serene tea rooms of Japan, offering a relaxed and inviting seating option.
In today’s fast-paced world, we all crave moments of relaxation and connection. A DIY floor puff cushion provides exactly that – a cozy spot to unwind, read a book, meditate, or simply spend quality time with loved ones. Plus, let’s be honest, store-bought cushions can be expensive and often lack that unique, handmade charm. That’s where this DIY project comes in! I’m going to guide you through creating your very own floor puff cushion, tailored to your style and comfort preferences. It’s easier than you think, and the satisfaction of lounging on something you made yourself is simply unmatched. So, grab your supplies, and let’s get crafting!
DIY Floor Puff Cushion: The Ultimate Comfort Project
Hey there, fellow DIY enthusiasts! Are you looking for a cozy and stylish addition to your living space? I’m so excited to share this project with you: a DIY floor puff cushion! This isn’t just any cushion; it’s a super comfortable, versatile piece that you can use for extra seating, a footrest, or even a makeshift coffee table. Plus, it’s a fantastic way to use up fabric scraps and add a personal touch to your home decor. Let’s get started!
Materials You’ll Need
Before we dive in, let’s gather all the necessary materials. Trust me, having everything ready will make the process so much smoother.
* Fabric: This is where you can get creative! I recommend using durable fabrics like canvas, denim, upholstery fabric, or even repurposed blankets. You’ll need enough fabric to create the cushion’s outer shell and inner lining. For a cushion approximately 30 inches in diameter and 12 inches high, aim for at least 2-3 yards of your main fabric and the same amount for the lining.
* Lining Fabric: Muslin or any inexpensive, lightweight fabric will work perfectly for the inner lining. This will hold the filling and prevent it from escaping.
* Filling: This is where the magic happens! You have several options:
* Polystyrene Beads (Beanbag Filling): These are lightweight and provide excellent support. However, they can be messy and aren’t the most eco-friendly option.
* Foam Scraps: A great way to recycle! Collect foam scraps from old cushions, mattresses, or upholstery projects. Just make sure they’re clean and dry.
* Fabric Scraps: Another fantastic recycling option! Use fabric scraps from previous sewing projects. This will give your cushion a unique, textured feel.
* Kapok Fiber: A natural, sustainable option that’s lightweight and breathable.
* Sewing Machine: A reliable sewing machine is essential for this project.
* Thread: Choose a thread that matches your fabric. I always recommend using a strong thread, especially for upholstery projects.
* Scissors or Rotary Cutter: For cutting fabric accurately.
* Measuring Tape or Ruler: Precision is key!
* Pins: To hold fabric pieces together while sewing.
* Chalk or Fabric Marker: For marking cutting lines.
* Large Bowl or Plate (for tracing circles): To create a perfect circle for the top and bottom of the cushion.
* Zipper (optional): If you want a removable cover for easy washing. A 20-22 inch zipper should be sufficient.
* Hand Sewing Needle: For closing the opening after filling (if not using a zipper).
* Stuffing Stick or Dowel Rod: To help distribute the filling evenly.
Creating the Cushion Cover
This is where we start bringing your vision to life! We’ll be constructing the outer shell of your floor puff cushion.
1. Cut the Fabric Circles:
* Using your large bowl or plate as a guide, trace two circles onto your main fabric. These will be the top and bottom of your cushion. I like to use a fabric marker for this, as it’s easier to see and doesn’t leave permanent marks.
* Carefully cut out the circles using your scissors or rotary cutter. Accuracy is important here, so take your time.
2. Cut the Fabric Strip for the Sides:
* Measure the circumference of your fabric circle. You can calculate this by multiplying the diameter by pi (approximately 3.14).
* Decide on the desired height of your cushion. I usually go for around 12 inches, but you can adjust this to your preference.
* Cut a fabric strip that is the circumference of the circle in length and your desired height plus 1 inch (for seam allowance) in width. For example, if your circle is 30 inches in diameter, the circumference is approximately 94.2 inches. You’ll need a strip that is 94.2 inches long and 13 inches wide.
3. Sew the Side Strip Together:
* If your fabric strip isn’t long enough, you’ll need to sew multiple pieces together to create the required length.
* Place the fabric pieces right sides together and sew along the short edges with a ½ inch seam allowance. Press the seams open.
4. Attach the Side Strip to the Top Circle:
* Pin the side strip to the top circle, right sides together. Make sure the edge of the strip aligns with the edge of the circle.
* Sew the strip to the circle with a ½ inch seam allowance. You’ll need to ease the fabric as you go, gently stretching the strip to fit the curve of the circle. This can be a bit tricky, so take your time and use plenty of pins.
* Clip the seam allowance around the curve to help it lie flat.
5. Attach the Side Strip to the Bottom Circle:
* Repeat the process from step 4 to attach the side strip to the bottom circle.
* Leave a 10-12 inch opening on one side for stuffing. This is crucial!
6. (Optional) Insert the Zipper:
* If you’re using a zipper, now’s the time to insert it.
* Open the seam where you left the opening for stuffing.
* Pin the zipper to the edges of the opening, right sides together.
* Sew the zipper in place using a zipper foot on your sewing machine.
Creating the Inner Lining
The inner lining is essential for containing the filling and preventing it from escaping through the seams of the outer cover.
1. Cut the Lining Circles:
* Using the same bowl or plate, trace two circles onto your lining fabric.
* Cut out the circles.
2. Cut the Lining Strip for the Sides:
* Measure the circumference of your fabric circle (same as before).
* Cut a lining strip that is the circumference of the circle in length and your desired height plus 1 inch (for seam allowance) in width.
3. Sew the Lining Side Strip Together:
* If your lining strip isn’t long enough, sew multiple pieces together to create the required length.
* Place the fabric pieces right sides together and sew along the short edges with a ½ inch seam allowance. Press the seams open.
4. Attach the Lining Side Strip to the Top Circle:
* Pin the side strip to the top circle, right sides together.
* Sew the strip to the circle with a ½ inch seam allowance, easing the fabric as you go.
* Clip the seam allowance around the curve.
5. Attach the Lining Side Strip to the Bottom Circle:
* Repeat the process from step 4 to attach the side strip to the bottom circle.
* Leave a 12-14 inch opening on one side for stuffing. This opening needs to be large enough to easily insert the filling.
6. Turn the Lining Right Side Out:
* Carefully turn the lining right side out through the opening.
Stuffing the Cushion
This is where your cushion starts to take shape and become irresistibly comfortable!
1. Insert the Lining into the Cover:
* Turn the outer cover right side out.
* Carefully insert the lining into the cover, making sure the seams align.
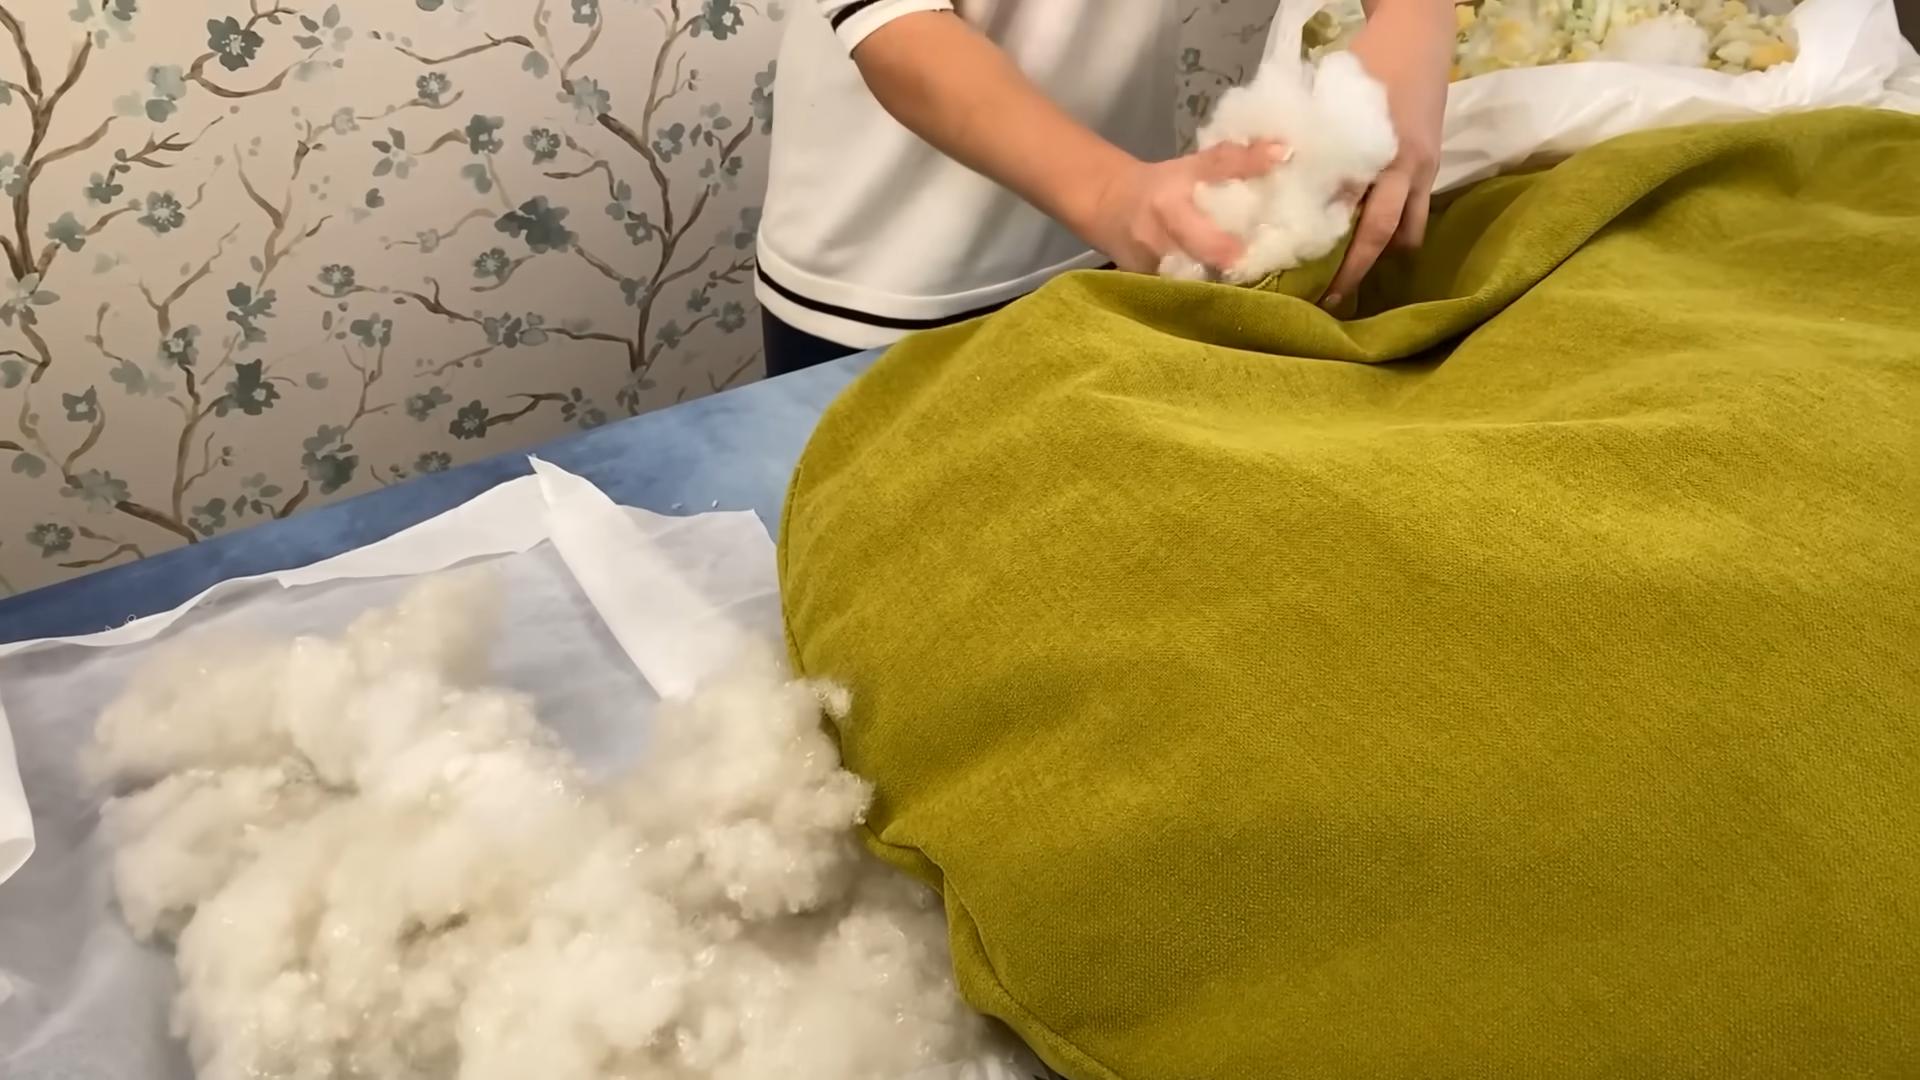
2. Start Stuffing:
* Begin filling the lining with your chosen filling material. I recommend doing this in a well-ventilated area, especially if you’re using polystyrene beads.
* Use a funnel or a large cup to help pour the filling into the opening.
* Don’t overstuff the cushion! You want it to be comfortable and pliable, not rock hard.
3. Distribute the Filling Evenly:
* Use a stuffing stick or dowel rod to help distribute the filling evenly throughout the cushion.
* Shake and fluff the cushion periodically to ensure the filling is evenly distributed.
4. Continue Stuffing Until Desired Firmness:
* Keep adding filling until the cushion reaches your desired level of firmness.
* Remember, you can always add or remove filling later if needed.
5. Close the Lining Opening:
* Once you’re happy with the amount of filling, it’s time to close the opening in the lining.
* Fold the edges of the opening inward and pin them together.
* Using a hand sewing needle and thread, carefully stitch the opening closed with a blind stitch. This will create an invisible seam.
Finishing Touches
Almost there! Now, let’s add the final touches to make your floor
Conclusion
So, there you have it! Creating your own DIY floor puff cushion isn’t just a fun project; it’s a gateway to unparalleled comfort, personalized style, and a sustainable approach to home décor. Forget those generic, mass-produced cushions that lack character and soul. This method empowers you to craft a floor puff that perfectly complements your space and reflects your unique personality.
Why is this DIY trick a must-try? Because it’s incredibly versatile. You can tailor the size, shape, and fabric to suit any room and any need. Need extra seating for movie night? A cozy spot for reading? A playful addition to a child’s room? This DIY floor puff cushion can be all of those things and more. Plus, it’s a fantastic way to upcycle old clothes, blankets, or fabric scraps, giving them a new lease on life and reducing textile waste.
But the benefits don’t stop there. The process of creating something with your own hands is incredibly rewarding. It’s a chance to unplug from the digital world, engage your creativity, and experience the satisfaction of bringing your vision to life. And let’s be honest, who doesn’t love showing off a handmade piece that sparks conversation and admiration?
Looking for suggestions or variations? The possibilities are endless!
* Experiment with different fabrics: Think beyond cotton and consider using denim for a rugged look, velvet for a touch of luxury, or even outdoor fabric for a weather-resistant option.
* Play with shapes: While a round or square puff is classic, don’t be afraid to get creative with geometric shapes or even freeform designs.
* Add embellishments: Buttons, tassels, pom-poms, embroidery – the sky’s the limit when it comes to adding personal touches.
* Consider different filling options: While stuffing is a popular choice, you could also use shredded foam, beanbag filling, or even old pillows for a more sustainable approach.
* Make it modular: Create several smaller puffs that can be arranged in different configurations to suit your needs.
Ultimately, the best part about this DIY project is that it’s entirely customizable. You have the freedom to create a floor puff cushion that is perfectly tailored to your taste and lifestyle.
We wholeheartedly encourage you to give this DIY trick a try. It’s a fun, affordable, and rewarding project that will add comfort, style, and personality to your home. Once you’ve created your masterpiece, we’d love to see it! Share your photos and experiences with us on social media using #DIYFloorPuffCushion. We can’t wait to see what you create! Let’s spread the joy of handmade comfort and inspire others to embrace their creativity.
Frequently Asked Questions (FAQ)
What kind of fabric is best for a DIY floor puff cushion?
The best fabric for your DIY floor puff cushion depends on your desired aesthetic, durability needs, and budget. Cotton is a popular and affordable choice, offering a wide range of colors and patterns. However, it may not be the most durable option for high-traffic areas. Denim is a great choice for a rugged and long-lasting cushion, while velvet adds a touch of luxury and sophistication. Outdoor fabrics are ideal for cushions that will be used outdoors, as they are water-resistant and fade-resistant. Consider the overall style of your room and the level of wear and tear the cushion will endure when making your fabric selection. Also, consider upcycling old fabrics like blankets, curtains, or even old jeans to create a unique and sustainable floor puff.
What is the best filling for a floor puff cushion?
The ideal filling for your floor puff cushion depends on your desired level of comfort, support, and budget. Stuffing is a common and affordable option, providing a soft and plush feel. Shredded foam offers more support and is a good choice for those who prefer a firmer cushion. Beanbag filling is lightweight and conforms to the body, making it a comfortable option for lounging. You can also use old pillows or blankets as filling, which is a great way to upcycle and save money. Experiment with different fillings to find the one that best suits your needs and preferences. Remember to consider the weight of the filling, as this will affect the overall weight and portability of the cushion.
How much fabric and filling do I need?
The amount of fabric and filling you need will depend on the size and shape of your floor puff cushion. For a standard round or square cushion, you’ll typically need at least 1-2 yards of fabric for the outer cover and a similar amount for the inner lining (if using). As for filling, it’s always better to overestimate than underestimate. Start with a large bag of stuffing, shredded foam, or beanbag filling and add more as needed until you achieve your desired level of firmness. A good rule of thumb is to start with about 5-10 pounds of filling for a medium-sized cushion and adjust from there. Remember to account for the seam allowance when cutting your fabric.
How do I clean my DIY floor puff cushion?
Cleaning your DIY floor puff cushion will depend on the type of fabric and filling you used. If the outer cover is removable and machine-washable, you can simply unzip it and toss it in the washing machine on a gentle cycle. If the cover is not removable, you can spot-clean it with a mild detergent and a damp cloth. Avoid using harsh chemicals or bleach, as these can damage the fabric. For the filling, it’s best to air it out regularly to prevent odors and mildew. If the filling becomes soiled, you may need to replace it entirely. Consider using a fabric protector spray to help prevent stains and spills.
Can I make a floor puff cushion without sewing?
Yes, you can! While sewing is the most common method for creating a floor puff cushion, there are alternative no-sew options. One popular method involves using fabric glue or fusible webbing to attach the fabric pieces together. This method is best suited for smaller cushions and may not be as durable as a sewn cushion. Another option is to use an old sweater or blanket as the outer cover, simply stuffing it with filling and tying off the ends. This is a quick and easy way to create a cozy and rustic floor puff cushion. While no-sew methods may not be as durable or polished as sewn cushions, they are a great option for those who don’t have sewing skills or equipment.
How can I make my floor puff cushion more durable?
To make your floor puff cushion more durable, consider using a heavy-duty fabric like denim or canvas for the outer cover. Reinforce the seams with extra stitching or by using a serger. Use a high-quality filling that will hold its shape and resist compression. You can also add an inner lining to protect the filling from wear and tear. Avoid placing the cushion in direct sunlight or in areas with high humidity, as this can damage the fabric and filling. Regularly fluff the cushion to maintain its shape and prevent it from becoming flat. By taking these precautions, you can ensure that your DIY floor puff cushion will last for years to come.
What if I don’t have enough fabric scraps?
If you don’t have enough fabric scraps to create a floor puff cushion, don’t worry! You can purchase fabric remnants or discounted fabric from your local fabric store. You can also ask friends and family if they have any fabric scraps they’re willing to donate. Another option is to create a patchwork design by piecing together smaller pieces of fabric. This is a great way to use up small scraps and create a unique and colorful cushion. You can also consider using old clothing items, such as jeans, t-shirts, or sweaters, as fabric sources. Get creative and think outside the box – you might be surprised at what you can come up with!
How can I make my floor puff cushion more comfortable?
To make your floor puff cushion more comfortable, choose a soft and plush fabric for the outer cover. Use a filling that conforms to the body and provides good support. Consider adding a layer of memory foam or batting to the top of the cushion for extra cushioning. You can also adjust the amount of filling to achieve your desired level of firmness. Experiment with different shapes and sizes to find the most comfortable design for your needs. Don’t be afraid to try out different combinations of fabrics and fillings until you find the perfect combination for ultimate comfort.
Leave a Comment