

DIY Indoor Herb Garden: Imagine stepping into your kitchen and snipping fresh basil for your pasta, or adding a sprig of rosemary to your roasted chicken, all without leaving the comfort of your home. Sounds dreamy, right? Well, it’s absolutely achievable with your very own DIY indoor herb garden! For centuries, cultivating herbs has been a cornerstone of cultures worldwide, from ancient Egyptians using them for medicinal purposes to medieval monks tending their monastery gardens.
But you don’t need to be a seasoned gardener to enjoy the benefits. In today’s fast-paced world, having a readily available source of fresh, flavorful herbs is not just a luxury, it’s a game-changer. Think about it: no more last-minute grocery store runs for that one crucial ingredient, no more wilted herbs languishing in the fridge. Plus, growing your own herbs is incredibly rewarding and a fantastic way to connect with nature, even if you only have a small space.
This article is your ultimate guide to creating a thriving DIY Indoor Herb Garden. I’ll walk you through everything from choosing the right herbs and containers to providing the perfect light and watering schedule. Get ready to unleash your inner green thumb and transform your kitchen into a fragrant, flavorful oasis! Let’s get started!
DIY Indoor Herb Garden: Fresh Flavors at Your Fingertips!
Hey there, fellow plant enthusiasts! Are you tired of buying wilted, overpriced herbs from the grocery store? Do you dream of having fresh basil for your pasta, mint for your mojitos, and rosemary for your roasted chicken, all within arm’s reach? Well, you’ve come to the right place! I’m going to walk you through creating your very own indoor herb garden. It’s easier than you think, and the rewards are incredibly delicious.
What You’ll Need: The Essential Supplies
Before we dive in, let’s gather our supplies. This is where you can get creative and personalize your garden to fit your style and space.
* Containers: This is where the fun begins! You can use anything from terracotta pots to repurposed mason jars, or even a stylish trough planter. Just make sure your containers have drainage holes. Trust me, your herbs will thank you.
* Potting Mix: Don’t skimp on the soil! Use a high-quality potting mix specifically formulated for containers. Avoid using garden soil, as it can compact and not drain well in pots.
* Herb Seeds or Seedlings: You can start your herbs from seeds, which is more economical, or buy seedlings from your local nursery for a quicker start. Choose herbs you love to cook with and that thrive indoors, like basil, mint, chives, parsley, oregano, thyme, and rosemary.
* Grow Lights (Optional but Recommended): If you don’t have a sunny windowsill, grow lights are essential for providing your herbs with the light they need to flourish. LED grow lights are energy-efficient and work wonders.
* Watering Can or Spray Bottle: A gentle watering can or spray bottle will help you water your herbs without overwatering them.
* Small Trowel or Spoon: For planting and transplanting your herbs.
* Labels: To keep track of what you’ve planted. You can use plant markers, popsicle sticks, or even write directly on the pots with a permanent marker.
* Gravel or Pebbles (Optional): To improve drainage in the bottom of your containers.
* Tray or Saucer: To catch excess water and protect your surfaces.
Getting Started: Planting Your Herbs
Now that we have our supplies, let’s get our hands dirty!
1. Prepare Your Containers: If your containers don’t have drainage holes, you’ll need to drill some. Place a layer of gravel or pebbles at the bottom of each container to improve drainage. This helps prevent root rot, which is a common problem with indoor plants.
2. Fill with Potting Mix: Fill your containers with potting mix, leaving about an inch of space at the top. Gently pat down the soil to remove any air pockets.
3. Plant Your Seeds or Seedlings:
* From Seeds: Follow the instructions on your seed packet for planting depth and spacing. Generally, you’ll want to sow seeds about ¼ inch deep and space them about an inch apart. Gently cover the seeds with soil and water lightly.
* From Seedlings: Gently remove the seedlings from their nursery pots. Loosen the roots slightly with your fingers. Dig a small hole in the potting mix and place the seedling in the hole. Backfill with soil and gently pat down. Space seedlings according to their mature size, usually a few inches apart.
4. Water Thoroughly: Water your newly planted herbs thoroughly, until water drains out of the drainage holes. This helps settle the soil and encourages root growth.
5. Label Your Herbs: Don’t forget to label your herbs! This will help you remember what you’ve planted and avoid any confusion later on.
Location, Location, Location: Finding the Perfect Spot
Choosing the right location for your indoor herb garden is crucial for its success.
1. Sunlight: Most herbs need at least 6 hours of sunlight per day. A south-facing windowsill is ideal. If you don’t have enough natural light, you’ll need to supplement with grow lights.
2. Temperature: Herbs generally prefer temperatures between 60-75°F (15-24°C). Avoid placing your herbs near drafts or heat sources.
3. Humidity: Indoor air can be dry, especially during the winter months. To increase humidity, you can group your plants together, use a humidifier, or place your pots on a tray filled with pebbles and water. Make sure the bottom of the pot isn’t sitting directly in the water.
Watering Wisdom: Keeping Your Herbs Hydrated
Watering is one of the most important aspects of caring for your indoor herb garden.
1. Check the Soil Moisture: Before watering, check the soil moisture by sticking your finger about an inch into the soil. If the soil feels dry, it’s time to water. If it feels moist, wait a day or two and check again.
2. Water Thoroughly: When you water, water thoroughly until water drains out of the drainage holes. This ensures that the entire root system is getting hydrated.
3. Avoid Overwatering: Overwatering is a common mistake that can lead to root rot. Make sure your containers have drainage holes and avoid letting your plants sit in standing water.
4. Water in the Morning: Water your herbs in the morning so that the foliage has time to dry before nightfall. This helps prevent fungal diseases.
Feeding Your Herbs: Providing Essential Nutrients
Like all plants, herbs need nutrients to grow and thrive.
1. Fertilize Regularly: Fertilize your herbs every 2-4 weeks with a balanced liquid fertilizer. Follow the instructions on the fertilizer label.
2. Organic Options: If you prefer organic gardening, you can use compost tea or fish emulsion to fertilize your herbs.
3. Don’t Over-Fertilize: Over-fertilizing can burn the roots of your herbs. It’s better to under-fertilize than to over-fertilize.
Harvesting Your Herbs: Enjoying the Fruits (or Leaves!) of Your Labor
Harvesting your herbs regularly encourages them to grow bushier and more productive.
1. Harvest Regularly: Start harvesting your herbs when they are about 6-8 inches tall.
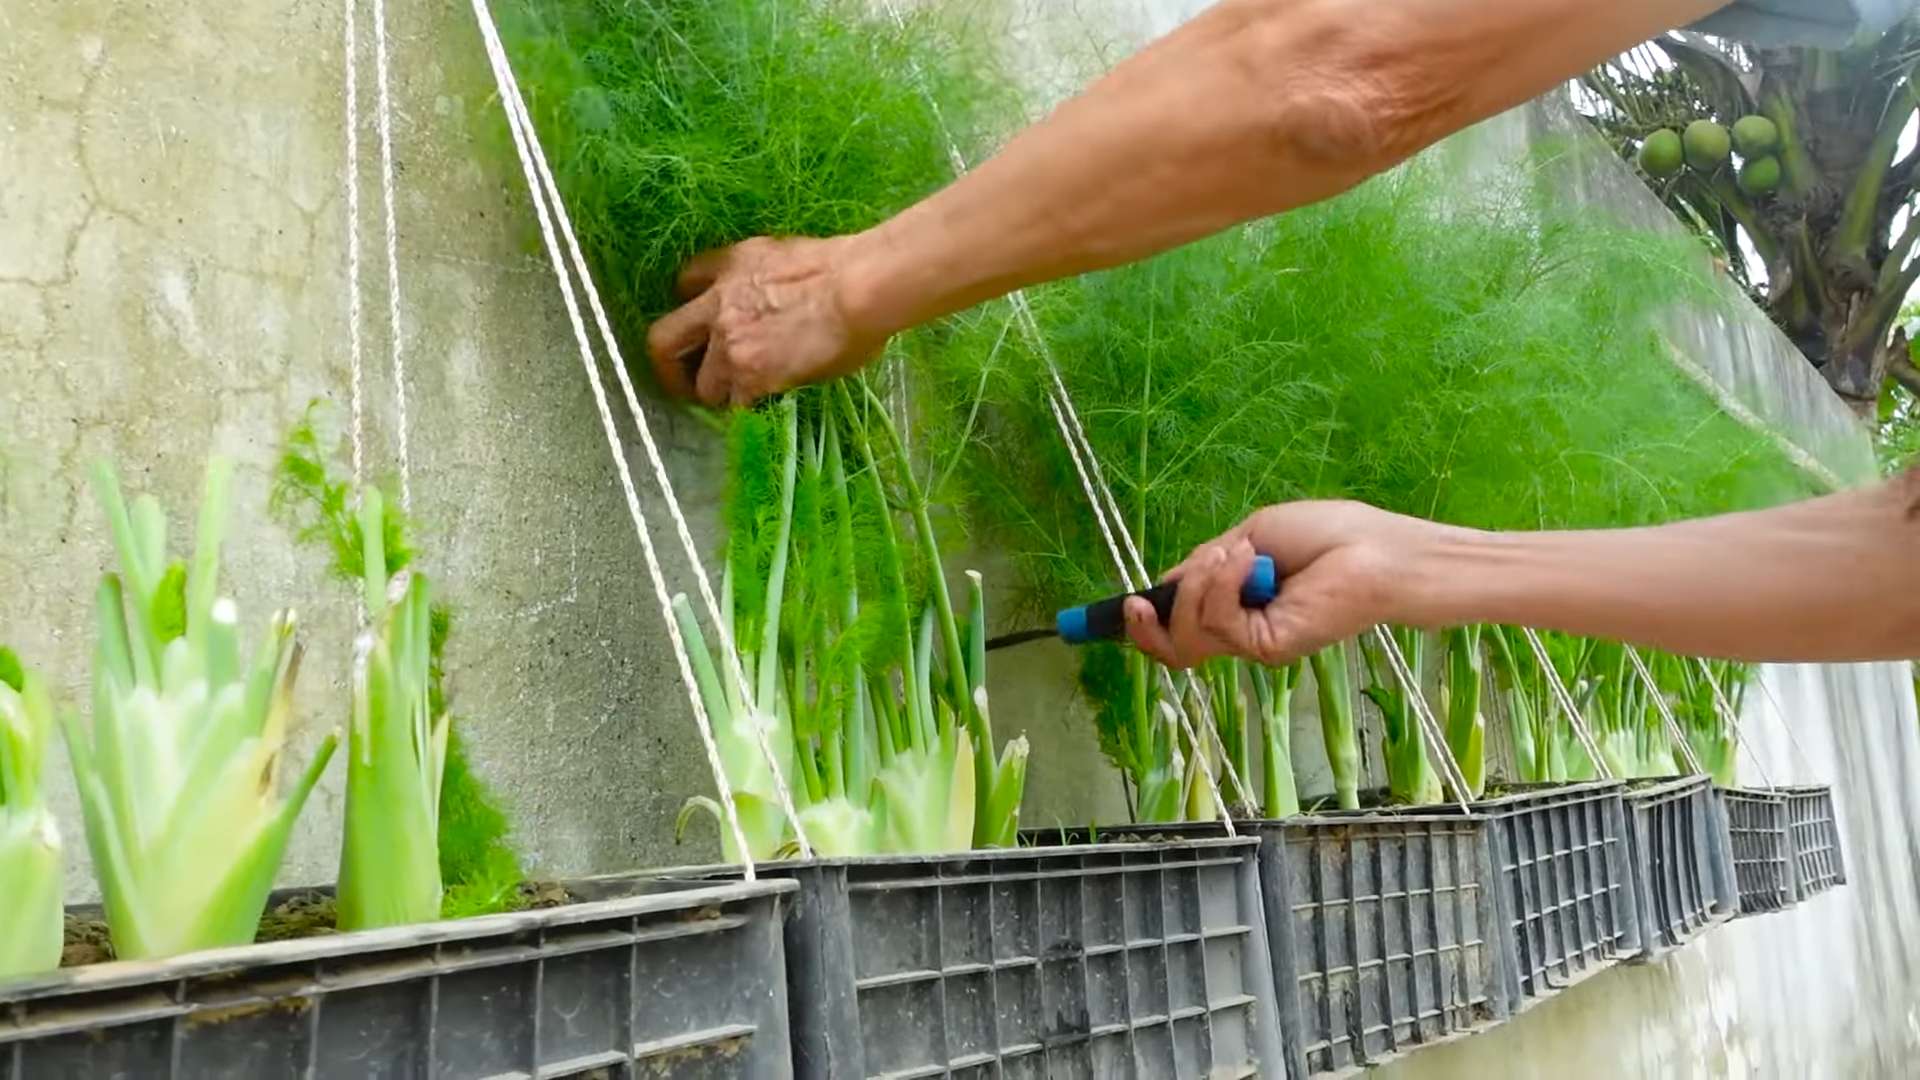
2. Pinch or Snip: Use your fingers or scissors to pinch or snip off the leaves.
3. Harvest from the Top: Harvest from the top of the plant, just above a set of leaves. This will encourage the plant to branch out and produce more leaves.
4. Don’t Harvest Too Much: Don’t harvest more than one-third of the plant at a time. This can stress the plant and slow down its growth.
Troubleshooting: Common Problems and Solutions
Even with the best care, you may encounter some problems with your indoor herb garden. Here are some common issues and how to fix them:
* Yellowing Leaves: This can be caused by overwatering, underwatering, nutrient deficiencies, or pests. Check the soil moisture, fertilize your herbs, and inspect them for pests.
* Leggy Growth: This is usually caused by insufficient light. Move your herbs to a sunnier location or supplement with grow lights.
* Powdery Mildew: This is a fungal disease that appears as a white powdery coating on the leaves. Improve air circulation, avoid overhead watering, and treat with a fungicide if necessary.
* Pests: Common pests that can infest indoor herb gardens include aphids, spider mites, and whiteflies. Inspect your plants regularly and treat with insecticidal soap or neem oil if necessary.
Choosing the Right Herbs: My Top Recommendations
Not all herbs are created equal when it comes to indoor growing. Here are some of my favorites that thrive indoors:
* Basil: A classic herb for Italian dishes. Choose compact varieties like ‘Spicy Globe’ or ‘Dwarf Greek’.
* Mint: Perfect for mojitos, teas, and desserts. Be sure to grow mint in its own container, as it can be invasive.
* Chives: A mild onion-flavored herb that’s great for salads, soups, and dips.
* Parsley: A versatile herb that’s used in many cuisines. Choose flat-leaf or curly parsley.
* Oregano: A flavorful herb that’s essential for Italian and Greek dishes.
* Thyme: A fragrant herb that’s great for roasting meats and vegetables.
* Rosemary: A woody herb that’s perfect for flavoring meats, poultry, and potatoes.
Extra Tips for a Thriving Herb Garden
* Rotate Your Plants: Rotate your plants regularly to ensure that all sides get equal exposure to light.
* Prune Regularly: Prune your herbs regularly to encourage bushier growth and prevent them from becoming leggy.
* Clean Your Tools: Clean your pruning shears and other tools regularly to prevent the spread of diseases.
*
Conclusion
So, there you have it! Creating your own DIY Indoor Herb Garden isn’t just a fun project; it’s a gateway to fresher, more flavorful meals and a touch of green serenity right in your home. Forget those sad, wilted herbs from the grocery store. Imagine stepping into your kitchen and snipping off exactly what you need, bursting with aroma and vitality.
This isn’t just about convenience; it’s about control. You know exactly where your herbs are coming from, what they’ve been exposed to, and how they’ve been cared for. That’s peace of mind you can’t buy. Plus, the satisfaction of nurturing something from seed (or seedling!) to plate is incredibly rewarding.
And the best part? This DIY Indoor Herb Garden is endlessly customizable. Feeling adventurous? Try growing exotic herbs like lemon verbena or Thai basil. Short on space? A vertical garden or a collection of small pots on a windowsill works wonders. Want to get the kids involved? Let them help with planting and watering – it’s a fantastic way to teach them about nature and where their food comes from.
Consider these variations to truly personalize your herb garden:
* Hydroponics: For a soil-free option, explore hydroponic systems. They’re efficient, clean, and can be surprisingly easy to set up.
* Mason Jar Garden: Repurpose mason jars for a rustic and charming look. They’re perfect for smaller herbs like chives or parsley.
* Pallet Garden: Upcycle a wooden pallet into a vertical herb garden. This is a great space-saving solution for balconies or small patios.
* Themed Gardens: Create themed gardens based on cuisine. A Mediterranean garden with oregano, thyme, and rosemary, or an Italian garden with basil, parsley, and sage.
Don’t be intimidated if you’re a beginner. Start small, choose herbs that are known to be easy to grow (mint, chives, and basil are excellent choices), and don’t be afraid to experiment. The beauty of a DIY project is that you learn as you go.
We truly believe that everyone can benefit from having a little bit of green in their lives, and a DIY Indoor Herb Garden is the perfect way to achieve that. It’s a simple, affordable, and incredibly rewarding project that will enhance your cooking, your home, and your overall well-being.
So, what are you waiting for? Gather your supplies, choose your herbs, and get planting! We’re confident that you’ll love the results. And most importantly, we want to hear about your experience. Share your photos, tips, and challenges in the comments below. Let’s create a community of indoor herb gardeners and inspire each other to grow! Let us know what herbs you chose for your DIY Indoor Herb Garden and how they are doing.
Frequently Asked Questions (FAQ)
What are the easiest herbs to grow indoors?
Some of the easiest herbs to grow indoors, especially for beginners, include:
* Basil: Basil is a popular choice for its culinary versatility and relatively easy growing requirements. It needs plenty of sunlight (at least 6 hours a day) and well-draining soil. Water regularly, but avoid overwatering. Pinch off the flower buds to encourage leaf growth.
* Mint: Mint is incredibly easy to grow, almost too easy! It can be quite invasive, so it’s best to keep it in its own pot. It prefers partial shade and moist soil. There are many varieties of mint to choose from, such as peppermint, spearmint, and chocolate mint.
* Chives: Chives are a hardy and low-maintenance herb that can tolerate a range of conditions. They prefer full sun but can also grow in partial shade. Water regularly and snip off the leaves as needed.
* Parsley: Parsley is another versatile herb that’s relatively easy to grow indoors. It needs at least 4 hours of sunlight a day and well-draining soil. There are two main types of parsley: curly and flat-leaf (Italian).
* Oregano: Oregano is a Mediterranean herb that thrives in sunny locations and well-draining soil. Allow the soil to dry out slightly between waterings.
How much sunlight do indoor herbs need?
Most indoor herbs need at least 6 hours of sunlight per day. A south-facing window is ideal, but east- or west-facing windows can also work. If you don’t have enough natural light, you can supplement with grow lights. LED grow lights are energy-efficient and provide the full spectrum of light that herbs need to thrive. Position the grow lights about 6-12 inches above the plants.
What kind of soil should I use for my indoor herb garden?
Use a well-draining potting mix specifically formulated for containers. Avoid using garden soil, as it can be too heavy and compact for indoor plants. A good potting mix will retain moisture while still allowing for proper drainage. You can also add perlite or vermiculite to improve drainage.
How often should I water my indoor herbs?
The frequency of watering will depend on the type of herb, the size of the pot, and the environmental conditions. In general, water when the top inch of soil feels dry to the touch. Avoid overwatering, as this can lead to root rot. Make sure the pot has drainage holes to allow excess water to escape.
How do I fertilize my indoor herbs?
Fertilize your indoor herbs every 2-4 weeks during the growing season (spring and summer) with a balanced liquid fertilizer diluted to half strength. Avoid fertilizing during the dormant season (fall and winter). Organic fertilizers, such as compost tea or fish emulsion, are also good options.
How do I prevent pests and diseases in my indoor herb garden?
Regularly inspect your herbs for pests and diseases. Common pests include aphids, spider mites, and whiteflies. If you find pests, you can try washing them off with a strong stream of water or using insecticidal soap. To prevent diseases, make sure your herbs have good air circulation and avoid overwatering.
Can I grow herbs from seeds indoors?
Yes, you can grow herbs from seeds indoors. Start the seeds in seed-starting trays or small pots filled with seed-starting mix. Keep the soil moist and warm, and provide plenty of light. Once the seedlings have developed a few sets of true leaves, you can transplant them into larger pots.
How do I harvest my indoor herbs?
Harvest your herbs regularly to encourage new growth. Snip off the leaves or stems as needed, using sharp scissors or pruning shears. Avoid removing more than one-third of the plant at a time.
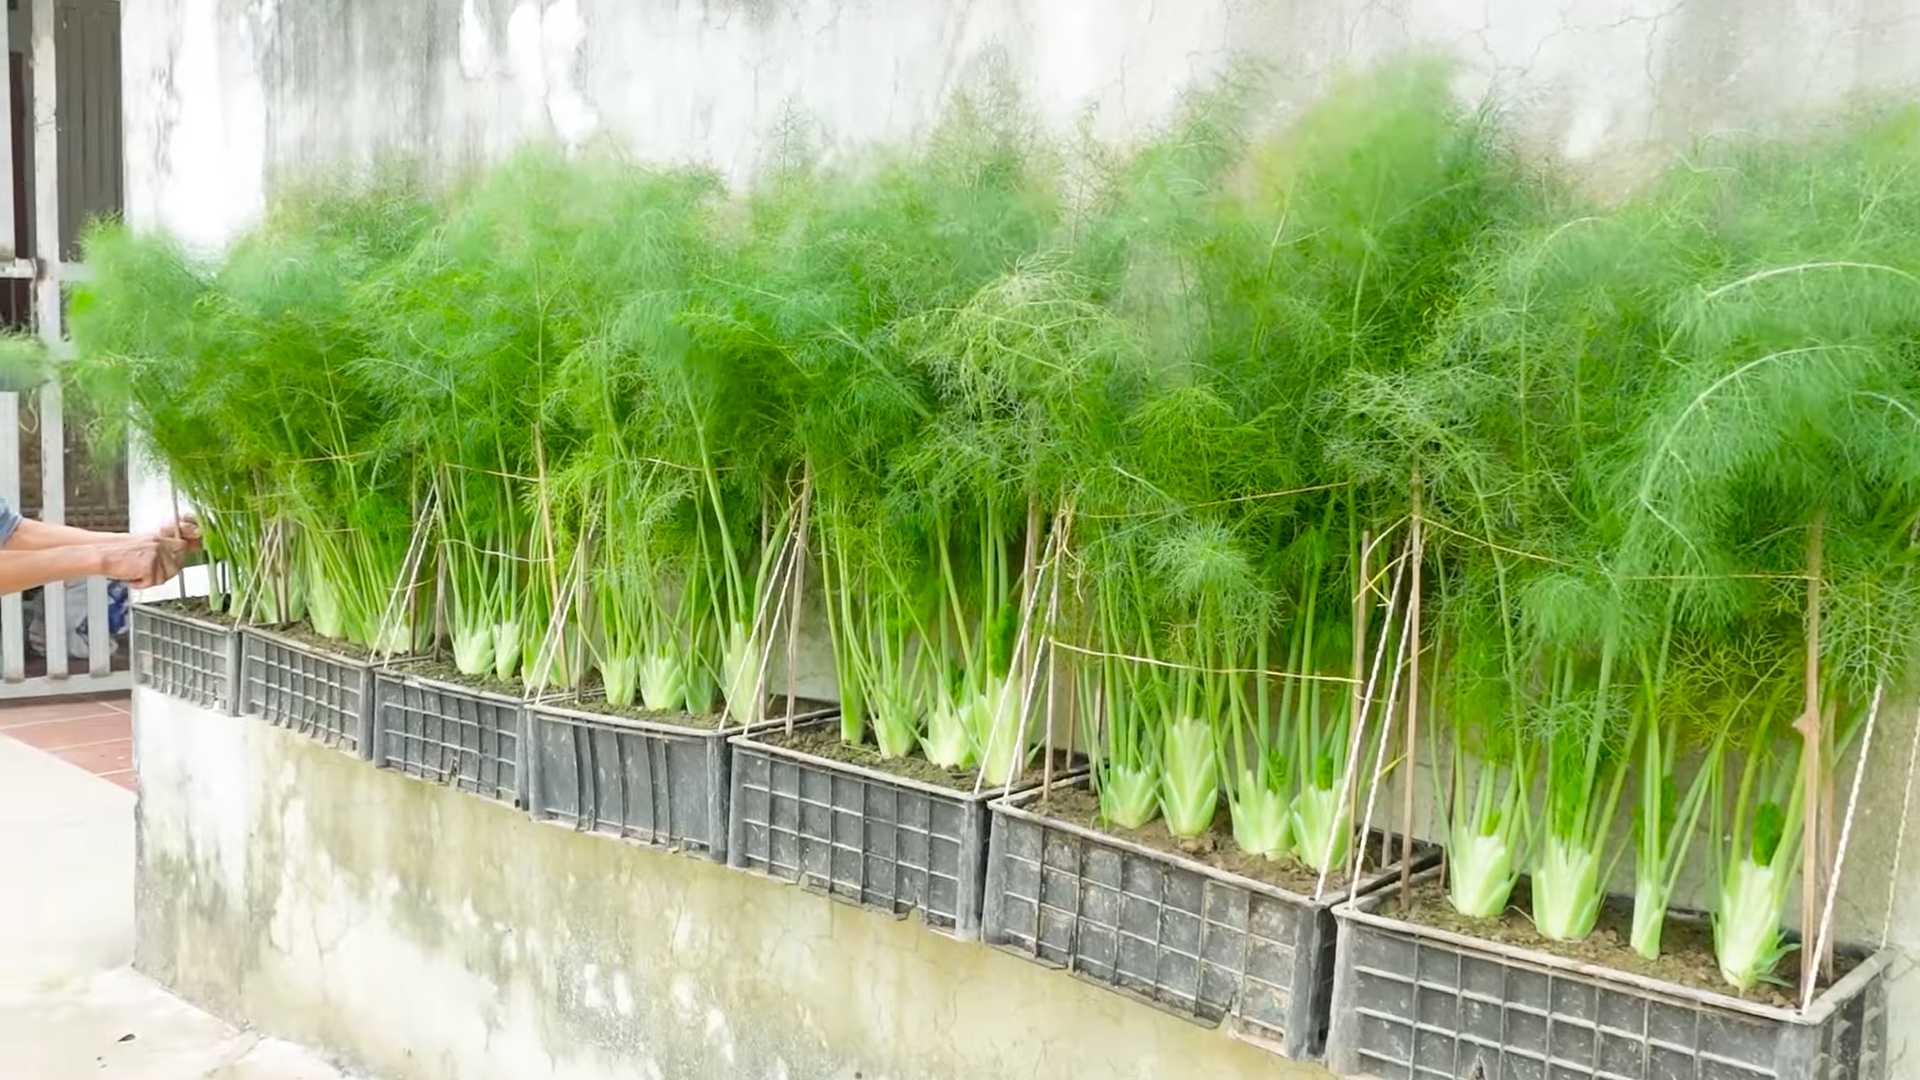
What herbs should I avoid planting together?
While many herbs can happily coexist, some combinations are best avoided. For example, mint is very invasive and can quickly take over a pot, crowding out other herbs. Fennel can also inhibit the growth of other plants. It’s generally best to plant herbs with similar growing requirements together.
How do I keep my indoor herb garden looking its best?
Regularly prune your herbs to encourage bushier growth and prevent them from becoming leggy. Remove any dead or yellowing leaves. Rotate the pots regularly to ensure that all sides of the plants receive equal sunlight. And most importantly, enjoy the process! Growing your own herbs is a rewarding and enjoyable experience.

Leave a Comment