

DIY Natural Drain Cleaner: Are you tired of slow-draining sinks and the harsh chemicals that promise to fix them? I know I am! There’s nothing more frustrating than standing in ankle-deep water while showering, or dealing with a kitchen sink that refuses to cooperate after a delicious meal. But before you reach for that bottle of corrosive drain cleaner, let’s explore a gentler, more effective, and frankly, more satisfying solution: a DIY natural drain cleaner.
For generations, resourceful homeowners have relied on simple, readily available ingredients to tackle household woes. Think about it – our grandmothers didn’t have access to the plethora of chemical solutions we do today. They used what they had: vinegar, baking soda, and a little elbow grease. This tradition of resourcefulness is not only cost-effective but also environmentally friendly. It’s about taking control and knowing exactly what’s going down your drain – literally!
Why is a DIY natural drain cleaner so important in today’s world? Well, for starters, commercial drain cleaners are often packed with harsh chemicals that can damage your pipes, pollute our waterways, and even pose a health risk to you and your family. Plus, they can be expensive! This DIY approach offers a safer, cheaper, and more sustainable way to keep your drains flowing freely. I’m excited to share some simple yet powerful recipes and techniques that will help you conquer those clogs without harming your home or the planet. Let’s get started!
DIY Natural Drain Cleaner: Banishing Clogs the Eco-Friendly Way
Tired of harsh chemicals eating away at your pipes and polluting the environment every time your drain gets clogged? Me too! That’s why I’ve perfected a super effective, all-natural drain cleaner that uses ingredients you probably already have in your pantry. It’s safe, affordable, and works wonders on most common clogs. Let’s get started!
What Causes Clogs Anyway?
Before we dive into the DIY magic, let’s quickly understand what we’re fighting. Most drain clogs are caused by a buildup of:
* Hair (the biggest culprit, especially in bathroom sinks and showers)
* Grease and fats (kitchen sinks, beware!)
* Soap scum (a nasty combination of soap and hard water minerals)
* Food particles (even with a strainer, some always sneak through)
* Small objects (think toothpaste caps, bits of plastic, etc.)
This natural drain cleaner is designed to break down these organic materials and flush them away.
The Power Trio: Baking Soda, Vinegar, and Boiling Water
This recipe relies on the simple yet powerful chemical reaction between baking soda (a base) and vinegar (an acid). This reaction creates carbon dioxide gas, which helps to loosen and break down the clog. The boiling water then flushes everything away.
What You’ll Need:
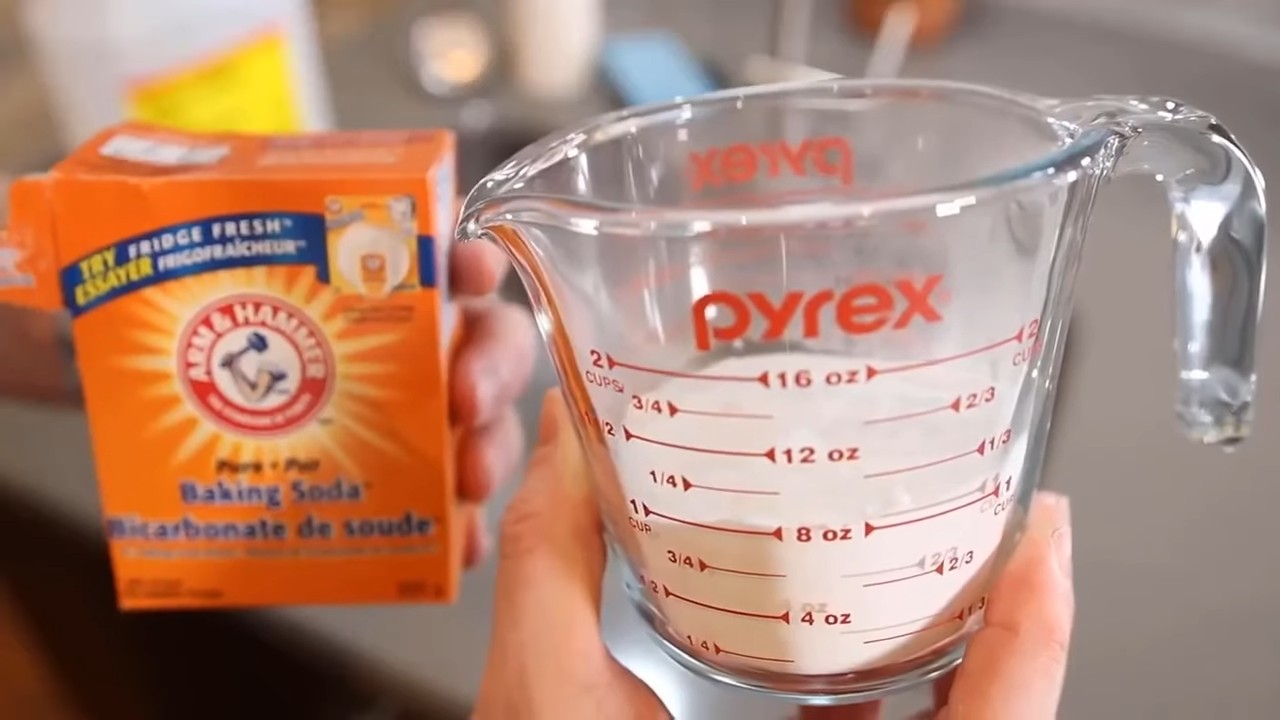
* 1 cup baking soda
* 2 cups white vinegar
* A kettle or pot for boiling water
* A measuring cup
* A spatula or spoon (optional, for pushing baking soda down the drain)
* Rubber gloves (optional, but recommended for handling hot water)
* Eye protection (optional, but recommended when working with vinegar)
Step-by-Step Instructions: Unclogging Your Drain
Here’s the breakdown of how to use this natural drain cleaner. Follow these steps carefully for the best results.
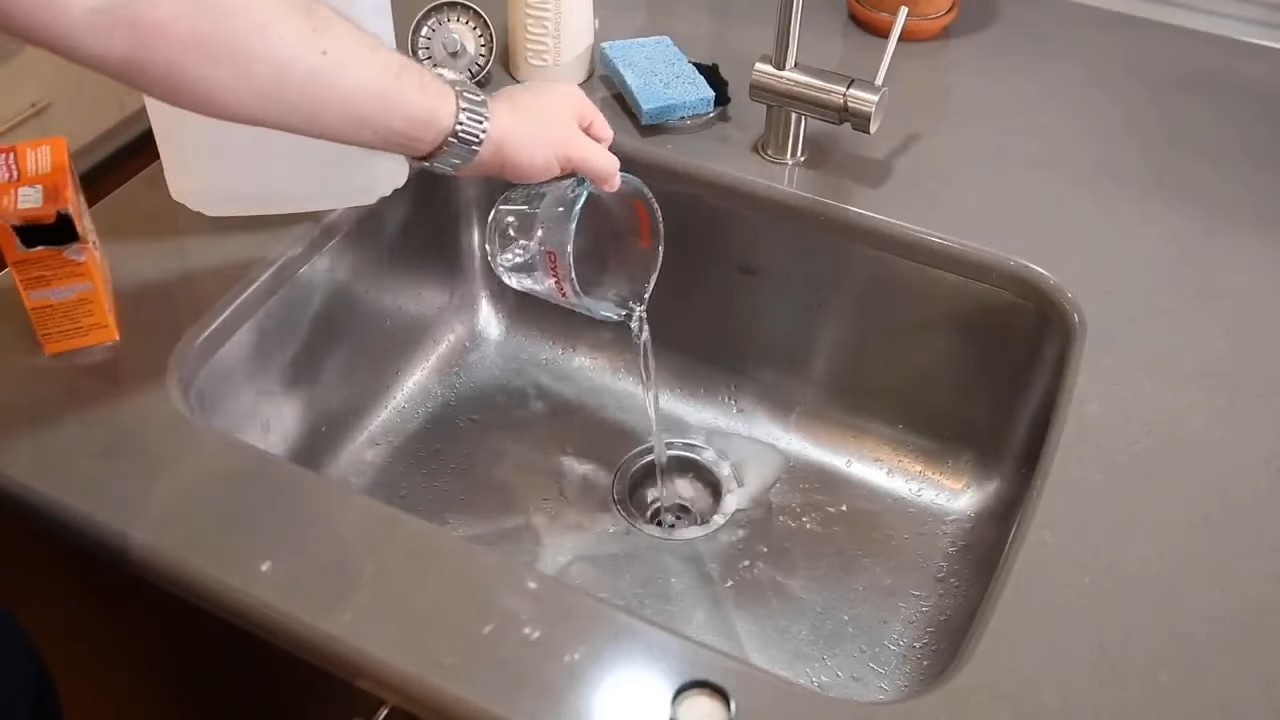
1. Prepare the Drain: The first thing you need to do is remove any standing water from the sink or tub. If there’s a lot of water, you can use a cup or small bucket to scoop it out. This ensures the baking soda and vinegar can directly target the clog.
2. Pour in the Baking Soda: Measure out 1 cup of baking soda and carefully pour it down the drain. Try to get as much of it down the drain as possible. If some sticks to the sides, use a spatula or spoon to gently push it down.
3. Add the Vinegar: Now, measure out 2 cups of white vinegar and slowly pour it down the drain on top of the baking soda. You’ll immediately see and hear the fizzing reaction. This is the carbon dioxide being released, which is what helps break down the clog.
4. Let it Fizz and Sit: This is the crucial part! Let the baking soda and vinegar mixture fizz and work its magic for at least 30 minutes. For tougher clogs, you can let it sit for an hour or even overnight. The longer it sits, the more time it has to break down the clog. Don’t skip this step!
5. Flush with Boiling Water: After the waiting period, carefully pour a kettle or pot of boiling water down the drain. The hot water helps to flush away the loosened clog and any remaining residue. Be careful when handling boiling water to avoid burns.
6. Repeat if Necessary: If the drain is still clogged after the first attempt, don’t despair! Sometimes, stubborn clogs require a second or even third treatment. Repeat steps 2-5 until the drain is clear.
7. Preventative Measures: Once your drain is clear, take some steps to prevent future clogs. Regularly flush your drain with hot water, especially after washing greasy dishes. You can also pour a cup of baking soda down the drain once a week followed by hot water to keep things flowing smoothly.
Dealing with Stubborn Clogs: Advanced Techniques
Sometimes, the basic baking soda and vinegar method isn’t enough to tackle really tough clogs. Here are a few advanced techniques you can try:
Using a Plunger
A plunger is a simple but effective tool for dislodging clogs.
1. Make sure there’s enough water: There needs to be enough water in the sink or tub to cover the cup of the plunger. If there isn’t, add some water.
2. Create a tight seal: Place the plunger over the drain opening, making sure to create a tight seal.
3. Plunge vigorously: Push and pull the plunger up and down vigorously for several minutes.
4. Remove the plunger: Lift the plunger to see if the water drains. If it does, congratulations! If not, repeat the process.
The Wire Coat Hanger Trick
This is a classic DIY trick for removing hair clogs.
1. Straighten the coat hanger: Straighten out a wire coat hanger as much as possible.
2. Bend the end: Bend one end of the coat hanger into a small hook.
3. Insert into the drain: Carefully insert the hooked end of the coat hanger into the drain opening.
4. Fish for the clog: Use the hook to fish around for the clog. You’ll likely pull out a disgusting mass of hair and gunk.
5. Dispose of the clog: Dispose of the clog in the trash.
6. Flush with hot water: Flush the drain with hot water to remove any remaining debris.
Enzyme Drain Cleaners
Enzyme drain cleaners are a natural alternative to chemical drain cleaners. They use enzymes to break down organic matter.
1. Follow the instructions: Follow the instructions on the enzyme drain cleaner bottle.
2. Pour into the drain: Pour the enzyme drain cleaner down the drain.
3. Let it sit: Let it sit for the recommended amount of time, usually overnight.
4. Flush with water: Flush the drain with water.
Important Safety Tips
* Always wear rubber gloves when handling hot water or potentially contaminated drain water.
* Consider eye protection when working with vinegar, as it can irritate your eyes.
* Never mix baking soda and vinegar with other drain cleaners, especially chemical ones. This can create dangerous fumes.
* Be careful when handling boiling water to avoid burns.
* If you have a septic system, avoid using excessive amounts of vinegar, as it can disrupt the balance of bacteria in the tank.
Why This Works: The Science Behind the Fizz
The magic of this DIY drain cleaner lies in the chemical reaction between baking soda (sodium bicarbonate) and vinegar (acetic acid). When these two substances combine, they create:
* Carbon Dioxide (CO2): This is the gas that causes the fizzing. The bubbles help to loosen and break down the clog.
* Water (H2O): A harmless byproduct of the reaction.
* Sodium Acetate (CH3COONa): A salt that is also a harmless byproduct.
The carbon dioxide gas is the key to this method’s effectiveness. It creates pressure within the drain, helping to dislodge the clog and push it along.
When to Call a Professional Plumber
While this DIY drain cleaner is effective for many common clogs, there are times when you need to call a professional plumber. These include:
* Severe clogs that don’t respond to any DIY methods. If you’ve tried everything and the drain is still completely blocked, it’s time to call in the experts.
* Recurring clogs. If you’re constantly dealing with clogged drains, there may be an underlying problem with your plumbing system.
* Suspected pipe damage. If you suspect that your pipes are damaged or leaking, it’s important to call a plumber right away to prevent further damage.
* Sewage backup. If you experience a sewage backup, it’s a serious health hazard and requires immediate professional attention.
Preventing Future Clogs: Proactive Measures
Prevention is always better than cure! Here are some tips to help prevent future drain clogs:
* Use drain strainers: Place drain strainers in all of your sinks and tubs to catch hair, food particles, and other debris.
* Avoid pouring grease down the drain: Dispose of grease in a container and throw it away.
* Flush with hot water regularly: Flush your drains with hot water after each use, especially after washing greasy dishes.
* Pour baking soda and vinegar down the drain weekly: As a preventative measure, pour a cup of baking soda down the drain followed by hot water once a week.
* Avoid flushing non-flushable items down the toilet: Only flush toilet paper down the toilet. Never flush items like feminine hygiene products, diapers, or wipes.
By following these tips, you can keep your drains clear and avoid the hassle of dealing with clogs.
Final Thoughts
This DIY natural drain cleaner is a simple, effective,
Conclusion
So, there you have it! Ditching the harsh chemicals and embracing this DIY natural drain cleaner is more than just a trend; it’s a conscious choice for a healthier home and a happier planet. We’ve walked you through a simple, effective method using ingredients you likely already have in your pantry: baking soda, vinegar, and boiling water. But why is this DIY trick a must-try?
Firstly, it’s incredibly cost-effective. Compare the price of baking soda and vinegar to those expensive, store-bought drain cleaners, and the savings are immediately apparent. You’re getting a powerful cleaning solution without breaking the bank. Secondly, and perhaps more importantly, you’re eliminating the risk of exposure to harmful chemicals. Commercial drain cleaners often contain corrosive substances that can irritate your skin, eyes, and respiratory system. With our natural alternative, you can breathe easy knowing you’re not introducing toxins into your home environment.
Thirdly, it’s surprisingly effective! The combination of baking soda and vinegar creates a fizzing action that helps to loosen clogs and break down grease and grime. The boiling water then flushes everything away, leaving your drains clean and fresh. While it might not tackle the most severe blockages instantly, regular use of this DIY cleaner can prevent buildup and keep your drains flowing smoothly.
Looking for variations? Absolutely! For a boost of freshness, add a few drops of your favorite essential oil to the baking soda before pouring it down the drain. Lemon, tea tree, and eucalyptus oils are all excellent choices for their antibacterial and deodorizing properties. If you suspect a particularly stubborn clog, try letting the baking soda and vinegar mixture sit in the drain for a longer period, perhaps even overnight, before flushing with boiling water. You can also use washing soda instead of baking soda for a stronger cleaning action, but be sure to wear gloves as washing soda can be slightly irritating to the skin.
Another variation involves using salt along with baking soda. Mix 1/2 cup of baking soda with 1/4 cup of salt and pour it down the drain, followed by boiling water. The salt acts as an abrasive, helping to scrub away stubborn debris.
We understand that switching to a DIY solution might seem daunting at first, but we encourage you to give it a try. The benefits for your health, your wallet, and the environment are simply too significant to ignore. Plus, it’s incredibly satisfying to know you’re taking control of your home cleaning routine in a safe and sustainable way.
So, roll up your sleeves, gather your ingredients, and get ready to experience the power of natural cleaning. We’re confident that you’ll be pleasantly surprised by the results. And most importantly, we want to hear about your experience! Share your tips, tricks, and success stories in the comments below. Let’s build a community of eco-conscious cleaners who are committed to keeping our homes and our planet healthy. What worked best for you? Did you try any variations? We’re eager to learn from your experiences and help others discover the magic of this simple yet effective DIY natural drain cleaner. Let’s ditch the chemicals and embrace a greener, cleaner future, one drain at a time!
Frequently Asked Questions (FAQ)
1. How often should I use this DIY natural drain cleaner?
We recommend using this DIY drain cleaner at least once a month as a preventative measure. If you notice your drains are draining slowly, you can use it more frequently, perhaps once a week, until the problem is resolved. Regular use will help prevent buildup and keep your drains flowing smoothly. For heavily used drains, like those in the kitchen, consider using it every two weeks.
2. Is this DIY drain cleaner safe for all types of pipes?
Generally, yes, this DIY drain cleaner is safe for most types of pipes, including PVC, copper, and older metal pipes. However, if you have very old or fragile pipes, it’s always a good idea to exercise caution. The boiling water could potentially soften or weaken older pipes, so you might consider using hot tap water instead. If you’re unsure about the condition of your pipes, consult a plumber before using any drain cleaner, natural or otherwise.
3. What if the drain is completely clogged? Will this DIY cleaner work?
While this DIY cleaner is effective for preventing clogs and clearing minor blockages, it might not be strong enough to tackle a completely clogged drain. If your drain is completely blocked, you might need to try a different approach first. Consider using a plunger to try to dislodge the clog. You can also try using a drain snake to physically remove the blockage. If these methods don’t work, you may need to call a plumber. Once the drain is partially cleared, you can then use this DIY cleaner to help remove any remaining debris and prevent future clogs.
4. Can I use this DIY cleaner in my toilet?
While the ingredients are safe for use in toilets, this particular method might not be the most effective for toilet clogs. Toilets often have larger and more complex clogs that require more force to dislodge. A plunger is usually the best first step for a clogged toilet. If that doesn’t work, a toilet auger (also known as a closet auger) is a specialized tool designed to break up or retrieve clogs in toilets.
5. What kind of vinegar should I use?
Plain white vinegar is the most effective and readily available option for this DIY drain cleaner. It has a higher acidity level than other types of vinegar, which helps to break down grease and grime. You can use apple cider vinegar in a pinch, but it might not be as effective. Avoid using balsamic vinegar or other flavored vinegars, as they may contain sugars or other additives that could actually contribute to buildup in your drains.
6. How much boiling water should I use?
We recommend using at least 4 cups (1 liter) of boiling water to flush the drain after the baking soda and vinegar mixture. The more boiling water you use, the better it will be at flushing away the loosened debris. Make sure to pour the boiling water slowly and steadily to avoid splashing.
7. Is there anything I should avoid pouring down my drains to prevent clogs?
Yes, there are several things you should avoid pouring down your drains to prevent clogs. These include:
* Grease and oil: These solidify as they cool and can coat the inside of your pipes, leading to blockages.
* Coffee grounds: Coffee grounds don’t dissolve and can accumulate in your pipes, forming a dense clog.
* Hair: Hair is a common culprit for drain clogs, as it can easily get tangled and trap other debris.
* Food scraps: Even small food scraps can contribute to clogs over time. Use a strainer in your sink to catch food particles.
* Paper towels and feminine hygiene products: These items don’t break down easily and can quickly clog your pipes.
8. Can I use this DIY cleaner if I have a septic system?
Yes, this DIY drain cleaner is generally safe for septic systems. The ingredients are natural and won’t harm the beneficial bacteria in your septic tank. However, it’s always a good idea to use it in moderation. Avoid using excessive amounts of baking soda or vinegar, as this could potentially disrupt the balance of your septic system. If you have any concerns, consult with a septic system professional.
9. What if the baking soda and vinegar mixture doesn’t fizz?
The fizzing action is a key part of how this DIY cleaner works. If the mixture doesn’t fizz, it could be due to a few reasons. First, make sure you’re using fresh baking soda. Baking soda can lose its effectiveness over time. Second, ensure that the vinegar is at room temperature. Cold vinegar might not react as strongly with the baking soda. Finally, make sure the drain is relatively dry before adding the baking soda and vinegar. If the drain is already full of water, the mixture will be diluted and won’t fizz as much.
10. Can I use this DIY natural drain cleaner on my garbage disposal?
Yes, you can use this DIY natural drain cleaner on your garbage disposal. In fact, it’s a great way to freshen up your disposal and help prevent odors. Just follow the same steps as you would for a regular drain: pour in the baking soda, followed by the vinegar, let it fizz, and then flush with boiling water. You can also add a few lemon or orange peels to the disposal while it’s running to help deodorize it. Remember to always run cold water while operating your garbage disposal.


Leave a Comment