

DIY onion bottle garden: Ever dreamt of fresh, flavorful onions right at your fingertips, without the hassle of a sprawling garden? I know I have! Imagine snipping off vibrant green onion tops to garnish your tacos or adding a burst of flavor to your stir-fries, all sourced from a recycled plastic bottle sitting right on your windowsill. This isn’t just a gardening project; it’s a mini-revolution in sustainable living and urban farming!
While the concept of container gardening has been around for centuries, with roots tracing back to ancient civilizations cultivating herbs and vegetables in pots, the modern twist of using recycled materials adds a layer of eco-consciousness that resonates deeply today. Think of it as a modern take on the “victory gardens” of the past, adapted for smaller spaces and a more sustainable future.
Let’s face it, not everyone has access to a large garden plot. Apartment dwellers, busy professionals, and those with limited mobility often miss out on the joys of growing their own food. That’s where this DIY onion bottle garden comes in! It’s a simple, space-saving, and budget-friendly way to cultivate fresh onions, regardless of your living situation. Plus, it’s a fantastic way to reduce waste by repurposing plastic bottles. So, grab your scissors, some soil, and let’s get started on this fun and rewarding project! I promise, you’ll be amazed at how easy it is to grow your own delicious onions.
Creating Your Own Charming Onion Bottle Garden
Hey there, fellow plant enthusiasts! Ever thought about turning those humble onion bulbs into a miniature garden inside a bottle? It’s a surprisingly easy and rewarding DIY project that adds a touch of green to any space, even if you’re short on room. Plus, it’s a fantastic way to recycle those plastic bottles we all seem to accumulate. Let’s dive into how you can create your very own onion bottle garden!
What You’ll Need
Before we get started, let’s gather all the necessary materials. This will make the process smoother and more enjoyable.
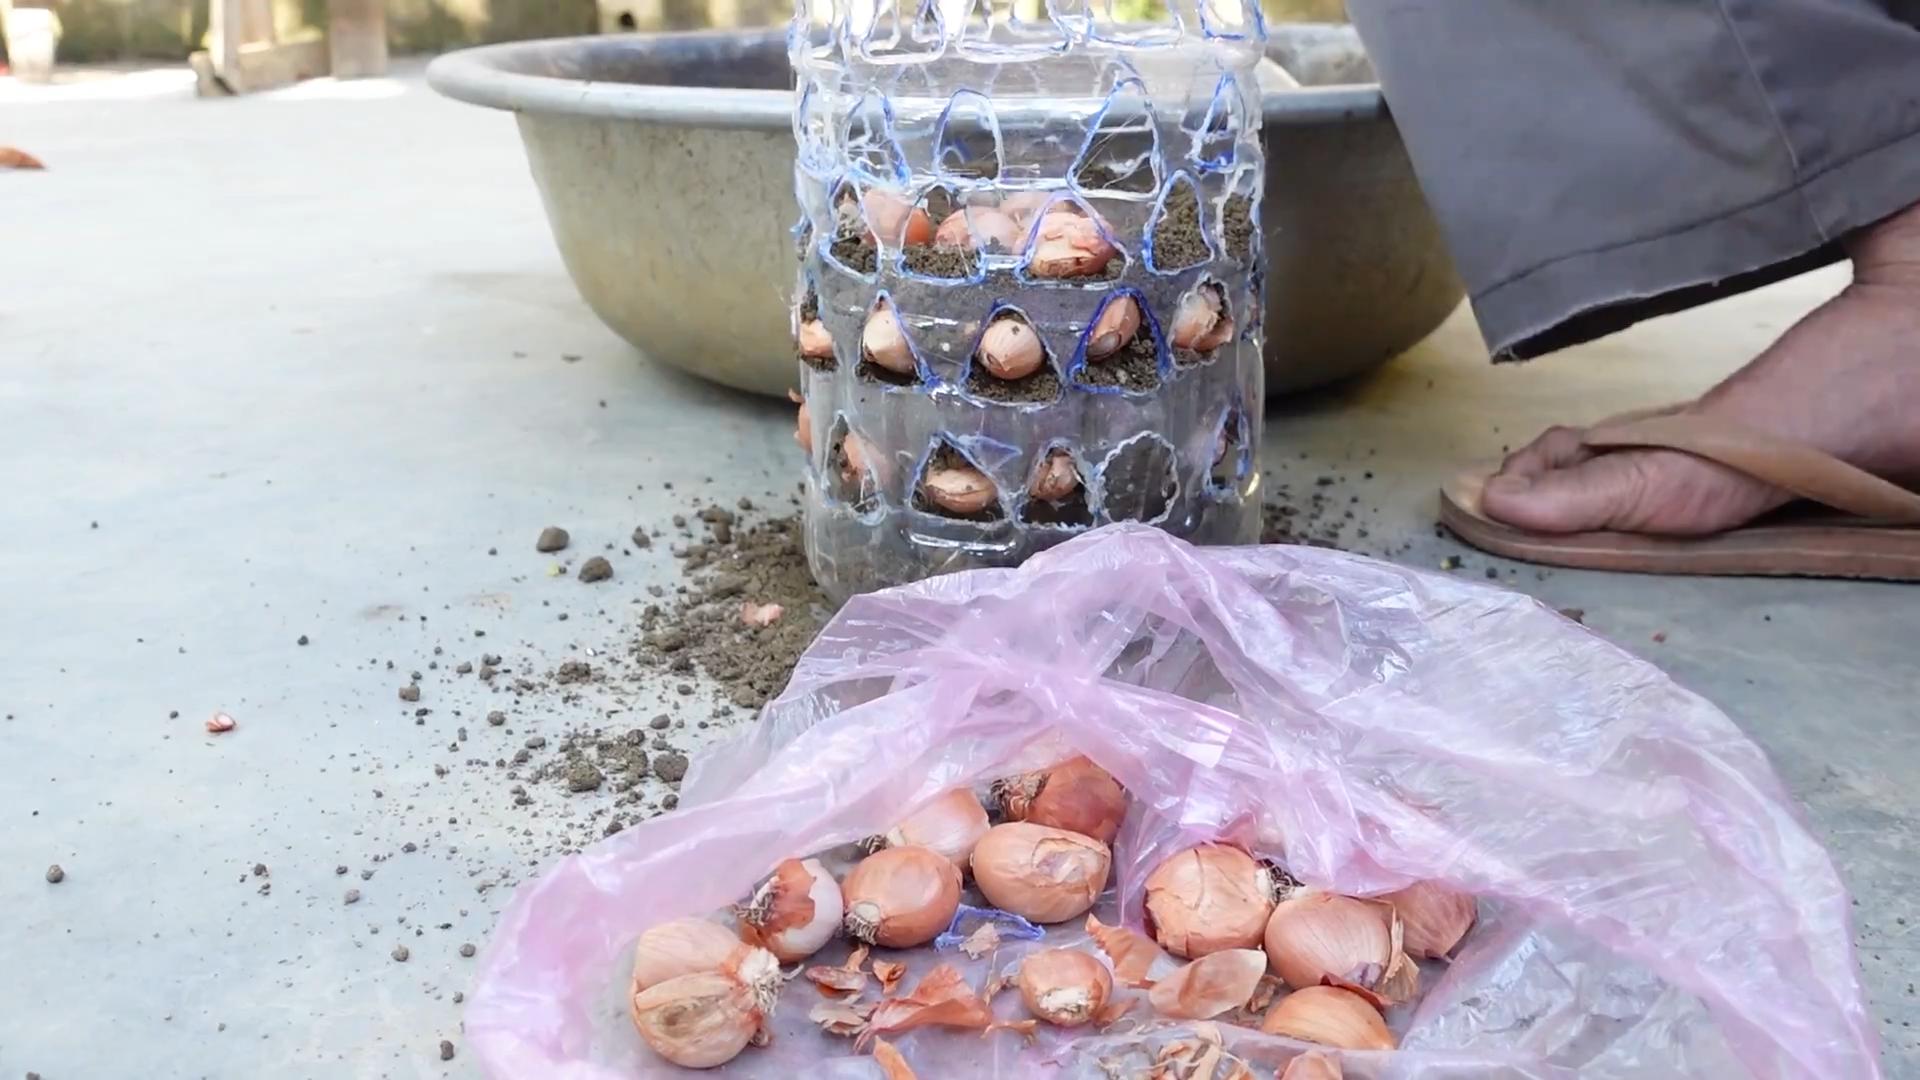
* Plastic Bottle: A clear plastic bottle (2-liter soda bottle works great) is the foundation of our garden. Make sure it’s clean and dry.
* Onion Bulbs: Choose small to medium-sized onion bulbs. You can use regular brown onions, red onions, or even shallots for variety. Look for bulbs that are firm and show signs of sprouting (tiny green shoots).
* Potting Soil: A good quality potting mix is essential for providing nutrients to your onions.
* Gravel or Pebbles: These will form a drainage layer at the bottom of the bottle to prevent waterlogging.
* Activated Charcoal (Optional): A thin layer of activated charcoal can help keep the soil fresh and prevent odors.
* Water: For watering your onion garden.
* Scissors or Utility Knife: For cutting the plastic bottle. Be careful!
* Spray Bottle (Optional): For misting the onion leaves.
* Decorations (Optional): Small stones, moss, or figurines to personalize your garden.
* Gloves (Optional): To keep your hands clean.
Preparing the Bottle
This is where we transform the plastic bottle into a suitable container for our onion garden.
1. Clean the Bottle: Thoroughly wash the plastic bottle with soap and water to remove any residue. Rinse it well and let it dry completely. This is important to prevent mold growth.
2. Cut the Bottle: Decide where you want to cut the bottle. A good option is to cut it about one-third of the way up from the bottom. This will give you a deep enough container for the onion roots to grow. Use scissors or a utility knife to carefully cut along the marked line. Be extremely cautious when using a utility knife.
3. Smooth the Edges (Optional): If the cut edge is sharp, you can smooth it down with sandpaper or cover it with decorative tape to prevent cuts.
Building the Onion Bottle Garden
Now for the fun part – assembling our miniature garden!
1. Drainage Layer: Pour a layer of gravel or pebbles into the bottom of the bottle. This layer should be about 1-2 inches thick. This is crucial for drainage, preventing the onion roots from sitting in water and rotting.
2. Activated Charcoal Layer (Optional): If you’re using activated charcoal, sprinkle a thin layer (about 1/4 inch) over the gravel. This will help absorb any odors and keep the soil fresh.
3. Add Potting Soil: Carefully add potting soil to the bottle, filling it up to about an inch below the cut edge. Gently pat down the soil to remove any air pockets. Don’t pack it too tightly, as the onion roots need room to breathe.
4. Plant the Onion Bulbs: Now it’s time to plant the onion bulbs. Make small holes in the soil, spaced about 1-2 inches apart. Place each onion bulb in a hole, with the pointed end (where the green shoots will emerge) facing upwards. Cover the bulbs with soil, leaving the very top of the bulb exposed. You want to see the tip peeking out.
5. Water Gently: Water the soil gently until it’s moist but not soggy. Avoid overwatering, as this can lead to root rot. A spray bottle can be helpful for this step.
6. Add Decorations (Optional): If you want to personalize your garden, add small stones, moss, or figurines around the onion bulbs. This is your chance to get creative!
Caring for Your Onion Bottle Garden
Maintaining your onion bottle garden is relatively simple. Here’s what you need to do:
* Light: Place your onion bottle garden in a bright location, but avoid direct sunlight, especially during the hottest part of the day. Too much direct sun can scorch the leaves. A spot near a window that receives indirect sunlight is ideal.
* Watering: Water the soil when it feels dry to the touch. Check the moisture level by sticking your finger into the soil. Water thoroughly, but make sure the excess water drains out of the drainage layer. Overwatering is a common mistake, so err on the side of caution.
* Misting: Mist the onion leaves with water every few days to keep them hydrated. This is especially important in dry climates.
* Fertilizing (Optional): You can fertilize your onion bottle garden every few weeks with a diluted liquid fertilizer. Follow the instructions on the fertilizer packaging.
* Rotation: Rotate the bottle garden regularly to ensure that all sides receive equal sunlight. This will prevent the onions from leaning towards the light.
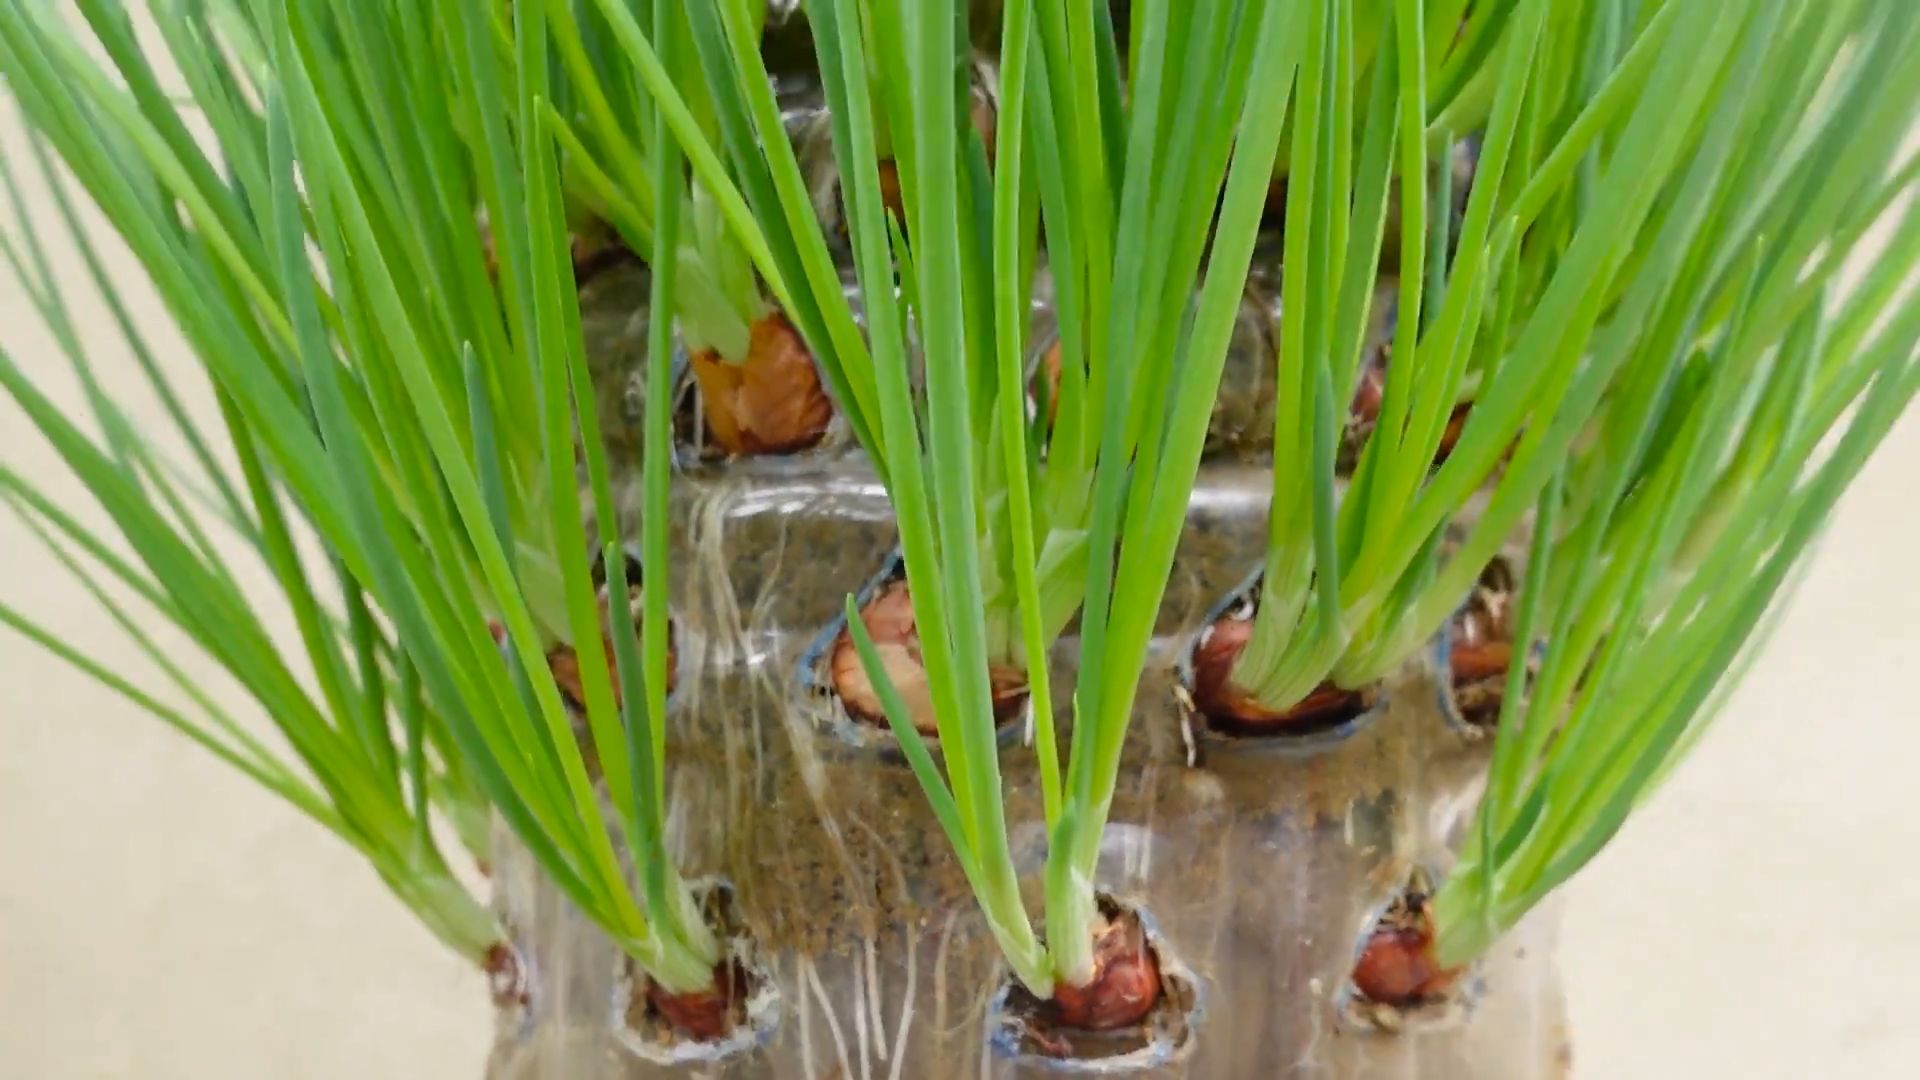
* Harvesting (Optional): You can harvest the green shoots (onion greens) as they grow. Simply snip them off with scissors. This will encourage the onions to produce more shoots.
Troubleshooting
Even with the best care, you might encounter some issues. Here are a few common problems and how to address them:
* Yellowing Leaves: Yellowing leaves can be a sign of overwatering, underwatering, or lack of nutrients. Check the soil moisture and adjust your watering accordingly. If the soil is dry, water more frequently. If it’s soggy, water less frequently. You can also try fertilizing the onions.
* Root Rot: Root rot is caused by overwatering and poor drainage. If you suspect root rot, carefully remove the onion bulbs from the bottle and inspect the roots. If the roots are brown and mushy, they are likely rotting. Discard the affected bulbs and replant healthy bulbs in fresh soil with better drainage.
* Mold Growth: Mold can grow on the soil surface if the humidity is too high. Improve ventilation by placing the bottle garden in a well-ventilated area. You can also try sprinkling a thin layer of cinnamon on the soil surface, as cinnamon has antifungal properties.
* Pests: Onion plants can be susceptible to pests such as aphids and spider mites. Inspect your plants regularly for signs of infestation. If you find pests, you can try spraying them with insecticidal soap or neem oil.
Creative Variations
Once you’ve mastered the basic onion bottle garden, you can experiment with different variations to create unique and eye-catching displays.
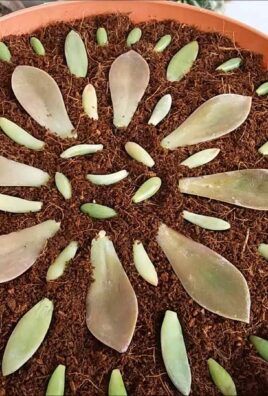
* Layered Garden: Create a layered garden by adding different types of soil and plants. For example, you could add a layer of sand or small pebbles on top of the potting soil and plant succulents or cacti alongside the onions.
* Terrarium Style: Turn your onion bottle garden into a terrarium by adding a lid or cover to the bottle. This will create a humid environment that is ideal for certain types of plants, such as ferns and mosses.
* Hanging Garden: Create a hanging garden by attaching ropes or wires to the bottle and suspending it from the ceiling or a hook. This is a great way to save space and add a touch of greenery to your home.
* Themed Garden: Create a themed garden by adding decorations that reflect a particular theme, such as a fairy garden, a beach garden, or a desert garden.
Why This DIY Project Rocks
* Recycling: It’s a fantastic way to reuse plastic bottles and reduce waste.
* Easy and Affordable: The materials are readily available and inexpensive.
* Space-Saving: Perfect for small apartments or homes with limited gardening space.
* Educational: A great way to teach kids about plant growth and recycling.
* Decorative: Adds a touch of green and personality to any space.
* Edible: You can harvest the onion greens for cooking.
So, there you have it! Creating your own onion bottle garden is a fun, easy, and rewarding DIY project that anyone can do. With a little creativity and care, you can transform a simple plastic bottle into a miniature oasis that will bring joy to your home. Happy gardening!
Conclusion
So, there you have it! Transforming a humble onion into a thriving bottle garden is not just a fun project; it’s a miniature ecosystem you can create with your own two hands. This DIY onion bottle garden offers a unique blend of sustainability, creativity, and horticultural delight. It’s a fantastic way to repurpose plastic bottles, observe the miracle of plant growth up close, and add a touch of green to any space, regardless of size.
But why is this DIY trick a must-try? Beyond the sheer enjoyment of crafting something beautiful and functional, it’s an educational experience. You’ll witness the fascinating process of root development, nutrient absorption, and the overall life cycle of a plant. It’s a perfect project for families, classrooms, or anyone with a curious mind and a love for nature. Plus, it’s incredibly low-maintenance once established, requiring minimal watering and care.
This is more than just a craft; it’s a miniature world in a bottle.
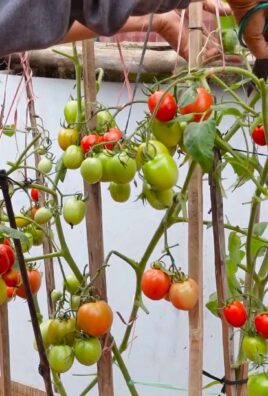
Looking for variations? Absolutely! Experiment with different types of onions. Red onions, shallots, or even garlic cloves can be used to create diverse and visually appealing bottle gardens. Consider adding small pebbles or decorative stones to the bottom of the bottle for improved drainage and aesthetic appeal. You can also introduce other small plants, such as moss or succulents, to create a more complex and vibrant ecosystem. Just be sure to choose plants that thrive in similar conditions and won’t overcrowd the onion.
Another exciting variation is to use different types of bottles. While plastic bottles are ideal for repurposing, you could also use glass jars or vases for a more elegant look. Just be mindful of the opening size and ensure it’s wide enough to accommodate the onion and your hand for planting.
Don’t be afraid to get creative with the soil mixture as well. While a standard potting mix works well, you can also add compost, perlite, or vermiculite to improve drainage and aeration. Experiment with different combinations to see what works best for your specific environment and onion variety.
We wholeheartedly encourage you to try this DIY onion bottle garden project. It’s a rewarding experience that will bring joy and a touch of nature into your life. Once you’ve created your own miniature garden, we’d love to see it! Share your photos and experiences with us on social media using #OnionBottleGardenDIY. We can’t wait to see your creations and hear about your journey! Let’s spread the word about this fun and sustainable way to bring a little bit of the outdoors inside.
Share Your Success!
Remember, the beauty of DIY projects lies in the sharing of knowledge and inspiration. Your experiences, tips, and variations can help others discover the joy of creating their own onion bottle gardens. So, don’t hesitate to share your successes, challenges, and creative ideas with the community. Together, we can cultivate a greener and more sustainable world, one onion bottle garden at a time.
FAQ
What kind of onion is best for a bottle garden?
The best onions for a bottle garden are those that are firm, healthy, and have visible roots starting to sprout. Yellow onions are a popular choice due to their availability and robust growth. However, you can also experiment with red onions, white onions, or even shallots. The key is to choose an onion that is free from blemishes or signs of rot. Smaller onions tend to be easier to manage in a bottle garden setting, but larger onions can also work if you have a sufficiently sized bottle. Consider the overall aesthetic you’re aiming for when selecting your onion. Red onions, for example, will add a pop of color to your miniature garden.
How often should I water my onion bottle garden?
Watering frequency depends on several factors, including the size of the bottle, the type of soil, and the ambient temperature. Generally, you should water your onion bottle garden when the top inch of soil feels dry to the touch. Avoid overwatering, as this can lead to root rot. A good rule of thumb is to water sparingly, just enough to moisten the soil without saturating it. During warmer months, you may need to water more frequently, while during cooler months, you can reduce the watering schedule. Observe your onion closely for signs of dehydration, such as wilting leaves, or overwatering, such as yellowing leaves. Adjust your watering accordingly.
What kind of soil should I use?
A well-draining potting mix is ideal for an onion bottle garden. This type of soil provides the necessary nutrients for the onion to thrive while also allowing excess water to drain away, preventing root rot. You can also amend the potting mix with perlite or vermiculite to improve drainage and aeration. Avoid using garden soil, as it can be too dense and may contain pests or diseases. A good soil mix will provide a balance of moisture retention and drainage, creating a healthy environment for your onion to grow.
How much sunlight does my onion bottle garden need?
Onions thrive in bright, indirect sunlight. Place your bottle garden in a location where it receives several hours of sunlight each day, but avoid direct sunlight, which can scorch the leaves. A windowsill facing east or west is often a good choice. If you don’t have access to natural sunlight, you can supplement with a grow light. Rotate the bottle garden regularly to ensure that all sides receive equal exposure to light. This will prevent the onion from leaning towards the light source and promote even growth.
Can I add other plants to my onion bottle garden?
Yes, you can add other plants to your onion bottle garden, but it’s important to choose plants that have similar growing requirements as onions. Small succulents, mosses, and air plants are good options. Avoid plants that are too large or aggressive, as they can overcrowd the onion and compete for resources. When adding other plants, be sure to provide adequate space for each plant to grow and ensure that the soil is appropriate for all the plants in the bottle garden. Consider the overall aesthetic you’re aiming for when selecting companion plants.
How long will my onion bottle garden last?
The lifespan of your onion bottle garden depends on several factors, including the type of onion, the growing conditions, and the overall health of the plant. With proper care, an onion bottle garden can last for several months or even a year. However, eventually, the onion will exhaust its resources and begin to decline. When this happens, you can either replace the onion with a new one or start a new bottle garden from scratch. The beauty of this project is that it’s easy to replicate and experiment with different variations.
What if my onion starts to rot?
If your onion starts to rot, it’s important to take action immediately to prevent the rot from spreading. Remove the affected parts of the onion and replace the soil with fresh potting mix. Ensure that the bottle garden has adequate drainage and avoid overwatering. If the rot is severe, it may be necessary to discard the onion and start a new bottle garden. Prevention is key, so be sure to use healthy onions, provide good drainage, and avoid overwatering.
Can I eat the onion greens that grow?
Yes, you can eat the onion greens that grow in your bottle garden. They have a mild onion flavor and can be used in salads, soups, or as a garnish. Simply snip off the greens as needed, being careful not to damage the onion bulb. However, it’s important to note that the onion bulb itself may not be as flavorful or tender as a commercially grown onion. The primary purpose of the bottle garden is to enjoy the aesthetic appeal and educational experience of growing an onion, rather than to harvest a large crop of onions.
How do I prevent mold from growing in my bottle garden?
Mold growth in a bottle garden is often caused by excessive moisture and poor ventilation. To prevent mold, ensure that the bottle garden has adequate drainage and avoid overwatering. You can also improve ventilation by leaving the bottle open for a few hours each day. If mold does appear, remove it immediately with a cotton swab dipped in rubbing alcohol. You can also sprinkle cinnamon on the soil, as cinnamon has antifungal properties.
Is this project safe for children?
The DIY onion bottle garden project is generally safe for children, but adult supervision is recommended, especially when using sharp objects such as scissors or knives to cut the plastic bottle. Ensure that children understand the importance of handling the onion and soil gently and avoiding overwatering. This project can be a fun and educational activity for children, teaching them about plant growth, sustainability, and the importance of caring for the environment.
Leave a Comment