

DIY pen holder craft projects are a fantastic way to declutter your workspace and add a personal touch to your desk! Have you ever found yourself drowning in a sea of pens, pencils, and markers, desperately searching for that one specific color you need? I know I have! That’s why I’m so excited to share some incredibly easy and creative DIY pen holder ideas that will not only organize your supplies but also inject some personality into your home or office.
The history of pen holders is surprisingly rich. From simple ceramic pots used by ancient scribes to ornate silver stands gracing the desks of Victorian scholars, the need to keep writing instruments organized has been a constant throughout history. While the materials and styles have evolved, the core purpose remains the same: to provide a convenient and aesthetically pleasing way to store our pens.
In today’s fast-paced world, where we’re constantly bombarded with information and tasks, a well-organized workspace is more important than ever. A DIY pen holder craft allows you to create a customized solution that perfectly fits your needs and reflects your unique style. Plus, it’s a fantastic way to upcycle materials, reduce waste, and unleash your inner artist. Who wouldn’t want a fun and functional project that helps the environment and keeps your desk looking sharp? Let’s dive into some amazing ideas!
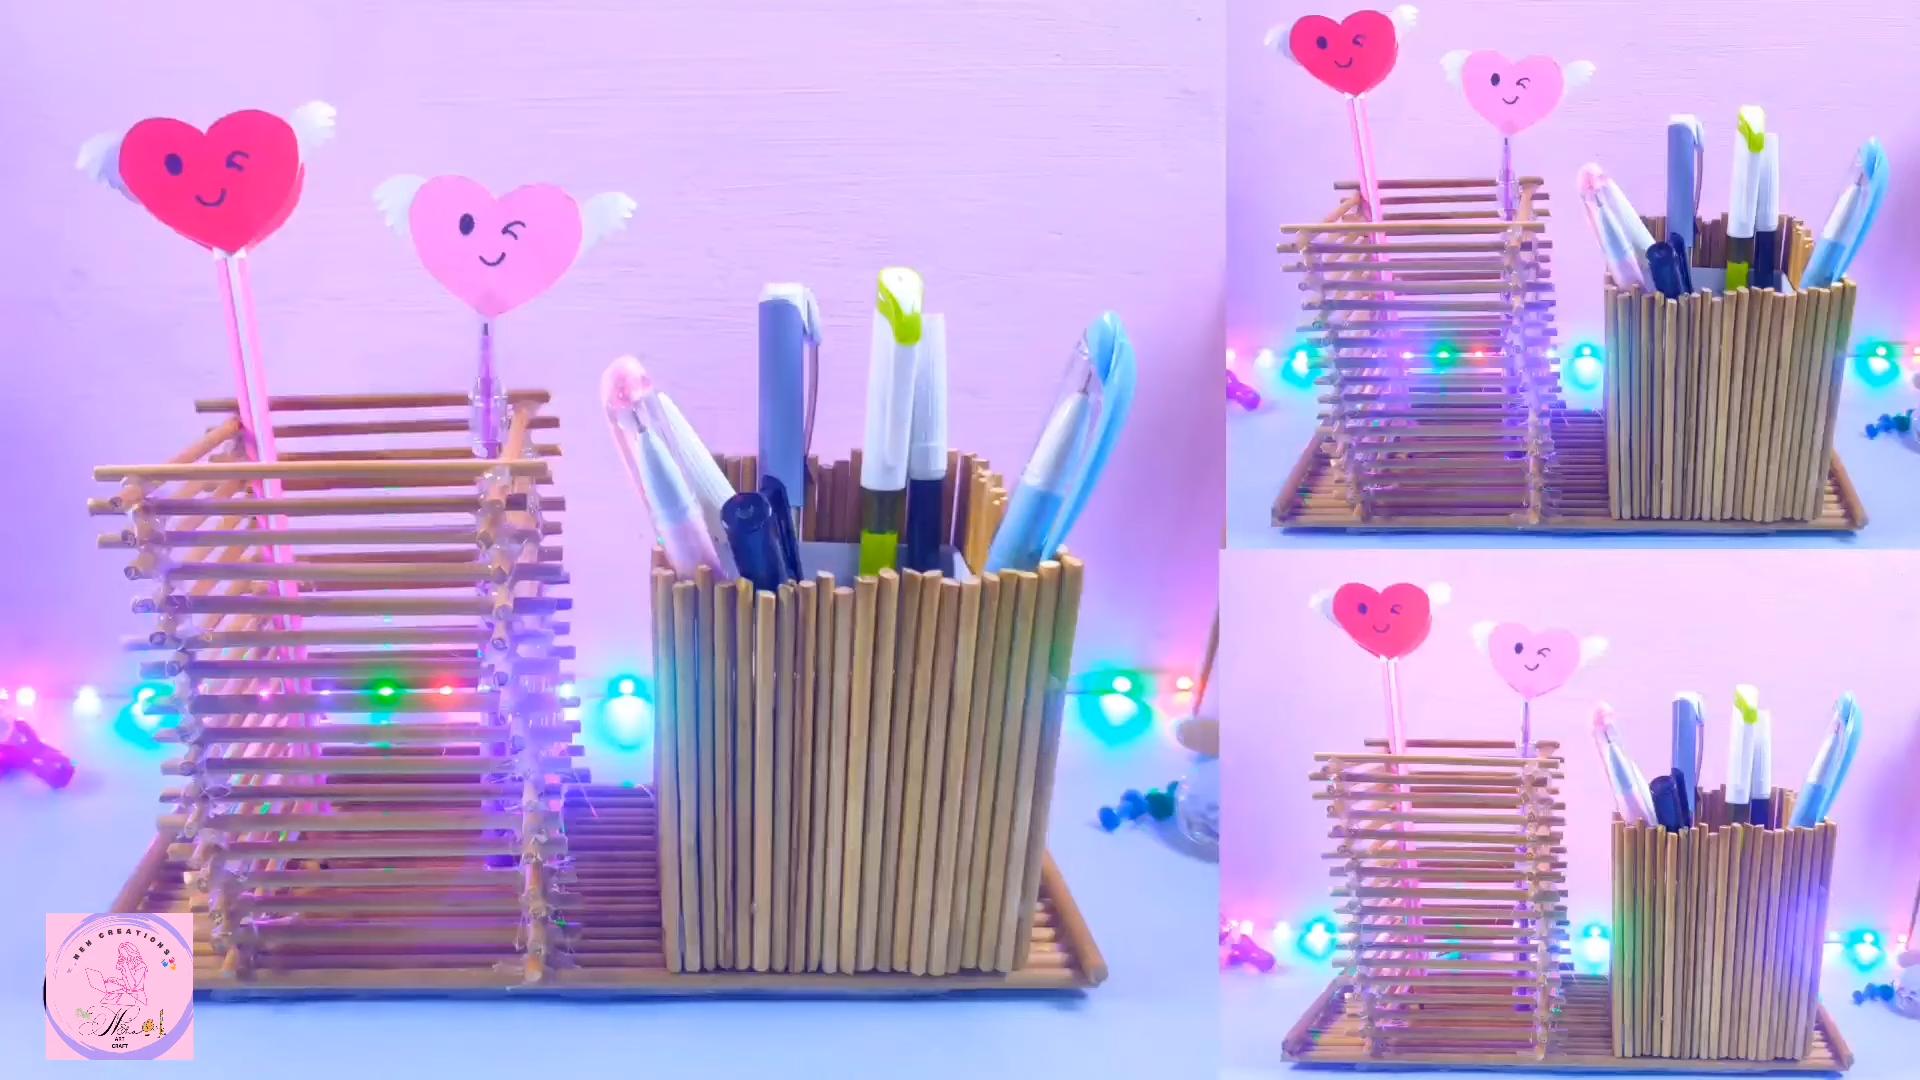
DIY Pen Holder: From Trash to Treasure!
Hey there, fellow crafters! Are you drowning in pens, pencils, and markers? Do you need a stylish and functional way to organize your desk without breaking the bank? Well, you’ve come to the right place! I’m going to show you how to create a super cute and personalized pen holder using materials you probably already have lying around. Get ready to transform some “trash” into a desk-organizing treasure!
Materials You’ll Need:
Before we dive in, let’s gather our supplies. This is a pretty flexible project, so feel free to substitute materials based on what you have on hand.
* Cardboard Tubes: Think toilet paper rolls, paper towel rolls, or even mailing tubes cut to size. The more variety in height, the more interesting your pen holder will be! I usually aim for at least 5-6 tubes.
* Cardboard Base: A piece of sturdy cardboard to glue the tubes onto. An old cereal box, a piece of shipping box, or even a thick piece of cardstock will work.
* Glue: Hot glue is my go-to for this project because it dries quickly and creates a strong bond. However, you can also use craft glue or even strong tape, but keep in mind the drying time will be longer.
* Scissors or Craft Knife: For cutting the cardboard base and any adjustments to the tubes.
* Ruler or Measuring Tape: To measure and cut the cardboard base accurately.
* Pencil: For marking measurements and sketching designs.
* Decorating Supplies: This is where you can really let your creativity shine! Here are some ideas:
* Paint (acrylic, tempera, spray paint – whatever you have!)
* Wrapping paper
* Fabric scraps
* Washi tape
* Glitter
* Buttons
* Ribbon
* Stickers
* Markers
* Yarn or twine
Preparing the Base and Tubes
Okay, let’s get started! The first step is to prepare the base and the cardboard tubes.
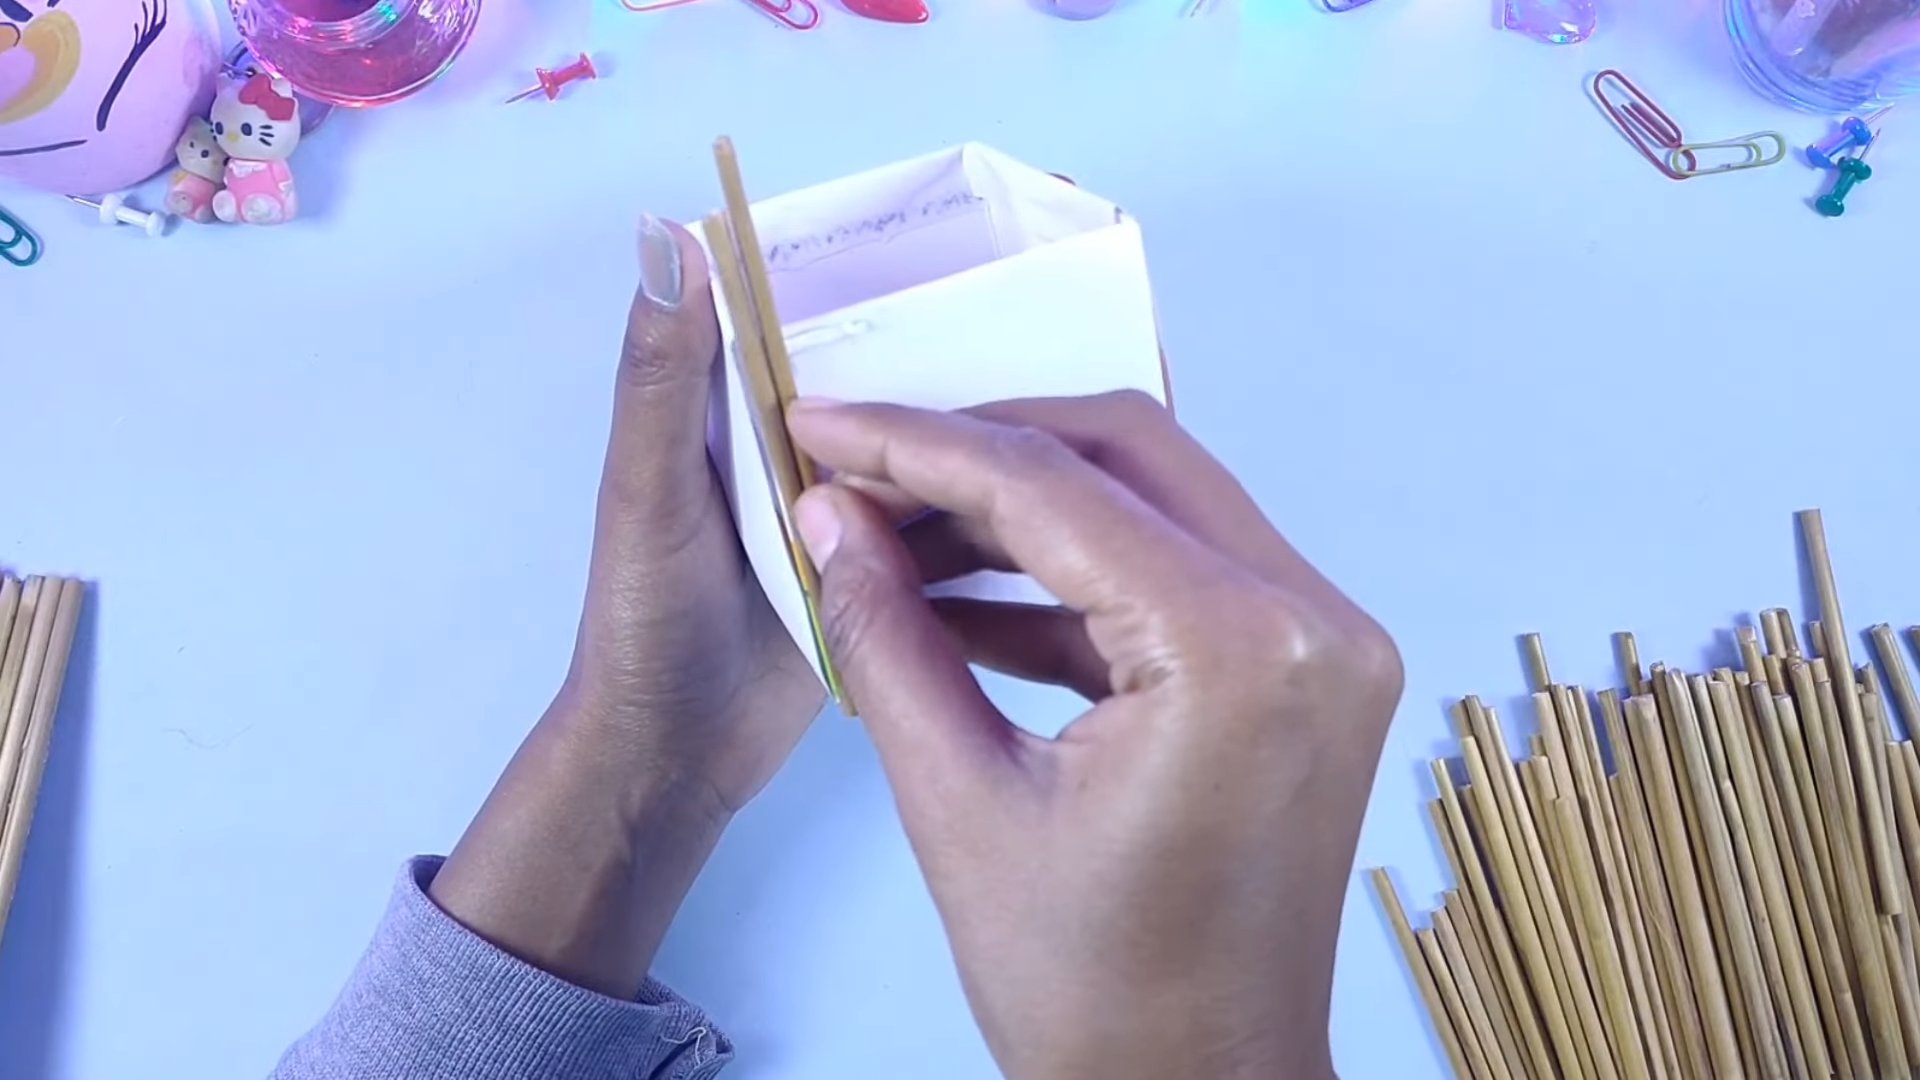
1. Cut the Cardboard Base: Decide how big you want your pen holder to be. I usually aim for a base that’s a few inches larger than the arrangement of tubes I have in mind. Use your ruler and pencil to draw a circle, square, rectangle, or any other shape you like on the cardboard. Then, carefully cut it out with your scissors or craft knife. Be careful when using a craft knife! Always use a cutting mat and cut away from yourself.
2. Adjust Tube Heights (Optional): If you want a more dynamic look, you can cut some of the cardboard tubes to different heights. This will create visual interest and make it easier to see all your pens. I like to have a mix of tall, medium, and short tubes. Use your ruler and pencil to mark where you want to cut the tubes, and then carefully cut them with your scissors or craft knife.
3. Clean the Tubes: Make sure your cardboard tubes are clean and free of any debris or stickers. You can wipe them down with a damp cloth if needed.
Assembling the Pen Holder
Now comes the fun part – putting everything together!
1. Arrange the Tubes: Before you glue anything, play around with the arrangement of your cardboard tubes on the base. This will help you decide where you want each tube to go. Consider the different heights and how they look together. I like to cluster the taller tubes towards the back and the shorter tubes towards the front, but there are no rules!
2. Glue the Tubes to the Base: Once you’re happy with the arrangement, it’s time to glue the tubes to the base. If you’re using hot glue, apply a generous amount to the bottom of each tube and quickly press it onto the cardboard base. Hold it in place for a few seconds until the glue sets. If you’re using craft glue, apply a thin layer to the bottom of each tube and press it onto the base. You’ll need to hold it in place for a longer period of time, or you can use tape to secure it while it dries. Be careful when using hot glue! It can burn your skin.
3. Reinforce the Glue (Optional): For extra stability, you can add a bead of glue around the base of each tube where it meets the cardboard. This will help to prevent the tubes from coming loose over time.
4. Let it Dry: Allow the glue to dry completely before moving on to the next step. This is especially important if you’re using craft glue.
Decorating Your Pen Holder
This is where you can really personalize your pen holder and make it your own! There are endless possibilities, so let your imagination run wild.
1. Painting: If you’re using paint, you can paint the entire pen holder one color, or you can create a more intricate design. I love using acrylic paint because it’s easy to work with and comes in a wide variety of colors. You can use a brush, sponge, or even your fingers to apply the paint. If you’re using spray paint, be sure to do it in a well-ventilated area and wear a mask.
2. Wrapping Paper or Fabric: You can also wrap the cardboard tubes in wrapping paper or fabric scraps. Cut the paper or fabric to the size of the tube, apply glue to the tube, and then carefully wrap the paper or fabric around it. Smooth out any wrinkles or bubbles.
3. Washi Tape: Washi tape is a great way to add pops of color and pattern to your pen holder. Simply wrap the tape around the tubes in different designs.
4. Glitter: If you’re feeling extra sparkly, you can add glitter to your pen holder. Apply glue to the areas where you want the glitter to stick, and then sprinkle the glitter over the glue. Shake off any excess glitter. Be careful when using glitter! It can get everywhere.
5. Buttons, Ribbon, and Stickers: You can also embellish your pen holder with buttons, ribbon, and stickers. Glue or tape them onto the tubes in any way you like.
6. Markers: Use markers to draw designs, write words, or add details to your pen holder.
7. Yarn or Twine: Wrap yarn or twine around the tubes for a rustic or textured look. Secure the ends with glue.
Specific Decoration Ideas:
Here are a few more detailed ideas to spark your creativity:
Ombre Effect
1. Choose your paint colors: Select 3-5 shades of the same color, ranging from light to dark.
2. Paint each tube: Paint each tube a different shade, creating a gradient effect. Start with the lightest shade at the front and gradually move to the darkest shade at the back.
3. Let it dry: Allow the paint to dry completely.
4. Add a sealant (optional): Apply a clear sealant to protect the paint and give it a glossy finish.
Geometric Patterns
1. Tape off sections: Use painter’s tape to create geometric patterns on the tubes.
2. Paint the exposed areas: Paint the exposed areas with different colors.
3. Remove the tape: Carefully remove the tape to reveal the geometric patterns.
4. Let it dry: Allow the paint to dry completely.
Themed Pen Holder
1. Choose a theme: Select a theme that reflects your interests, such as animals, nature, or your favorite hobby.
2. Gather themed materials: Collect materials that relate to your theme, such as animal stickers, leaves, or miniature figurines.
3. Decorate the tubes: Decorate the tubes with the themed materials. For example, you could glue animal stickers onto the tubes or wrap them in fabric with a nature print.
Personalized Pen Holder
1. Print out photos or quotes: Print out photos of your friends, family, or pets, or find inspiring quotes online.
2. Cut and glue: Cut out the photos or quotes and glue them onto the tubes.
3. Add embellishments: Add embellishments such as glitter, ribbon, or stickers to personalize your pen holder even further.
Final Touches
Once you’re happy with the decoration, let everything dry completely. Then, you can add any final touches, such as a coat of sealant to protect the decoration.
Now, all that’s left to do is fill your new pen holder with your favorite pens, pencils, and markers! Enjoy your organized and stylish desk! I hope you had fun creating this DIY pen holder. Remember, the most important thing is to have fun and let your creativity shine! Happy crafting!
Conclusion
So, there you have it! Transforming everyday items into functional and stylish desk organizers is not only incredibly satisfying but also a fantastic way to personalize your workspace and reduce clutter. This DIY pen holder craft is more than just a project; it’s an opportunity to unleash your creativity, embrace sustainability by repurposing materials, and add a unique touch to your home or office.
Why is this DIY trick a must-try? Because it’s simple, affordable, and endlessly customizable. Forget about generic, mass-produced pen holders that lack personality. With just a few basic supplies and a little imagination, you can create a pen holder that perfectly reflects your style and meets your specific needs. Imagine a pen holder crafted from repurposed tin cans, adorned with colorful washi tape and holding your favorite writing instruments. Or perhaps a rustic-chic holder made from reclaimed wood, adding a touch of natural beauty to your desk. The possibilities are truly limitless.
Looking for suggestions or variations? Consider using different materials to create unique textures and aesthetics. Corkboard can provide a soft, tactile surface, while fabric scraps can add pops of color and pattern. Experiment with different shapes and sizes to accommodate various types of pens, pencils, and other desk essentials. You could even create a multi-compartment holder to keep everything neatly organized. For a more advanced project, try incorporating embellishments like beads, buttons, or even small mosaic tiles. Don’t be afraid to get creative and personalize your pen holder to make it truly your own.
Beyond the aesthetic appeal, this DIY project also offers a sense of accomplishment and pride. Knowing that you created something beautiful and functional with your own hands is incredibly rewarding. It’s a small but meaningful way to express your individuality and add a personal touch to your surroundings. Plus, it’s a great way to reduce waste and contribute to a more sustainable lifestyle.
We wholeheartedly encourage you to try this DIY pen holder craft. Gather your supplies, unleash your creativity, and transform ordinary materials into extraordinary desk organizers. We’re confident that you’ll be amazed by the results. And most importantly, we want to hear about your experience! Share your creations with us on social media using #DIYPenHolderCraft. We can’t wait to see what you come up with! Let’s inspire each other and spread the joy of DIY crafting. So, what are you waiting for? Get started today and create a pen holder that’s as unique and special as you are!
Frequently Asked Questions (FAQ)
What kind of materials can I use for this DIY pen holder craft?
The beauty of this project lies in its versatility! You can use a wide range of materials, both new and repurposed. Some popular options include:
* **Repurposed Containers:** Tin cans, glass jars, plastic bottles, cardboard tubes, and even old mugs can be transformed into stylish pen holders.
* **Natural Materials:** Wood scraps, bamboo, twigs, and stones can add a rustic and organic touch to your desk.
* **Craft Supplies:** Cardboard, felt, fabric scraps, washi tape, paint, beads, buttons, and glitter can be used to decorate and embellish your pen holder.
* **Upcycled Items:** Old CDs, DVDs, and even broken toys can be incorporated into your design for a unique and eco-friendly look.
Remember to choose materials that are durable and suitable for holding pens and pencils. Also, consider the overall aesthetic you’re aiming for and select materials that complement your style.
Do I need any special tools for this project?
The tools you’ll need will depend on the materials you choose and the complexity of your design. However, some basic tools that are generally helpful include:
* **Scissors or a craft knife:** For cutting and shaping materials.
* **Glue gun or craft glue:** For adhering different components together.
* **Ruler or measuring tape:** For ensuring accurate measurements.
* **Pencil or marker:** For marking and outlining designs.
* **Paintbrushes or sponges:** For applying paint or other finishes.
* **Sandpaper:** For smoothing rough edges.
* **Protective gloves:** To protect your hands from glue or paint.
If you’re working with wood or metal, you may also need additional tools like a saw, drill, or hammer. Always use caution when working with sharp tools and follow safety guidelines.
How can I make my pen holder more stable?
Stability is crucial for a functional pen holder. Here are a few tips to ensure your creation stays upright:
* **Choose a sturdy base:** If you’re using a lightweight container, add weight to the bottom by filling it with sand, pebbles, or marbles.
* **Use a wide base:** A wider base provides more stability. Consider attaching a larger piece of cardboard or wood to the bottom of your pen holder.
* **Reinforce the structure:** If you’re using cardboard or other flexible materials, reinforce the structure with extra layers of material or by adding internal supports.
* **Apply a non-slip coating:** Apply a non-slip coating to the bottom of your pen holder to prevent it from sliding around on your desk.
How can I personalize my DIY pen holder?
Personalization is what makes this project truly special! Here are some ideas to make your pen holder unique:
* **Paint it:** Use your favorite colors or create a custom design with stencils or freehand painting.
* **Add embellishments:** Glue on beads, buttons, sequins, or other decorative elements.
* **Wrap it:** Wrap your pen holder with fabric scraps, yarn, or washi tape.
* **Decoupage it:** Apply images or patterns using the decoupage technique.
* **Add a personal touch:** Incorporate elements that reflect your interests or hobbies, such as miniature figurines, charms, or photos.
Don’t be afraid to experiment and try new things! The possibilities are endless when it comes to personalization.
How do I clean my DIY pen holder?
The cleaning method will depend on the materials you used to create your pen holder. However, here are some general guidelines:
* **Dust regularly:** Use a soft cloth or duster to remove dust and debris.
* **Wipe with a damp cloth:** For sticky or stubborn messes, wipe the surface with a damp cloth and mild soap.
* **Avoid harsh chemicals:** Avoid using harsh chemicals or abrasive cleaners, as they can damage the finish.
* **Spot clean:** For specific stains or spills, spot clean with a gentle cleaner.
If you’re unsure about the best way to clean your pen holder, test a small, inconspicuous area first.
Can I make this project with kids?
Absolutely! This DIY pen holder craft is a great activity for kids of all ages. However, adult supervision is recommended, especially when using sharp tools or hot glue. Choose age-appropriate materials and designs, and let your kids unleash their creativity. It’s a fun and educational way to encourage their artistic skills and promote recycling.
Where can I find inspiration for my DIY pen holder?
Inspiration is everywhere! Here are some places to look for ideas:
* **Online:** Browse Pinterest, Instagram, and other social media platforms for DIY pen holder ideas.
* **Craft stores:** Visit your local craft store and browse the aisles for inspiration.
* **Magazines and books:** Look through craft magazines and books for project ideas and techniques.
* **Nature:** Take a walk in nature and gather inspiration from the colors, textures, and shapes you see.
* **Your own imagination:** Let your creativity flow and come up with your own unique designs.
Remember to adapt and modify ideas to suit your own style and preferences. The most important thing is to have fun and create something you love!
Leave a Comment