

DIY pot protectors: Ever feel like your precious potted plants are under constant siege? From curious critters digging in the soil to clumsy feet knocking them over, keeping your container garden safe can feel like a full-time job. I know the feeling! That’s why I’m so excited to share some clever and easy DIY pot protector ideas that will not only safeguard your green babies but also add a touch of personality to your outdoor (or indoor!) space.
Protecting potted plants has been a concern for gardeners for centuries. Historically, gardeners have used everything from strategically placed rocks to thorny branches to deter unwanted visitors. Today, we have the advantage of modern materials and a little creative ingenuity to craft effective and attractive solutions.
Why do you need these DIY pot protectors? Well, beyond the obvious protection from pests and accidental damage, these projects are a fantastic way to express your creativity and personalize your garden. Plus, let’s be honest, a little extra security for your plants can save you a lot of heartache (and replanting!). So, grab your tools, gather your materials, and let’s dive into some fun and functional DIY projects that will keep your potted plants thriving!
DIY Pot Protectors: Say Goodbye to Scratched Cookware!
Hey everyone! Are you tired of your beautiful pots and pans getting scratched and scuffed every time you stack them? I know I was! That’s why I decided to take matters into my own hands and create my own pot protectors. It’s a super easy and affordable project, and trust me, your cookware will thank you. Plus, it’s a great way to use up fabric scraps you might have lying around. Let’s get started!
What You’ll Need
Before we dive in, let’s gather our supplies. This is a pretty low-key project, so you probably already have most of this stuff!
* Fabric: Felt is a great option because it doesn’t fray, but you can use any soft fabric you like. I’ve used old t-shirts, fleece scraps, and even repurposed towels. The key is to choose something that will cushion your pots and pans.
* Scissors: A good pair of fabric scissors will make your life much easier.
* Measuring Tape or Ruler: For accurate sizing.
* Pencil or Fabric Marker: To trace your circles.
* Sewing Machine (Optional): If you want to get fancy and add some stitching around the edges. But don’t worry, hand-sewing works just as well!
* Needle and Thread (If not using a sewing machine): Choose a thread color that complements your fabric.
* Circular Objects for Tracing: Plates, bowls, or pot lids in various sizes to create different sized protectors.
* Pins (Optional): To hold fabric layers together while cutting or sewing.
Choosing Your Fabric
The fabric you choose is really important. You want something that’s soft enough to protect your cookware but also durable enough to withstand repeated use. Here are a few of my favorite options:
* Felt: As I mentioned before, felt is a fantastic choice. It’s inexpensive, easy to work with, and comes in a wide variety of colors. Plus, it doesn’t fray, so you don’t have to worry about finishing the edges.
* Fleece: Fleece is another great option, especially if you’re looking for something extra soft and plush. It’s also very durable and machine washable.
* Cotton Flannel: Cotton flannel is a good choice if you want something natural and breathable. It’s also relatively inexpensive and easy to find.
* Repurposed Fabrics: Don’t be afraid to get creative and use up old t-shirts, towels, or blankets. Just make sure the fabric is clean and in good condition.
Making the Pot Protectors: Step-by-Step
Okay, now for the fun part! Here’s how to make your own pot protectors:
1. Gather Your Pots and Pans: Start by gathering all the pots and pans you want to protect. This will help you determine the sizes of the protectors you need.
2. Measure the Diameter: Measure the diameter of the bottom of each pot and pan. Add an extra inch or two to this measurement to ensure the protector is large enough to fully cover the surface. I usually add 2 inches just to be safe.
3. Choose Your Circular Objects: Find plates, bowls, or pot lids that are close to the sizes you need. These will be your templates for tracing.
4. Trace the Circles: Place your chosen circular object on your fabric and trace around it with a pencil or fabric marker. Repeat this process for each pot and pan, creating a variety of sizes. Remember to trace multiple circles for each size, as you’ll need at least two layers of fabric for each protector. I usually do three layers for extra cushioning.
5. Cut Out the Circles: Carefully cut out the circles you traced. If you’re using multiple layers of fabric, you can pin them together before cutting to ensure they stay aligned.
6. Layer the Circles: Stack the fabric circles together, aligning the edges as closely as possible.
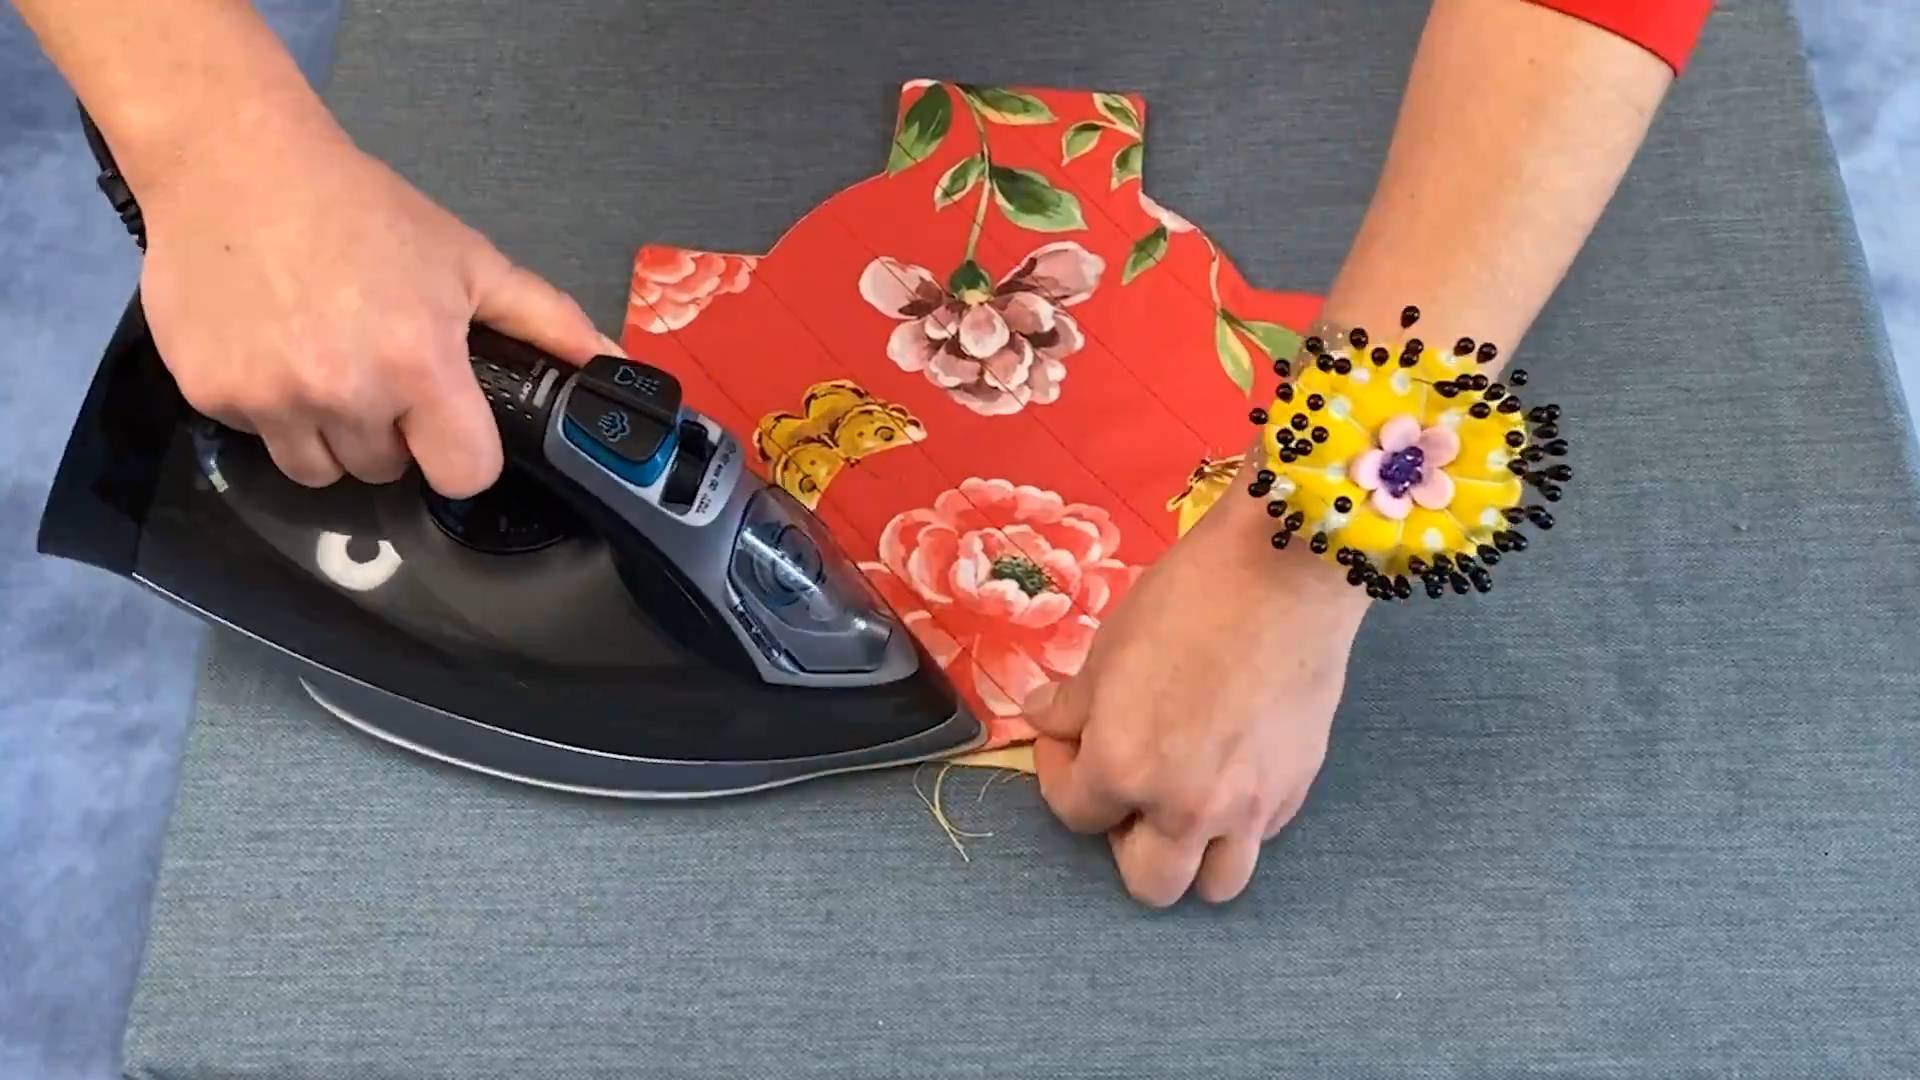
7. Sew the Edges (Optional): If you have a sewing machine, you can sew around the edges of the circles to secure the layers together and give them a more finished look. Use a simple straight stitch or a zigzag stitch. If you don’t have a sewing machine, you can hand-sew the edges using a running stitch or a blanket stitch. This step is optional, but it will make your protectors more durable.
8. Trim Any Excess Fabric: Once you’ve sewn the edges, trim any excess fabric that might be sticking out.
9. Repeat for All Sizes: Repeat steps 4-8 for all the different sizes of pot protectors you need.
Adding Extra Touches (Optional)
Want to add a little extra flair to your pot protectors? Here are a few ideas:
* Use Different Fabrics: Mix and match different fabrics to create a more colorful and interesting look.
* Add Appliqués: Cut out small shapes from felt or other fabric and sew them onto the protectors.
* Embroider Designs: Embroider simple designs or patterns onto the protectors.
* Add a Hanging Loop: Sew a small loop of fabric onto one edge of the protector so you can hang it up when not in use.
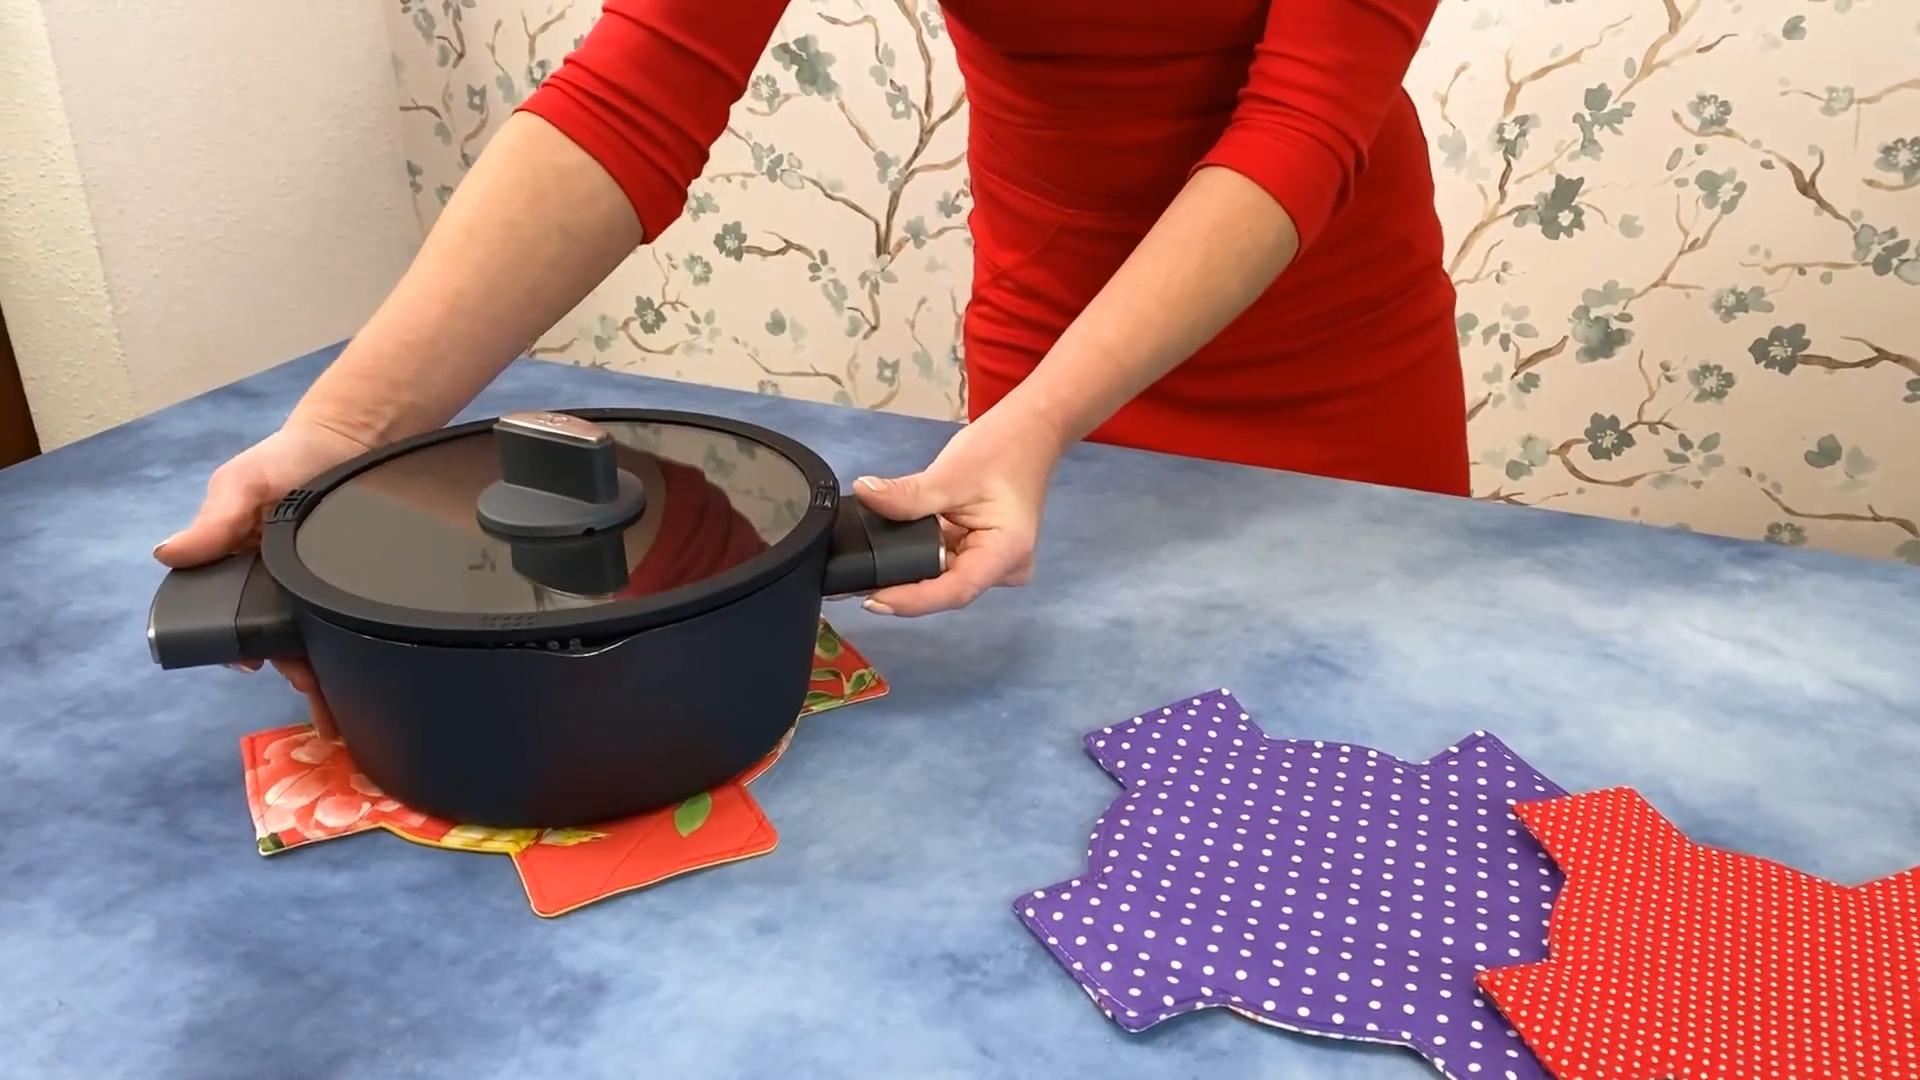
Using Your Pot Protectors
Now that you’ve made your pot protectors, it’s time to put them to use! Simply place a protector between each pot and pan when you stack them. This will prevent them from scratching and scuffing each other.
Tips and Tricks
Here are a few extra tips and tricks to help you get the most out of your DIY pot protectors:
* Use Different Colors for Different Sizes: This will help you quickly identify the right size protector for each pot and pan.
* Make Extra Protectors: It’s always a good idea to have a few extra protectors on hand in case one gets lost or damaged.
* Wash Your Protectors Regularly: To keep your protectors clean and fresh, wash them regularly in the washing machine. Use a gentle cycle and mild detergent.
* Store Your Protectors in a Convenient Location: Keep your protectors in a drawer or cabinet near your pots and pans so they’re always within easy reach.
* Consider the Thickness: For heavier pots and pans, consider using more layers of fabric for extra protection.
* Don’t Overlap Protectors: Make sure the protectors fully cover the bottom surface of each pot and pan to prevent scratches.
* Get the Kids Involved: This is a great project to do with kids! They can help with tracing, cutting, and even sewing (with supervision, of course).
* Experiment with Shapes: While circles are the easiest shape to work with, you can also experiment with other shapes, such as squares or rectangles.
* Use Non-Slip Fabric: If you’re worried about the protectors slipping, use a non-slip fabric on one side.
* Consider Heat Resistance: If you sometimes place hot pots and pans directly on top of each other, consider using a heat-resistant fabric for your protectors.
Troubleshooting
Sometimes things don’t go exactly as planned. Here are a few common problems you might encounter and how to fix them:
* Fabric is Slipping While Cutting: Use pins to hold the fabric layers together securely.
* Circles are Uneven: Take your time when tracing and cutting. If you’re having trouble cutting a perfect circle, try using a rotary cutter and a cutting mat.
* Sewing Machine is Jamming: Make sure your sewing machine is properly threaded and that you’re using the correct needle for your fabric.
* Hand-Sewing is Taking Too Long: Try using a faster stitch, such as a running stitch.
* Protectors are Too Small: Remeasure your pots and pans and make larger protectors.
* Protectors are Too Big: Trim the edges of the protectors to make them fit better.
Why This DIY Matters
Beyond just protecting your cookware, this DIY project is a small step towards a more sustainable lifestyle. By repurposing old fabrics, you’re reducing waste and giving new life to materials that might otherwise end up in the trash. Plus, you’re saving money by not having to buy expensive store-bought pot protectors. It’s a win-win!
Alternative Materials
While fabric is the most common material for pot protectors, you can also use other materials, such as:
* Cork: Cork is a natural and sustainable material that provides excellent cushioning. You can buy cork sheets or repurpose cork coasters.
* Foam: Foam is another good option, especially if you’re looking for something extra thick and protective. You can buy foam sheets or repurpose foam packaging.
* Silicone: Silicone is heat-resistant and non-slip, making it a great choice for pot protectors. You can buy silicone mats or repurpose silicone baking sheets.
Final
Conclusion
So, there you have it! Ditching those flimsy, store-bought pot protectors and embracing these DIY wonders is a game-changer for anyone who values their cookware. We’ve shown you how simple it is to create effective, customized protection for your pots and pans, saving you money and reducing waste in the process.
Why is this DIY trick a must-try? Because it’s more than just a cost-effective alternative; it’s about taking control of your kitchen organization and extending the life of your valuable cookware. No more scratches, dings, or chipped enamel! These DIY pot protectors offer superior cushioning and prevent the metal-on-metal contact that leads to damage. Plus, you can tailor them to fit your specific needs and preferences.
Consider these variations to personalize your DIY pot protector project even further:
* Fabric Frenzy: Experiment with different fabrics! Felt is a classic choice, but you could also use upcycled denim, old towels, or even quilted fabric scraps for a more luxurious feel. Just ensure the fabric is thick enough to provide adequate protection.
* Shape Shifting: Don’t limit yourself to circles! Cut out squares, stars, or even fun, whimsical shapes to add a touch of personality to your kitchen.
* Size Matters: Customize the size of your protectors to perfectly fit your smallest saucepan to your largest stockpot. A variety of sizes ensures comprehensive protection for your entire cookware collection.
* Added Grip: For extra security, consider adding a small amount of non-slip fabric or silicone dots to one side of the protector. This will prevent it from sliding around and ensure it stays in place between your pots and pans.
* Scent-sational: Infuse your protectors with a subtle, pleasant scent by adding a few drops of essential oil to the fabric before cutting. Lavender, lemon, or eucalyptus can add a refreshing touch to your kitchen storage.
We are confident that once you experience the benefits of these DIY pot protectors, you’ll never go back to store-bought options. They are durable, customizable, and incredibly easy to make. They are also a great way to use up fabric scraps and reduce your environmental impact.
Don’t wait any longer! Gather your materials, unleash your creativity, and start protecting your precious cookware today. We encourage you to try this simple yet effective DIY trick and share your experiences with us. Let us know what variations you tried, what fabrics you used, and how these DIY pot protectors have transformed your kitchen organization. Share your photos and tips in the comments below – we can’t wait to see your creations!
Frequently Asked Questions (FAQ)
What materials are best for making DIY pot protectors?
The best materials for DIY pot protectors are those that offer good cushioning and are durable enough to withstand repeated use. Felt is a popular choice because it’s inexpensive, readily available, and provides excellent protection against scratches. Other suitable options include:
* Fleece: Soft and plush, fleece offers excellent cushioning and is gentle on cookware surfaces.
* Cotton: A natural and breathable option, cotton is easy to work with and can be layered for added thickness.
* Upcycled Fabrics: Old towels, blankets, or denim can be repurposed into effective and eco-friendly pot protectors.
* Quilted Fabric: Provides a luxurious feel and excellent protection due to its multiple layers.
Avoid using thin or flimsy fabrics that won’t offer adequate protection. Also, consider the washability of the fabric if you plan to clean your pot protectors regularly.
How do I determine the right size for my DIY pot protectors?
The ideal size for your DIY pot protectors will depend on the size of your pots and pans. A good rule of thumb is to make the protectors slightly larger than the diameter of your cookware. This ensures that the entire surface is protected and prevents metal-on-metal contact.
To determine the correct size, measure the diameter of each of your pots and pans. Then, add an extra inch or two to that measurement to create a template for your pot protectors. You can create a variety of sizes to accommodate your entire cookware collection.
How do I clean my DIY pot protectors?
The cleaning method for your DIY pot protectors will depend on the fabric you used. In general, it’s best to hand wash them with mild soap and water. Avoid using harsh chemicals or bleach, as these can damage the fabric.
If you used a machine-washable fabric like cotton or fleece, you can wash them in the washing machine on a gentle cycle. Be sure to dry them on a low setting or air dry them to prevent shrinking.
For felt pot protectors, spot cleaning is usually sufficient. Use a damp cloth to blot any stains or spills. Avoid soaking them in water, as this can cause them to lose their shape.
How thick should my DIY pot protectors be?
The thickness of your DIY pot protectors will depend on the type of fabric you use and the level of protection you desire. In general, aim for a thickness of at least 1/4 inch. This will provide adequate cushioning and prevent scratches.
If you’re using a thinner fabric like cotton, you can layer it multiple times to achieve the desired thickness. You can also add a layer of batting or padding for extra protection.
Can I use these DIY pot protectors for non-stick cookware?
Yes, these DIY pot protectors are perfectly safe to use with non-stick cookware. In fact, they are especially beneficial for protecting the delicate non-stick coating from scratches and damage.
When using them with non-stick cookware, be sure to use a soft fabric like felt or fleece to avoid any abrasion. Also, avoid using pot protectors that are too rough or abrasive, as these can scratch the non-stick surface.
How long will these DIY pot protectors last?
The lifespan of your DIY pot protectors will depend on the quality of the materials you use and how frequently you use them. With proper care, they should last for several years.
To extend their lifespan, be sure to clean them regularly and store them properly. Avoid exposing them to extreme heat or moisture, as this can damage the fabric.
Are there any safety concerns with using DIY pot protectors?
There are no major safety concerns with using DIY pot protectors, as long as you use common sense and take a few precautions.
Avoid using flammable materials like paper or cardboard. Also, be sure to keep them away from open flames or heat sources.
If you’re using essential oils to scent your pot protectors, be sure to use them sparingly and avoid using oils that are known to be toxic or irritating.
Can I sell these DIY pot protectors?
Yes, you can absolutely sell these DIY pot protectors! They make a great handmade item to sell at craft fairs, online marketplaces, or even to friends and family.
Be sure to use high-quality materials and create a professional-looking product. You can also offer a variety of sizes, colors, and fabrics to appeal to a wider range of customers.
What if I don’t have a sewing machine?
No problem! You can easily make these DIY pot protectors without a sewing machine. Simply hand-stitch the edges together using a basic running stitch or blanket stitch.
Hand-stitching may take a bit longer, but it’s a perfectly viable option for those who don’t have access to a sewing machine.
Where can I find inspiration for different designs and patterns?
The internet is a treasure trove of inspiration for DIY projects! Search online for “DIY pot protector patterns” or “fabric scrap projects” to find a wealth of ideas.
You can also browse Pinterest, Instagram, and other social media platforms for inspiration. Don’t be afraid to experiment with different colors, fabrics, and shapes to create your own unique designs.

Leave a Comment