

DIY Sink Cleaner Recipe: Are you tired of stubborn clogs and lingering odors plaguing your kitchen or bathroom sink? I know I am! Before you reach for those harsh, chemical-laden drain cleaners, let’s explore a natural and effective solution that’s not only better for the environment but also gentler on your pipes and your wallet.
For generations, resourceful homeowners have relied on simple, homemade remedies to tackle household challenges. Think back to your grandmother’s cleaning secrets – often involving ingredients readily available in the pantry. This DIY approach isn’t just about saving money; it’s about taking control of the ingredients we use in our homes and minimizing our exposure to potentially harmful chemicals.
A clogged or smelly sink can be a real nuisance, disrupting your daily routine and creating an unpleasant atmosphere. Store-bought drain cleaners can be expensive and corrosive, potentially damaging your plumbing over time. That’s why I’m so excited to share this simple yet powerful DIY Sink Cleaner Recipe. It’s a fantastic way to maintain a clean and fresh-smelling sink without resorting to harsh chemicals. Plus, you probably already have most of the ingredients in your kitchen right now! Let’s dive in and discover how to create your own effective and eco-friendly sink cleaner.
DIY Sink Cleaner: Say Goodbye to Clogs and Smells!
Okay, let’s face it, dealing with a clogged or smelly sink is nobody’s idea of a good time. Store-bought drain cleaners can be harsh, expensive, and not always effective. That’s why I’m going to share my go-to DIY sink cleaner recipe that’s not only super easy to make but also uses ingredients you probably already have in your pantry! This method is gentle enough for regular use and powerful enough to tackle most common sink issues.
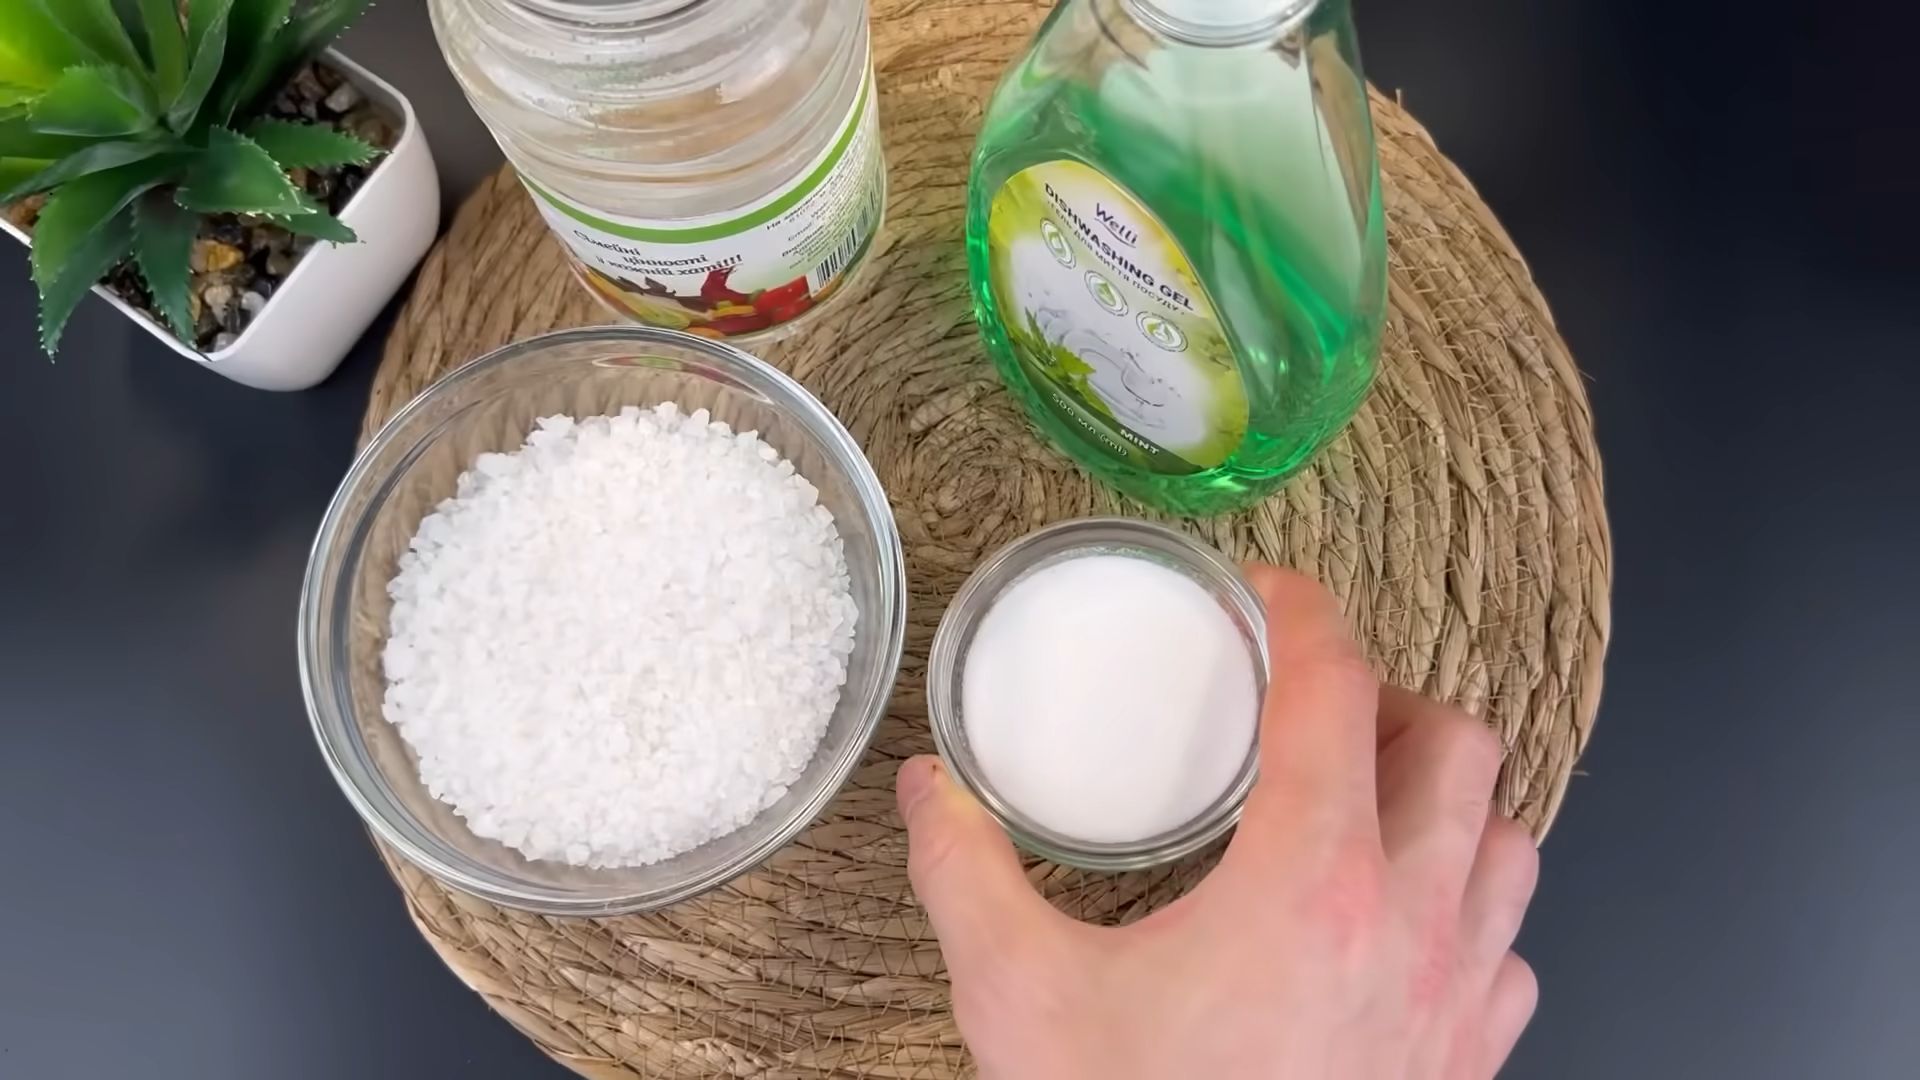
What You’ll Need
Before we dive in, let’s gather our supplies. This is a pretty simple recipe, so you won’t need anything fancy.
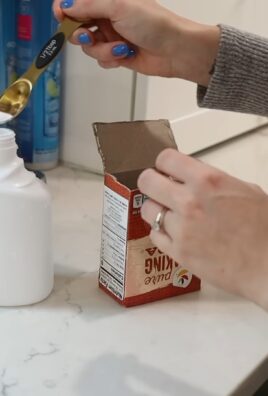
* 1 cup Baking Soda
* 2 cups White Vinegar
* Boiling Water (at least 4 cups, but more is better)
* Optional: A few drops of your favorite essential oil (like lemon, tea tree, or eucalyptus) for a fresh scent.
* A kettle or pot for boiling water
* A measuring cup
* A heat-resistant container (like a glass measuring cup) for mixing (optional)
* A spatula or spoon (optional, for stirring)
Why This Works
You might be wondering why these simple ingredients are so effective. Here’s the science behind the magic:
* Baking Soda: This is a mild alkali that helps to neutralize acids and break down grease and grime. It also acts as a gentle abrasive to scrub away buildup.
* White Vinegar: An acid that reacts with baking soda to create a fizzing action. This fizz helps to loosen clogs and dislodge debris from the drain walls.
* Boiling Water: The heat helps to melt away grease and flush out any remaining debris. It also helps to activate the baking soda and vinegar.
* Essential Oils: These add a pleasant scent and can also have antibacterial properties.
Step-by-Step Instructions: Unclogging and Freshening Your Sink
Alright, let’s get down to business! Follow these steps carefully for a sparkling clean and clog-free sink.
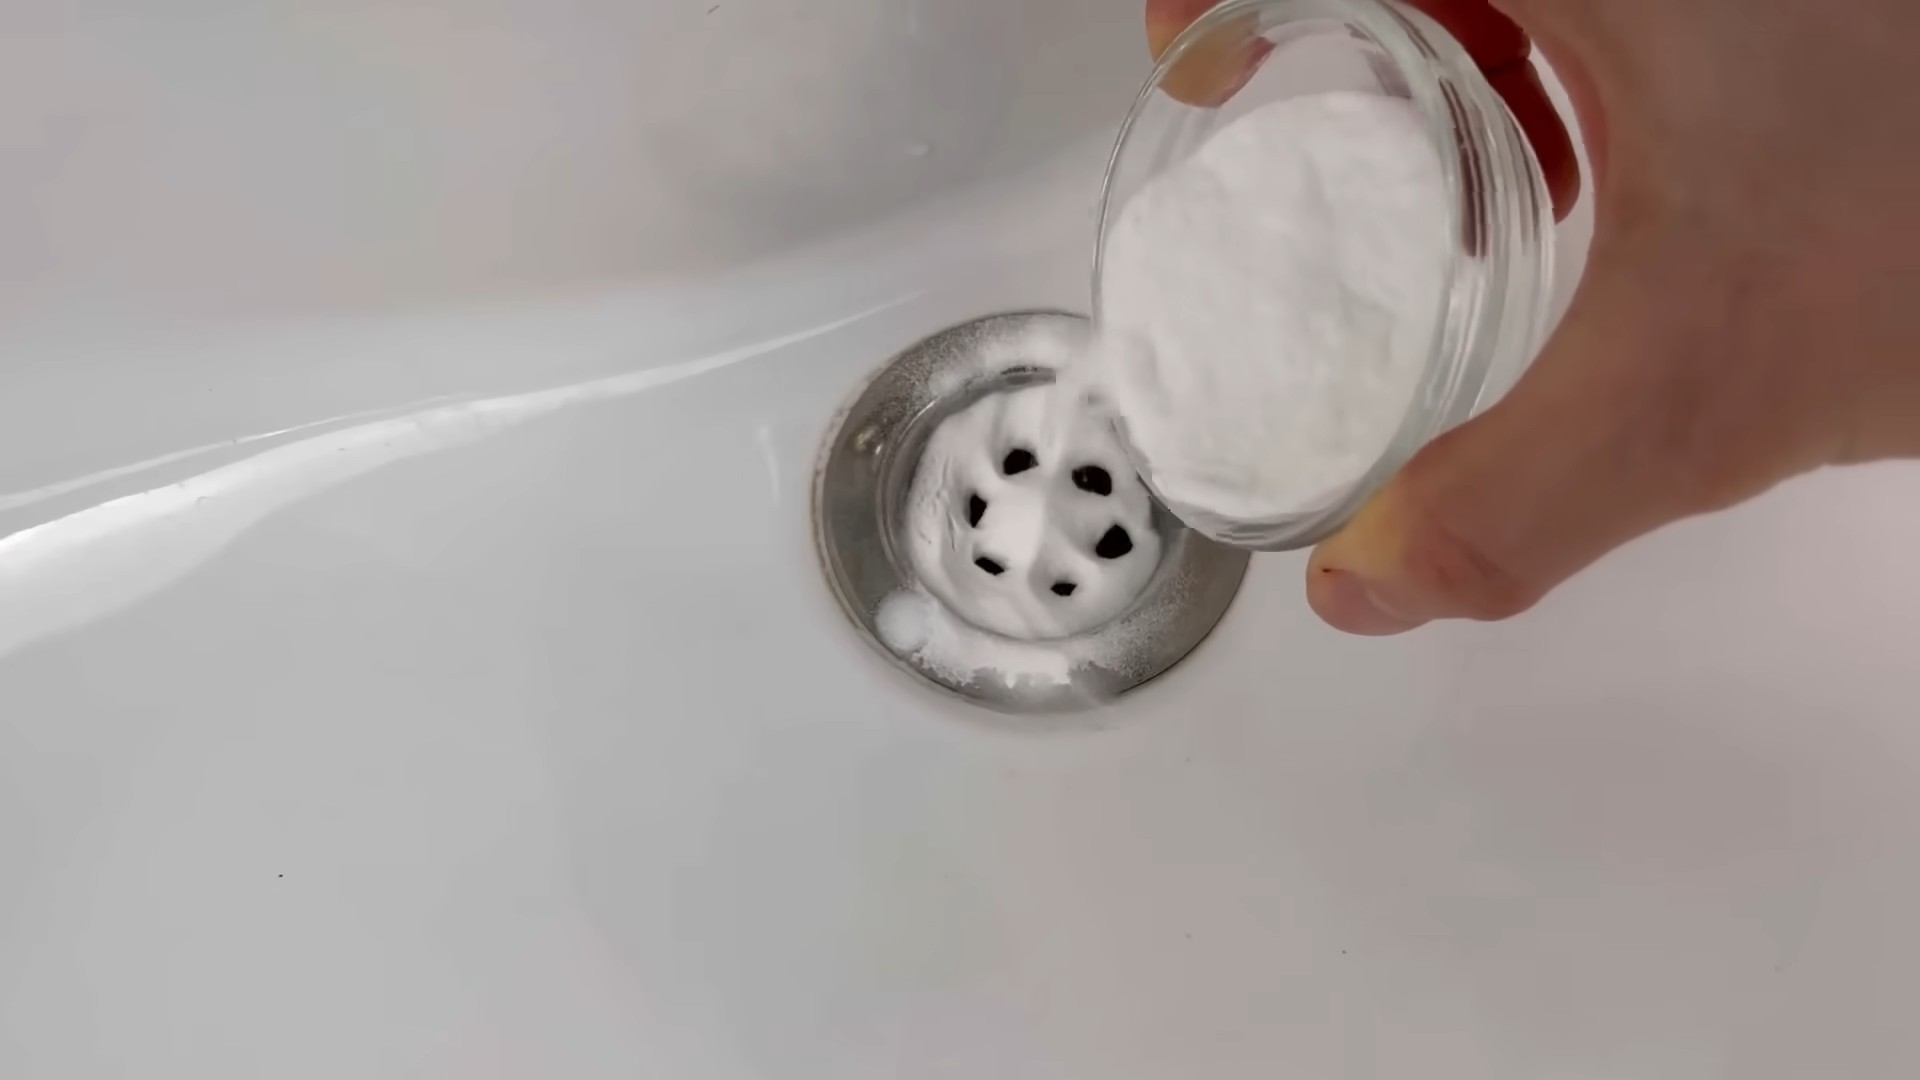
1. Clear the Sink: Make sure your sink is empty of any dishes, utensils, or other items. You want a clear path to the drain. Remove the stopper or strainer if possible. This will allow the baking soda and vinegar to go directly down the drain.
2. Pour in the Baking Soda: Measure out 1 cup of baking soda and carefully pour it directly down the drain. Try to get as much of it down the drain as possible. If some sticks to the sides, don’t worry too much; the vinegar will help to wash it down.
3. Add the Vinegar: Now, measure out 2 cups of white vinegar. Slowly pour the vinegar down the drain on top of the baking soda. You should immediately see and hear a fizzing reaction. This is exactly what we want!
4. Let it Fizz: Let the baking soda and vinegar mixture fizz and bubble for at least 30 minutes. For tougher clogs, you can let it sit for an hour or even overnight. The longer it sits, the more time it has to break down the clog. I usually set a timer so I don’t forget about it.
5. Flush with Boiling Water: After the fizzing has subsided, carefully pour at least 4 cups of boiling water down the drain. Pour it slowly and steadily to help flush out any remaining debris. Be careful not to splash yourself with the boiling water.
6. Check the Drain: Turn on the faucet and let the water run for a few minutes to see if the drain is clear. If the water drains quickly and easily, you’re all set! If the drain is still slow or clogged, repeat steps 2-5. You might need to do this a few times for stubborn clogs.
7. Add Essential Oils (Optional): If you want to add a fresh scent, add a few drops of your favorite essential oil down the drain after you’ve flushed it with boiling water. I love using lemon or tea tree oil for their clean and refreshing scents.
Dealing with Stubborn Clogs
Sometimes, a simple baking soda and vinegar treatment isn’t enough to tackle really stubborn clogs. If you’ve tried the above steps a few times and your drain is still slow, here are a few additional tips:
* Plunger Power: After flushing with boiling water, try using a plunger to dislodge the clog. Make sure there’s enough water in the sink to cover the cup of the plunger. Create a tight seal around the drain and plunge vigorously for several minutes.
* The Bent Wire Hanger Trick: Straighten out a wire coat hanger and bend one end into a small hook. Carefully insert the hooked end into the drain and try to fish out any hair, food particles, or other debris that might be causing the clog. Be careful not to push the clog further down the drain.
* Check the P-Trap: The P-trap is the curved pipe under your sink. It’s designed to trap debris and prevent sewer gases from entering your home. Sometimes, clogs can form in the P-trap. To clean it, place a bucket under the P-trap to catch any water. Loosen the slip nuts that connect the P-trap to the drain pipes. Carefully remove the P-trap and clean out any debris. Reassemble the P-trap and tighten the slip nuts.
* Enzyme Drain Cleaners: If you’re still having trouble, you can try using an enzyme drain cleaner. These cleaners use enzymes to break down organic matter like hair, grease, and food particles. They’re generally safer than chemical drain cleaners, but they can take longer to work.
Preventing Future Clogs
Prevention is always better than cure! Here are a few tips to help prevent future sink clogs:
* Use a Drain Strainer: A drain strainer is a simple and inexpensive way to catch hair, food particles, and other debris before they go down the drain.
* Avoid Pouring Grease Down the Drain: Grease is a major culprit when it comes to sink clogs. Always dispose of grease in a separate container.
* Flush with Hot Water Regularly: Run hot water down the drain for a few minutes every week to help flush out any buildup.
* Regular Cleaning: Use this DIY sink cleaner recipe regularly (once a month or so) to keep your drains clean and clear.
Safety First!
While this DIY sink cleaner is generally safe, it’s important to take a few precautions:
* Wear Gloves: While not strictly necessary, wearing gloves can protect your hands from irritation.
* Avoid Splashing: Be careful when pouring boiling water and vinegar to avoid splashing yourself.
* Ventilation: Make sure the room is well-ventilated when using vinegar.
* Don’t Mix with Other Cleaners: Never mix this DIY cleaner with other drain cleaners, especially chemical ones. This can create dangerous fumes.
* Keep Out of Reach of Children and Pets: Store baking soda and vinegar in a safe place out of reach of children and pets.
Essential Oil Blends for a Fresh Scent
Want to customize your sink cleaner with a delightful aroma? Here are a few essential oil blend ideas:
* Citrus Burst: Lemon, orange, and grapefruit essential oils for a bright and energizing scent.
* Eucalyptus Mint: Eucalyptus and peppermint essential oils for a refreshing and invigorating scent.
* Lavender Tea Tree: Lavender and tea tree essential oils for a calming and antibacterial scent.
* Clean & Fresh: Lemon and Tea Tree for a clean and fresh scent.
Remember to use only a few drops of essential oil, as they are highly concentrated.
Troubleshooting
* No Fizzing: If you don’t see any fizzing when you add the vinegar, it could be that your baking soda is old or your vinegar is weak. Try using fresh baking soda and vinegar.
* Still Clogged After Multiple Attempts: If you’ve tried the above steps multiple times and your drain is still clogged, it’s time to call a plumber. There might be a more serious issue with your plumbing.
* Unpleasant Smell Lingering: If you still notice an unpleasant smell after cleaning your drain, it could be coming from your garbage disposal. Try cleaning your garbage disposal with ice cubes and lemon peels.
Final Thoughts
I hope this DIY sink cleaner recipe helps you keep your sinks clean, clear, and smelling fresh! It’s a simple, effective, and eco-friendly way to tackle common sink problems. Plus, it’s a lot cheaper than buying commercial drain cleaners. Give it a try, and let me know how it works for you! Happy cleaning!
Conclusion
So, there you have it! This simple, yet incredibly effective, DIY sink cleaner recipe is a game-changer for anyone tired of battling stubborn grime and unpleasant odors in their kitchen or bathroom. Forget those harsh, chemical-laden commercial cleaners that can irritate your skin and pollute your home. This homemade solution is not only eco-friendly and cost-effective, but it also delivers impressive results, leaving your sink sparkling clean and smelling fresh.
Why is this DIY sink cleaner a must-try? Because it’s a powerful combination of readily available ingredients that work synergistically to break down grease, eliminate bacteria, and deodorize your drain. The baking soda acts as a gentle abrasive and deodorizer, while the vinegar provides a fizzing action that helps to dislodge debris. The essential oils, beyond their pleasant scent, offer antibacterial and antifungal properties, further enhancing the cleaning power.
But the beauty of this DIY sink cleaner doesn’t stop there. It’s incredibly versatile and can be easily customized to suit your specific needs and preferences.
Here are a few suggestions and variations to consider:
* For extra stubborn clogs: After pouring the baking soda and vinegar mixture down the drain, let it sit for at least 30 minutes, or even overnight, before flushing with hot water. This will give the mixture more time to break down the blockage.
* Lemon power: Add a few drops of lemon essential oil to the mixture for an extra boost of cleaning power and a refreshing citrus scent. Lemon is a natural degreaser and can help to cut through tough grime.
* Tea tree for disinfection: If you’re concerned about bacteria or mold, add a few drops of tea tree essential oil. Tea tree oil is a potent antibacterial and antifungal agent.
* Eucalyptus for freshness: Eucalyptus essential oil not only smells amazing but also has antiseptic properties. It’s a great addition for a truly clean and fresh-smelling sink.
* Preventative maintenance: Use this DIY sink cleaner recipe once a week as a preventative measure to keep your drains clear and odor-free. Regular use will help to prevent build-up and keep your sink in top condition.
* Adjusting the consistency: If you prefer a thicker paste, add a little more baking soda until you reach your desired consistency. This can be helpful for cleaning the sink basin itself.
We are confident that once you try this DIY sink cleaner, you’ll be amazed by the results. It’s a simple, effective, and eco-friendly way to keep your sink clean and fresh.
So, what are you waiting for? Gather your ingredients, follow the simple steps, and experience the satisfaction of a sparkling clean sink, achieved with your own homemade solution.
We encourage you to try this DIY sink cleaner recipe and share your experience with us! Let us know what variations you tried, what scents you used, and how well it worked for you. Your feedback is invaluable and helps us to improve our recipes and provide the best possible information to our readers. Share your before-and-after photos on social media and tag us! We can’t wait to see your sparkling clean sinks!
Frequently Asked Questions (FAQ)
What exactly makes this DIY sink cleaner better than store-bought options?
Store-bought sink cleaners often contain harsh chemicals like bleach, ammonia, and phosphates, which can be harmful to your health and the environment. These chemicals can irritate your skin, eyes, and respiratory system. They can also pollute waterways and harm aquatic life. Our DIY sink cleaner, on the other hand, uses natural, biodegradable ingredients that are safe for you, your family, and the planet. It’s also significantly cheaper to make than buying commercial cleaners. Plus, you have complete control over the ingredients, allowing you to customize the scent and cleaning power to your liking.
Can I use this DIY sink cleaner on all types of sinks?
This DIY sink cleaner is generally safe for most types of sinks, including stainless steel, porcelain, and ceramic. However, it’s always a good idea to test it in an inconspicuous area first, especially if you have a more delicate or antique sink. Avoid using abrasive scrub brushes on easily scratched surfaces. For natural stone sinks like marble or granite, it’s best to avoid using vinegar, as it can etch the surface over time. Instead, use a milder alternative like baking soda and water paste.
How often should I use this DIY sink cleaner?
For regular maintenance and to prevent clogs, we recommend using this DIY sink cleaner once a week. If you have a particularly busy sink or are dealing with a persistent clog, you can use it more frequently, such as every other day, until the problem is resolved. Remember to flush thoroughly with hot water after each use.
What if I don’t have essential oils? Can I still make the cleaner?
Yes, you can definitely still make the cleaner without essential oils. The baking soda and vinegar are the primary cleaning agents, and they will still be effective without the added oils. The essential oils primarily add fragrance and some additional antibacterial properties. If you don’t have essential oils, you can simply omit them or substitute them with a few drops of lemon juice for a fresh scent.
The baking soda and vinegar mixture fizzes up a lot. Is that normal?
Yes, the fizzing is perfectly normal and is actually a key part of the cleaning process. The reaction between baking soda (a base) and vinegar (an acid) creates carbon dioxide gas, which helps to dislodge debris and break down grease in your drain. The fizzing action also helps to distribute the cleaning mixture throughout the drainpipe.
What if the clog is really bad and the DIY cleaner doesn’t work?
If you have a severe clog that doesn’t respond to the DIY sink cleaner, you may need to try a few other methods. First, try using a plunger to create suction and dislodge the blockage. If that doesn’t work, you can try using a drain snake to physically remove the clog. As a last resort, you may need to call a professional plumber. However, in many cases, this DIY cleaner will be sufficient to clear minor to moderate clogs.
Can I use this cleaner in my garbage disposal?
Yes, this cleaner is safe to use in your garbage disposal. In fact, it can help to freshen and clean your disposal. Just follow the same steps as you would for a regular sink drain. After pouring the mixture down the disposal, let it sit for a few minutes before running the disposal with cold water.
How should I store leftover baking soda and vinegar?
Baking soda should be stored in an airtight container in a cool, dry place. Vinegar should be stored in its original container, tightly sealed, in a cool, dark place. Both ingredients have a long shelf life when stored properly.
Is this DIY sink cleaner safe for septic systems?
Yes, this DIY sink cleaner is generally considered safe for septic systems. The ingredients are natural and biodegradable, and they won’t harm the beneficial bacteria in your septic tank. However, it’s always a good idea to use any cleaning product in moderation when you have a septic system.
Can I use a different type of vinegar, like apple cider vinegar?
While white vinegar is the most commonly recommended type of vinegar for cleaning, you can use apple cider vinegar as a substitute. However, white vinegar is generally more acidic and therefore more effective at cleaning. Apple cider vinegar may also leave a slight residue due to its higher sugar content.
Leave a Comment