

Fog Free Mirror Hack: Are you tired of stepping out of a steamy shower only to be greeted by a completely fogged-up mirror? I know I am! It’s a daily frustration that can ruin your morning routine. But what if I told you there’s a simple, DIY solution that will keep your bathroom mirror crystal clear, even after the hottest shower?
Mirrors have been a part of our lives for centuries, dating back to ancient civilizations who used polished stones and metals to reflect their images. While the technology has evolved significantly, the problem of fogging remains a persistent annoyance. This is especially true in smaller bathrooms with poor ventilation.
Let’s face it, nobody enjoys wiping down their mirror every single morning. It’s time-consuming, and often leaves streaks behind. That’s where this amazing fog free mirror hack comes in! This DIY trick is not only incredibly easy and affordable, but it also uses ingredients you likely already have in your home. I’m going to show you how to create a fog-resistant barrier that will keep your mirror clear and ready for you to get ready for your day. Say goodbye to foggy reflections and hello to a clearer, brighter morning!
DIY Fog-Free Bathroom Mirror: A Simple & Effective Guide
Okay, let’s face it, nobody enjoys wiping down a foggy mirror after a hot shower. It’s annoying, time-consuming, and honestly, a bit of a waste of a perfectly good shower’s relaxing vibes. So, I’m going to share my tried-and-true method for creating a DIY fog-free bathroom mirror. This isn’t some complicated, expensive project; it’s a simple hack that uses readily available materials and will save you tons of frustration.
What You’ll Need
Before we dive in, let’s gather our supplies. This is a pretty straightforward project, so the list is short and sweet:
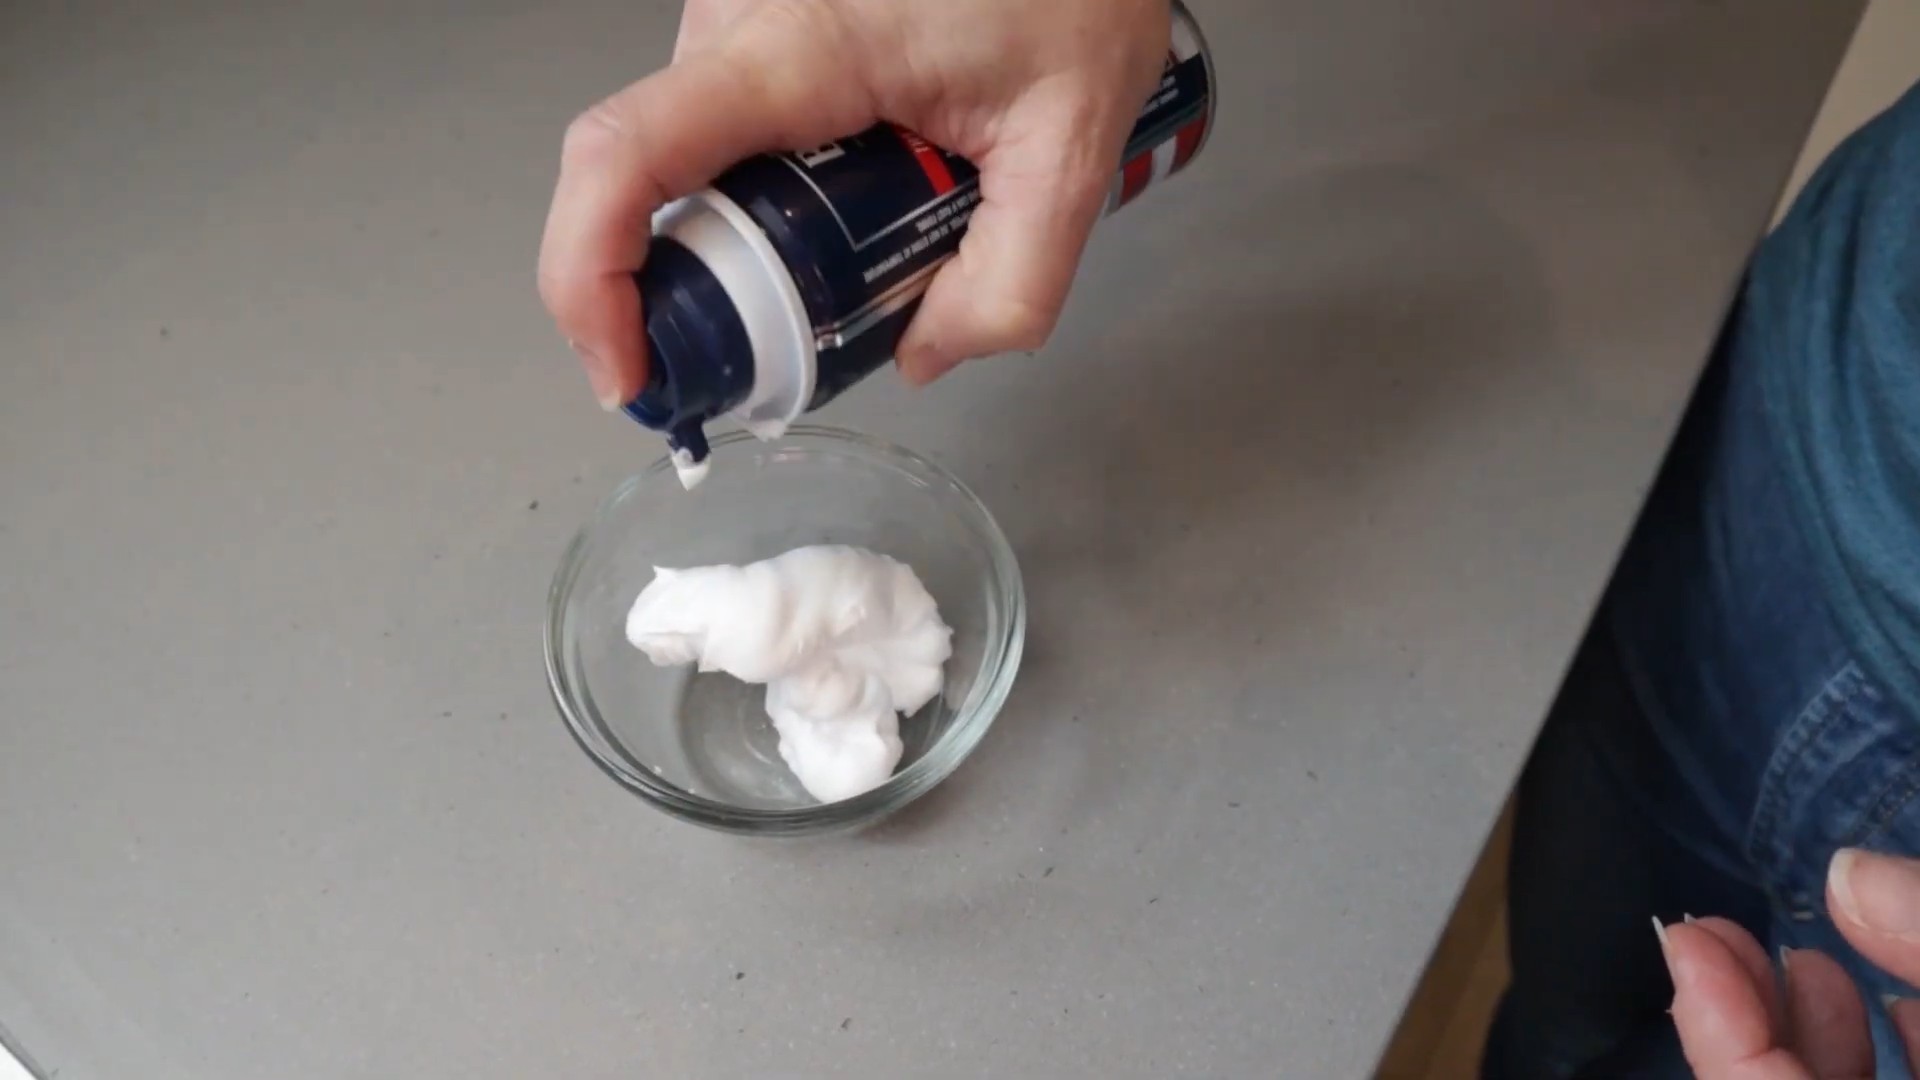
- Shaving Cream: Yep, you read that right! Plain old shaving cream is the star of this show. I recommend using a basic, non-gel shaving cream. The foamy kind works best.
- Microfiber Cloth: You’ll need a clean, soft microfiber cloth for buffing. This is crucial for achieving a streak-free finish.
- Spray Bottle (Optional): While not strictly necessary, a spray bottle filled with water can be helpful for rinsing if you accidentally apply too much shaving cream.
Step-by-Step Instructions: The Fog-Free Magic
Alright, let’s get down to business! Follow these steps carefully, and you’ll be enjoying a fog-free mirror in no time.
- Prepare Your Mirror: Start with a clean and dry mirror. Wipe away any existing water spots, toothpaste splatters, or dust. A clean surface is essential for the shaving cream to adhere properly. I usually use a glass cleaner and then dry it thoroughly with a clean cloth.
- Apply the Shaving Cream: This is where the magic begins! Take your shaving cream and apply a thin layer to the entire surface of the mirror. Don’t go overboard; a little goes a long way. You want to cover the mirror completely, but you shouldn’t have thick globs of shaving cream. Think of it like frosting a cake – a thin, even layer is key.
- Spread the Shaving Cream: Using your fingers or a clean, dry cloth, gently spread the shaving cream evenly across the mirror surface. Make sure to cover every inch, including the edges. The goal is to create a uniform layer that will act as a barrier against the steam.
- Let it Sit: Now, patience is a virtue! Let the shaving cream sit on the mirror for a few minutes – I usually wait about 2-3 minutes. This allows the ingredients in the shaving cream to work their magic and create a protective film.
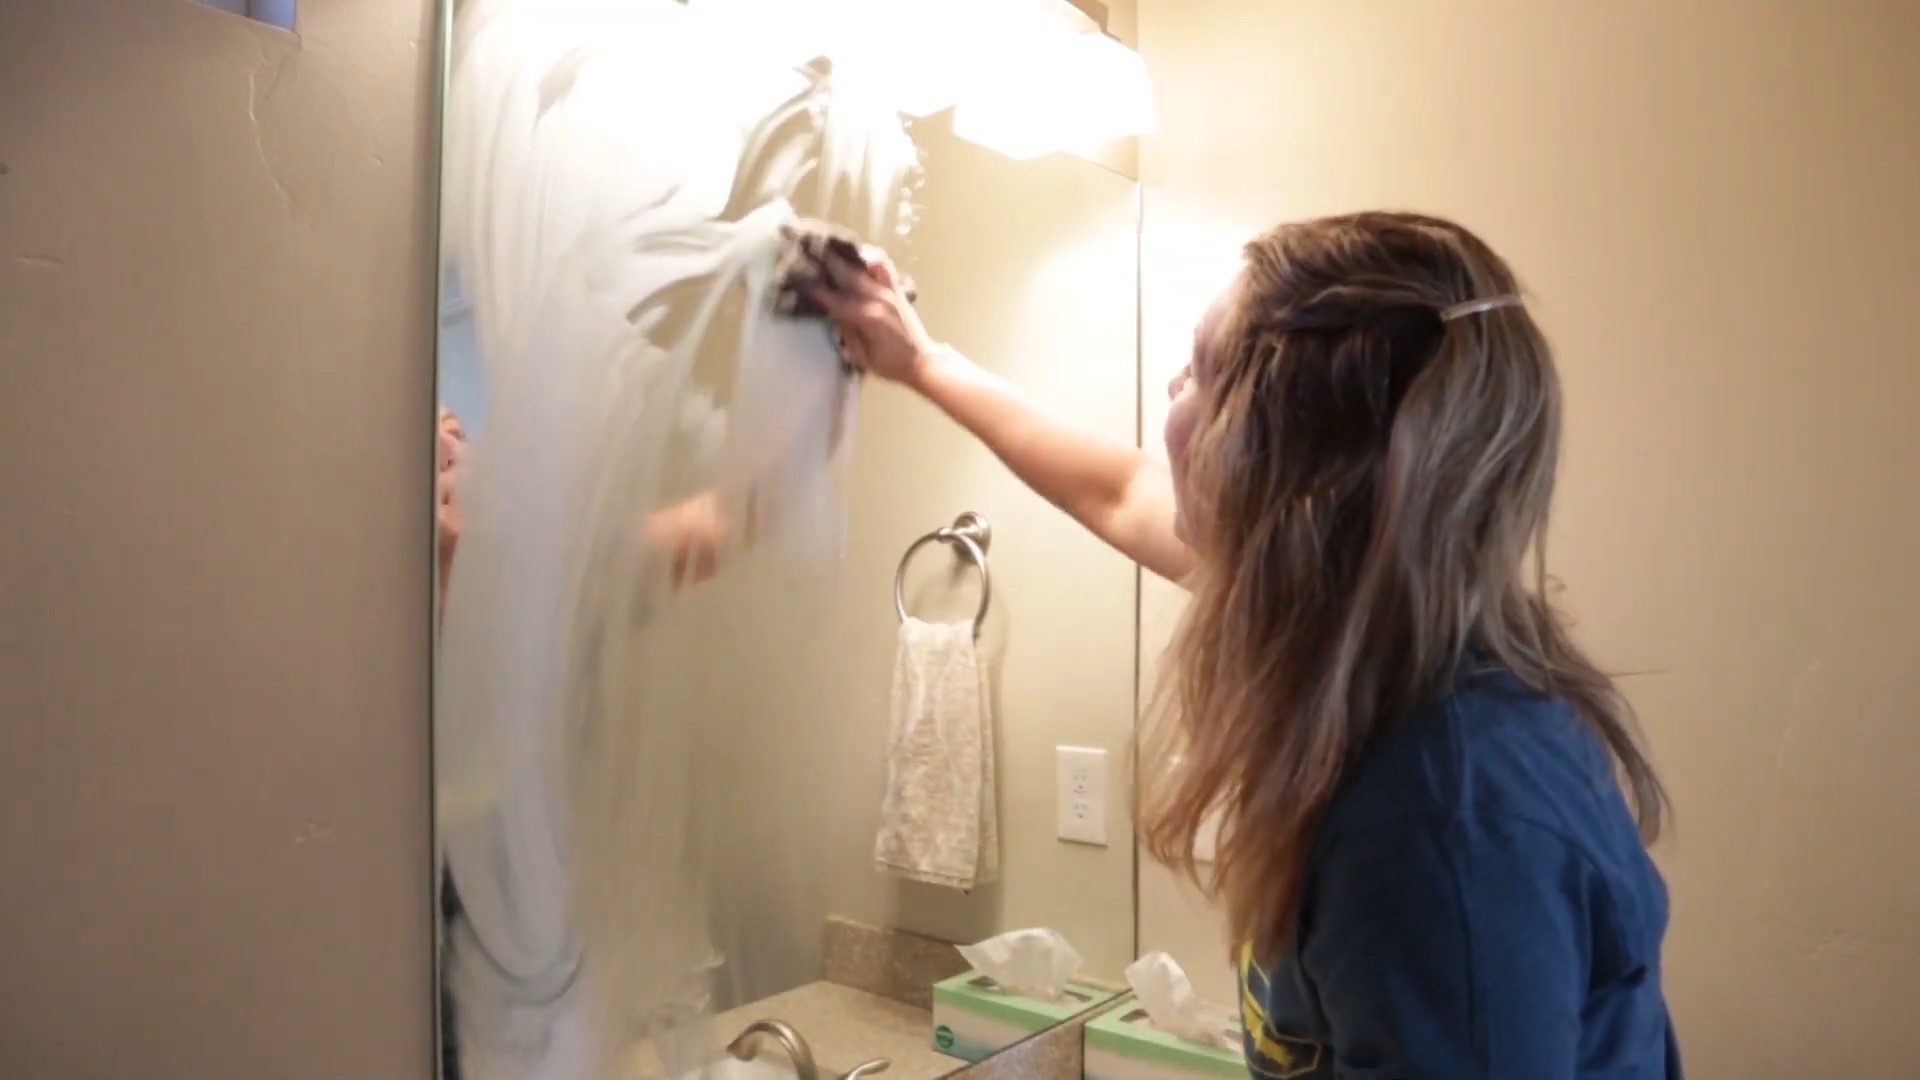
- Buff it Out: This is the most important step! Take your clean microfiber cloth and begin buffing the shaving cream off the mirror. Use circular motions and apply gentle pressure. The key here is to buff until the mirror is clear and streak-free. This might take a few minutes, so don’t rush it. Keep buffing until you can see your reflection clearly.
- Check for Streaks: Once you’ve buffed the mirror, take a step back and examine it closely. Look for any streaks or residue. If you see any, continue buffing with a clean section of your microfiber cloth. You might need to use a slightly damp corner of the cloth to remove stubborn streaks.
- Optional Rinse (If Needed): If you accidentally applied too much shaving cream and are having trouble buffing it all away, you can lightly spray the mirror with water from your spray bottle. Then, immediately buff it dry with your microfiber cloth. Be careful not to over-saturate the mirror, as this can leave water spots.
- Test it Out: Now for the fun part! Turn on the hot water in your shower and let the steam build up. Observe your mirror and marvel at its fog-free glory! You should be able to see your reflection clearly, even in the steamiest conditions.
Why This Works: The Science Behind the Magic
So, why does shaving cream prevent fogging? It’s all about the surfactants! Shaving cream contains surfactants, which are substances that reduce the surface tension of water. When you apply shaving cream to the mirror, the surfactants create a thin film that prevents water droplets from beading up and forming fog. Instead, the water spreads out evenly, creating a transparent layer that allows you to see your reflection clearly.
Troubleshooting and Tips for Success
Even with the best instructions, sometimes things don’t go exactly as planned. Here are some common issues and how to fix them:
- Streaky Mirror: If your mirror is still streaky after buffing, try using a different microfiber cloth or a clean section of the same cloth. You might also need to apply a bit more pressure while buffing. If the streaks persist, try lightly dampening the cloth with water and buffing again.
- Shaving Cream Residue: If you’re having trouble removing all the shaving cream residue, try using a slightly damp cloth and buffing in small, circular motions. You can also try using a glass cleaner to remove any stubborn residue.
- Fog Returns Quickly: The longevity of the fog-free effect depends on several factors, including the humidity level in your bathroom and the type of shaving cream you use. If the fog returns quickly, simply reapply the shaving cream as needed. I usually reapply every week or two.
- Type of Shaving Cream Matters: As I mentioned earlier, plain old foamy shaving cream works best. Gel shaving creams tend to be more difficult to buff out and can leave a sticky residue. Avoid using shaving creams that contain moisturizers or oils, as these can also leave streaks.
- Ventilation is Key: While this hack works wonders, it’s not a substitute for proper bathroom ventilation. Make sure your bathroom fan is working properly and use it during and after showers to help reduce humidity.
Alternative Methods (If Shaving Cream Isn’t Your Thing)
While I swear by the shaving cream method, there are a few other DIY options you can try:
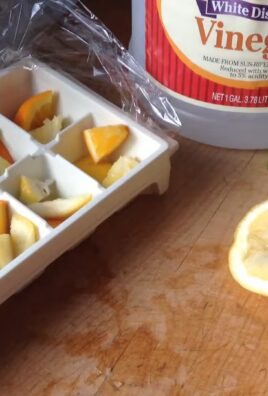
- Vinegar and Water: Mix equal parts white vinegar and water in a spray bottle. Spray the mixture onto your mirror and wipe it clean with a microfiber cloth. Vinegar is a natural cleaner and can help prevent fogging.
- Dish Soap and Water: Add a few drops of dish soap to a spray bottle filled with water. Spray the mixture onto your mirror and wipe it clean with a microfiber cloth. Dish soap, like shaving cream, contains surfactants that can help prevent fogging.
- Commercial Anti-Fog Sprays: If you’re not into DIY, you can purchase commercial anti-fog sprays specifically designed for bathroom mirrors. These sprays are typically more expensive than the DIY options, but they can be very effective.
Long-Term Maintenance
To keep your mirror fog-free for as long as possible, here are a few tips:
- Regular Cleaning: Clean your mirror regularly with a glass cleaner to remove any dirt, dust, or water spots. This will help the shaving cream film last longer.
- Reapply as Needed: As I mentioned earlier, you’ll need to reapply the shaving cream every week or two, depending on your bathroom’s humidity levels.
- Proper Ventilation: Always use your bathroom fan during and after showers to help reduce humidity and prevent fogging.
Safety First!
While this is a pretty safe DIY project, here are a few safety precautions to keep in mind:
- Avoid Eye Contact: Avoid getting shaving cream in your eyes. If you do, rinse them thoroughly with water.
- Ventilation: Work in a well-ventilated area to avoid inhaling excessive amounts of shaving cream fumes.
- Supervise Children: If you’re doing this project with children, supervise them closely to ensure they don’t ingest any shaving cream.
Final Thoughts
This DIY fog-free mirror hack is a simple, affordable, and effective way to eliminate the frustration of foggy mirrors. With just a few readily available materials and a little bit of elbow grease, you can enjoy a clear reflection every time you step out of the shower. Give it a try, and I promise you won’t be disappointed! It’s one of those little things that makes a big difference in your daily routine. Happy fog-free showering!
Conclusion
So, there you have it! This simple, yet incredibly effective, fog-free mirror hack is a game-changer for anyone tired of wiping down their bathroom mirror after every shower. Forget expensive sprays and complicated solutions. This DIY method is not only budget-friendly but also utilizes ingredients you likely already have in your home.
Why is this a must-try? Because it genuinely works! Imagine stepping out of a hot shower and being greeted by a perfectly clear reflection. No more streaks, no more waiting for the fog to dissipate, just instant visibility. This hack saves you time, reduces waste from disposable cleaning products, and provides a consistently clear mirror. It’s a small change that makes a big difference in your daily routine.
Beyond the basic recipe, feel free to experiment! Some people find that adding a few drops of essential oil, like lavender or eucalyptus, can enhance the experience with a subtle, spa-like aroma. Just be sure to test a small area first to ensure the essential oil doesn’t damage the mirror’s surface. Another variation involves using a microfiber cloth for application and buffing, which can further minimize streaks and maximize clarity. You can also adjust the ratio of vinegar to water based on your water hardness. If you have particularly hard water, you might find that a slightly higher concentration of vinegar works best.
This fog-free mirror hack is more than just a cleaning tip; it’s a lifestyle upgrade. It’s about simplifying your routine and enjoying a small luxury every day. We’re confident that once you try this method, you’ll wonder how you ever lived without it.
Don’t just take our word for it, though. We wholeheartedly encourage you to give this DIY trick a try. It’s quick, easy, and the results speak for themselves. And most importantly, we want to hear about your experience! Did you find it as effective as we did? Did you try any variations? Share your thoughts, tips, and photos in the comments below. Let’s build a community of fog-free mirror enthusiasts! Your feedback will not only help others discover this amazing hack but also contribute to refining and improving the method for everyone. Let us know if you have any questions, and happy fog-free showering!
Frequently Asked Questions (FAQ)
1. What exactly causes bathroom mirrors to fog up?
The fog on your bathroom mirror is caused by condensation. When hot, moist air from your shower comes into contact with the cooler surface of the mirror, the water vapor in the air cools down rapidly. This rapid cooling causes the water vapor to condense into tiny water droplets, forming the fog that obscures your reflection. The temperature difference between the air and the mirror is the primary factor.
2. How does this DIY fog-free mirror hack work?
This DIY solution works by creating a thin, invisible film on the surface of the mirror. This film reduces the surface tension of the water droplets that form during condensation. Instead of forming individual, opaque droplets that create fog, the water spreads out into a thin, transparent layer. This allows you to see your reflection clearly, even in a steamy bathroom. The vinegar helps to clean the mirror and further reduce surface tension, while the water dilutes the vinegar to prevent damage and streaking.
3. What are the ingredients needed for this fog-free mirror hack?
You only need two simple ingredients: white vinegar and water. The recommended ratio is typically a 1:1 mixture of white vinegar and water, but you can adjust this based on your water hardness and personal preference. You’ll also need a spray bottle to apply the solution and a clean cloth (preferably microfiber) to wipe and buff the mirror.
4. Is white vinegar the only type of vinegar I can use?
While white vinegar is the most commonly recommended type for this hack, primarily due to its acidity and lack of coloring, you could potentially use other types of vinegar, such as apple cider vinegar. However, be cautious, as some vinegars may leave a residue or discoloration on the mirror. Always test a small, inconspicuous area first to ensure it doesn’t damage or stain the surface. White vinegar is generally the safest and most effective option.
5. How often do I need to reapply the fog-free solution?
The frequency of reapplication depends on several factors, including how often you shower, the humidity levels in your bathroom, and the effectiveness of your initial application. Generally, you’ll need to reapply the solution every 1-2 weeks. You’ll know it’s time to reapply when you start to notice fog forming on the mirror again.
6. Will this fog-free mirror hack damage my mirror?
When used correctly, this DIY solution should not damage your mirror. White vinegar is a relatively mild acid, and when diluted with water, it’s safe for most glass surfaces. However, it’s always a good idea to test the solution on a small, inconspicuous area of the mirror first, especially if you have an antique or particularly delicate mirror. Avoid using abrasive cleaners or scrub brushes, as these can scratch the surface.
7. Can I use this fog-free solution on other surfaces besides mirrors?
While this solution is primarily designed for mirrors, it can also be used on other glass surfaces, such as shower doors and windows. However, be cautious when using it on surfaces with special coatings or films, as the vinegar could potentially damage them. Always test a small area first. It’s generally not recommended for use on painted or varnished surfaces.
8. What if I don’t have white vinegar? Are there any alternatives?
If you don’t have white vinegar, you can try using a small amount of dish soap diluted in water. Apply the solution to the mirror and wipe it off with a clean cloth. However, dish soap may leave streaks, so be sure to buff the mirror thoroughly. Another alternative is to use a commercial fog-free spray, but these can be more expensive and may contain harsh chemicals.
9. My mirror is still streaky after applying the solution. What am I doing wrong?
Streaking can occur if you’re using too much solution, if your cloth is dirty, or if you’re not buffing the mirror properly. Try using less solution and make sure your cloth is clean and dry. Use a microfiber cloth for best results. Buff the mirror in circular motions until it’s completely dry and streak-free. You might also try diluting the vinegar solution further.
10. Is this fog-free mirror hack safe for children and pets?
The diluted vinegar solution is generally considered safe for children and pets, but it’s always best to keep cleaning products out of their reach. Avoid spraying the solution directly in their faces or allowing them to ingest it. If you’re concerned about potential allergies or sensitivities, you can use a natural alternative, such as lemon juice diluted in water. As with any cleaning product, use caution and common sense.

Leave a Comment