

Grow Artichokes at Home? Absolutely! Imagine stepping into your backyard and harvesting your own spiky treasures, ready to be steamed, grilled, or dipped in garlic aioli. It sounds like a dream, right? Well, it doesn’t have to be! For centuries, artichokes have been prized for their unique flavor and nutritional benefits, gracing tables from the Mediterranean to California. Their journey from wild thistle to culinary delicacy is a fascinating one, and now, you can be a part of that story.
But why should you bother with growing artichokes at home? Let’s be honest, store-bought artichokes can be expensive and sometimes lack that fresh, vibrant taste. Plus, there’s something incredibly satisfying about nurturing a plant from seedling to harvest. This DIY guide is your key to unlocking the secrets of successfully grow artichokes at home, even if you’re a beginner gardener. I’m here to share simple, effective tricks and hacks that will transform your garden into an artichoke haven. Get ready to impress your friends and family with your homegrown delicacies!
Grow Your Own Delicious Artichokes: A Beginner’s Guide
Hey there, fellow gardening enthusiasts! I’m so excited to share my experience with growing artichokes at home. These architectural beauties not only add a unique touch to your garden but also provide a delicious and healthy harvest. Don’t be intimidated – with a little patience and the right guidance, you can absolutely cultivate these thistles in your own backyard. Let’s dive in!
Choosing the Right Artichoke Variety
Before we get our hands dirty, it’s crucial to select the right artichoke variety for your climate. Artichokes are perennials in warmer regions (zones 7-10), but in colder areas, they’re often grown as annuals. Here are a few popular varieties to consider:
* ‘Green Globe’: This is a classic and widely available variety, known for its large, round, green artichokes. It’s a reliable producer and a great choice for beginners.
* ‘Violetta’: If you’re looking for something a bit different, ‘Violetta’ offers beautiful purple-tinged artichokes. They’re just as delicious as the green varieties and add a pop of color to your garden.
* ‘Imperial Star’: This variety is specifically bred for annual production, making it a great option for gardeners in colder climates. It matures quickly and produces a good yield in a single season.
* ‘Big Heart’: As the name suggests, this variety boasts large, meaty hearts with fewer prickly chokes. It’s a relatively new variety and gaining popularity for its ease of preparation.
I personally started with ‘Green Globe’ because it’s readily available and known for its reliability. Once you get the hang of it, you can experiment with other varieties!
Preparing Your Artichoke Bed
Artichokes are heavy feeders, meaning they need nutrient-rich soil to thrive. Proper soil preparation is key to a successful harvest. Here’s what I recommend:
* Sunlight: Artichokes need at least 6-8 hours of direct sunlight per day. Choose a location in your garden that receives plenty of sunshine.
* Soil: Artichokes prefer well-draining soil that’s rich in organic matter. Amend your soil with compost, aged manure, or other organic materials to improve its fertility and drainage. The ideal pH is between 6.0 and 7.0.
* Drainage: Artichokes don’t like soggy soil. Make sure your planting area has good drainage to prevent root rot. If your soil is heavy clay, consider building raised beds to improve drainage.
* Space: Artichokes can grow quite large, reaching up to 3-4 feet tall and wide. Give them plenty of space to spread out. I recommend spacing plants at least 4 feet apart.
Starting Artichokes from Seed (Optional)
While you can start artichokes from seed, it’s a bit more challenging and time-consuming. Artichokes started from seed may not produce in their first year, especially in colder climates. If you’re feeling adventurous, here’s a basic outline:
1. Start seeds indoors: About 8-10 weeks before the last expected frost, sow artichoke seeds in seed-starting trays or small pots filled with seed-starting mix.
2. Keep them warm: Maintain a soil temperature of around 70-75°F (21-24°C) for optimal germination. Use a heat mat if necessary.
3. Provide light: Once the seedlings emerge, provide them with plenty of light. A grow light is ideal, but a sunny windowsill can also work.
4. Harden off: Gradually acclimate the seedlings to outdoor conditions by exposing them to increasing amounts of sunlight and fresh air over a period of 1-2 weeks before transplanting them into the garden.
I personally prefer to start with established plants or root divisions, as it’s a faster and more reliable way to get a harvest.
Planting Artichoke Starts or Root Divisions
This is where the real fun begins! Whether you’re using purchased starts or root divisions from an existing plant, the planting process is essentially the same.
1. Dig a hole: Dig a hole that’s slightly larger than the root ball of your artichoke start or root division.
2. Amend the soil: Mix some compost or aged manure into the soil at the bottom of the hole.
3. Plant the artichoke: Gently remove the artichoke from its container and place it in the hole. Make sure the top of the root ball is level with the surrounding soil.
4. Backfill the hole: Fill the hole with soil, gently firming it around the plant.
5. Water thoroughly: Water the newly planted artichoke thoroughly to help settle the soil and encourage root growth.
6. Mulch: Apply a layer of mulch around the base of the plant to help retain moisture, suppress weeds, and regulate soil temperature. I like to use straw or shredded leaves.
Caring for Your Artichoke Plants
Once your artichokes are planted, it’s important to provide them with the care they need to thrive.
* Watering: Artichokes need consistent moisture, especially during dry periods. Water deeply and regularly, aiming to keep the soil consistently moist but not waterlogged.
* Fertilizing: Artichokes are heavy feeders and benefit from regular fertilization. Apply a balanced fertilizer every 4-6 weeks during the growing season. You can also side-dress with compost or aged manure.
* Weeding: Keep the area around your artichoke plants free of weeds. Weeds compete with artichokes for nutrients and water.
* Pest Control: Artichokes can be susceptible to certain pests, such as aphids, snails, and slugs. Inspect your plants regularly and take action if you notice any signs of infestation. I prefer to use organic pest control methods, such as insecticidal soap or diatomaceous earth.
* Pruning: After the main harvest, cut back the spent flower stalks to encourage the plant to produce more side shoots. In colder climates, cut the plant back to the ground in the fall and mulch heavily to protect it from frost.
Harvesting Your Artichokes
The moment you’ve been waiting for! Harvesting artichokes is a rewarding experience.
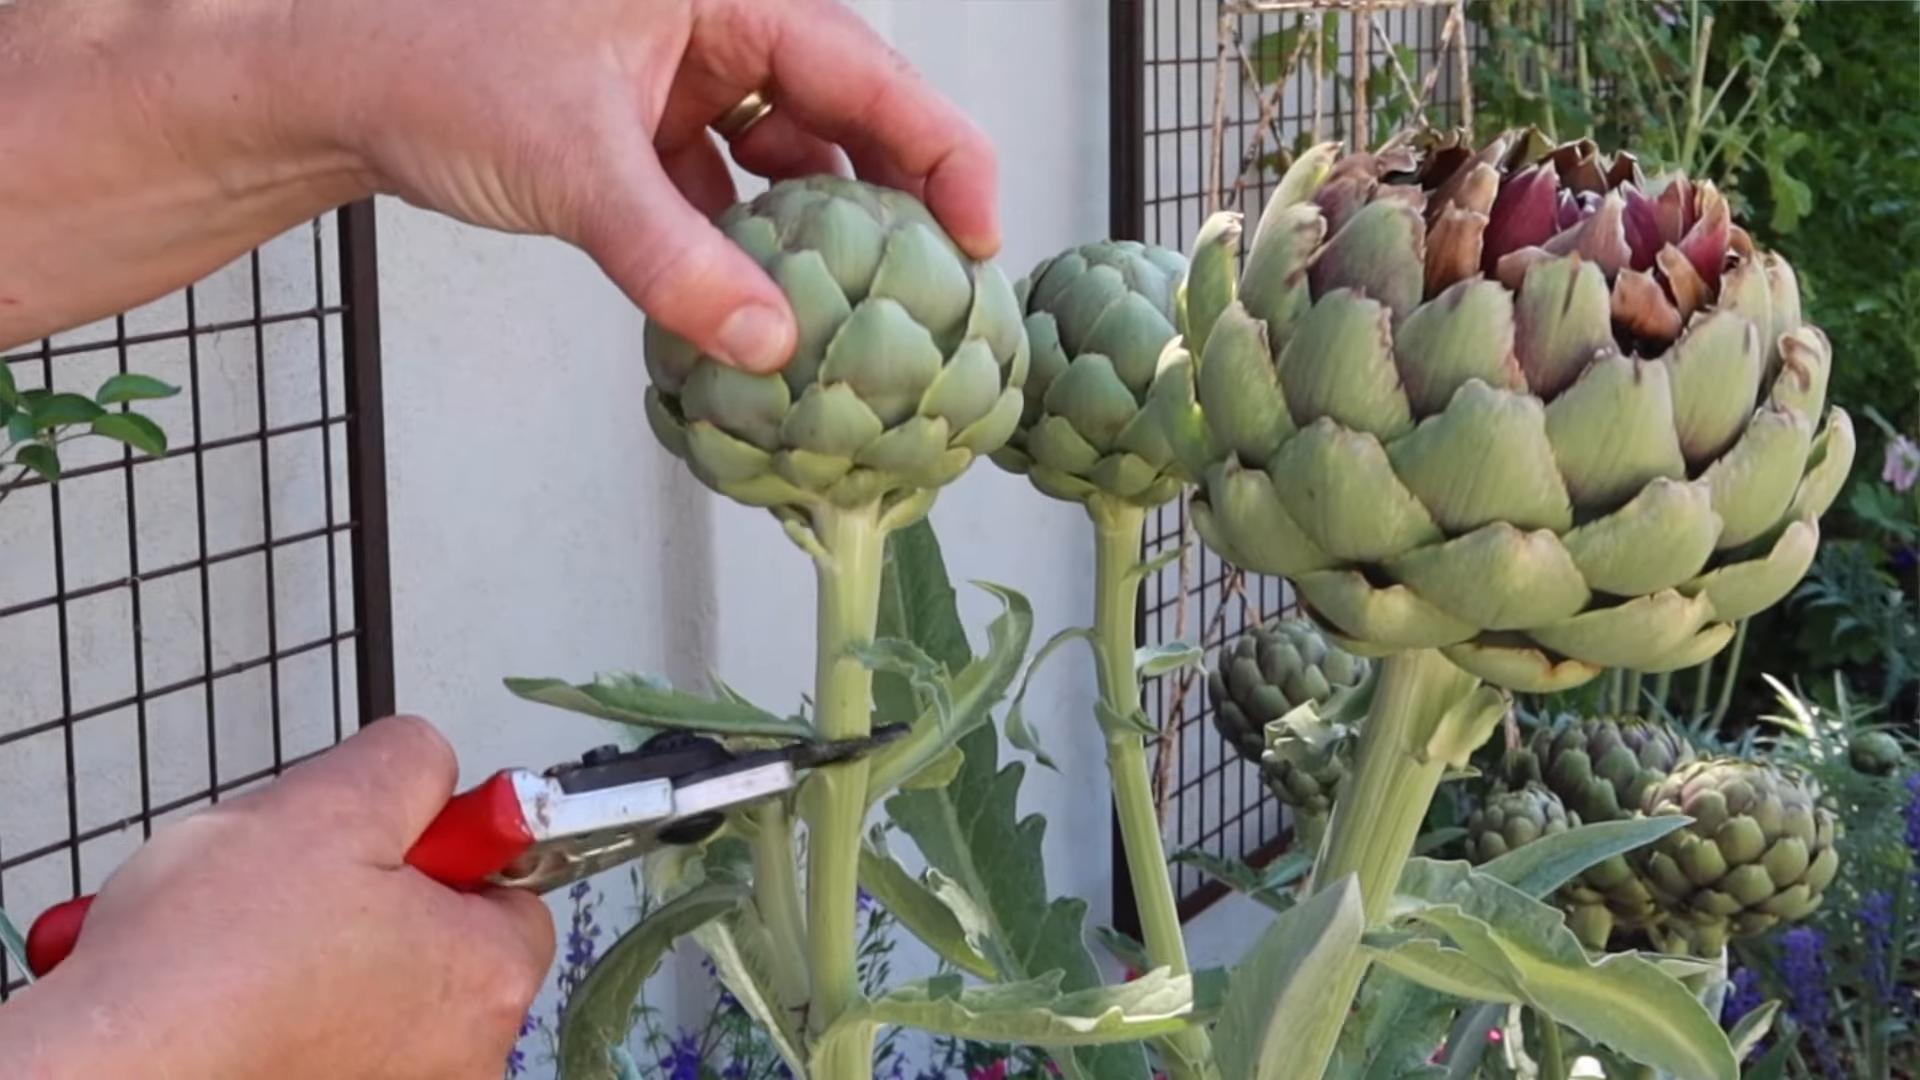
1. Timing: Artichokes are ready to harvest when the buds are still tight and firm, but the scales have begun to slightly open. The size of the artichoke will vary depending on the variety, but generally, you’ll want to harvest them when they’re about 3-4 inches in diameter.
2. Cutting: Use a sharp knife or pruning shears to cut the artichoke stem about 2-3 inches below the base of the bud.
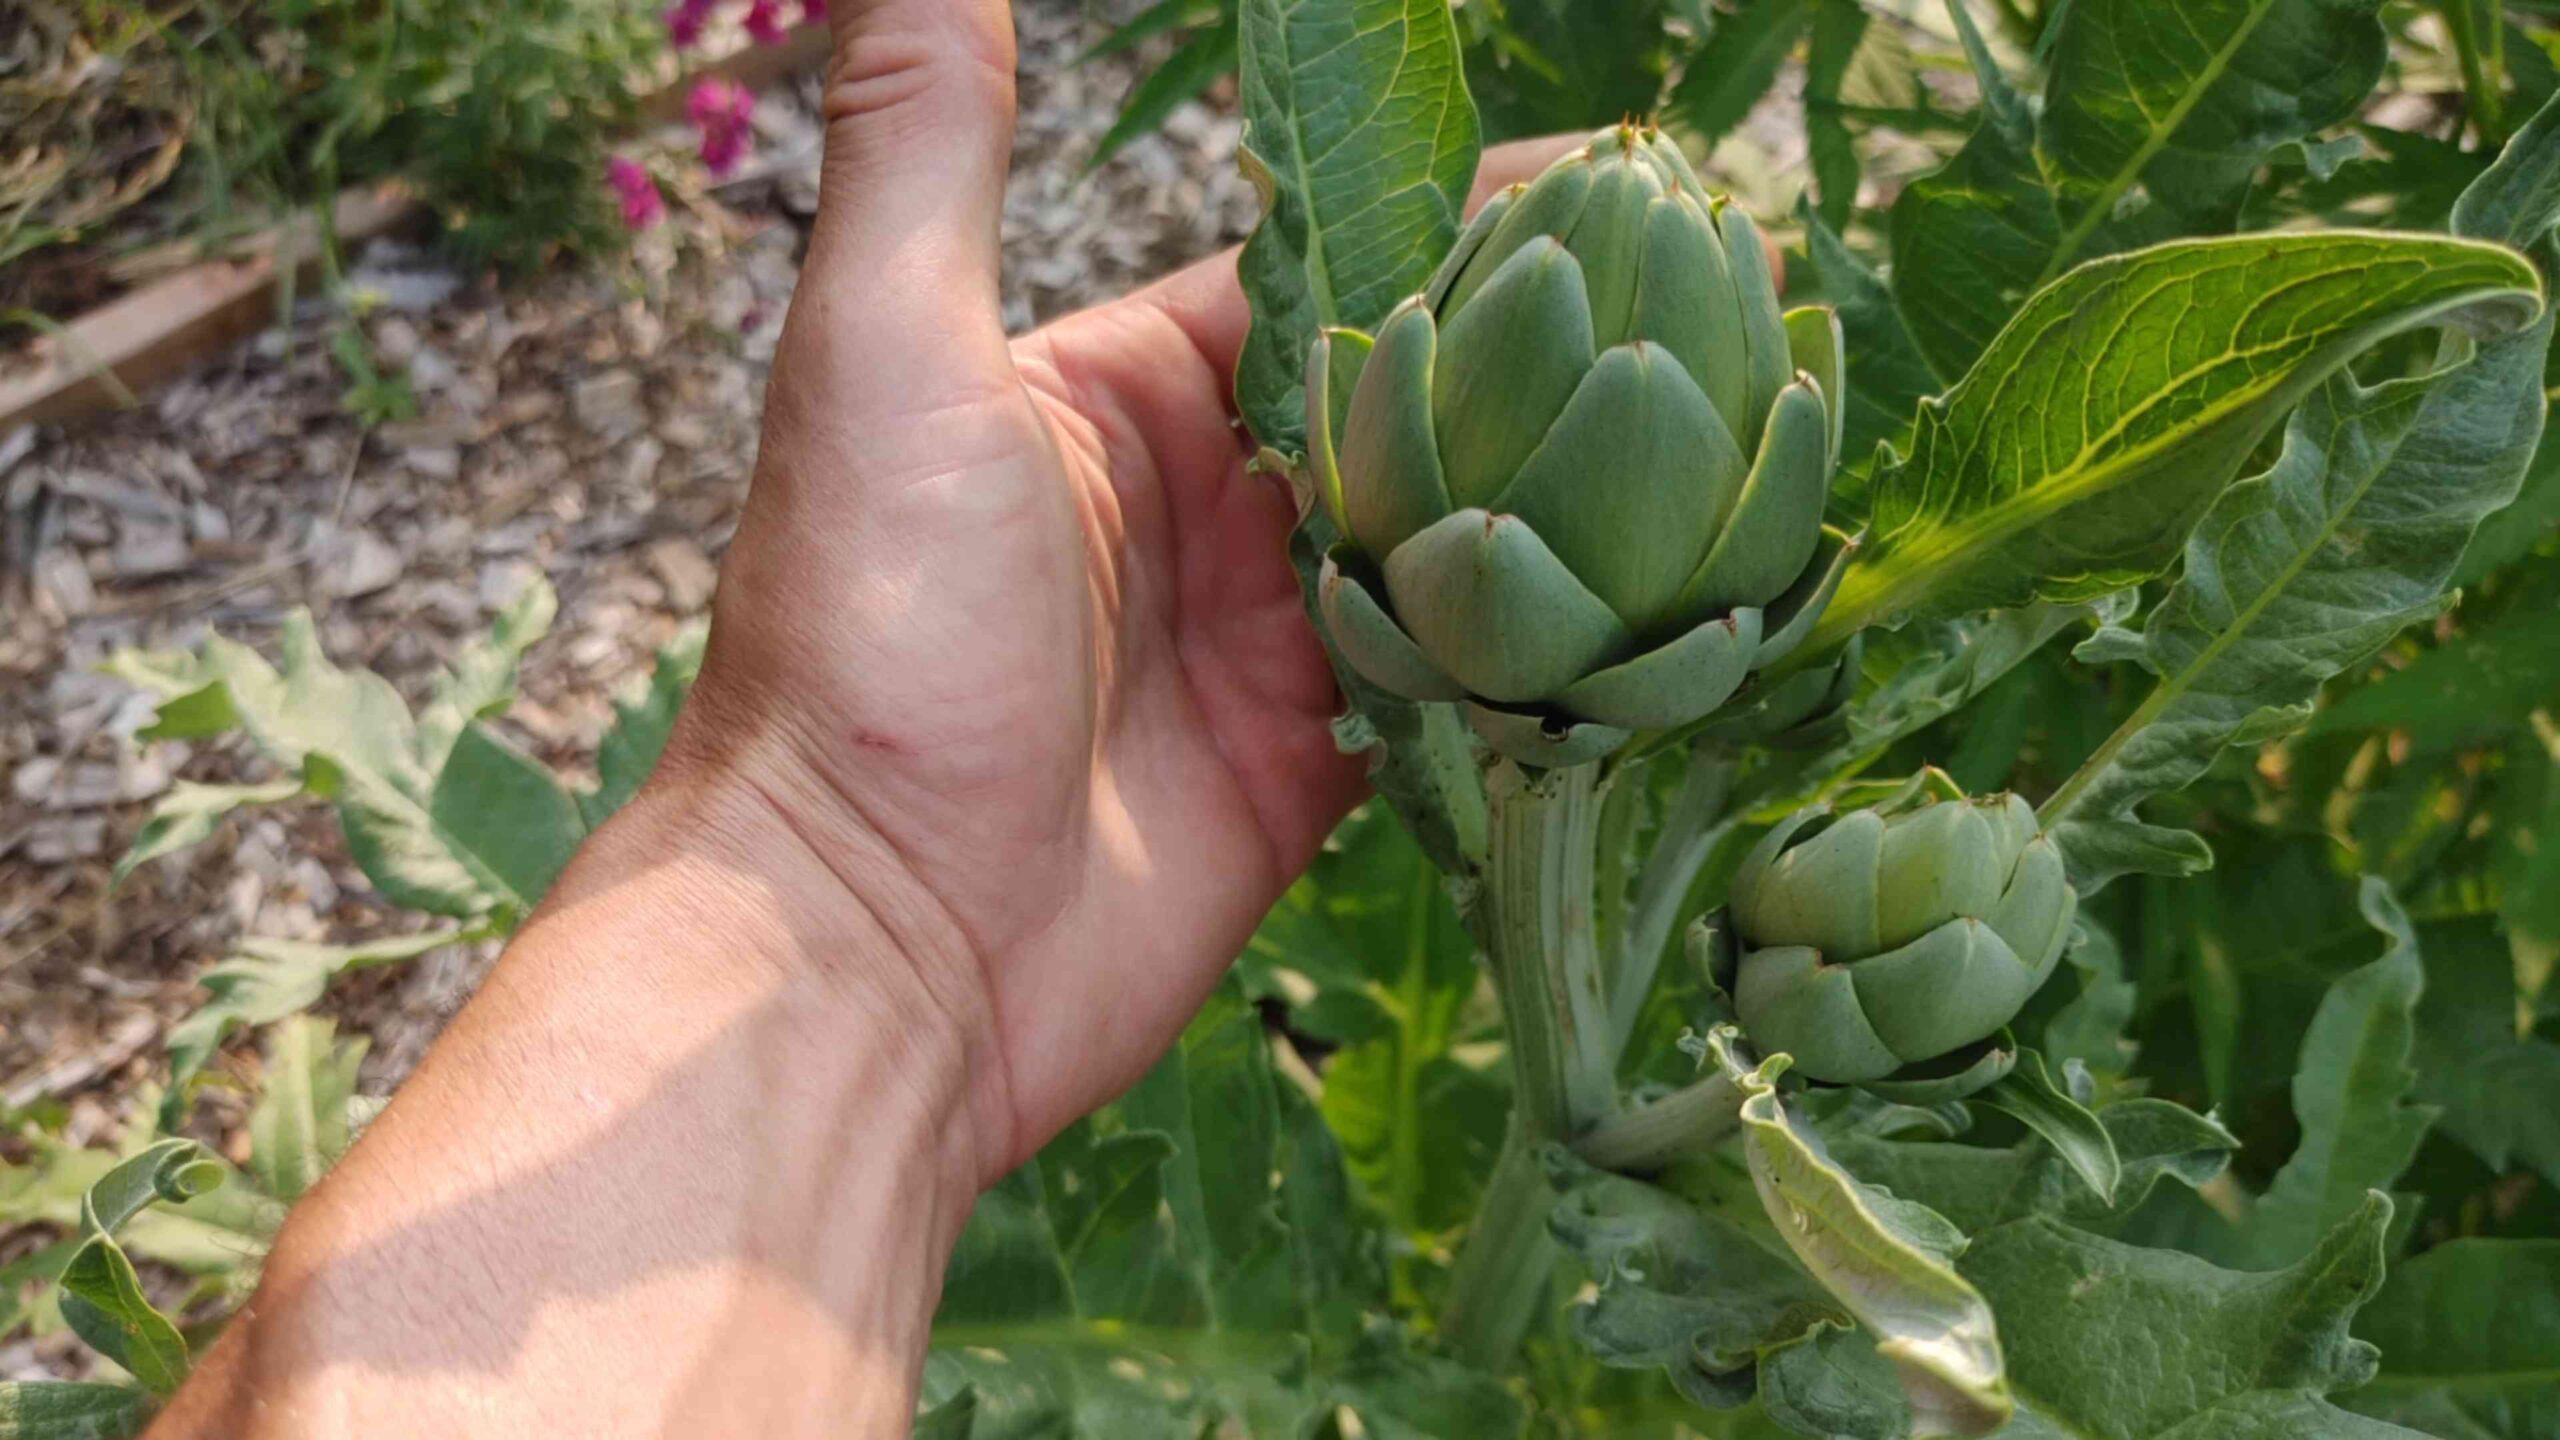
3. Side shoots: After harvesting the main artichoke, you can also harvest the smaller side shoots that develop along the stem. These are often more tender than the main artichoke.
4. Storage: Artichokes can be stored in the refrigerator for up to a week. To keep them fresh, wrap them loosely in a plastic bag.
Overwintering Artichokes in Colder Climates
If you live in a colder climate (zones 6 or lower), you’ll need to take steps to protect your artichoke plants from frost damage during the winter.
1. Cut back the plant: In the fall, after the first frost, cut the artichoke plant back to the ground.
2. Mulch heavily: Apply a thick layer of mulch around the base of the plant to insulate the roots from the cold. I recommend using straw, shredded leaves, or pine needles.
3. Cover with a protective layer: For added protection, you can cover the mulched plant with a layer of burlap or a plastic tarp.
4. Remove the covering in spring: In the spring, after the last frost, remove the protective covering and mulch to allow the plant to begin growing again.
Troubleshooting Common Artichoke Problems
Even with the best care, you may encounter some problems when growing artichokes. Here are a few common issues and how to address them:
* Aphids: These small, sap-sucking insects can infest artichoke plants, causing stunted growth and distorted leaves. Control aphids with insecticidal soap or neem oil.
* Snails and slugs: These pests can damage artichoke leaves and buds. Handpick them off the plants or use snail and slug bait.
* Root rot: This fungal disease can occur in poorly drained soil. Prevent root rot by planting artichokes in well-draining soil and avoiding overwatering.
* Lack of bud production: This can be caused by insufficient sunlight, poor soil fertility, or inadequate watering. Make sure your artichokes are getting enough sunlight, fertilize them regularly, and water them deeply during dry periods.
Enjoying Your Homegrown Artichokes
Now for the best part – enjoying the fruits (or rather, the thistles) of your labor
Conclusion
So, there you have it! Growing artichokes at home might seem daunting at first, but with a little patience and the right approach, you can absolutely cultivate these delicious and impressive vegetables in your own backyard. We’ve walked you through the key steps, from selecting the right variety and preparing your soil to nurturing your plants and harvesting your bounty.
Why is this DIY trick a must-try? Because nothing beats the flavor of a freshly harvested, homegrown artichoke. The subtle sweetness and tender texture are simply unmatched by store-bought varieties. Plus, growing your own food is incredibly rewarding, connecting you to the natural world and providing a sense of accomplishment. You’ll know exactly where your food comes from and how it was grown, ensuring the highest quality and freshness.
But the benefits don’t stop there. Artichoke plants are also beautiful additions to any garden, with their striking silvery-green foliage and architectural form. They attract beneficial pollinators like bees and butterflies, contributing to a healthier ecosystem in your backyard. And let’s not forget the bragging rights! Imagine serving your guests a delicious artichoke dip made with artichokes you grew yourself.
Looking for variations? Consider these ideas to personalize your artichoke-growing experience:
* Experiment with different varieties: ‘Green Globe’ is a classic choice, but explore other options like ‘Violetta’ for a beautiful purple hue or ‘Imperial Star’ for earlier harvests.
* Companion planting: Plant artichokes alongside herbs like rosemary, thyme, and sage to deter pests and enhance flavor.
* Container gardening: If you have limited space, you can grow artichokes in large containers. Just be sure to choose a pot that’s at least 24 inches in diameter and provides excellent drainage.
* Overwintering strategies: In colder climates, protect your artichoke plants from frost by mulching heavily or covering them with burlap.
Ultimately, the best way to learn is by doing. Don’t be afraid to get your hands dirty and experiment. Growing artichokes at home is a journey, and there will be successes and challenges along the way. But with a little dedication and the information we’ve provided, you’ll be well on your way to enjoying a bountiful harvest of homegrown artichokes.
We encourage you to give this DIY trick a try. Start small, be patient, and most importantly, have fun! And once you’ve harvested your first artichokes, we’d love to hear about your experience. Share your tips, tricks, and photos with us in the comments below. Let’s build a community of artichoke enthusiasts and inspire others to grow their own food. Happy gardening!
Frequently Asked Questions (FAQ)
Q: What is the best time of year to plant artichokes?
A: The ideal time to plant artichokes depends on your climate. In mild-winter regions (zones 7-10), you can plant artichokes in the fall for a spring harvest. In colder climates (zones 6 and below), it’s best to start artichoke seeds indoors 8-10 weeks before the last expected frost and transplant them outdoors in the spring after the danger of frost has passed. This gives the plants a head start and allows them to establish themselves before the heat of summer.
Q: How much space do artichoke plants need?
A: Artichoke plants can grow quite large, reaching up to 3-4 feet in height and width. Therefore, it’s essential to provide them with ample space to thrive. Space artichoke plants at least 4 feet apart in rows that are 6-8 feet apart. This will allow for proper air circulation and sunlight penetration, which are crucial for healthy growth and artichoke production. If you’re growing artichokes in containers, choose a pot that’s at least 24 inches in diameter to accommodate their extensive root system.
Q: What kind of soil do artichokes prefer?
A: Artichokes thrive in well-drained, fertile soil that is rich in organic matter. The ideal soil pH is between 6.0 and 7.0. Before planting, amend your soil with compost, aged manure, or other organic materials to improve its drainage, fertility, and water-holding capacity. Artichokes are heavy feeders, so it’s also beneficial to incorporate a slow-release fertilizer into the soil at planting time.
Q: How often should I water artichoke plants?
A: Artichokes need consistent moisture, especially during the growing season. Water deeply and regularly, ensuring that the soil remains consistently moist but not waterlogged. Avoid overhead watering, as this can increase the risk of fungal diseases. A good rule of thumb is to water when the top inch of soil feels dry to the touch. During hot, dry weather, you may need to water more frequently. Mulching around the base of the plants can help to retain moisture and suppress weeds.
Q: How do I fertilize artichoke plants?
A: Artichokes are heavy feeders and benefit from regular fertilization. Apply a balanced fertilizer (e.g., 10-10-10) every 4-6 weeks during the growing season. You can also side-dress the plants with compost or aged manure. Avoid over-fertilizing, as this can lead to excessive foliage growth at the expense of artichoke production.
Q: How do I protect artichoke plants from pests and diseases?
A: Artichokes can be susceptible to various pests and diseases, including aphids, slugs, snails, and powdery mildew. Regularly inspect your plants for signs of infestation or disease. Handpick pests or use organic pest control methods like insecticidal soap or neem oil. To prevent fungal diseases, ensure good air circulation and avoid overhead watering. Remove any infected leaves or stems promptly.
Q: When are artichokes ready to harvest?
A: Artichokes are typically ready to harvest in the spring or early summer, depending on the variety and your climate. The artichokes are ready when the bracts (the outer leaves) are still tightly closed and the artichoke feels firm and heavy. The size of the artichoke will vary depending on the variety, but generally, they should be about 3-4 inches in diameter. Use a sharp knife to cut the artichoke stem about 2-3 inches below the base of the artichoke.
Q: Can I grow artichokes in containers?
A: Yes, you can grow artichokes in containers, but you’ll need to choose a large pot that’s at least 24 inches in diameter to accommodate their extensive root system. Use a well-draining potting mix and provide regular watering and fertilization. Container-grown artichokes may need to be watered more frequently than those grown in the ground, especially during hot weather.
Q: How do I overwinter artichoke plants in cold climates?
A: In cold climates (zones 6 and below), artichoke plants need protection from frost and freezing temperatures. After the first frost, cut back the foliage to about 6 inches above the ground. Mulch heavily around the base of the plants with straw, leaves, or other organic materials. You can also cover the plants with burlap or a frost blanket. In very cold regions, you may need to dig up the plants and store them in a cool, dark place over the winter. Replant them in the spring after the danger of frost has passed.
Q: Are artichokes perennials?
A: Artichokes are technically perennials, meaning they can live for more than two years. However, in colder climates, they are often grown as annuals because they may not survive the winter. With proper care and protection, you can overwinter artichoke plants and enjoy them for several years.
Q: Can I eat the flowers of the artichoke plant?
A: While the edible part of the artichoke is the immature flower bud, if you allow the bud to fully open, it will produce a beautiful purple flower. While the flower itself is technically edible, it becomes quite tough and less palatable. The main attraction of the artichoke is the tender heart and the fleshy base of the bracts, which are best enjoyed before the flower opens.
Leave a Comment