

Grow Basil at Home and unlock a world of fresh, aromatic flavor right at your fingertips! Imagine stepping into your kitchen and snipping vibrant green basil leaves, bursting with sunshine and ready to elevate your next culinary masterpiece. Forget those wilted, overpriced bunches from the grocery store – with a few simple tricks, you can cultivate your own thriving basil patch, no matter the size of your living space.
Basil, revered for centuries, boasts a rich history intertwined with cultures around the globe. From ancient medicinal uses to its symbolic representation of love and good fortune in Italian folklore, this herb has always held a special place in our hearts and kitchens. But beyond its historical significance, growing your own basil offers a practical solution to a common problem: access to fresh, high-quality herbs.
Let’s face it, buying fresh basil can be a gamble. It often spoils quickly, leaving you with a sad, brown mess. That’s where the magic of DIY comes in! I’m going to share some easy-to-follow home gardening tricks that will empower you to grow basil at home successfully, even if you’re a complete beginner. These hacks will not only save you money but also provide you with a constant supply of fragrant basil, ready to transform your pasta sauces, salads, and pizzas into culinary delights. So, grab your gardening gloves, and let’s get started!
Grow Your Own Delicious Basil: A Beginner’s Guide
Hey there, fellow plant enthusiasts! I’m so excited to share my tried-and-true method for growing vibrant, fragrant basil right in your own home. Forget those wilted, overpriced bunches at the grocery store – with a little love and these simple steps, you’ll have a constant supply of fresh basil for all your culinary creations. Let’s get started!
What You’ll Need
Before we dive in, let’s gather our supplies. This is a pretty straightforward project, so you probably have a lot of these items already.
* **Basil Seeds:** Choose your favorite variety! Genovese is a classic, but lemon basil, Thai basil, and purple basil are also fantastic options. I personally love growing a mix for variety.
* **Small Pots or Seed Trays:** These will be your starting point. Make sure they have drainage holes!
* **Seed Starting Mix:** This is lighter and more nutrient-rich than regular potting soil, perfect for delicate seedlings.
* **Potting Soil:** Once your seedlings are bigger, they’ll need a more substantial home.
* **Watering Can or Spray Bottle:** Gentle watering is key, especially in the early stages.
* **Grow Lights (Optional but Recommended):** If you don’t have a sunny windowsill, grow lights will be your best friend.
* **Small Shovel or Spoon:** For transferring seedlings.
* **Plant Labels and a Marker:** To keep track of your basil varieties.
* **Well-Draining Container (for mature plants):** Choose a pot that’s at least 6 inches in diameter.
* **Liquid Fertilizer:** A balanced fertilizer will help your basil thrive.
Starting Your Basil Seeds
This is where the magic begins! We’re going to coax those tiny seeds into becoming beautiful basil plants.
1. **Prepare Your Seed Trays or Pots:** Fill your seed trays or small pots with seed starting mix. Gently pat it down, but don’t pack it too tightly. You want the roots to be able to easily penetrate the soil.
2. **Sow the Seeds:** Sprinkle a few basil seeds on top of the soil in each cell or pot. Basil seeds are tiny, so don’t overdo it. I usually aim for 2-3 seeds per cell.
3. **Cover the Seeds:** Lightly cover the seeds with a thin layer of seed starting mix. Again, be gentle!
4. **Water Thoroughly:** Use your spray bottle or watering can to gently moisten the soil. You want it to be damp, but not soggy.
5. **Create a Humid Environment:** Cover the seed trays or pots with a clear plastic lid or plastic wrap. This will help retain moisture and create a greenhouse effect.
6. **Find a Warm Spot:** Place your seed trays or pots in a warm location, ideally around 70-75°F (21-24°C). A heat mat can be helpful if your home is cooler.
7. **Wait for Germination:** Be patient! Basil seeds typically germinate within 5-10 days. Keep the soil consistently moist during this time. Check daily and mist with water as needed.
8. **Remove the Cover:** Once the seedlings emerge, remove the plastic lid or wrap.
9. **Provide Light:** Place the seedlings under grow lights or in a sunny windowsill. They need at least 6-8 hours of light per day. If using a windowsill, rotate the pots regularly to ensure even growth.
Transplanting Your Basil Seedlings
Once your seedlings have developed a few sets of true leaves (the leaves that look like miniature basil leaves, not just the initial seed leaves), it’s time to transplant them into larger pots.
1. **Prepare Your Larger Pots:** Fill your larger pots with potting soil. Make a small hole in the center of each pot, large enough to accommodate the root ball of the seedling.
2. **Gently Remove the Seedlings:** Carefully loosen the soil around the seedlings with a small spoon or your fingers. Gently lift the seedlings out of the seed trays or pots, being careful not to damage the roots.
3. **Transplant the Seedlings:** Place each seedling into the hole in the larger pot. Gently backfill with potting soil, making sure the top of the root ball is level with the soil surface.
4. **Water Thoroughly:** Water the transplanted seedlings thoroughly.
5. **Provide Support (Optional):** If your seedlings are a bit leggy (tall and spindly), you can use a small stake to provide support.
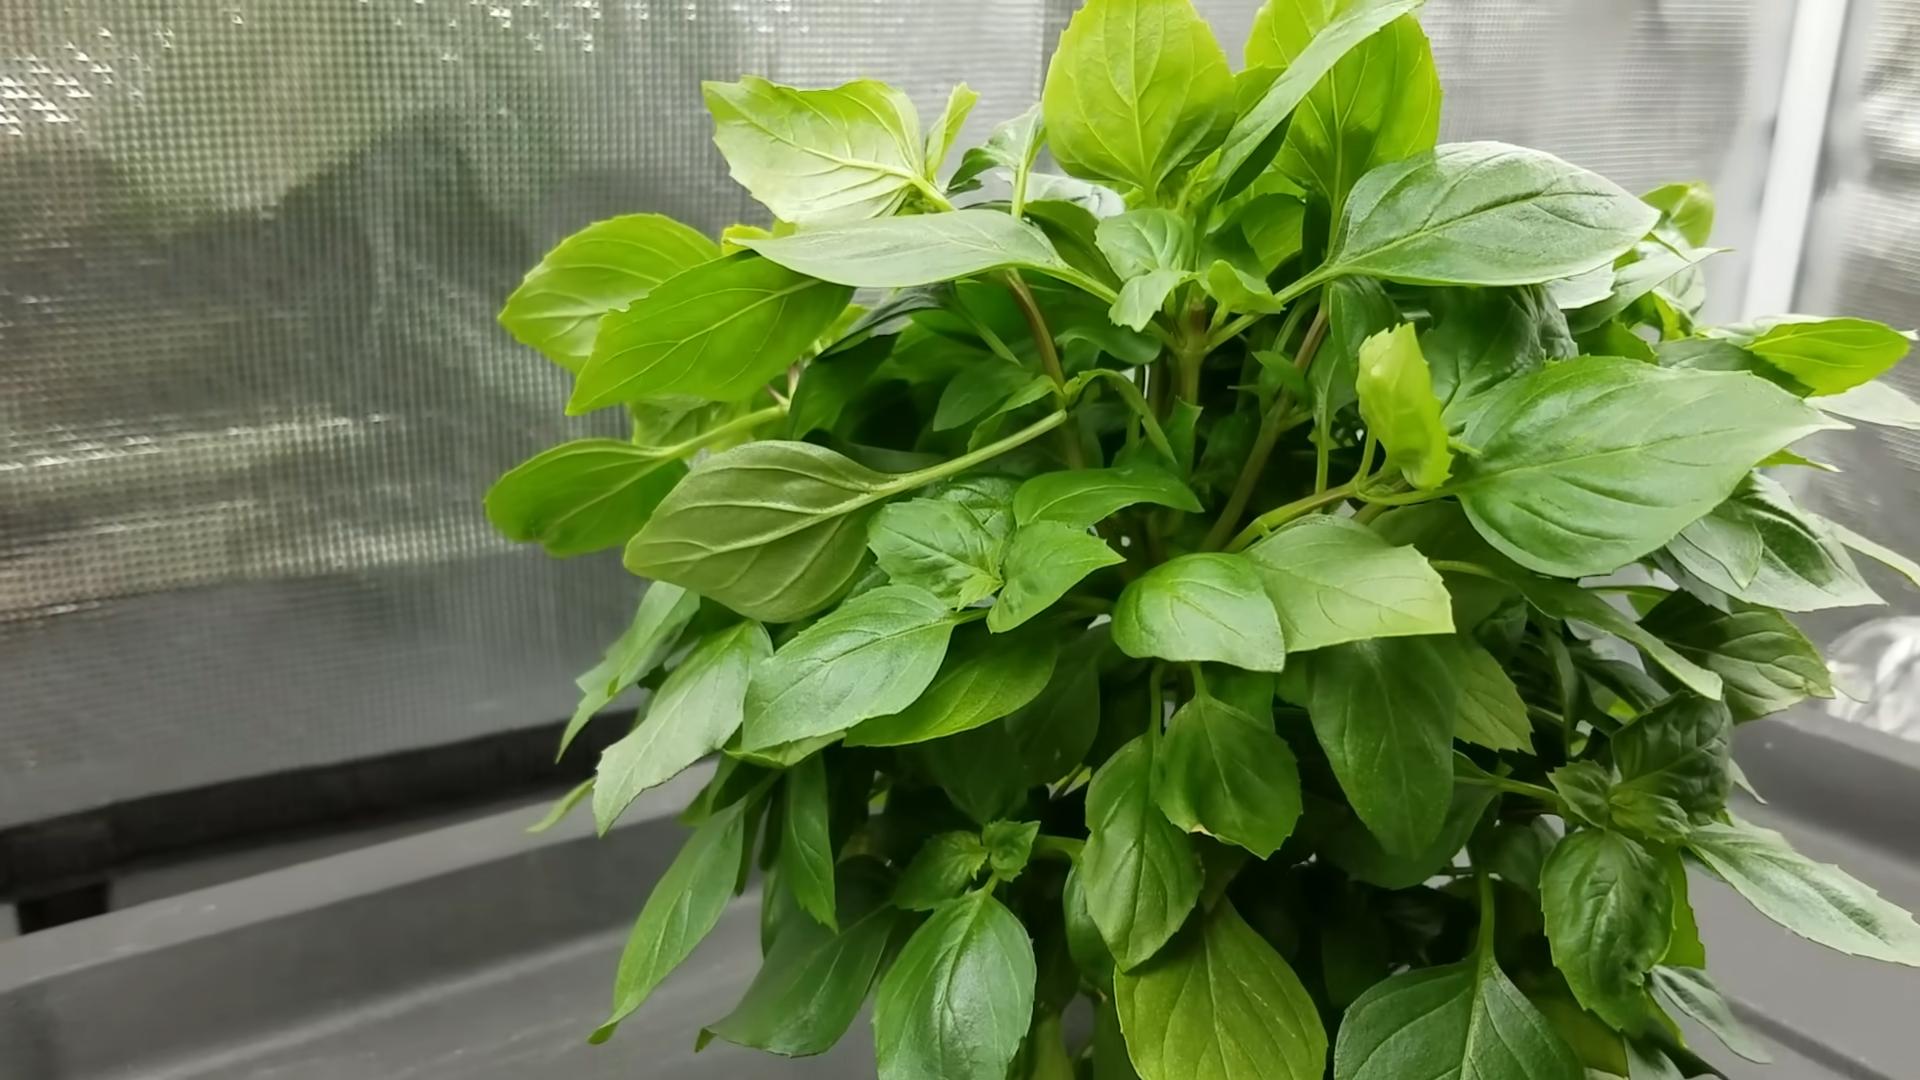
Caring for Your Basil Plants
Now that your basil plants are in their new homes, it’s time to provide them with the care they need to thrive.
1. **Light:** Basil loves sunlight! Aim for at least 6-8 hours of direct sunlight per day. If you’re using grow lights, keep them on for 14-16 hours per day.
2. **Watering:** Water your basil plants regularly, but don’t overwater. The soil should be moist, but not soggy. Allow the top inch of soil to dry out between waterings. I usually water every 2-3 days, but this will depend on the temperature and humidity in your home.
3. **Fertilizing:** Feed your basil plants with a balanced liquid fertilizer every 2-3 weeks. Follow the instructions on the fertilizer package.
4. **Pinching and Pruning:** This is crucial for encouraging bushy growth and preventing your basil plants from flowering too early. When your basil plant has 6-8 leaves, pinch off the top set of leaves, just above a node (where the leaves grow out of the stem). This will encourage the plant to branch out and produce more leaves. Continue to pinch off the top sets of leaves as needed. Also, remove any flower buds as soon as you see them. Flowering will cause the basil plant to stop producing leaves and become bitter.
5. **Temperature:** Basil prefers warm temperatures, ideally between 65-80°F (18-27°C). Avoid exposing your basil plants to temperatures below 50°F (10°C).
6. **Humidity:** Basil prefers moderate humidity. If your home is very dry, you can increase the humidity around your basil plants by placing them on a tray filled with pebbles and water. Make sure the bottom of the pot isn’t sitting directly in the water.
7. **Pest Control:** Keep an eye out for pests such as aphids, spider mites, and whiteflies. If you notice any pests, you can try spraying your basil plants with insecticidal soap or neem oil.
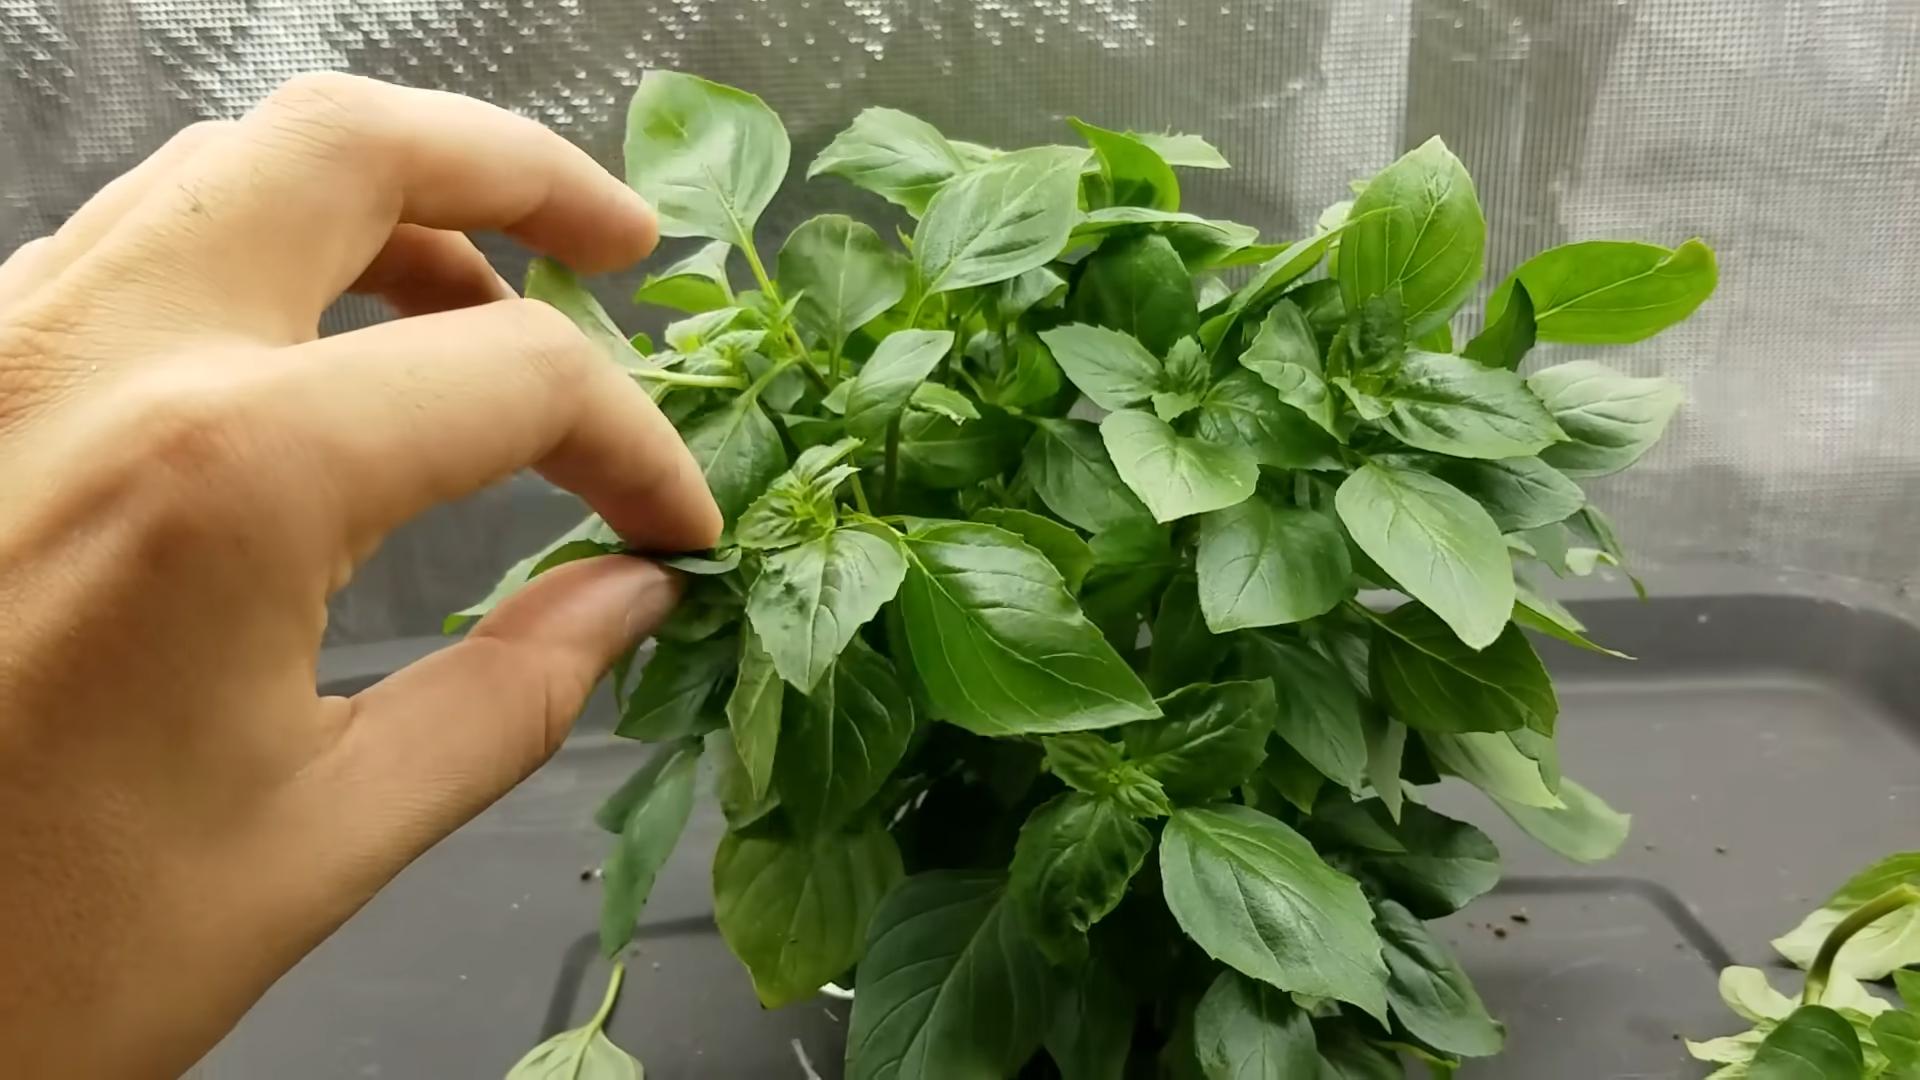
Harvesting Your Basil
The best part! You can start harvesting your basil leaves as soon as the plant is large enough.
1. **Harvest Regularly:** Regular harvesting will encourage your basil plant to produce more leaves.
2. **Pinch or Cut:** Pinch or cut off the top sets of leaves, just above a node.
3. **Use Fresh or Preserve:** Use your fresh basil leaves immediately, or preserve them by drying, freezing, or making pesto.
Troubleshooting
Even with the best care, you might encounter a few challenges along the way. Here are some common problems and how to fix them:
* **Yellowing Leaves:** This could be a sign of overwatering, underwatering, or nutrient deficiency. Check the soil moisture and adjust your watering accordingly. If the soil is dry, water thoroughly. If the soil is soggy, allow it to dry out before watering again. If you suspect a nutrient deficiency, fertilize your basil plant with a balanced liquid fertilizer.
* **Leggy Growth:** This is usually caused by insufficient light. Move your basil plant to a sunnier location or provide supplemental light with grow lights. Remember to pinch off the top sets of leaves to encourage bushy growth.
* **Pests:** As mentioned earlier, keep an eye out for pests. Spray your basil plants with insecticidal soap or neem oil if you notice any infestations.
* **Slow Growth:** This could be due to a variety of factors, including insufficient light, poor soil, or cool temperatures. Make sure your basil plant is getting enough light, is planted in well-draining soil, and is kept in a warm location.
Enjoy Your Homegrown Basil!
And there you have it! With a little patience and care, you can grow your own delicious basil at home. I hope this guide has been helpful. Happy gardening! I find it incredibly rewarding to nurture these plants from tiny seeds to fragrant, flavorful additions to my meals. Plus, the aroma of fresh basil in the house is simply divine. Don’t be afraid to experiment with different varieties and find what works best for you. Happy growing!
Conclusion
So, there you have it! Growing basil at home, especially using this simple DIY propagation trick, is more than just a gardening project; it’s an investment in fresh flavor, a sustainable practice, and a rewarding experience. We’ve walked you through the process, highlighting how easy it is to transform a single store-bought bunch of basil into a thriving herb garden.
Why is this a must-try? Because it’s cost-effective, reduces food waste, and gives you access to fresh, aromatic basil whenever you need it. Imagine the convenience of snipping off a few leaves for your pasta sauce, pesto, or summer salad, knowing that you nurtured those leaves from a simple cutting. No more wilted, expensive basil from the grocery store!
But the benefits extend beyond convenience. Growing your own basil connects you to the natural world, providing a sense of accomplishment and well-being. It’s a fantastic way to introduce children to gardening and teach them about the life cycle of plants. Plus, fresh basil is simply bursting with flavor compared to its dried counterpart.
Looking for variations? Absolutely! Experiment with different types of basil. There’s sweet basil, of course, the classic choice for Italian dishes. But don’t stop there! Try lemon basil for a citrusy twist, Thai basil for Asian-inspired cuisine, or purple basil for a beautiful and flavorful addition to salads. You can even try propagating different varieties side-by-side to create a diverse and fragrant herb garden.
Consider the type of container you use. While we suggested a simple glass of water for propagation, you can also use a propagation station or even directly plant the cuttings in a well-draining potting mix after they’ve developed roots. For long-term growth, choose a pot that’s at least 6 inches in diameter to allow the basil plant to develop a strong root system.
Think about companion planting. Basil is known to repel certain pests, making it a great companion plant for tomatoes, peppers, and other vegetables. Planting basil near these plants can help protect them from unwanted insects and improve their overall health.
And don’t forget about harvesting! Regular harvesting encourages the plant to produce more leaves, resulting in a bushier and more productive plant. Simply pinch off the top leaves just above a leaf node to encourage new growth.
We are confident that you’ll find this DIY trick for growing basil at home incredibly rewarding. It’s a simple, effective, and sustainable way to enjoy fresh basil year-round. So, grab a bunch of basil, follow our instructions, and get ready to experience the joy of homegrown herbs.
We can’t wait to hear about your experiences! Share your photos and stories with us on social media using #HomegrownBasil and let us know how this DIY trick worked for you. What varieties did you try? What dishes did you create with your fresh basil? We’re eager to learn from your successes and help you troubleshoot any challenges you may encounter. Happy gardening!
FAQ
Frequently Asked Questions About Growing Basil at Home
1. How long does it take for basil cuttings to root in water?
Generally, you should see roots emerging from your basil cuttings within 7-14 days. The speed of root development can depend on factors like the temperature of the water, the amount of light the cuttings receive, and the overall health of the basil stems. Make sure to change the water every 1-2 days to keep it fresh and oxygenated, which will encourage faster rooting.
2. What kind of water should I use for propagating basil?
Tap water is generally fine for propagating basil, but it’s best to let it sit out for 24 hours to allow any chlorine to dissipate. Alternatively, you can use filtered water or rainwater. Avoid using distilled water, as it lacks the minerals that plants need to thrive.
3. How much light do basil cuttings need while rooting?
Basil cuttings need bright, indirect light to root successfully. Avoid placing them in direct sunlight, which can scorch the leaves. A spot near a window that receives morning sun or filtered light throughout the day is ideal. If you don’t have access to natural light, you can use a grow light to provide the necessary illumination.
4. When should I transplant the rooted basil cuttings into soil?
Once the roots are about 1-2 inches long, it’s time to transplant your basil cuttings into soil. Choose a well-draining potting mix and a pot that’s at least 6 inches in diameter. Gently remove the cuttings from the water and plant them in the soil, being careful not to damage the delicate roots. Water thoroughly after planting and keep the soil consistently moist but not waterlogged.
5. What kind of soil is best for growing basil?
Basil thrives in well-draining soil that is rich in organic matter. A good potting mix for basil should contain a blend of peat moss, perlite, and vermiculite. You can also amend your soil with compost or other organic matter to improve its fertility and drainage. The ideal pH for basil is between 6.0 and 7.5.
6. How often should I water my basil plant?
Water your basil plant regularly, keeping the soil consistently moist but not waterlogged. The frequency of watering will depend on factors like the weather, the size of the pot, and the type of soil. Check the soil moisture by sticking your finger into the soil about an inch deep. If the soil feels dry, it’s time to water. Avoid overwatering, as this can lead to root rot.
7. How much sunlight does basil need?
Basil needs at least 6-8 hours of sunlight per day to thrive. Choose a sunny location for your basil plant, whether it’s indoors or outdoors. If you’re growing basil indoors, place it near a south-facing window or use a grow light to provide adequate illumination.
8. How do I harvest basil to encourage growth?
Harvest basil regularly to encourage bushier growth. Pinch off the top leaves just above a leaf node (the point where leaves grow from the stem). This will encourage the plant to produce new shoots from the leaf nodes, resulting in a fuller and more productive plant. Avoid harvesting more than one-third of the plant at a time.
9. What are some common pests and diseases that affect basil?
Basil can be susceptible to pests like aphids, spider mites, and whiteflies. Check your plants regularly for signs of infestation and treat them with insecticidal soap or neem oil if necessary. Basil can also be affected by diseases like fungal leaf spot and root rot. To prevent these diseases, ensure good air circulation around your plants and avoid overwatering.
10. Can I grow basil indoors year-round?
Yes, you can grow basil indoors year-round if you provide it with adequate light, water, and nutrients. Place your basil plant near a sunny window or use a grow light to supplement natural light. Water regularly, keeping the soil consistently moist but not waterlogged. Fertilize your basil plant every 2-4 weeks with a balanced liquid fertilizer.
11. What are some different varieties of basil I can grow?
There are many different varieties of basil to choose from, each with its own unique flavor and aroma. Some popular varieties include sweet basil, lemon basil, Thai basil, purple basil, and Genovese basil. Experiment with different varieties to find your favorites.
12. Can I propagate basil from seed instead of cuttings?
Yes, you can also propagate basil from seed. Sow basil seeds indoors 6-8 weeks before the last frost or directly outdoors after the danger of frost has passed. Keep the soil moist and warm until the seeds germinate. Once the seedlings are large enough to handle, transplant them into individual pots or into the garden.
13. My basil leaves are turning yellow. What could be the problem?
Yellowing basil leaves can be caused by several factors, including overwatering, underwatering, nutrient deficiencies, or pest infestations. Check the soil moisture to ensure that you’re not overwatering or underwatering. Fertilize your basil plant with a balanced liquid fertilizer to address any nutrient deficiencies. Inspect the leaves for signs of pests and treat them accordingly.
14. My basil plant is flowering. Should I remove the flowers?
Yes, you should remove the flowers from your basil plant to encourage continued leaf production. Once the plant starts to flower, it will focus its energy on producing seeds rather than leaves. Pinch off the flower buds as soon as you see them to keep the plant producing flavorful leaves.
15. Can I dry or freeze basil for later use?
Yes, you can dry or freeze basil for later use. To dry basil, hang the stems upside down in a cool, dry place until the leaves are brittle. Alternatively, you can dry the leaves in a dehydrator or oven. To freeze basil, chop the leaves and mix them with a little olive oil or water. Freeze the mixture in ice cube trays and then transfer the frozen cubes to a freezer bag.
Leave a Comment