

Grow Bell Peppers Backyard – sounds like a dream, right? Imagine stepping outside your back door and plucking a vibrant, crisp bell pepper straight from the vine. No more bland, store-bought peppers; just fresh, flavorful goodness ready for your next culinary adventure! But let’s be honest, the thought of cultivating these beauties can feel a little daunting.
Bell peppers have a rich history, originating in South America and making their way across the globe, becoming a staple in cuisines from Mexico to the Mediterranean. For centuries, gardeners have been perfecting the art of growing these colorful vegetables, and now, I’m here to share some of their secrets with you.
Why do you need these DIY tricks and hacks? Because growing bell peppers doesn’t have to be a gamble! With the right knowledge and a little bit of effort, you can transform your backyard into a pepper paradise. I’m going to show you how to avoid common pitfalls, maximize your yield, and grow bell peppers backyard like a pro, even if you’re a complete beginner. Forget expensive gardening services; let’s get our hands dirty and create something amazing together!
Growing Bell Peppers Like a Pro: From Seed to Salsa in Your Own Backyard
Okay, so you want to grow bell peppers? Awesome! I’m here to tell you, it’s totally doable, even if you don’t have a sprawling farm. I’ve been growing bell peppers in my backyard for years, and let me tell you, there’s nothing quite like biting into a crisp, homegrown pepper. This guide will walk you through everything you need to know, from starting seeds indoors to harvesting a bumper crop.
Choosing Your Bell Pepper Varieties
First things first, let’s talk peppers! There are so many varieties to choose from, it can be a little overwhelming. Here’s a quick rundown of some popular choices:
* California Wonder: This is your classic, all-purpose bell pepper. It’s reliable, produces well, and is great for stuffing, roasting, or just snacking on raw.
* Yolo Wonder: Similar to California Wonder, but often more disease-resistant. A solid choice if you’ve had issues with pepper diseases in the past.
* Golden Bell: A beautiful golden-yellow pepper with a slightly sweeter flavor than the red varieties.
* Purple Beauty: A stunning purple pepper that turns green when cooked. It’s a bit more ornamental, but still delicious.
* Chocolate Beauty: A deep brown, almost chocolate-colored pepper. It has a rich, slightly smoky flavor.
* Mini Bells: These are smaller, snack-sized peppers that come in a variety of colors. Perfect for lunchboxes or appetizers.
Consider your climate and what you plan to do with your peppers when making your choice. I personally love growing a mix of colors for visual appeal and flavor variety!
Starting Your Bell Pepper Seeds Indoors
Bell peppers have a long growing season, so starting them indoors is essential, especially if you live in a cooler climate. I usually start my seeds about 8-10 weeks before the last expected frost.
What You’ll Need:
* Bell pepper seeds (obviously!)
* Seed starting trays or small pots
* Seed starting mix (this is important – regular potting soil is too heavy)
* A spray bottle filled with water
* A heat mat (optional, but highly recommended)
* A grow light (also optional, but helps prevent leggy seedlings)
Step-by-Step Instructions:
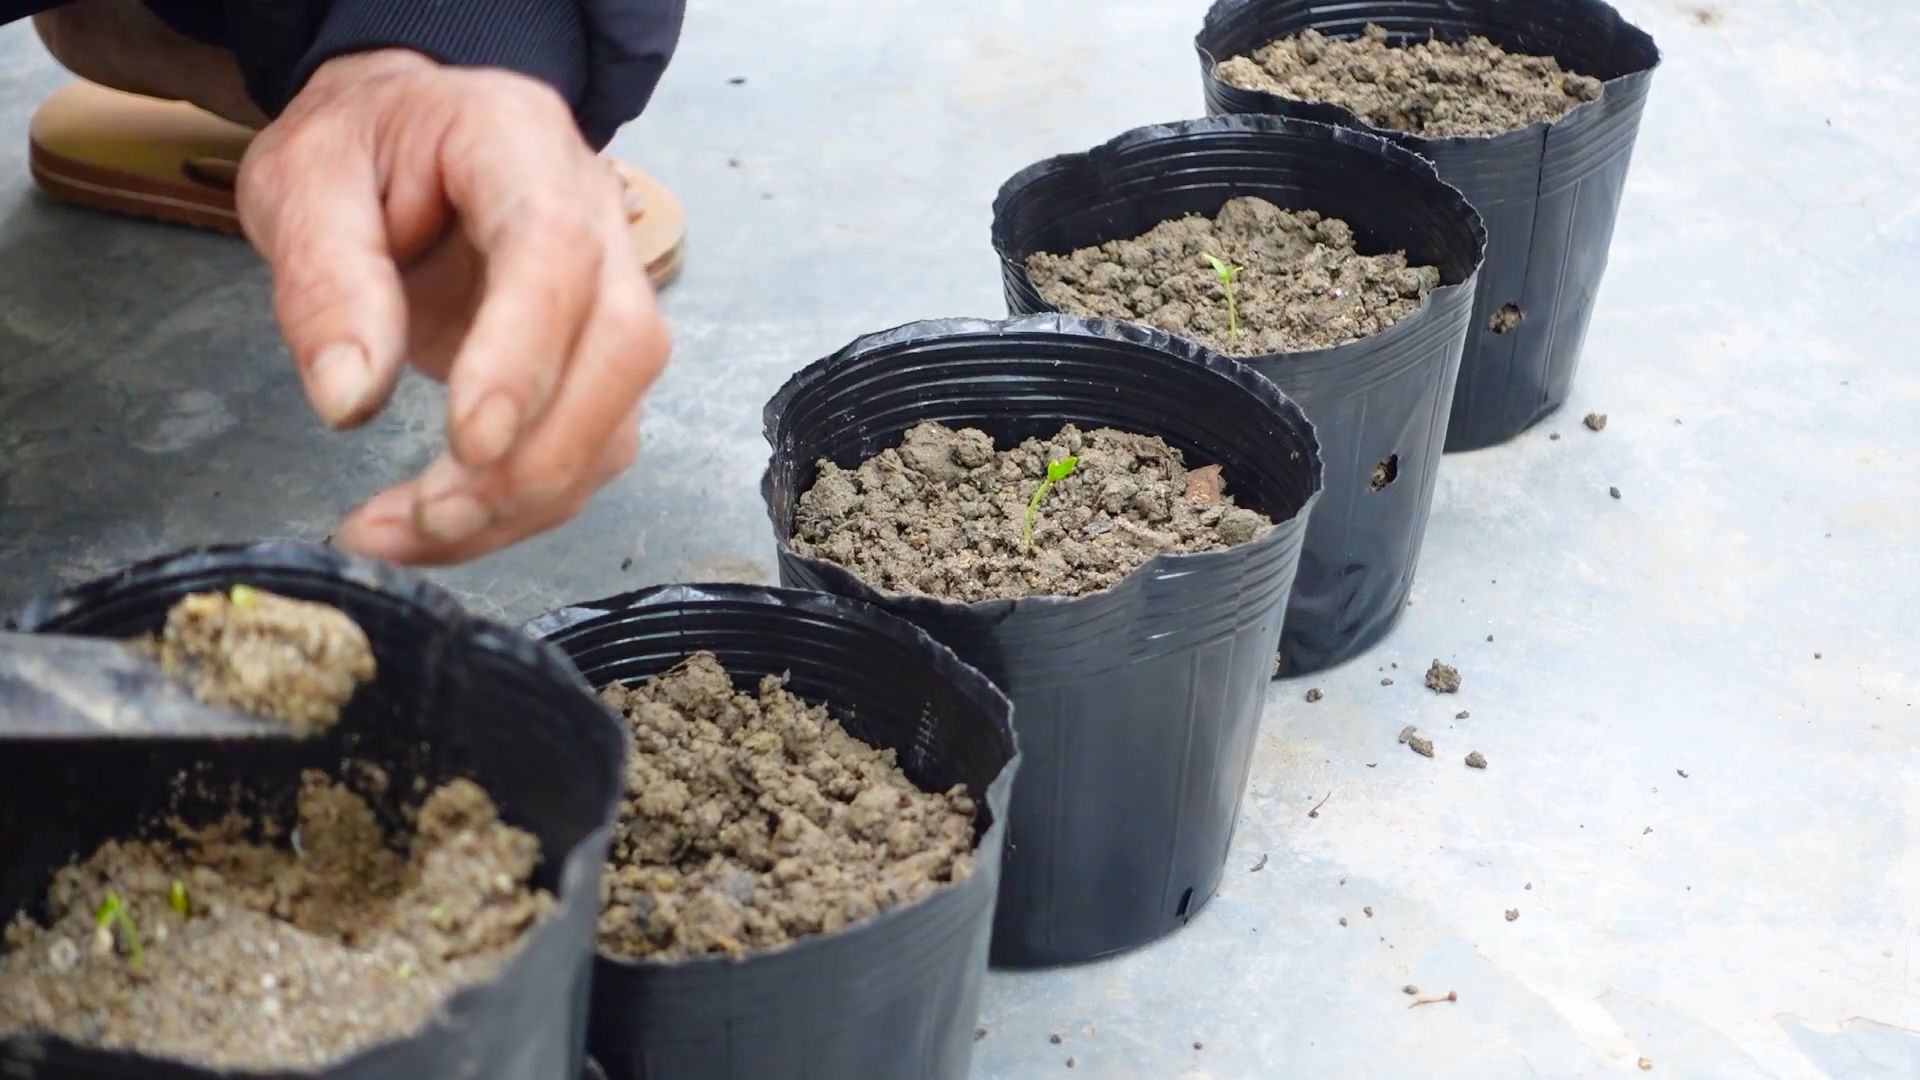
1. Prepare Your Seed Starting Trays: Fill your seed starting trays or pots with seed starting mix. Gently tap the trays to settle the mix.
2. Sow the Seeds: Make a small indentation (about ¼ inch deep) in the center of each cell or pot. Place 2-3 seeds in each indentation. This increases your chances of at least one seed germinating.
3. Cover the Seeds: Gently cover the seeds with seed starting mix.
4. Water Thoroughly: Use a spray bottle to thoroughly moisten the soil. You want it to be damp, but not soggy.
5. Provide Warmth: Place the seed starting trays on a heat mat. Bell peppers need warm soil to germinate (around 75-85°F).
6. Provide Light: Place the trays under a grow light or in a very sunny window. If using a grow light, keep it a few inches above the trays and adjust as the seedlings grow.
7. Keep the Soil Moist: Check the soil daily and mist with water as needed to keep it consistently moist. Don’t let it dry out!
8. Wait Patiently: Germination usually takes 7-14 days. Once the seedlings emerge, remove them from the heat mat.
9. Thin the Seedlings: Once the seedlings have their first true leaves (the second set of leaves that appear after the initial seed leaves), thin them to one seedling per cell or pot. Choose the strongest, healthiest-looking seedling and snip off the others at the soil line with scissors. Don’t pull them out, as this can disturb the roots of the remaining seedling.
Hardening Off Your Bell Pepper Seedlings
Before you can plant your bell pepper seedlings outdoors, you need to “harden them off.” This process gradually acclimates them to the outdoor environment, preventing shock and ensuring they thrive.
What You’ll Need:
* Your bell pepper seedlings
* A sheltered outdoor location (like a porch or patio)
Step-by-Step Instructions:
1. Day 1-2: Place the seedlings in a sheltered outdoor location for 1-2 hours. Make sure they are protected from direct sunlight and strong winds.
2. Day 3-4: Increase the outdoor exposure to 3-4 hours.
3. Day 5-6: Increase the outdoor exposure to 5-6 hours, including some direct sunlight.
4. Day 7: Leave the seedlings outdoors overnight, as long as the temperature doesn’t drop below 55°F.
After a week of hardening off, your seedlings should be ready to be planted in the garden!
Planting Your Bell Pepper Seedlings in the Garden
Now for the fun part – getting those peppers in the ground!
What You’ll Need:
* Your hardened-off bell pepper seedlings
* A sunny location with well-drained soil
* Compost or other organic matter
* Gardening gloves
* A trowel or shovel
* Watering can or hose
* Mulch (optional)
* Stakes or cages (optional, but recommended for taller varieties)
Step-by-Step Instructions:
1. Prepare the Soil: Choose a location that gets at least 6-8 hours of sunlight per day. Bell peppers love sunshine! Amend the soil with compost or other organic matter to improve drainage and fertility.
2. Dig the Holes: Dig holes that are slightly larger than the root balls of your seedlings. Space the holes about 18-24 inches apart.
3. Remove the Seedlings from Their Containers: Gently remove the seedlings from their containers. If the roots are tightly bound, gently loosen them with your fingers.
4. Plant the Seedlings: Place the seedlings in the holes and backfill with soil. Make sure the top of the root ball is level with the surrounding soil.
5. Water Thoroughly: Water the seedlings thoroughly after planting.
6. Mulch (Optional): Apply a layer of mulch around the plants to help retain moisture, suppress weeds, and regulate soil temperature.
7. Stake or Cage (Optional): If you’re growing taller varieties, consider staking or caging them to provide support and prevent them from falling over. I find this especially helpful when the peppers start getting heavy.
Caring for Your Bell Pepper Plants
Once your bell pepper plants are in the ground, it’s important to provide them with the care they need to thrive.
Watering:
Bell peppers need consistent moisture, especially during hot weather. Water deeply whenever the top inch of soil feels dry. Avoid overhead watering, as this can promote fungal diseases. Soaker hoses or drip irrigation are ideal.
Fertilizing:
Bell peppers are heavy feeders, so regular fertilization is important. I like to use a balanced fertilizer (like 10-10-10) every 2-3 weeks. You can also use organic fertilizers like compost tea or fish emulsion.
Pruning:
Pruning bell pepper plants can help improve air circulation and encourage fruit production. Remove any suckers (small shoots that grow from the base of the plant) and any yellowing or diseased leaves.
Pest and Disease Control:
Keep an eye out for common bell pepper pests like aphids, flea beetles, and tomato hornworms. You can control these pests with insecticidal soap, neem oil, or by hand-picking them off the plants.
Bell peppers are also susceptible to certain diseases, such as blossom end rot (caused by calcium deficiency) and fungal diseases. To prevent blossom end rot, make sure your soil is rich in calcium and water consistently. To prevent fungal diseases, avoid overhead watering and provide good air circulation.
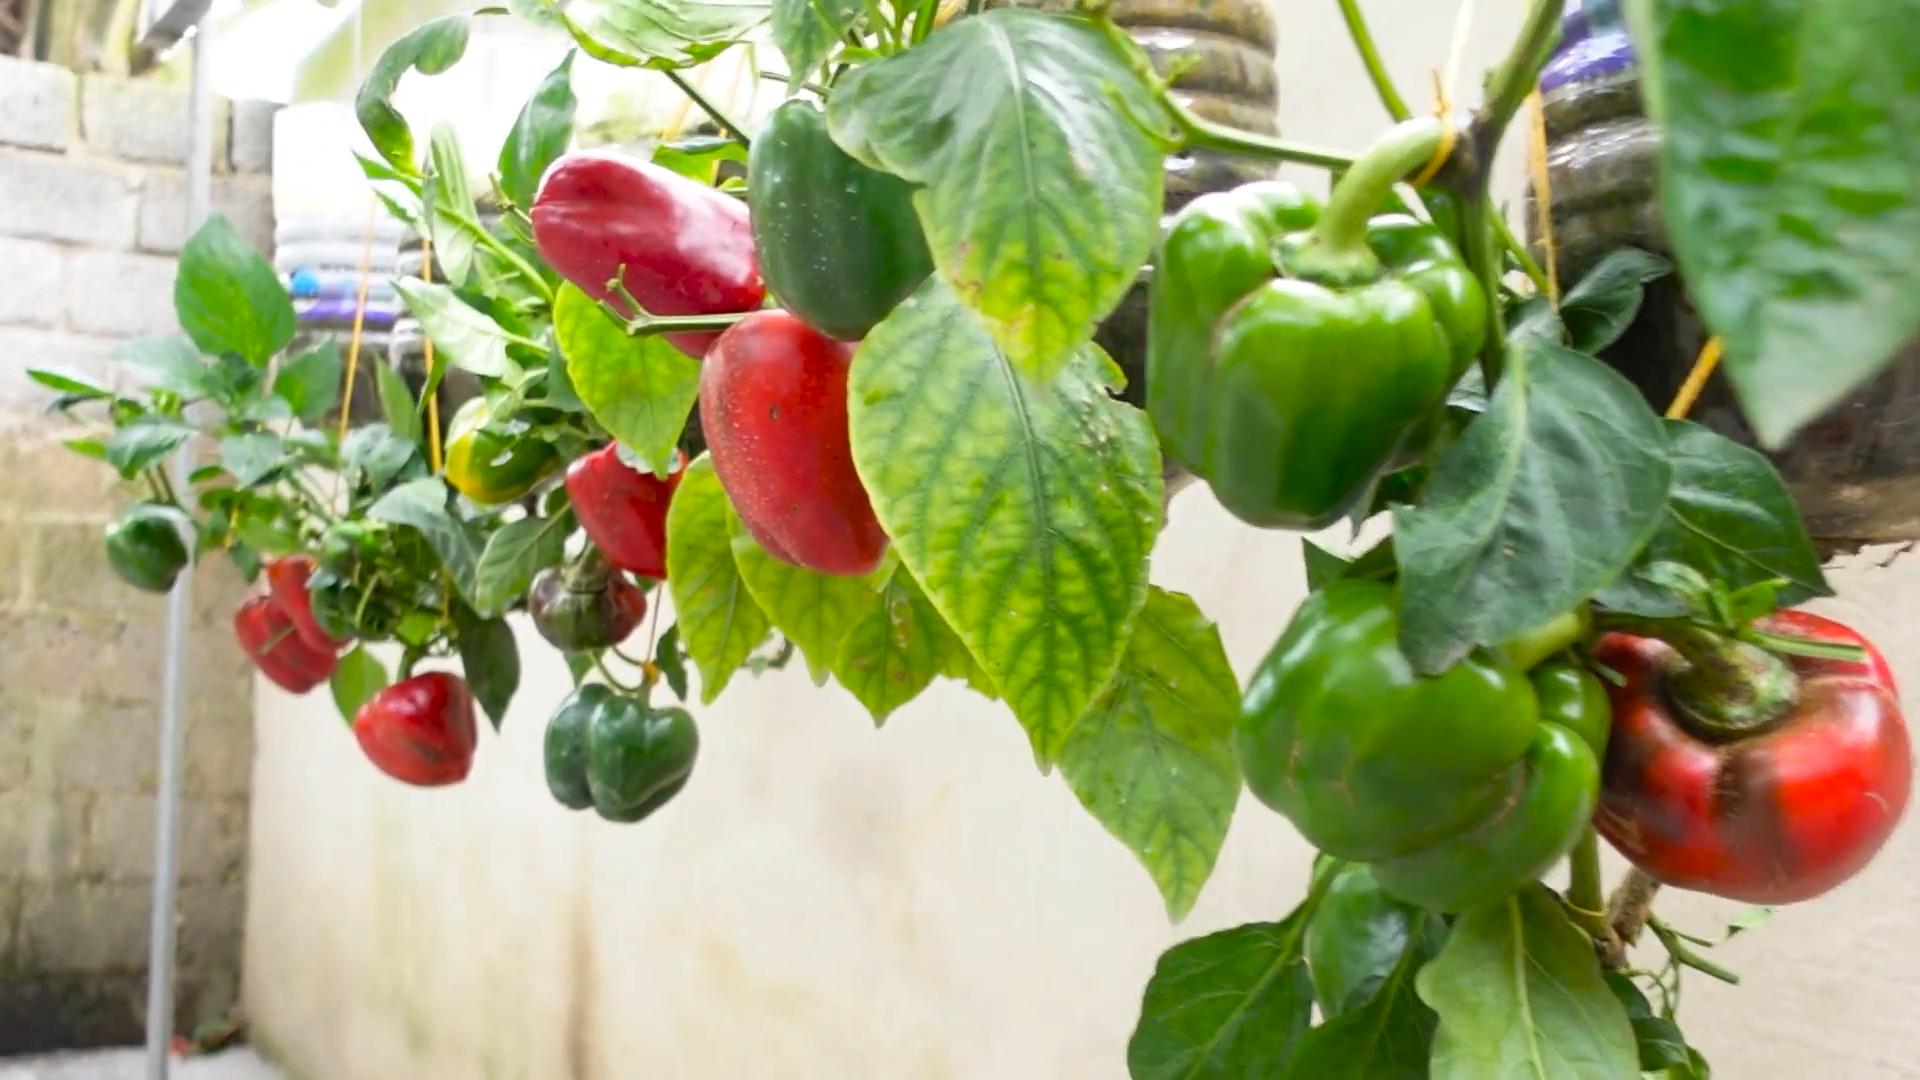
Harvesting Your Bell Peppers
The moment you’ve been waiting for! Harvesting your own homegrown bell peppers is incredibly rewarding.
When to Harvest:
Bell peppers can be harvested at any stage of maturity, but they are sweetest and most flavorful when they are fully colored. Green bell peppers are simply unripe peppers.
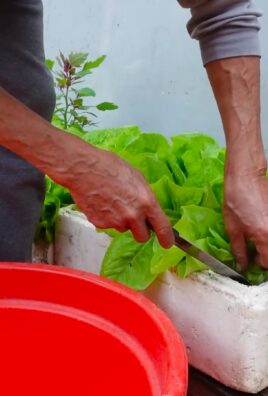
How to Harvest:
Use a sharp knife or pruning shears to cut the peppers from the plant. Leave a small piece of stem attached to the pepper.
Storing Your Harvest:
Bell peppers can be stored in the refrigerator for up to a week. For longer storage, you can freeze them. Simply wash, core, and chop the peppers, then blanch them in boiling water for 2-3 minutes. Drain and cool the peppers, then freeze them in freezer bags.
Troubleshooting Common Bell Pepper Problems
Even with the best care, you might encounter some problems while growing bell peppers.
Conclusion
So, there you have it! Growing bell peppers in your backyard doesn’t have to be a daunting task. With a little planning, the right techniques, and a dash of patience, you can be harvesting vibrant, delicious bell peppers right from your own garden. This DIY approach not only saves you money but also gives you the satisfaction of knowing exactly where your food comes from and how it was grown.
Why is this a must-try? Because store-bought bell peppers simply can’t compare to the flavor and freshness of homegrown ones. Plus, you have complete control over the growing process, ensuring they are free from harmful pesticides and chemicals. Imagine the burst of flavor in your salads, stir-fries, and stuffed pepper recipes – all thanks to your own green thumb!
But don’t stop there! Experiment with different varieties of bell peppers. Try growing colorful yellow, orange, or even purple bell peppers to add visual appeal to your garden and your plate. You can also explore different growing methods, such as container gardening if you have limited space, or vertical gardening to maximize your yield. Consider companion planting with herbs like basil or marigolds to deter pests and enhance the flavor of your peppers.
We encourage you to take the plunge and try growing bell peppers in your backyard. It’s a rewarding experience that connects you with nature and provides you with fresh, healthy produce. Don’t be afraid to experiment and learn along the way. Every garden is unique, and what works for one person may not work for another.
Most importantly, we want to hear about your experiences! Share your tips, tricks, and challenges in the comments below. Let us know what varieties you’re growing, what growing methods you’re using, and any secrets you’ve discovered along the way. Together, we can create a community of backyard gardeners who are passionate about growing their own food. So, get your hands dirty, embrace the challenge, and enjoy the delicious rewards of growing bell peppers in your backyard! We are confident that you will find this DIY project to be both enjoyable and fruitful. Happy gardening!
Frequently Asked Questions (FAQ)
What is the best time to start growing bell peppers?
The ideal time to start growing bell peppers depends on your climate. In general, bell peppers thrive in warm weather, so you should start them indoors 6-8 weeks before the last expected frost. This gives them a head start and allows them to develop strong roots before being transplanted outdoors. If you live in a warmer climate with a longer growing season, you can start them directly in the ground after the last frost has passed. However, starting them indoors is generally recommended for better results.
What kind of soil is best for growing bell peppers?
Bell peppers prefer well-drained, fertile soil that is rich in organic matter. The soil should have a slightly acidic to neutral pH level, ideally between 6.0 and 7.0. Before planting, amend the soil with compost, aged manure, or other organic materials to improve its fertility and drainage. You can also add a slow-release fertilizer to provide essential nutrients throughout the growing season. Avoid heavy clay soils, as they can retain too much moisture and lead to root rot.
How much sunlight do bell peppers need?
Bell peppers require at least 6-8 hours of direct sunlight per day to thrive. Choose a location in your backyard that receives plenty of sunlight throughout the day. If you live in a particularly hot climate, providing some afternoon shade can help prevent the peppers from getting sunburned. Insufficient sunlight can result in stunted growth, fewer peppers, and reduced flavor.
How often should I water my bell pepper plants?
Bell peppers need consistent moisture to produce healthy fruits. Water deeply and regularly, especially during hot, dry weather. Aim to keep the soil consistently moist but not waterlogged. Overwatering can lead to root rot, while underwatering can cause the peppers to become small and bitter. A good rule of thumb is to water when the top inch of soil feels dry to the touch. Mulching around the plants can help retain moisture and suppress weeds.
What are some common pests and diseases that affect bell peppers?
Bell peppers are susceptible to various pests and diseases, including aphids, whiteflies, spider mites, blossom-end rot, and fungal diseases. Regularly inspect your plants for signs of infestation or disease. Use organic pest control methods, such as insecticidal soap or neem oil, to control pests. To prevent blossom-end rot, ensure that your plants receive consistent watering and that the soil is rich in calcium. Improve air circulation around the plants to prevent fungal diseases.
How do I prevent blossom-end rot in my bell peppers?
Blossom-end rot is a common problem in bell peppers, characterized by a dark, leathery spot on the bottom of the fruit. It is caused by a calcium deficiency, which can be due to inconsistent watering, poor soil drainage, or a lack of calcium in the soil. To prevent blossom-end rot, ensure that your plants receive consistent watering, especially during hot, dry weather. Amend the soil with calcium-rich materials, such as bone meal or crushed eggshells. You can also use a calcium-based foliar spray to provide a quick boost of calcium to the plants.
When are bell peppers ready to harvest?
Bell peppers are typically ready to harvest when they have reached their mature size and color. The exact time will depend on the variety of pepper you are growing. Generally, green bell peppers are ready to harvest when they are firm and have reached their full size, usually around 3-4 inches long. Colored bell peppers, such as red, yellow, and orange, will take longer to mature and will develop their color as they ripen. You can harvest them when they have reached their desired color and are still firm to the touch. Use a sharp knife or pruning shears to cut the peppers from the plant, leaving a short stem attached.
Can I grow bell peppers in containers?
Yes, bell peppers can be successfully grown in containers, making them a great option for gardeners with limited space. Choose a container that is at least 12 inches in diameter and has good drainage holes. Use a high-quality potting mix that is well-draining and rich in organic matter. Provide the plants with plenty of sunlight and water regularly. You may also need to fertilize them more frequently than plants grown in the ground, as the nutrients in the potting mix can be depleted more quickly.
What are some good companion plants for bell peppers?
Companion planting can help improve the growth and health of your bell pepper plants. Some good companion plants for bell peppers include basil, marigolds, carrots, onions, and garlic. Basil helps repel pests and improve the flavor of the peppers. Marigolds also deter pests and attract beneficial insects. Carrots and onions can help improve soil drainage and aeration. Garlic can help prevent fungal diseases. Avoid planting bell peppers near fennel or brassicas (such as cabbage and broccoli), as they can inhibit their growth.
How can I get more bell peppers from my plants?
To maximize your bell pepper yield, ensure that your plants receive adequate sunlight, water, and nutrients. Prune the plants to encourage branching and fruit production. Pinch off any suckers that grow from the base of the plant, as they can divert energy away from the main stems. Support the plants with stakes or cages to prevent them from falling over when they are laden with fruit. Regularly harvest the peppers as they ripen to encourage the plant to produce more.
Leave a Comment