

Grow Bitter Gourd Easily, even if you think you don’t have a green thumb! Have you ever dreamt of harvesting your own vibrant, knobbly bitter gourds right from your backyard? It might seem intimidating, but trust me, it’s more achievable than you think. For generations, bitter gourd, also known as Karela, has been a staple in Asian and African cuisines, revered not only for its unique, slightly bitter flavor but also for its impressive health benefits. From traditional medicine to culinary delights, this vegetable holds a special place in many cultures.
But let’s be honest, growing bitter gourd can sometimes feel like a battle against pests, diseases, and unpredictable weather. That’s where these DIY tricks and hacks come in! I’m going to share some simple, yet effective methods to help you grow bitter gourd easily, regardless of your gardening experience. Imagine the satisfaction of serving a home-cooked meal featuring your own homegrown bitter gourd, knowing exactly where it came from and how it was nurtured.
This article is packed with practical tips and step-by-step instructions to help you overcome common challenges and maximize your harvest. Whether you’re dealing with limited space, poor soil, or pesky insects, I’ve got you covered. So, grab your gardening gloves, and let’s embark on this exciting journey to cultivate your own thriving bitter gourd patch!
Grow Bitter Gourd Like a Pro: My Foolproof DIY Guide
Hey there, fellow gardening enthusiasts! Are you ready to tackle a slightly challenging, yet incredibly rewarding, vegetable? I’m talking about bitter gourd, also known as bitter melon or karela. Don’t let the name scare you! With a little know-how and my tried-and-true methods, you’ll be harvesting your own crop of this nutritious and flavorful veggie in no time. I’ve been growing bitter gourd for years, and I’m excited to share all my secrets with you.
What You’ll Need: The Essential Supplies
Before we dive into the nitty-gritty, let’s gather our supplies. Having everything on hand will make the process smooth and enjoyable.
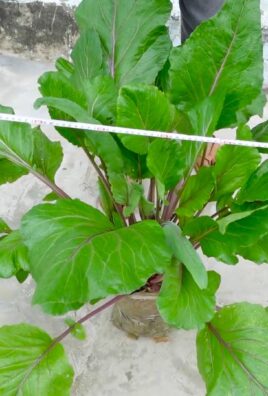
* Bitter Gourd Seeds: Choose a variety that suits your climate and taste preferences. I personally love the long, green varieties, but there are also shorter, rounder ones.
* Seed Starting Trays or Small Pots: These are perfect for getting your seedlings off to a strong start.
* Seed Starting Mix: A light and airy mix is crucial for healthy germination.
* Well-Draining Soil: Bitter gourd thrives in soil that drains well. Amend your garden soil with compost or other organic matter to improve drainage.
* Compost or Aged Manure: This will provide essential nutrients for your plants.
* Trellis or Support Structure: Bitter gourd is a vine, so it needs something to climb on. A trellis, fence, or even a sturdy bamboo structure will work.
* Gardening Gloves: Protect your hands from dirt and potential irritants.
* Watering Can or Hose: For regular watering.
* Fertilizer (Optional): A balanced fertilizer can boost growth and fruit production. I prefer organic options like fish emulsion or seaweed extract.
* Mulch (Optional): Mulch helps retain moisture, suppress weeds, and regulate soil temperature.
* Pruning Shears or Scissors: For occasional pruning.
Phase 1: Starting Your Bitter Gourd Seeds
This is where the magic begins! Getting your seeds to germinate successfully is the first step towards a bountiful harvest.
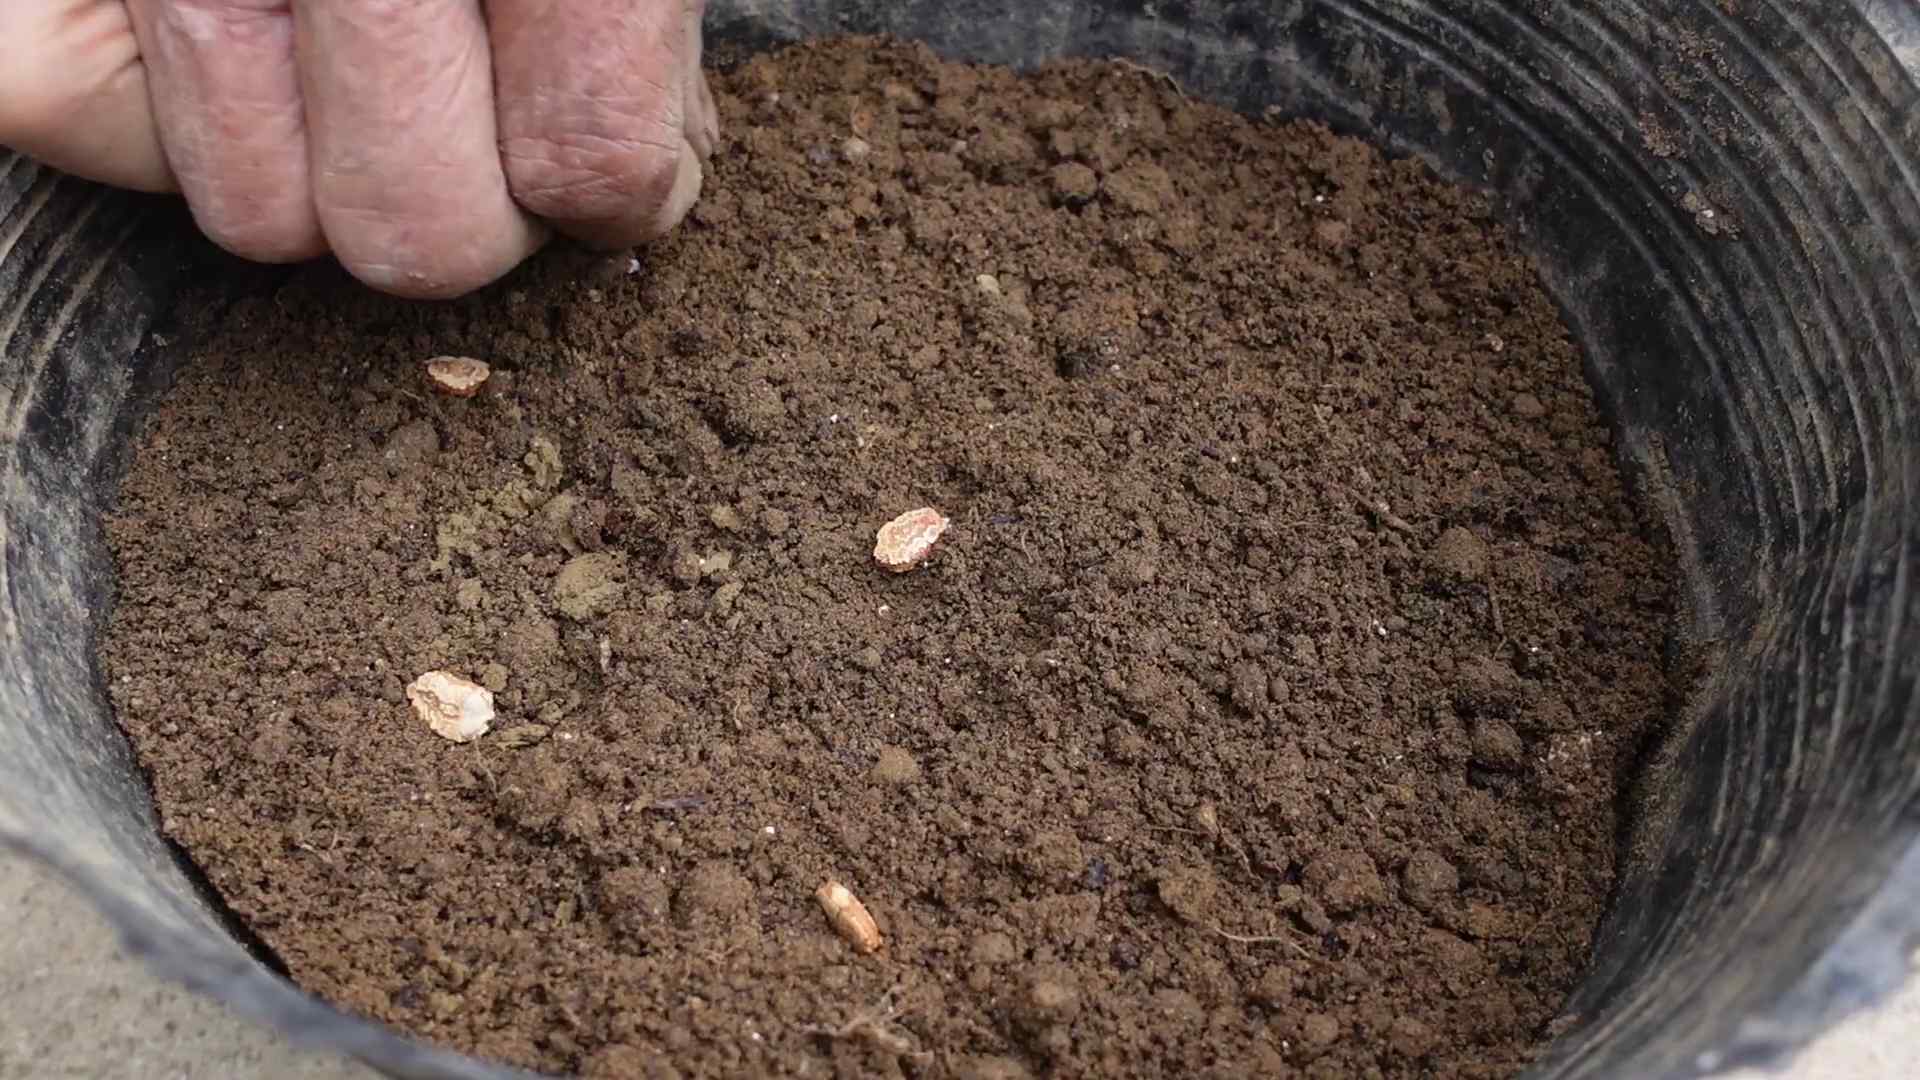
1. Soaking the Seeds (Optional but Recommended): To speed up germination, I like to soak my bitter gourd seeds in warm water for 24 hours before planting. This helps soften the hard outer shell and encourages sprouting.
2. Preparing Your Seed Starting Trays or Pots: Fill your seed starting trays or small pots with seed starting mix. Gently press down the soil to create a firm surface.
3. Planting the Seeds: Make a small hole (about 1/2 inch deep) in the center of each pot or cell. Place one seed in each hole and cover it with soil. Gently pat down the soil.
4. Watering the Seeds: Water the soil gently but thoroughly. You want the soil to be moist but not waterlogged.
5. Creating a Warm and Humid Environment: Bitter gourd seeds germinate best in warm and humid conditions. You can cover the seed starting trays with a clear plastic lid or plastic wrap to create a mini-greenhouse effect.
6. Finding the Right Location: Place the seed starting trays in a warm location with indirect sunlight. A sunny windowsill or a greenhouse is ideal.
7. Monitoring Germination: Keep the soil consistently moist but not soggy. Germination typically takes 7-14 days. Once the seedlings emerge, remove the plastic lid or wrap.
Phase 2: Transplanting Your Seedlings
Once your seedlings have developed a few sets of true leaves, it’s time to transplant them into their permanent home in the garden.
1. Hardening Off the Seedlings: Before transplanting, you need to “harden off” the seedlings. This means gradually exposing them to outdoor conditions to acclimate them to the sun, wind, and temperature changes. Start by placing the seedlings outdoors for a few hours each day, gradually increasing the time over a week or two.
2. Preparing the Garden Bed: Choose a sunny location in your garden with well-draining soil. Amend the soil with compost or aged manure to improve fertility and drainage.
3. Digging the Planting Holes: Dig holes that are slightly larger than the root balls of your seedlings. Space the holes about 2-3 feet apart.
4. Transplanting the Seedlings: Gently remove the seedlings from their pots or trays. Be careful not to damage the roots. Place each seedling in a planting hole and backfill with soil. Gently pat down the soil around the base of the plant.
5. Watering After Transplanting: Water the seedlings thoroughly after transplanting. This will help them settle into their new home.
6. Adding Mulch (Optional): Apply a layer of mulch around the base of the plants to help retain moisture, suppress weeds, and regulate soil temperature.
Phase 3: Providing Support and Training the Vines
Bitter gourd is a vigorous vine, so providing adequate support is essential for healthy growth and fruit production.
1. Installing a Trellis or Support Structure: Install a trellis, fence, or other support structure near your bitter gourd plants. Make sure the structure is sturdy enough to support the weight of the mature vines and fruits.
2. Training the Vines: As the vines grow, gently guide them onto the trellis or support structure. You can use plant ties or twine to secure the vines to the structure.
3. Pruning (Optional): Pruning can help improve air circulation and encourage fruit production. Remove any dead or yellowing leaves. You can also prune back the tips of the vines to encourage branching. I usually prune lightly, focusing on removing overcrowded or unproductive growth.
Phase 4: Watering and Fertilizing
Consistent watering and fertilization are crucial for healthy growth and abundant fruit production.
1. Watering Regularly: Water your bitter gourd plants regularly, especially during hot and dry weather. Aim to keep the soil consistently moist but not waterlogged. Water deeply and less frequently, rather than shallowly and often.
2. Fertilizing (Optional): If your soil is poor or you want to boost growth, you can fertilize your bitter gourd plants every few weeks with a balanced fertilizer. I prefer organic options like fish emulsion or seaweed extract. Follow the instructions on the fertilizer label.
Phase 5: Pest and Disease Management
Like any plant, bitter gourd can be susceptible to pests and diseases. Here’s how to keep your plants healthy and thriving.
1. Monitoring for Pests: Regularly inspect your plants for pests such as aphids, spider mites, and squash bugs.
2. Dealing with Pests: If you find pests, you can try to remove them by hand or spray the plants with insecticidal soap or neem oil. I always prefer organic pest control methods whenever possible.
3. Preventing Diseases: To prevent diseases, ensure good air circulation around your plants and avoid overwatering. If you notice any signs of disease, such as powdery mildew or leaf spot, treat the plants with a fungicide.
4. Companion Planting: Consider planting companion plants like marigolds or basil near your bitter gourd to deter pests.
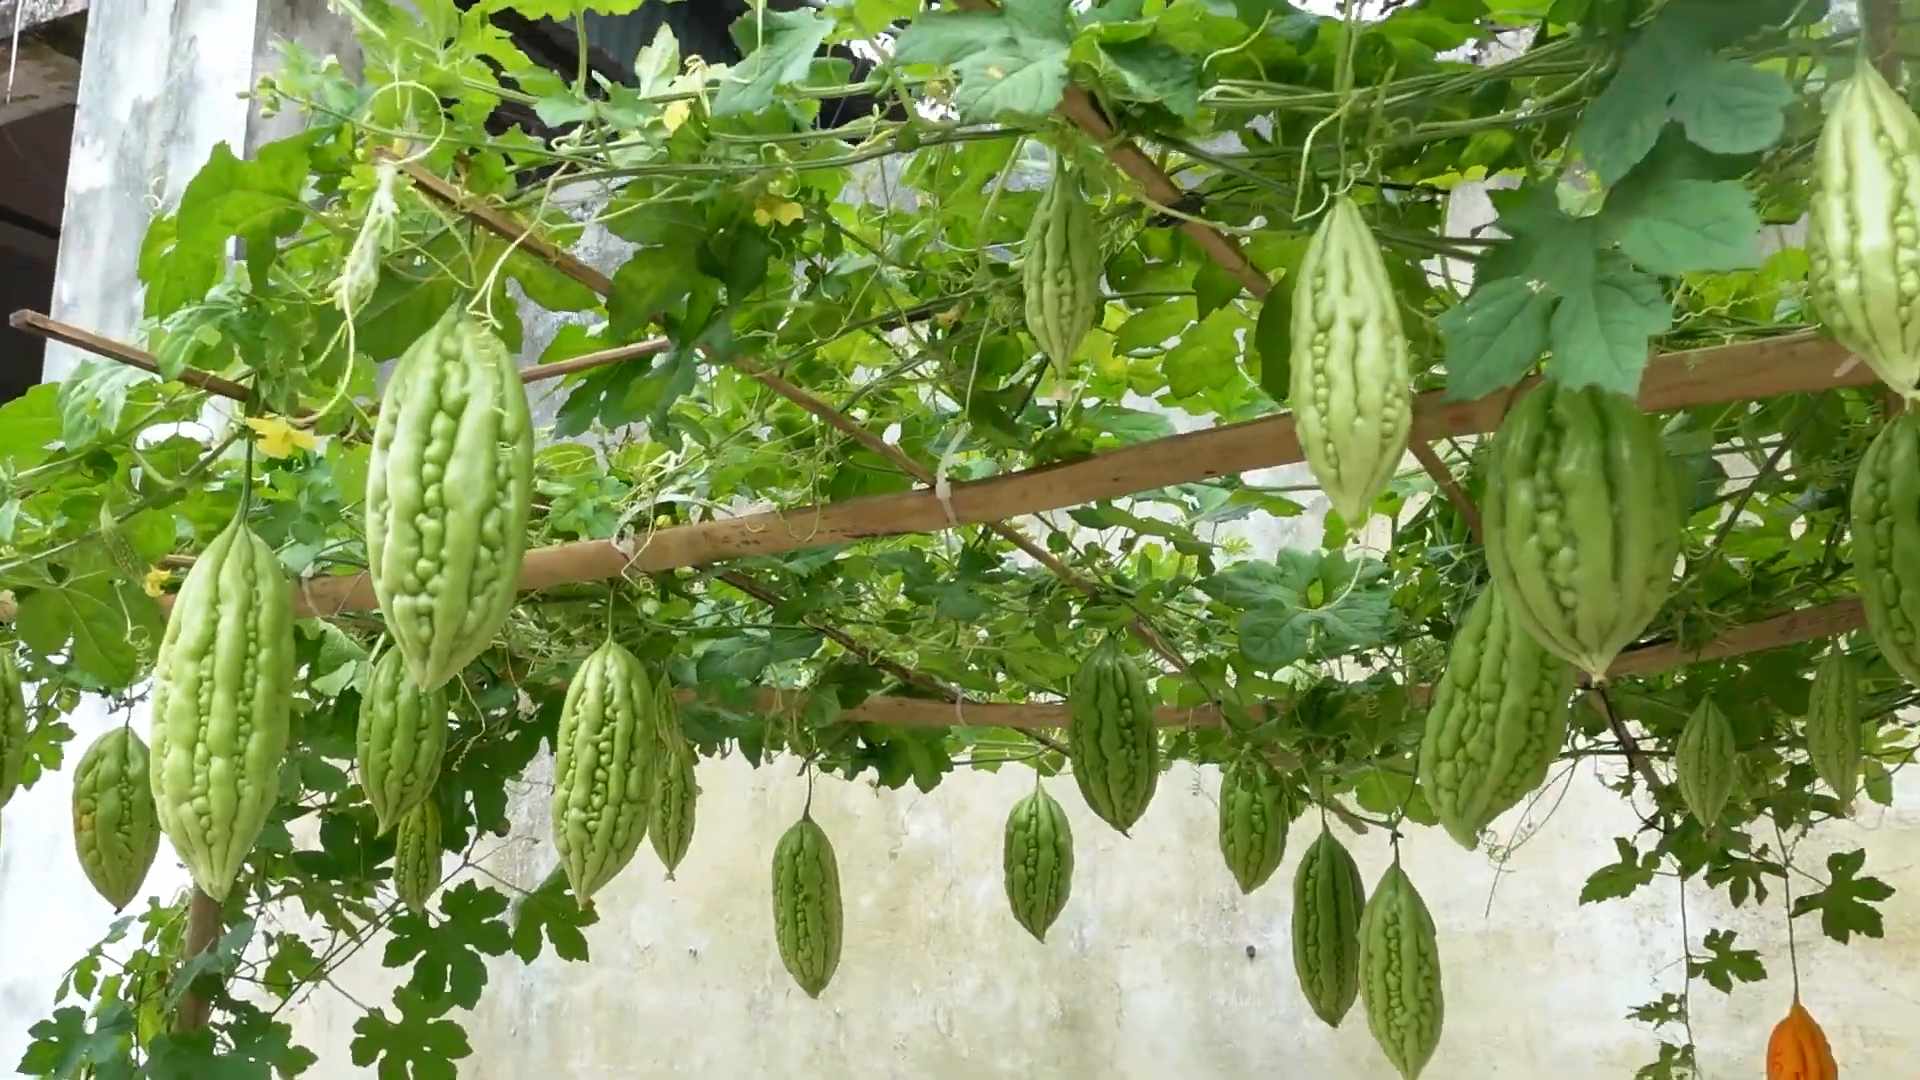
Phase 6: Harvesting Your Bitter Gourd
The moment you’ve been waiting for! Harvesting your own homegrown bitter gourd is incredibly satisfying.
1. Knowing When to Harvest: Bitter gourd is typically ready to harvest about 2-3 months after planting. The fruits should be firm and green, but not too ripe. Overripe fruits will turn yellow or orange and become more bitter.
2. Harvesting the Fruits: Use a sharp knife or pruning shears to cut the fruits from the vine. Leave a small stem attached to the fruit.
3. Storing Your Harvest: Bitter gourd can be stored in the refrigerator for up to a week.
Tips and Tricks for Success
Here are a few extra tips and tricks that I’ve learned over the years to help you grow the best bitter gourd possible:
* Choose the Right Variety: Select a variety that is well-suited to your climate and growing conditions.
* Provide Plenty of Sunlight: Bitter gourd needs at least 6-8 hours of sunlight per day.
* Improve Soil Drainage: Bitter gourd thrives in well-draining soil. Amend your soil with compost or other organic matter to improve drainage.
* Water Regularly: Keep the soil consistently moist but not waterlogged.
* Fertilize Regularly: Fertilize your plants every few weeks with a balanced fertilizer.
* Provide Support: Bitter gourd is a vine, so it needs something to climb on.
* Monitor for Pests and Diseases: Regularly inspect your plants for pests and diseases.
* Harvest Regularly: Harvest the fruits when they are firm and green.
* Don’t Be Afraid to Experiment: Gardening is all about learning and experimenting. Don’t be afraid to try new things and see what works best for you.
Growing bitter gourd can be a
Conclusion
So, there you have it! Growing bitter gourd doesn’t have to be a daunting task. By implementing this simple, yet effective DIY trick, you’re setting yourself up for a bountiful harvest of this incredibly nutritious vegetable. We’ve walked you through the process, highlighting the key steps and offering insights that will help you overcome common challenges.
But why is this DIY method a must-try? It’s all about maximizing your yield and minimizing the effort. Traditional methods can often lead to inconsistent results, with plants struggling to thrive due to inadequate support or poor nutrient absorption. This trick addresses these issues head-on, creating an optimal environment for your bitter gourd to flourish. Think of it as giving your plants a VIP pass to growth and productivity!
Beyond the basic method, there’s plenty of room for experimentation. Consider these variations to tailor the technique to your specific needs and preferences:
* Vertical Gardening Twist: Adapt the support structure to a vertical garden setup. This is perfect for those with limited space, allowing you to grow bitter gourd even on a balcony or small patio. Use sturdy netting or a trellis to guide the vines upwards.
* Companion Planting Power: Introduce companion plants like marigolds or basil near your bitter gourd. These plants can help deter pests and attract beneficial insects, further enhancing the health and productivity of your crop.
* Nutrient Boost: Supplement your soil with organic fertilizers like compost tea or fish emulsion. This will provide your bitter gourd plants with the essential nutrients they need to produce abundant, high-quality fruit.
* Seed Starting Secrets: For an even earlier harvest, start your bitter gourd seeds indoors a few weeks before the last expected frost. This will give your plants a head start and allow them to establish themselves before being transplanted outdoors.
Ultimately, the success of your bitter gourd growing endeavor hinges on your willingness to experiment and adapt. Don’t be afraid to try new things and see what works best for you. Remember, gardening is a journey of learning and discovery.
We are confident that this DIY trick will revolutionize your approach to growing bitter gourd. It’s a game-changer that will not only simplify the process but also significantly increase your yield. Imagine the satisfaction of harvesting your own fresh, homegrown bitter gourd, knowing that you played a key role in its success.
Now, it’s your turn! We encourage you to give this DIY trick a try and experience the difference for yourself. We’re eager to hear about your results, so please share your experiences, tips, and photos in the comments section below. Let’s build a community of passionate bitter gourd growers who are dedicated to sharing their knowledge and helping each other succeed. Let us know how this method helped you grow bitter gourd easily. Happy gardening!
Frequently Asked Questions (FAQ)
Q1: What type of soil is best for growing bitter gourd?
A: Bitter gourd thrives in well-drained, fertile soil that is rich in organic matter. A slightly acidic to neutral pH (6.0 to 7.0) is ideal. Before planting, amend your soil with compost, well-rotted manure, or other organic materials to improve its structure and fertility. If your soil is heavy clay, consider adding sand or perlite to improve drainage. A soil test can help you determine the specific nutrient needs of your soil and guide your fertilization strategy.
Q2: How often should I water my bitter gourd plants?
A: Bitter gourd plants need consistent moisture, especially during hot and dry weather. Water deeply and regularly, aiming to keep the soil consistently moist but not waterlogged. The frequency of watering will depend on factors such as the weather, soil type, and the size of your plants. As a general rule, water when the top inch of soil feels dry to the touch. Avoid overhead watering, as this can increase the risk of fungal diseases. Drip irrigation or soaker hoses are excellent options for delivering water directly to the roots of your plants.
Q3: What kind of support structure should I use for my bitter gourd vines?
A: Bitter gourd vines are vigorous climbers and require a sturdy support structure to grow properly. A trellis, fence, or arbor are all suitable options. The support structure should be at least 6 feet tall to accommodate the growth of the vines. Make sure the structure is strong enough to support the weight of the mature plants and the developing fruit. You can also use netting or string to guide the vines along the support structure. Regularly check the vines and adjust them as needed to ensure they are properly supported.
Q4: How do I prevent pests and diseases from affecting my bitter gourd plants?
A: Prevention is key when it comes to managing pests and diseases in your bitter gourd plants. Start by selecting disease-resistant varieties and planting in well-drained soil. Practice crop rotation to prevent the buildup of soilborne pathogens. Regularly inspect your plants for signs of pests or diseases, such as aphids, squash bugs, or powdery mildew. If you detect any problems, take action promptly. Organic pest control methods, such as insecticidal soap or neem oil, can be effective for controlling many common pests. For fungal diseases, improve air circulation around your plants and avoid overhead watering.
Q5: When is the best time to harvest bitter gourd?
A: Bitter gourd is typically ready to harvest about 8-12 weeks after planting. The fruit should be firm, green, and slightly immature. Overripe bitter gourd will turn yellow or orange and become bitter. Use a sharp knife or pruning shears to cut the fruit from the vine, leaving a short stem attached. Harvest regularly to encourage continued production. The ideal time to harvest is in the morning when the fruit is cool and crisp.
Q6: Can I grow bitter gourd in containers?
A: Yes, you can successfully grow bitter gourd in containers, provided you choose a large enough container and provide adequate support. Select a container that is at least 18 inches in diameter and 18 inches deep. Fill the container with a well-draining potting mix that is rich in organic matter. Provide a trellis or other support structure for the vines to climb. Water regularly and fertilize every 2-3 weeks with a balanced fertilizer. Place the container in a sunny location that receives at least 6-8 hours of direct sunlight per day.
Q7: My bitter gourd flowers are dropping off without producing fruit. What could be the reason?
A: There are several reasons why bitter gourd flowers might drop off without producing fruit. One common cause is lack of pollination. Bitter gourd plants have separate male and female flowers, and pollination is required for fruit set. If there are not enough pollinators in your area, you may need to hand-pollinate the flowers. Another possible cause is stress, such as from extreme temperatures, drought, or nutrient deficiencies. Ensure your plants are receiving adequate water and nutrients, and protect them from extreme weather conditions.
Q8: How can I hand-pollinate my bitter gourd flowers?
A: Hand-pollinating bitter gourd flowers is a simple process. Identify the male and female flowers. Male flowers have a long, slender stem, while female flowers have a small, immature fruit behind the flower. Use a small paintbrush or cotton swab to collect pollen from the male flower. Gently transfer the pollen to the stigma of the female flower. It’s best to hand-pollinate in the morning when the flowers are open and the pollen is fresh.
Q9: How do I save seeds from my bitter gourd for next year?
A: To save seeds from your bitter gourd, allow a few fruits to fully mature on the vine. The fruit will turn yellow or orange and become soft. Once the fruit is ripe, harvest it and scoop out the seeds. Wash the seeds thoroughly to remove any pulp. Spread the seeds out on a paper towel to dry completely. Store the dried seeds in an airtight container in a cool, dark, and dry place.
Q10: What are some of the health benefits of eating bitter gourd?
A: Bitter gourd is a highly nutritious vegetable with numerous health benefits. It is rich in vitamins, minerals, and antioxidants. Studies have shown that bitter gourd can help regulate blood sugar levels, making it beneficial for people with diabetes. It may also have anti-inflammatory, anti-cancer, and immune-boosting properties. Incorporating bitter gourd into your diet can contribute to overall health and well-being.
Leave a Comment