

Grow Leaf Mustard at Home – sounds intimidating, right? Trust me, it’s not! Imagine stepping outside your back door and snipping fresh, peppery mustard greens for your salad or stir-fry. No more trips to the grocery store for wilted, overpriced greens. This DIY guide will unlock the secrets to cultivating your own vibrant patch of leaf mustard, even if you think you have a black thumb!
Leaf mustard, also known as mustard greens, has a rich history, particularly in Asian and Southern American cuisines. For centuries, it’s been a staple, not just for its unique flavor, but also for its impressive nutritional benefits. Think of it as a superfood hiding in plain sight! But beyond its culinary and health benefits, growing your own food connects you to nature and provides a sense of accomplishment that’s hard to beat.
Why do you need this DIY trick? Because growing your own leaf mustard is surprisingly easy and rewarding! It’s a fast-growing crop, perfect for beginners, and can be grown in containers or directly in your garden. Plus, knowing exactly where your food comes from gives you peace of mind. So, ditch the store-bought greens and let’s embark on this exciting journey to grow leaf mustard at home. I promise, you’ll be amazed at how simple and satisfying it is!
Grow Your Own Delicious Leaf Mustard: A Beginner’s Guide
Hey there, fellow foodies and garden enthusiasts! I’m so excited to share my experience with growing leaf mustard at home. It’s surprisingly easy, incredibly rewarding, and adds a zesty kick to your meals. Plus, nothing beats the taste of fresh, homegrown greens. Let’s dive in!
Choosing Your Mustard Variety
Before we get our hands dirty, let’s talk mustard varieties. There are tons of options, each with its own unique flavor profile. Here are a few of my favorites:
* ‘Florida Broadleaf’: This is a classic, reliable choice with a mild, slightly peppery flavor. It’s great for beginners.
* ‘Red Giant’: If you want a bit of visual appeal, ‘Red Giant’ is the way to go. Its deep purple leaves add a pop of color to your garden and have a bolder, spicier taste.
* ‘Osaka Purple’: Similar to ‘Red Giant’ but with a slightly milder flavor.
* ‘Southern Giant Curled’: This variety has frilly, curled leaves and a strong, pungent flavor. It’s perfect for adding a serious kick to your dishes.
* ‘Mizuna’: Technically a Japanese mustard green, Mizuna has a delicate, slightly peppery flavor and feathery leaves. It’s delicious in salads and stir-fries.
I recommend starting with ‘Florida Broadleaf’ if you’re new to growing mustard greens. Once you get the hang of it, you can experiment with other varieties to find your personal favorite.
Getting Started: What You’ll Need
Okay, let’s gather our supplies. Here’s what you’ll need to grow your own leaf mustard:
* Mustard seeds: Choose your desired variety from a reputable seed supplier.
* Potting soil: Use a well-draining potting mix. I prefer organic mixes for the best flavor and health.
* Containers (optional): If you’re growing in containers, choose pots that are at least 6 inches deep.
* Garden trowel: For digging and planting.
* Watering can or hose: For watering your plants.
* Fertilizer (optional): A balanced organic fertilizer can help boost growth.
* Sunny location: Mustard greens need at least 6 hours of sunlight per day.
Step-by-Step Planting Guide
Now for the fun part – planting! Here’s a step-by-step guide to get you started:
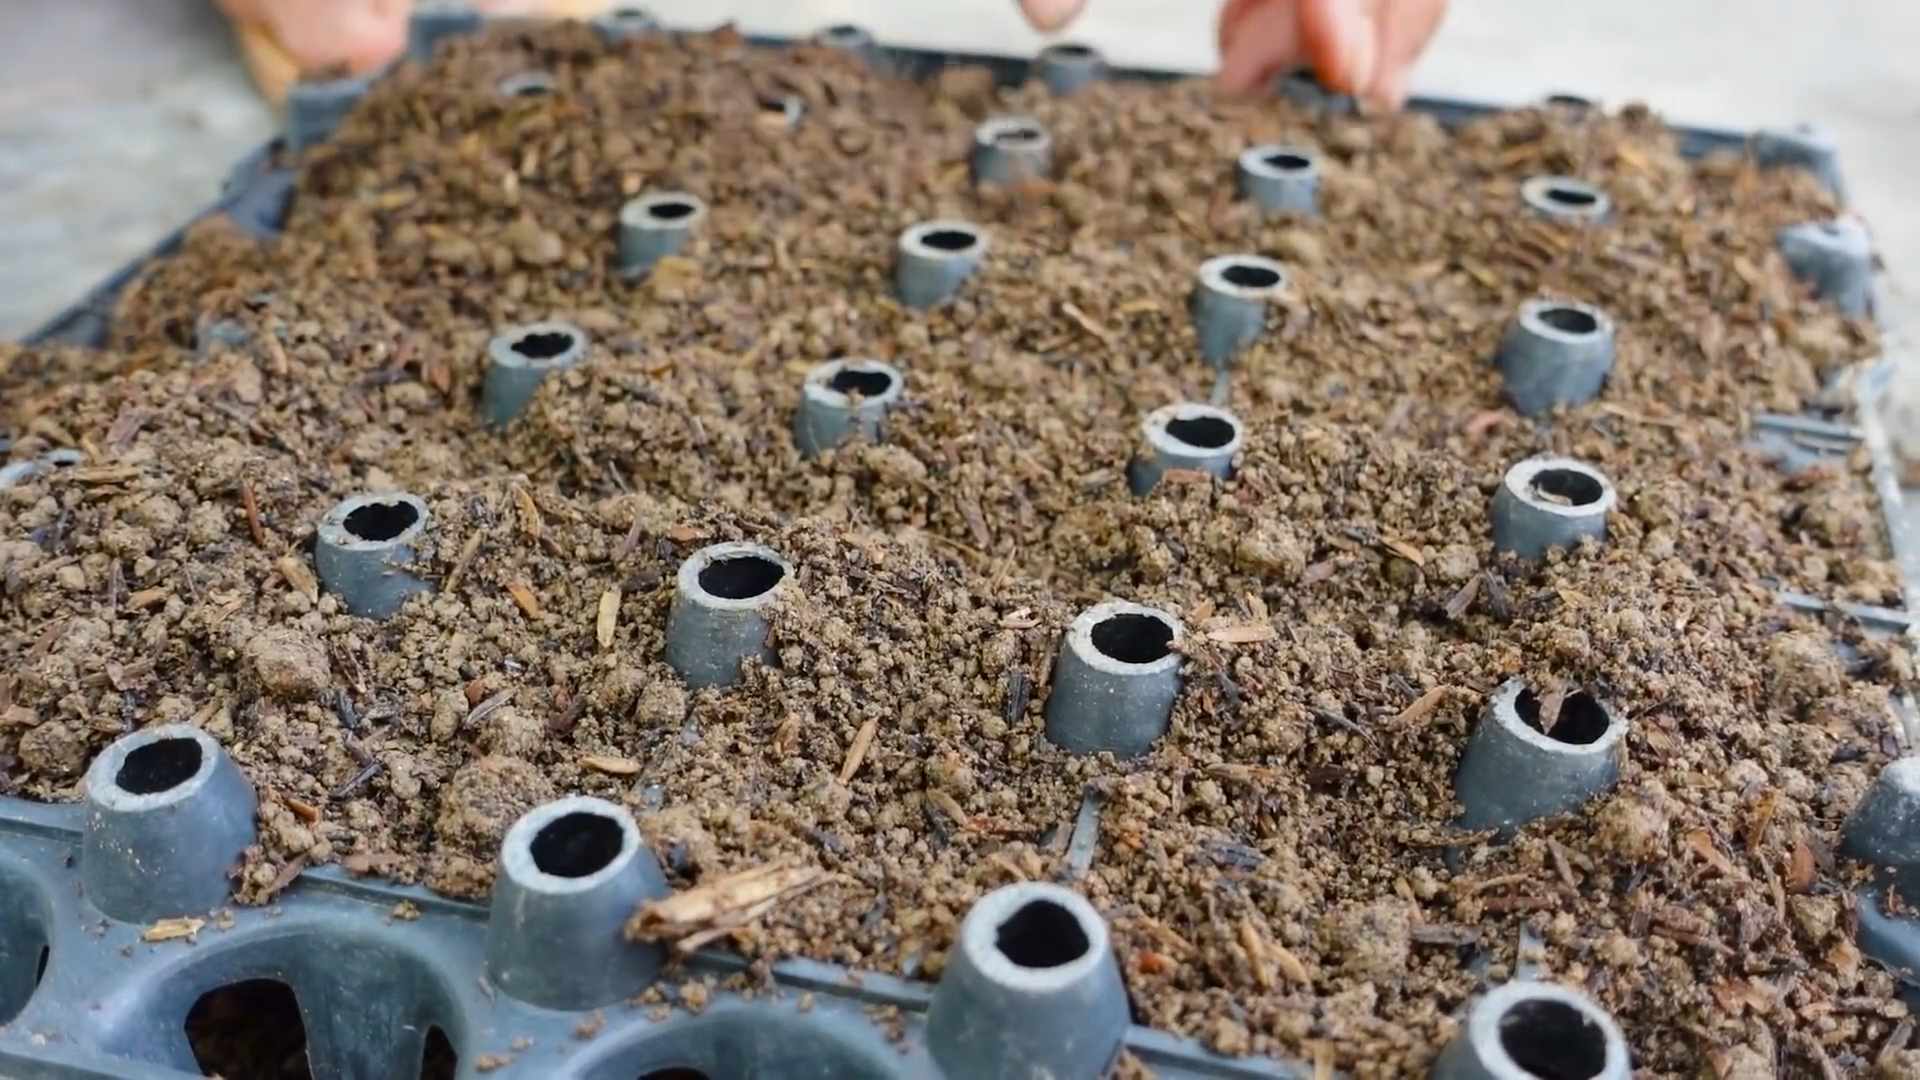
1. Prepare the soil: If you’re planting in the ground, loosen the soil with a garden fork and remove any rocks or debris. Amend the soil with compost or other organic matter to improve drainage and fertility. If you’re using containers, fill them with potting mix, leaving about an inch of space at the top.
2. Sow the seeds: Mustard seeds are tiny, so you don’t need to plant them very deep. Sprinkle the seeds evenly over the surface of the soil. Aim for about 10-15 seeds per square inch.
3. Cover the seeds: Gently cover the seeds with a thin layer of soil (about 1/4 inch).
4. Water thoroughly: Water the soil gently but thoroughly, making sure to moisten the entire surface. Avoid overwatering, which can cause the seeds to rot.
5. Keep the soil moist: Keep the soil consistently moist until the seeds germinate. This usually takes about 5-7 days. You can cover the planting area with plastic wrap or a humidity dome to help retain moisture. Just be sure to remove the cover once the seedlings emerge.
6. Thin the seedlings (optional): Once the seedlings have a few true leaves, you can thin them out to give them more space to grow. This is especially important if you sowed the seeds densely. Aim for about 2-3 inches between plants. I usually just snip off the extra seedlings at the soil line with scissors.
7. Fertilize (optional): If you want to give your mustard greens a boost, you can fertilize them with a balanced organic fertilizer every 2-3 weeks. Follow the instructions on the fertilizer package.
Caring for Your Mustard Greens
Once your mustard greens are up and growing, here’s how to keep them happy and healthy:
* Watering: Water regularly, especially during hot, dry weather. Mustard greens need consistent moisture to thrive. Check the soil moisture regularly and water when the top inch of soil feels dry to the touch. Avoid overwatering, which can lead to root rot.
* Sunlight: Make sure your mustard greens get at least 6 hours of sunlight per day. If you’re growing them indoors, you may need to supplement with grow lights.
* Weeding: Keep the area around your mustard greens free of weeds. Weeds can compete with your plants for nutrients and water.
* Pest control: Mustard greens are relatively pest-resistant, but they can sometimes be bothered by aphids, flea beetles, or cabbage worms. Inspect your plants regularly for signs of pests. If you find any, you can try spraying them with insecticidal soap or neem oil. I prefer to handpick any pests I find whenever possible.
* Bolting: Mustard greens can bolt (go to seed) in hot weather. Bolting makes the leaves bitter and less palatable. To prevent bolting, try to grow your mustard greens in the cooler months of spring or fall. You can also provide shade during the hottest part of the day. If your plants do start to bolt, you can still harvest the leaves, but they may not taste as good.
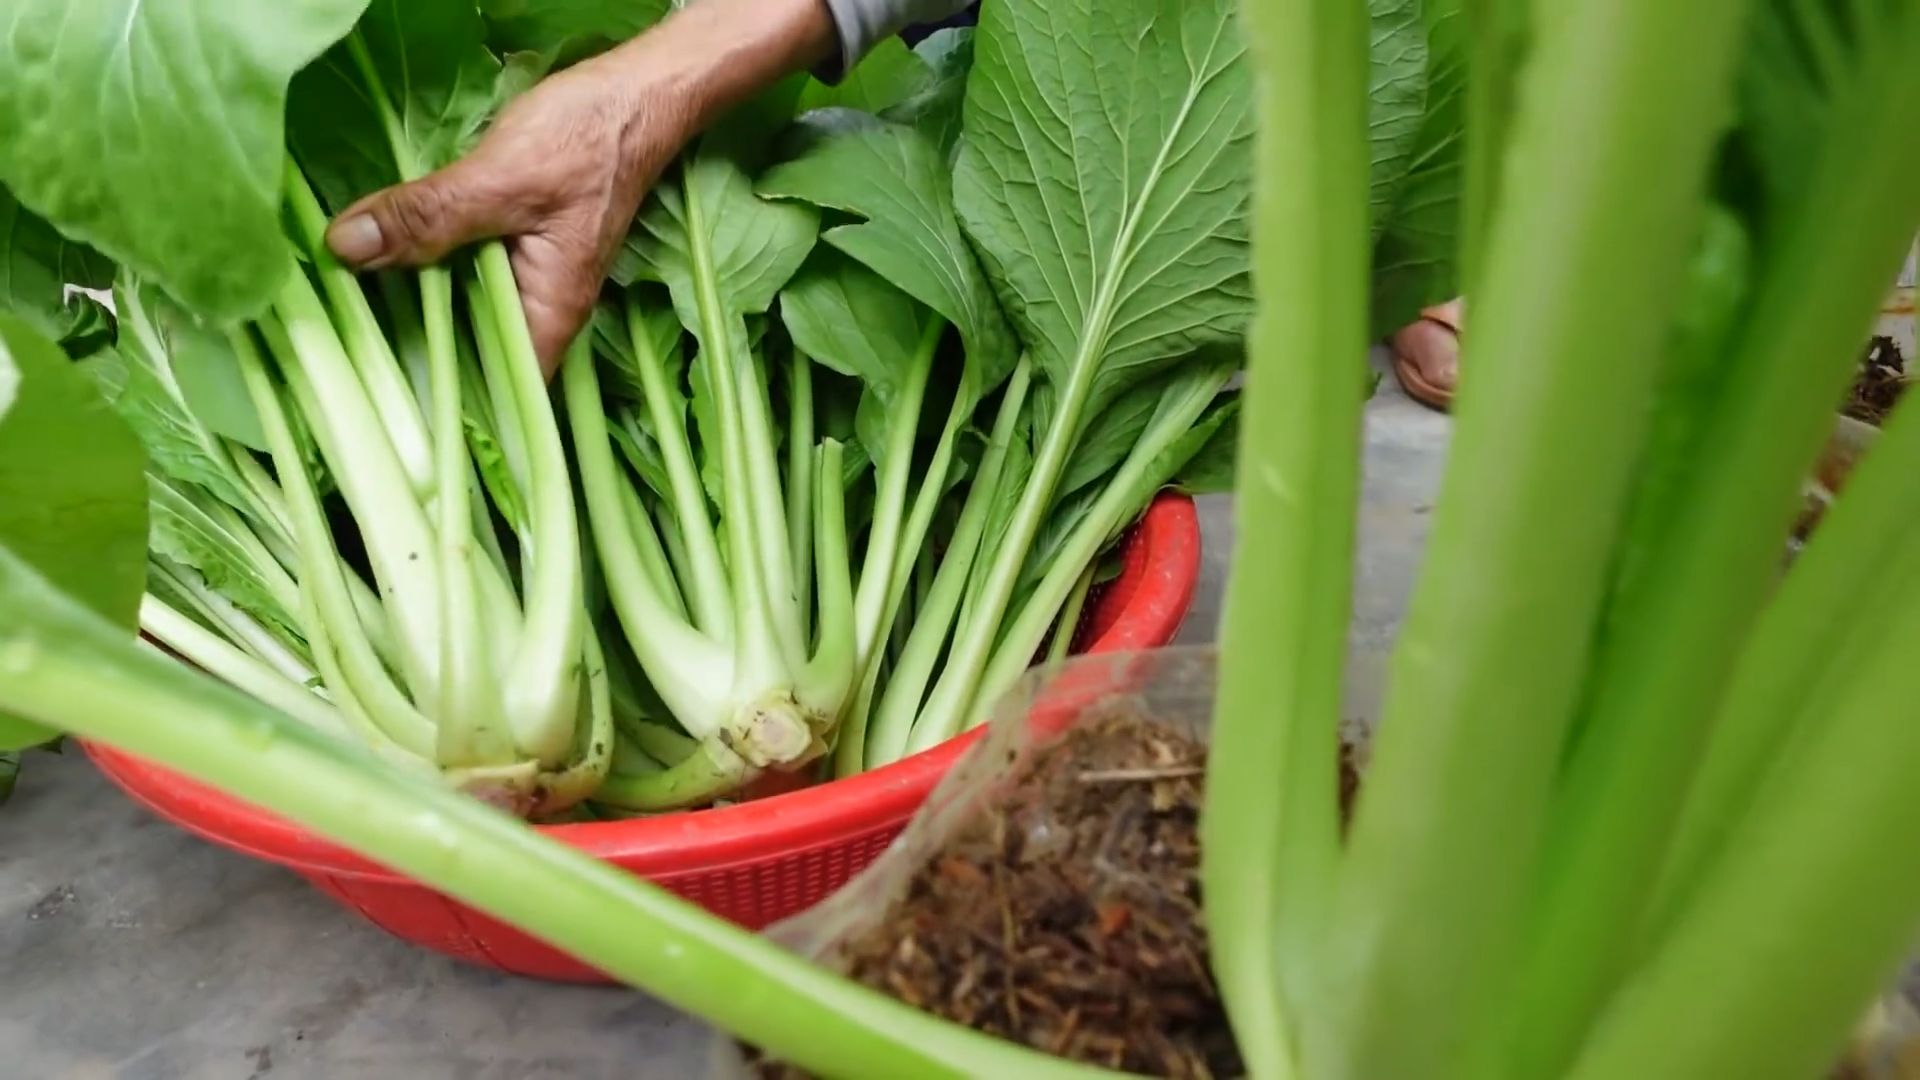
Harvesting Your Bounty
The best part of growing your own mustard greens is, of course, harvesting them! You can start harvesting the leaves when they are about 4-6 inches long.
* Cut the outer leaves: Use scissors or a knife to cut the outer leaves, leaving the inner leaves to continue growing. This is called “cut-and-come-again” harvesting, and it allows you to harvest your mustard greens multiple times.
* Harvest regularly: Harvest your mustard greens regularly to encourage new growth.
* Wash the leaves: Wash the leaves thoroughly before using them.
Using Your Homegrown Mustard Greens
Now that you have a bounty of fresh mustard greens, what do you do with them? The possibilities are endless! Here are a few of my favorite ways to use homegrown mustard greens:
* Salads: Add mustard greens to your salads for a peppery kick.
* Stir-fries: Mustard greens are delicious in stir-fries.
* Soups: Add mustard greens to your soups for extra flavor and nutrients.
* Sautéed: Sauté mustard greens with garlic and olive oil for a simple and delicious side dish.
* Pickled: Pickle your mustard greens for a tangy and flavorful condiment.
* Smoothies: Add a handful of mustard greens to your smoothies for a healthy boost.
Troubleshooting Common Problems
Even with the best care, you might encounter a few problems while growing your mustard greens. Here are some common issues and how to fix them:
* Yellowing leaves: This can be caused by overwatering, underwatering, nutrient deficiencies, or pests. Check the soil moisture and adjust your watering accordingly. Fertilize your plants with a balanced organic fertilizer. Inspect your plants for pests and treat them as needed.
* Holes in leaves: This is usually caused by flea beetles or cabbage worms. Spray your plants with insecticidal soap or neem oil. Handpick any pests you find.
* Bolting: As mentioned earlier, bolting is caused by hot weather. Try to grow your mustard greens in the cooler months of spring or fall. Provide shade during the hottest part of the day.
* Slow growth: This can be caused by lack of sunlight, poor soil, or nutrient deficiencies. Make sure your plants are getting enough sunlight. Amend the soil with compost or other organic matter. Fertilize your plants with a balanced organic fertilizer.
Extending Your Harvest
Want to keep enjoying fresh mustard greens for as long as possible? Here are a few tips for extending your harvest:
* Succession planting: Sow new seeds every 2-3 weeks to ensure a continuous supply of mustard greens.
* Cold frames or row covers: Use cold frames or row covers to protect your plants from frost and extend the growing season.
* Overwintering: In mild climates, you can overwinter your mustard greens by covering them with a thick layer of mulch.
Saving Seeds
If you want to save seeds from your mustard greens, allow a few plants to bolt and go to seed. Once the seed pods are dry and brown, harvest them and store them in a cool, dry place. You can then use these seeds to grow more mustard greens next year.
Final Thoughts
Growing your own leaf mustard is a fun and rewarding experience. With a little bit of care and attention, you can enjoy a continuous supply
Conclusion
So, there you have it! Growing your own leaf mustard at home is not only surprisingly simple, but it’s also incredibly rewarding. Imagine stepping into your garden or onto your balcony and harvesting fresh, peppery greens whenever you need them. No more last-minute trips to the grocery store or settling for wilted, pre-packaged mustard greens. This DIY trick empowers you to have a constant supply of vibrant, flavorful leaves right at your fingertips.
But why is this a must-try? Beyond the convenience, growing your own leaf mustard allows you to control the entire process. You know exactly what goes into your food – no harmful pesticides or herbicides, just pure, natural goodness. Plus, the taste of freshly harvested leaf mustard is simply unmatched. The peppery bite is more pronounced, the texture is crisper, and the overall flavor is far superior to anything you can buy in a store.
Think of the possibilities! You can add your homegrown leaf mustard to salads for an extra kick, stir it into soups and stews for a burst of flavor, or sauté it with garlic and olive oil for a simple yet delicious side dish. Get creative and experiment with different varieties of leaf mustard, such as Red Giant for a beautiful color contrast or Osaka Purple for a milder flavor. You can even try growing them in containers indoors if you have limited outdoor space.
Consider these variations to elevate your leaf mustard growing experience:
* Succession Planting: Plant new seeds every few weeks to ensure a continuous harvest throughout the growing season. This prevents you from being overwhelmed with a large harvest all at once and ensures a steady supply of fresh greens.
* Companion Planting: Plant leaf mustard alongside other vegetables like radishes, carrots, and beets. These plants can help deter pests and improve the overall health of your garden.
* Microgreens: Harvest your leaf mustard seedlings as microgreens for an even more intense flavor and a boost of nutrients. Microgreens are perfect for adding to salads, sandwiches, and smoothies.
* Spicy Boost: For an extra spicy kick, try stressing your leaf mustard plants slightly by withholding water for a short period before harvesting. This can intensify the peppery flavor.
We wholeheartedly encourage you to give this DIY trick a try. It’s a fun, easy, and rewarding way to add fresh, healthy greens to your diet. And most importantly, it allows you to connect with your food in a meaningful way.
Don’t be afraid to experiment and find what works best for you. Every garden is different, and every gardener has their own unique style. The key is to have fun and enjoy the process.
Once you’ve tried growing your own leaf mustard, we’d love to hear about your experience! Share your tips, tricks, and photos in the comments below. Let’s build a community of home gardeners who are passionate about growing their own food. Your insights could inspire others to take the plunge and discover the joys of growing their own leaf mustard at home. So, get your hands dirty, plant some seeds, and get ready to enjoy the delicious rewards!
Frequently Asked Questions (FAQ)
What is the best time of year to plant leaf mustard?
Leaf mustard is a cool-season crop, meaning it thrives in cooler temperatures. The best time to plant it is in early spring or late summer/early fall. Avoid planting during the hottest months of summer, as the heat can cause the leaves to become bitter and bolt (go to seed prematurely). In spring, plant after the last frost. For a fall harvest, plant about 4-6 weeks before the first expected frost. If you live in a region with mild winters, you may be able to grow leaf mustard throughout the winter months.
How much sunlight does leaf mustard need?
Leaf mustard prefers full sun, which means at least 6 hours of direct sunlight per day. However, it can tolerate partial shade, especially in hotter climates. If you’re growing leaf mustard indoors, make sure to provide it with plenty of light, either through a sunny window or with grow lights. Insufficient sunlight can result in leggy growth and reduced flavor.
What kind of soil is best for growing leaf mustard?
Leaf mustard grows best in well-drained soil that is rich in organic matter. Amend your soil with compost or other organic materials before planting to improve its fertility and drainage. The ideal soil pH for leaf mustard is between 6.0 and 7.5. You can test your soil pH with a home testing kit or by sending a sample to your local agricultural extension office.
How often should I water leaf mustard?
Leaf mustard needs consistent moisture to thrive. Water regularly, especially during dry periods. Aim to keep the soil consistently moist but not waterlogged. Overwatering can lead to root rot, while underwatering can cause the leaves to wilt and become bitter. A good rule of thumb is to water when the top inch of soil feels dry to the touch.
How do I harvest leaf mustard?
You can begin harvesting leaf mustard leaves when they are about 4-6 inches long. Simply cut the outer leaves with a sharp knife or scissors, leaving the inner leaves to continue growing. This cut-and-come-again method allows you to harvest multiple times from the same plant. Harvest in the morning for the best flavor.
What are some common pests and diseases that affect leaf mustard?
Leaf mustard can be susceptible to several pests and diseases, including aphids, flea beetles, cabbage worms, and downy mildew. To prevent pest and disease problems, practice good garden hygiene, such as removing weeds and debris from around your plants. You can also use organic pest control methods, such as insecticidal soap or neem oil, to control aphids and other pests. For diseases, ensure good air circulation and avoid overwatering.
Can I grow leaf mustard in containers?
Yes, leaf mustard grows well in containers. Choose a container that is at least 6 inches deep and has drainage holes. Use a high-quality potting mix and water regularly. Container-grown leaf mustard may need to be fertilized more frequently than plants grown in the ground.
How do I store harvested leaf mustard?
To store harvested leaf mustard, wash the leaves thoroughly and pat them dry. Wrap them in a paper towel and store them in a plastic bag in the refrigerator. Leaf mustard will typically last for about 3-5 days in the refrigerator. You can also freeze leaf mustard, but it will lose some of its texture and flavor. To freeze, blanch the leaves in boiling water for 2 minutes, then plunge them into ice water. Drain well and freeze in freezer bags or containers.
Is leaf mustard nutritious?
Yes, leaf mustard is a highly nutritious vegetable. It is a good source of vitamins A, C, and K, as well as folate, calcium, and fiber. It also contains antioxidants that can help protect against cell damage. Adding leaf mustard to your diet is a great way to boost your overall health.
How can I make my leaf mustard less spicy?
The spiciness of leaf mustard can vary depending on the variety and growing conditions. If you prefer a milder flavor, try growing a less spicy variety, such as Osaka Purple. You can also reduce the spiciness by harvesting the leaves when they are young and tender. Cooking leaf mustard can also help to mellow out its flavor.
Leave a Comment