

Grow Malunggay at Home and unlock a world of health benefits right in your backyard! Have you ever dreamt of having a superfood readily available, just steps from your kitchen? Well, dream no more! This isn’t just about gardening; it’s about embracing a tradition that spans centuries and cultures. Malunggay, also known as Moringa, has been revered for its nutritional and medicinal properties for generations, particularly in South Asia and Africa, where it’s been a staple for centuries.
But why should you bother learning how to grow Malunggay at home? In today’s fast-paced world, access to fresh, nutrient-rich food can be a challenge. Imagine being able to add a handful of freshly picked Malunggay leaves to your smoothie, soup, or stir-fry, knowing you’re boosting your immune system and overall well-being. Plus, growing your own Malunggay is incredibly rewarding! It’s a fast-growing, low-maintenance plant that can thrive in various climates. I’m excited to share some simple, DIY tricks and hacks that will empower you to cultivate your own Malunggay tree, even if you have limited space or gardening experience. Let’s get started and bring the power of Malunggay to your home!

Grow Your Own Malunggay: A Beginner’s Guide
Hey there, fellow gardening enthusiasts! I’m so excited to share my experience with growing malunggay (also known as moringa) right in my backyard. It’s surprisingly easy, incredibly rewarding, and you’ll have a constant supply of this nutritional powerhouse. Trust me, once you taste fresh malunggay leaves, you’ll never want to buy them again!
Why Grow Malunggay?
Before we dive in, let’s quickly talk about why malunggay is so amazing. It’s packed with vitamins, minerals, and antioxidants. People call it a “miracle tree” for a reason! You can use the leaves in soups, stews, salads, or even make a healthy tea. Plus, growing your own means you know exactly where it’s coming from and how it’s been treated.
Getting Started: What You’ll Need
Okay, let’s gather our supplies. Here’s what you’ll need to get your malunggay journey started:
* Malunggay Seeds or Cuttings: You can find seeds online or at your local nursery. Cuttings are another great option, especially if you know someone who already has a malunggay tree.
* Potting Soil: A well-draining potting mix is essential.
* Pots or a Garden Bed: Choose a pot that’s at least 12 inches in diameter, or prepare a sunny spot in your garden.
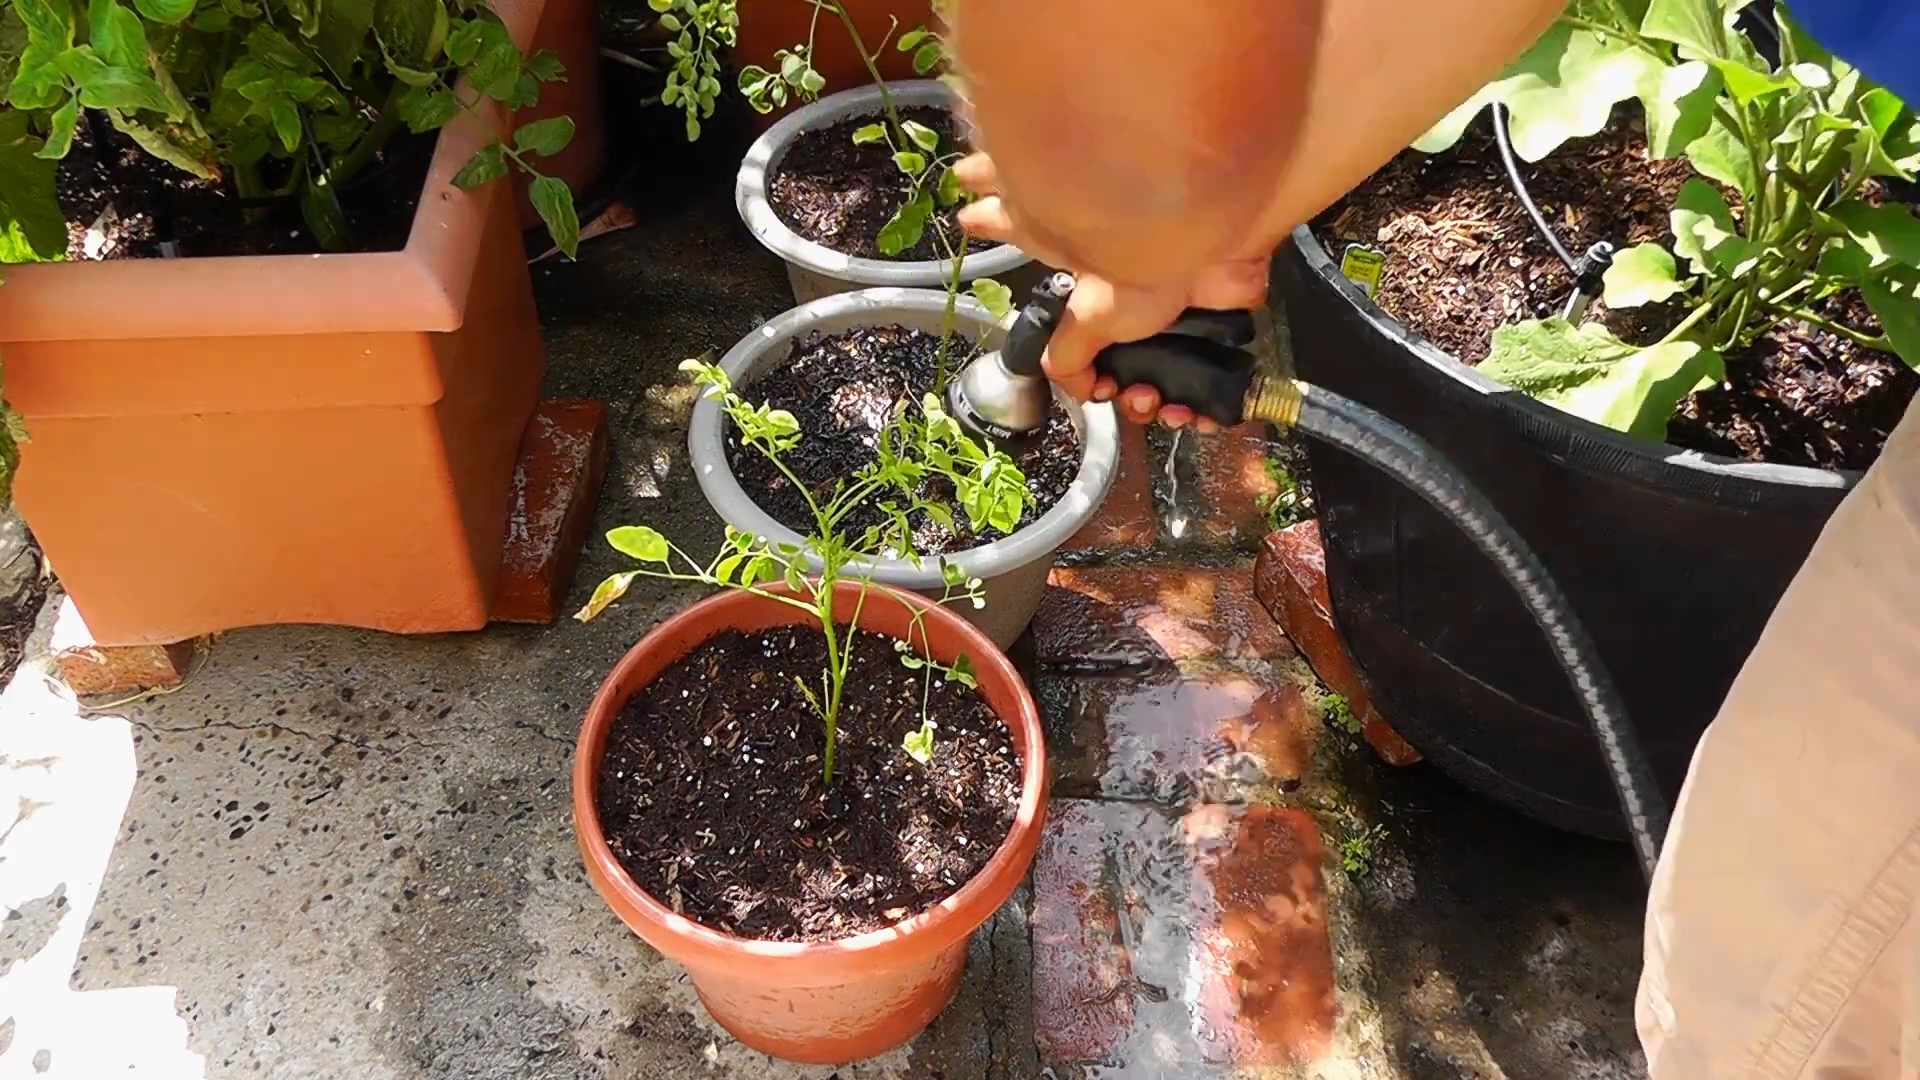
* Watering Can or Hose: For keeping your malunggay happy and hydrated.
* Fertilizer (Optional): A balanced fertilizer can help boost growth, but it’s not strictly necessary.
* Gardening Gloves: To keep your hands clean and protected.
* Pruning Shears: For trimming and shaping your tree later on.
Growing Malunggay from Seeds: A Step-by-Step Guide
I personally started with seeds, and it was a fun and rewarding experience. Here’s how I did it:
1. Soaking the Seeds: To improve germination, I like to soak the malunggay seeds in warm water for 24 hours before planting. This helps soften the seed coat and encourages sprouting. Just put them in a small bowl and cover them with water.
2. Preparing the Seedling Pots: Fill small seedling pots with your well-draining potting mix. Make sure the pots have drainage holes at the bottom.
3. Planting the Seeds: Make a small hole (about 1/2 inch deep) in the center of each pot. Place one or two seeds in each hole and cover them gently with soil. Lightly water the soil.
4. Creating a Mini-Greenhouse (Optional): To create a humid environment that encourages germination, you can cover the pots with plastic wrap or a clear plastic bag. Just make sure to poke a few holes for ventilation.
5. Finding the Right Spot: Place the pots in a warm, sunny location. Malunggay loves sunlight! A windowsill or a spot in your garden that gets at least 6 hours of sunlight a day is ideal.
6. Watering Regularly: Keep the soil consistently moist, but not waterlogged. Check the soil moisture daily and water when the top inch feels dry.
7. Waiting for Germination: Be patient! Malunggay seeds can take anywhere from 1 to 3 weeks to germinate. Once you see sprouts, remove the plastic wrap (if you used it).
8. Thinning the Seedlings: If you planted two seeds in each pot and both sprouted, you’ll need to thin them out. Choose the strongest seedling and gently remove the weaker one.
9. Transplanting the Seedlings: Once the seedlings are about 6 inches tall and have developed a few sets of true leaves, it’s time to transplant them into larger pots or your garden bed.
* Hardening Off: Before transplanting, you’ll need to “harden off” the seedlings. This means gradually exposing them to outdoor conditions to help them adjust. Start by placing them outside for an hour or two each day, gradually increasing the time over a week.
* Choosing the Right Location: Select a sunny spot in your garden with well-draining soil. Malunggay can grow quite tall, so make sure there’s enough space.
* Digging the Hole: Dig a hole that’s twice as wide and as deep as the seedling’s root ball.
* Transplanting Carefully: Gently remove the seedling from its pot and place it in the hole. Backfill with soil and water thoroughly.
Growing Malunggay from Cuttings: A Faster Route
If you have access to malunggay cuttings, this method is even faster than starting from seeds. Here’s how to do it:
1. Selecting the Cuttings: Choose healthy, mature branches that are about 1-2 inches in diameter and 12-18 inches long.
2. Preparing the Cuttings: Remove any leaves from the bottom half of the cutting. This will encourage root growth.
3. Rooting Hormone (Optional): Dipping the cut end of the cutting in rooting hormone can help speed up the rooting process, but it’s not essential.
4. Planting the Cuttings: You can either plant the cuttings directly into the ground or start them in pots.
* Direct Planting: Dig a hole that’s about 6 inches deep and wide enough to accommodate the cutting. Place the cutting in the hole and backfill with soil. Water thoroughly.
* Potting Method: Fill a large pot with well-draining potting mix. Make a hole in the center and insert the cutting. Backfill with soil and water thoroughly.
5. Providing Support: Since the cuttings don’t have roots yet, they might need some support. You can use a stake or tie them to a nearby object.
6. Keeping the Soil Moist: Keep the soil consistently moist, but not waterlogged.
7. Waiting for Roots to Develop: It can take several weeks for the cuttings to develop roots. You’ll know they’ve rooted when you see new growth.
Caring for Your Malunggay Tree: Tips and Tricks
Once your malunggay tree is established, it’s relatively low-maintenance. Here are a few tips to keep it thriving:
* Sunlight: Malunggay loves sunlight, so make sure it gets at least 6 hours of direct sunlight each day.
* Watering: Water regularly, especially during dry periods. Malunggay is drought-tolerant once established, but it will grow best with consistent moisture.
* Fertilizing: You can fertilize your malunggay tree every few months with a balanced fertilizer. Follow the instructions on the fertilizer package. I personally prefer using organic fertilizers like compost tea or fish emulsion.
* Pruning: Pruning is essential for shaping your tree and encouraging new growth. Prune regularly to remove dead or damaged branches and to keep the tree at a manageable size. I usually prune mine after harvesting leaves.
* Pest Control: Malunggay is generally pest-resistant, but occasionally you might encounter aphids or other common garden pests. You can control these pests with insecticidal soap or neem oil.
Harvesting Malunggay Leaves: When and How
You can start harvesting malunggay leaves as soon as the tree is big enough. Here’s how I do it:
* When to Harvest: The best time to harvest malunggay leaves is in the morning, after the dew has dried.
* How to Harvest: Use pruning shears to cut off branches with leaves. You can harvest individual leaves or entire branches.
* Storing the Leaves: Fresh malunggay leaves can be stored in the refrigerator for up to a week. Wrap them in a damp paper towel and place them in a plastic bag. You can also dry the leaves for longer storage.
Using Malunggay Leaves: Culinary Delights
Now for the fun part – using your homegrown malunggay leaves! Here are a few of my favorite ways to enjoy them:
* Soups and Stews: Add malunggay leaves to your favorite soups and stews for a boost of nutrients.
* Salads: Young, tender malunggay leaves can be added to salads.
* Smoothies: Blend malunggay leaves into your smoothies for a healthy and delicious drink.
* Tea: Steep malunggay leaves in hot water to make a nutritious tea.
* Stir-fries: Add malunggay leaves to your stir-fries for a flavorful and healthy addition.
Troubleshooting: Common Problems and Solutions
Even with the best care, you might encounter some problems while growing malunggay. Here are a few common issues and how to address them:
* Yellowing Leaves: This could be a
Conclusion
So, there you have it! Growing your own Malunggay at home is not just a rewarding experience; it’s a gateway to a healthier lifestyle and a more sustainable way of living. We’ve walked you through the simple steps, from sourcing your cuttings or seeds to nurturing your plant into a thriving source of this nutritional powerhouse.
Why is this DIY trick a must-try? Because it puts you in control. You know exactly where your Malunggay comes from, how it’s grown, and what (or rather, what isn’t) used in its cultivation. No pesticides, no hidden chemicals, just pure, unadulterated goodness straight from your garden to your table. Think of the savings on your grocery bill, the satisfaction of harvesting your own food, and the peace of mind knowing you’re providing your family with a superfood packed with vitamins, minerals, and antioxidants.
But the benefits extend beyond personal gain. Growing Malunggay is also an environmentally friendly choice. It’s a fast-growing tree that requires minimal water and care, making it perfect for even the most novice gardeners. Plus, it helps improve soil health and can even act as a natural windbreak.
Ready to take your Malunggay cultivation to the next level? Consider these variations:
* Container Gardening: If you’re short on space, Malunggay thrives in large containers. Just ensure proper drainage and use a well-draining potting mix. This is perfect for balconies or patios.
* Hydroponics: For the more adventurous, explore hydroponic Malunggay cultivation. This method allows for faster growth and higher yields.
* Companion Planting: Plant Malunggay alongside other beneficial plants like basil or marigolds to deter pests and attract pollinators.
* Different Varieties: While the most common variety is Moringa oleifera, explore other varieties like Moringa stenopetala for unique flavors and textures.
Don’t be afraid to experiment and find what works best for you and your local climate. The beauty of DIY gardening is the freedom to customize and adapt.
We wholeheartedly encourage you to embark on this journey of growing your own Malunggay. It’s easier than you think, and the rewards are immeasurable. Once you’ve harvested your first batch of fresh, homegrown Malunggay, we’d love to hear about your experience! Share your photos, tips, and recipes with us in the comments below. Let’s build a community of Malunggay enthusiasts and spread the word about this incredible plant. Let’s all learn how to **grow Malunggay at home**!
Frequently Asked Questions (FAQ)
What are the best conditions for growing Malunggay?
Malunggay thrives in warm, sunny climates. It needs at least 6-8 hours of direct sunlight per day. The ideal temperature range is between 65°F and 95°F (18°C and 35°C). While it’s drought-tolerant once established, regular watering is crucial, especially during the initial stages of growth. Well-draining soil is essential to prevent root rot. Avoid planting in areas with standing water.
How often should I water my Malunggay plant?
Water deeply but infrequently, allowing the soil to dry out slightly between waterings. Overwatering can lead to root rot, which is a common problem for Malunggay. During hot, dry periods, you may need to water more frequently. Check the soil moisture by sticking your finger about an inch deep into the soil. If it feels dry, it’s time to water.
What kind of soil is best for Malunggay?
Malunggay prefers well-draining soil that is rich in organic matter. A sandy loam soil is ideal. If your soil is heavy clay, amend it with compost, aged manure, or other organic materials to improve drainage and aeration. A slightly acidic to neutral pH (6.0-7.0) is optimal.
How long does it take for Malunggay to grow from seed or cutting?
From seed, Malunggay can take anywhere from 2-4 weeks to germinate. Cuttings, on the other hand, typically root within 1-2 weeks. Once established, Malunggay is a fast-growing tree, capable of reaching several feet in height within a year. You can start harvesting leaves within 6-8 months of planting.
How do I harvest Malunggay leaves?
Harvest Malunggay leaves by snipping off the branches with clean pruning shears or scissors. Focus on harvesting the younger, more tender leaves, as they are more palatable. You can harvest leaves regularly throughout the growing season. Avoid removing more than one-third of the plant’s foliage at any one time, as this can stress the tree.
Are there any pests or diseases that affect Malunggay?
Malunggay is generally resistant to pests and diseases. However, it can be susceptible to aphids, caterpillars, and root rot. To prevent pests, inspect your plants regularly and remove any pests by hand or with a strong spray of water. Encourage beneficial insects like ladybugs to control aphid populations. To prevent root rot, ensure proper drainage and avoid overwatering.
Can I grow Malunggay indoors?
Yes, you can grow Malunggay indoors, but it requires a large pot and plenty of sunlight. Place your Malunggay plant near a sunny window or supplement with grow lights. Rotate the plant regularly to ensure even growth. Indoor-grown Malunggay may not grow as quickly or as large as outdoor-grown plants, but you can still harvest leaves for culinary use.
How do I propagate Malunggay from cuttings?
To propagate Malunggay from cuttings, take a 12-18 inch cutting from a mature branch. Remove the leaves from the bottom half of the cutting. Dip the cut end in rooting hormone (optional) and plant it in a pot filled with well-draining potting mix. Water the cutting regularly and keep the soil moist but not soggy. Place the pot in a warm, sunny location. Roots should develop within 1-2 weeks.
What are the nutritional benefits of Malunggay?
Malunggay is a nutritional powerhouse, packed with vitamins, minerals, and antioxidants. It’s a good source of vitamin A, vitamin C, calcium, potassium, and iron. It also contains essential amino acids and is a good source of protein. Malunggay has been shown to have anti-inflammatory, antioxidant, and anti-diabetic properties.
How can I use Malunggay in cooking?
Malunggay leaves can be used in a variety of dishes. They can be added to soups, stews, salads, and smoothies. They can also be sautéed, steamed, or used to make tea. Malunggay pods can be cooked and eaten like green beans. Malunggay seeds can be roasted and eaten like nuts. The flowers are also edible and can be added to salads or used as a garnish.
Is Malunggay safe to consume?
Malunggay is generally safe to consume in moderate amounts. However, pregnant women should avoid consuming large quantities of Malunggay, as it may have uterine stimulating effects. People with certain medical conditions should consult with their doctor before consuming Malunggay.
Can I use Malunggay as fertilizer?
Yes, Malunggay leaves can be used as a natural fertilizer. They are rich in nitrogen and other nutrients that can benefit plants. You can add Malunggay leaves to your compost pile or use them as a green manure. You can also make a Malunggay leaf extract by soaking the leaves in water for several days and then using the water to fertilize your plants.
Leave a Comment