

Grow Pechay in a Pot? Absolutely! Imagine stepping outside your door and harvesting fresh, crisp pechay right from your own container garden. No more trips to the grocery store for this nutritious leafy green! For centuries, cultivating vegetables in small spaces has been a vital practice, especially in densely populated areas of Asia, where pechay is a staple. This tradition, born out of necessity, has evolved into a rewarding hobby for urban dwellers worldwide.
I know what you’re thinking: “I don’t have a green thumb!” But trust me, growing pechay in a pot is surprisingly easy, even for beginners. This DIY guide will walk you through every step, from choosing the right pot and soil to harvesting your bountiful crop. Why is this DIY trick so important? Well, not only will you enjoy the freshest, most flavorful pechay imaginable, but you’ll also save money, reduce your carbon footprint, and experience the immense satisfaction of nurturing your own food. Plus, it’s a fantastic way to add a touch of green to your balcony, patio, or even a sunny windowsill. So, let’s get started and discover the joy of growing your own pechay!
Grow Your Own Delicious Pechay in a Pot: A Beginner’s Guide
Hey there, fellow plant enthusiasts! Ever thought about growing your own fresh veggies, but felt intimidated? Well, let me tell you, growing pechay (also known as bok choy) in a pot is surprisingly easy and rewarding. I’ve done it myself countless times, and nothing beats the taste of homegrown greens. So, grab your gardening gloves, and let’s get started!
What You’ll Need
Before we dive in, let’s gather all the necessary materials. Trust me, having everything ready beforehand will make the process much smoother.
* Pechay Seeds: Choose a variety you like. I personally prefer the ‘Black Behi’ variety for its dark green leaves and slightly peppery taste, but any pechay seed will do. You can find these at most garden centers or online.
* Pot: A pot that’s at least 6 inches deep and 8 inches in diameter is ideal for a single pechay plant. If you’re planning to grow multiple plants in one pot, go for a larger one. Make sure it has drainage holes! This is crucial to prevent waterlogging.
* Potting Mix: Use a well-draining potting mix. I recommend a mix specifically formulated for vegetables. Avoid using garden soil directly, as it can compact and hinder drainage.
* Watering Can or Hose: For, well, watering! A gentle watering can is best, especially when the seedlings are young.
* Fertilizer (Optional): A balanced liquid fertilizer or slow-release fertilizer can give your pechay a boost. I usually use a diluted seaweed extract.
* Trowel or Small Shovel: For transferring seedlings and mixing soil.
* Sunlight: Pechay needs at least 4-6 hours of sunlight per day. Choose a sunny spot on your balcony, patio, or windowsill.
Step-by-Step Planting Guide
Okay, now for the fun part! Let’s get those seeds in the soil.
1. Prepare the Pot: Fill your pot with the potting mix, leaving about an inch of space from the top. Gently pat down the soil to remove any large air pockets.
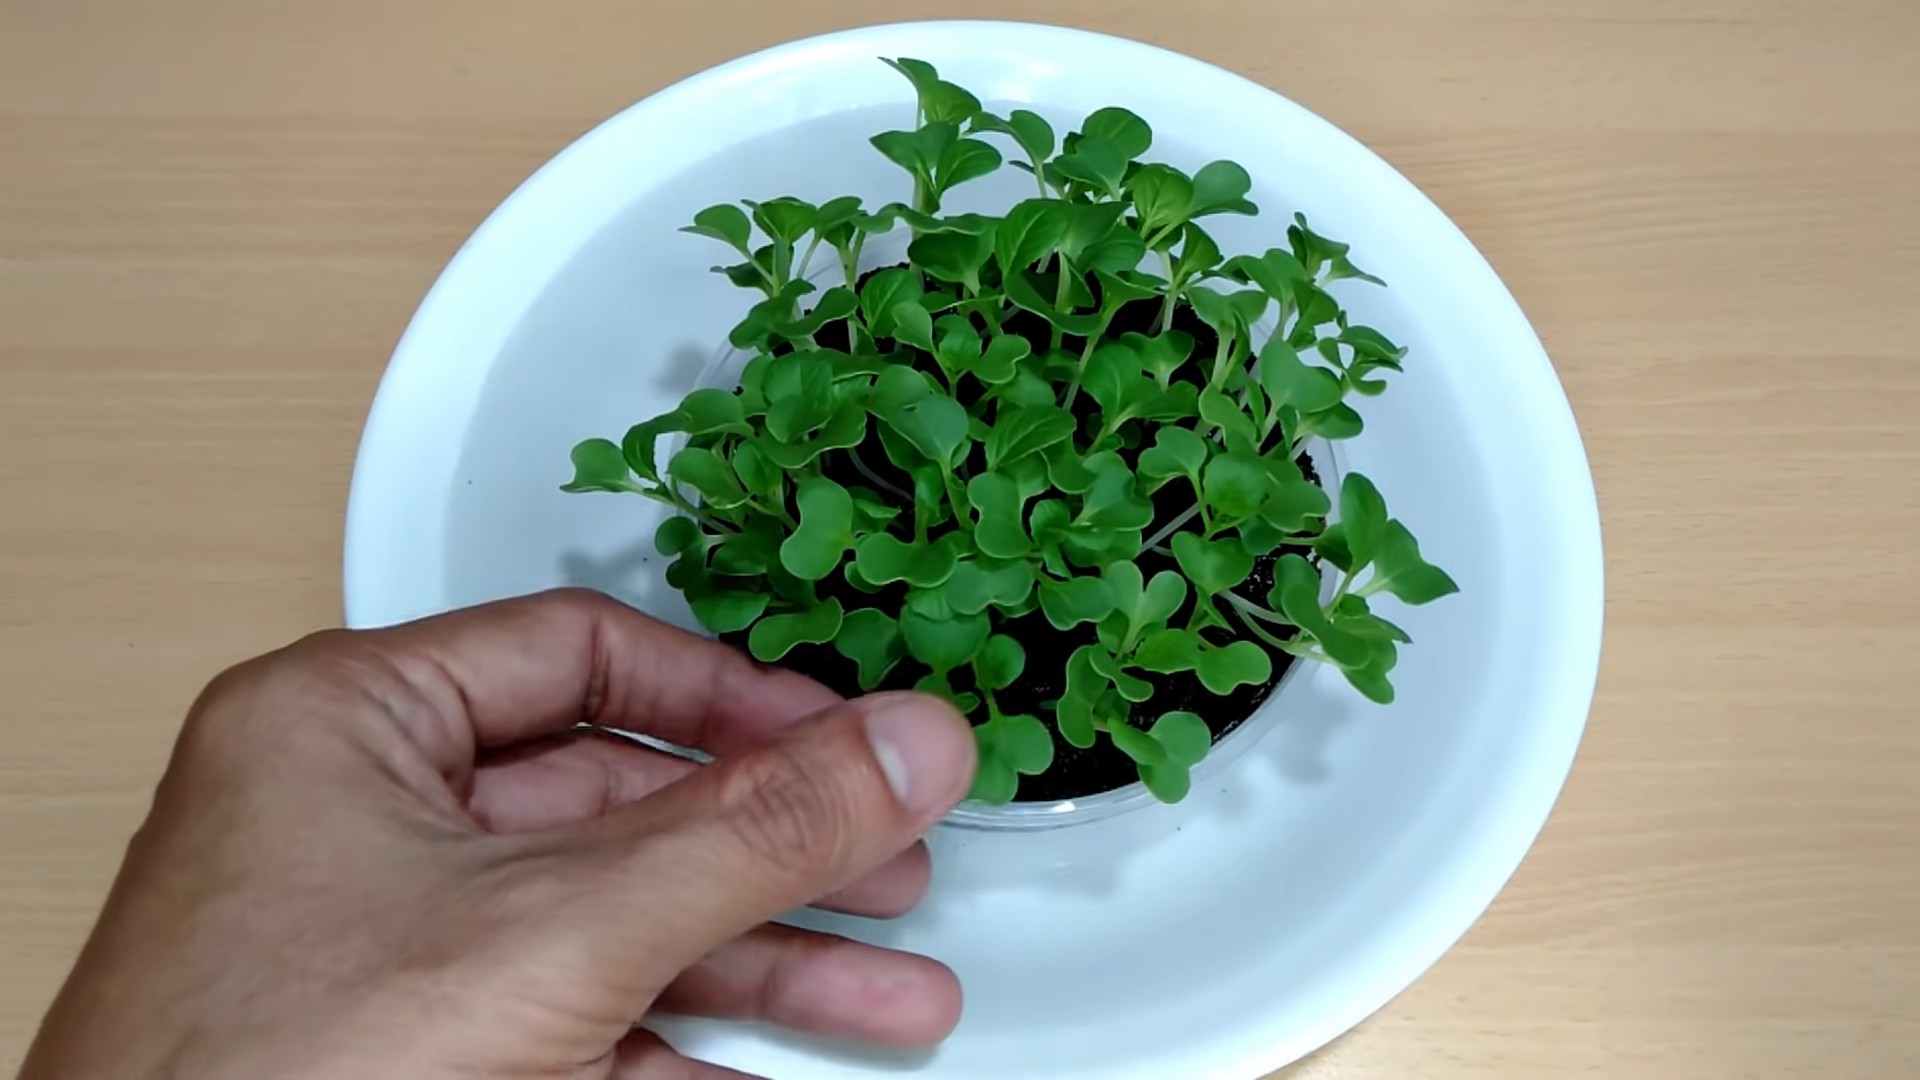
2. Sow the Seeds: There are two ways to do this: direct sowing or transplanting seedlings. I usually prefer direct sowing because it’s less stressful for the plants.
* Direct Sowing: Sprinkle the pechay seeds evenly over the surface of the soil. Aim for about 2-3 seeds per inch. Then, lightly cover the seeds with a thin layer of potting mix (about ¼ inch).
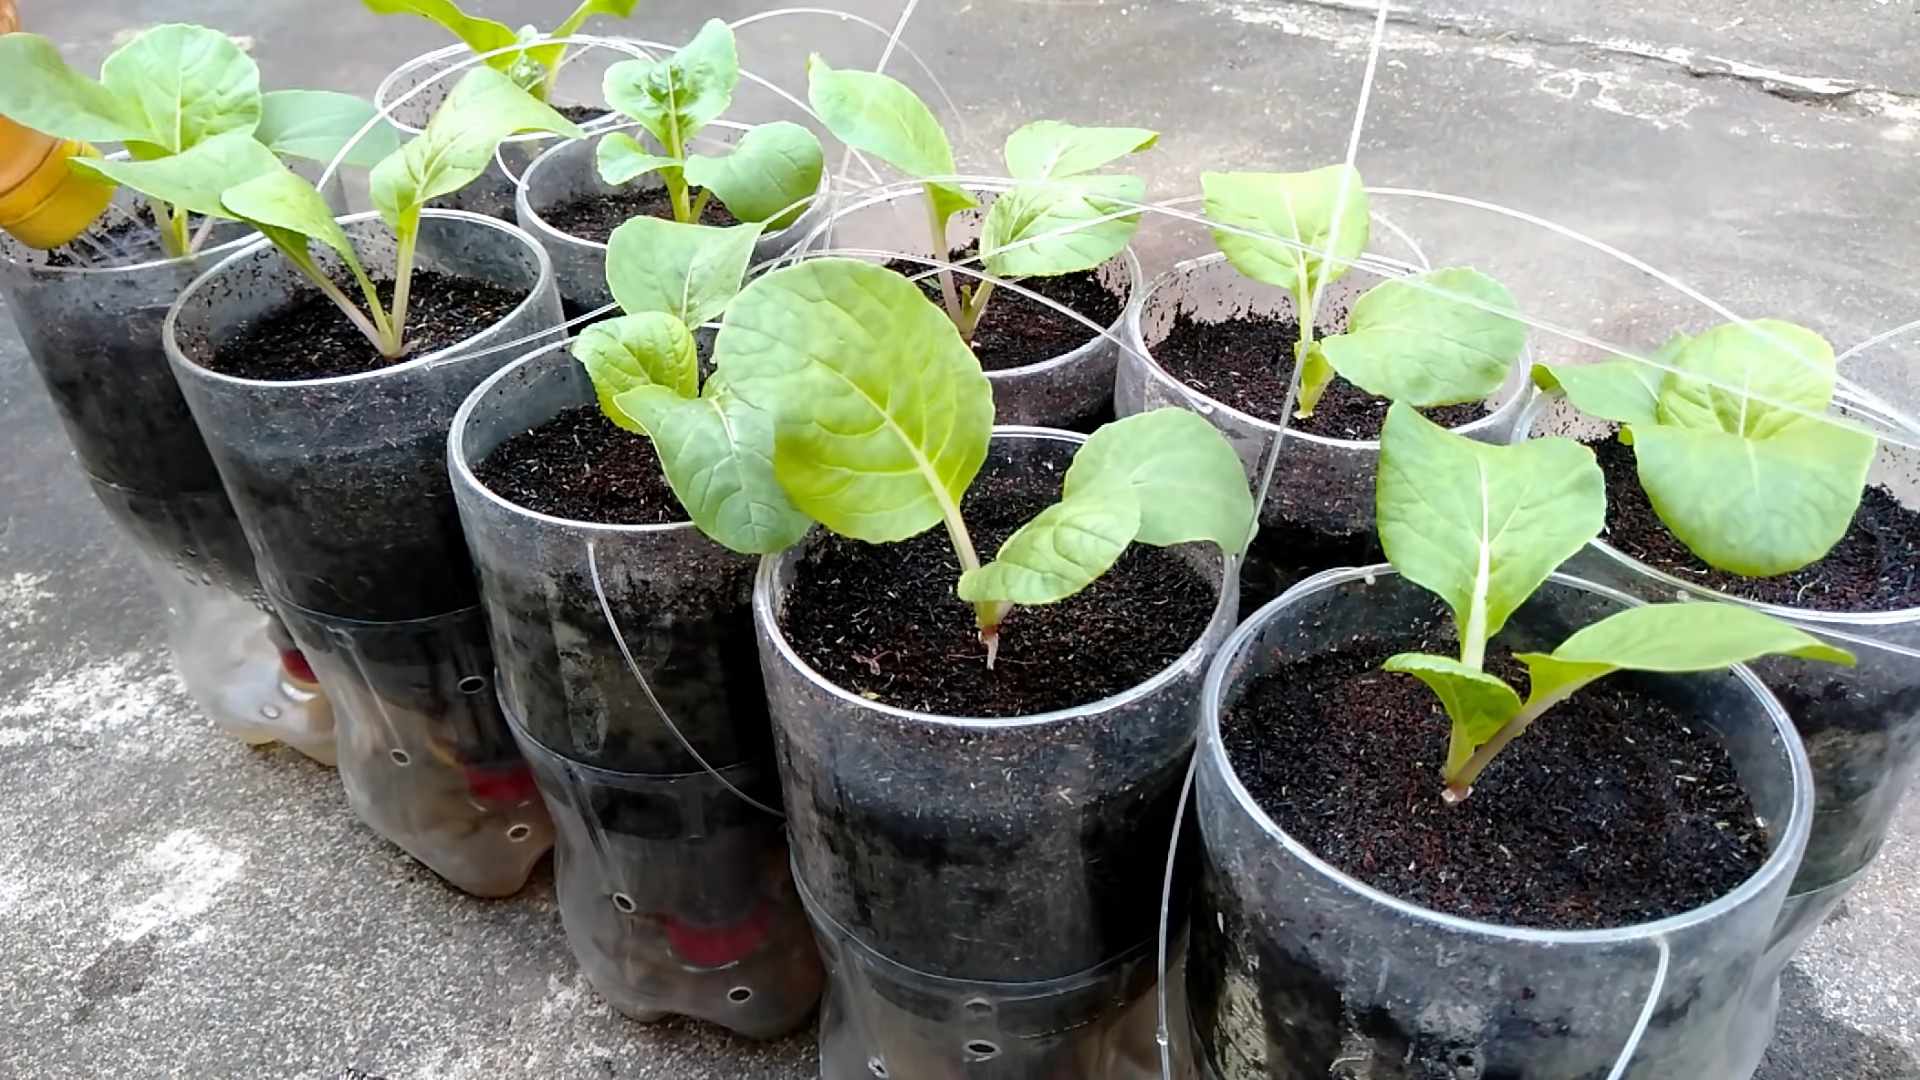
* Transplanting Seedlings: If you’re using seedlings, gently remove them from their container. Make a small hole in the potting mix large enough to accommodate the seedling’s root ball. Place the seedling in the hole and gently backfill with soil.
3. Water Thoroughly: After sowing or transplanting, water the soil gently but thoroughly. You want the soil to be moist but not waterlogged.
4. Find a Sunny Spot: Place the pot in a location that receives at least 4-6 hours of sunlight per day. If you’re growing indoors, a south-facing window is ideal.
5. Keep the Soil Moist: Check the soil moisture daily. Water when the top inch of soil feels dry to the touch. Avoid overwatering, as this can lead to root rot.
6. Thin the Seedlings (If Necessary): If you direct sowed your seeds, you’ll need to thin the seedlings once they have a few true leaves (the leaves that look like miniature pechay leaves). Thin them to about 4-6 inches apart. This will give the remaining plants enough space to grow. I know it feels cruel to pull out the little guys, but it’s necessary for the health of the others!
7. Fertilize (Optional): If you’re using fertilizer, start applying it about 2-3 weeks after sowing or transplanting. Follow the instructions on the fertilizer package. I usually dilute the seaweed extract to half strength and apply it every two weeks.
Caring for Your Pechay Plants
Now that your pechay plants are growing, it’s important to provide them with the right care to ensure a bountiful harvest.
* Watering: As mentioned earlier, keep the soil consistently moist but not waterlogged. Water deeply whenever the top inch of soil feels dry. During hot weather, you may need to water more frequently.
* Sunlight: Ensure your pechay plants receive at least 4-6 hours of sunlight per day. If you’re growing indoors, you may need to supplement with artificial light.
* Fertilizing: Continue fertilizing every 2-3 weeks, following the instructions on the fertilizer package.
* Pest Control: Keep an eye out for pests such as aphids, slugs, and snails. You can usually control these pests by handpicking them off the plants or using insecticidal soap. I’ve found that a strong blast of water from the hose can also dislodge aphids.
* Weeding: Remove any weeds that may pop up in the pot. Weeds compete with your pechay plants for nutrients and water.
Harvesting Your Pechay
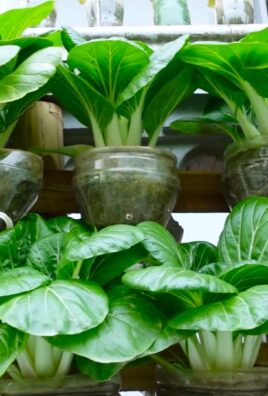
The best part! You can start harvesting your pechay about 45-60 days after sowing.
* Harvesting Individual Leaves: You can harvest individual leaves as needed, starting with the outer leaves. This will allow the inner leaves to continue growing.
* Harvesting the Entire Plant: If you want to harvest the entire plant, simply cut it off at the base.
* Best Time to Harvest: The best time to harvest pechay is in the morning, after the dew has dried. This is when the leaves are at their freshest.
Troubleshooting Common Problems
Even with the best care, you may encounter some problems while growing pechay. Here are some common issues and how to address them:
* Yellowing Leaves: This can be caused by overwatering, underwatering, or nutrient deficiencies. Check the soil moisture and adjust your watering accordingly. If you suspect a nutrient deficiency, try fertilizing with a balanced fertilizer.
* Stunted Growth: This can be caused by insufficient sunlight, poor soil, or pests. Ensure your plants are getting enough sunlight and that the soil is well-draining. Check for pests and take appropriate action.
* Bolting (Premature Flowering): This can be caused by hot weather or stress. Pechay is a cool-season crop, so it’s best to grow it in the spring or fall. If your plants start to bolt, harvest them immediately, as the leaves will become bitter.
* Pest Infestations: As mentioned earlier, keep an eye out for pests such as aphids, slugs, and snails. Control them by handpicking, using insecticidal soap, or blasting them with water.
Tips for a Bountiful Harvest
Here are a few extra tips to help you maximize your pechay harvest:
* Succession Planting: Sow new seeds every 2-3 weeks to ensure a continuous supply of fresh pechay.
* Choose the Right Variety: Some pechay varieties are more heat-tolerant than others. If you live in a warm climate, choose a heat-tolerant variety.
* Provide Shade During Hot Weather: If the weather gets too hot, provide your pechay plants with some shade during the hottest part of the day.
* Rotate Your Crops: Avoid planting pechay in the same pot year after year. This can help prevent soilborne diseases.
* Enjoy Your Harvest! Use your homegrown pechay in stir-fries, soups, salads, or any other dish you like.
Choosing the Right Pot
The pot you choose plays a significant role in the success of your pechay growing endeavor. Here’s a more detailed look at what to consider:
* Size Matters: As I mentioned before, a pot that’s at least 6 inches deep and 8 inches in diameter is a good starting point for a single plant. However, bigger is often better! A larger pot provides more room for the roots to grow, which translates to a healthier and more productive plant. If you’re planning to grow multiple pechay plants in one container, opt for a pot that’s at least 12 inches deep and wide.
* Material Considerations: Pots come in various materials, each with its own pros and cons:
* Terracotta: Terracotta pots are porous, which means they allow air and moisture to pass through the walls. This can be beneficial for drainage, but it also means that the soil will dry out more quickly.
* Plastic: Plastic pots are lightweight, inexpensive, and retain moisture well. However, they can become brittle and crack over time, especially if exposed to direct sunlight.
* Ceramic:
Conclusion
So, there you have it! Growing your own pechay in a pot is not only achievable, but it’s also incredibly rewarding. From the satisfaction of nurturing a plant from seed to harvest, to the unparalleled freshness of homegrown greens, this DIY project is a must-try for any gardening enthusiast, regardless of experience level. Forget those wilted, overpriced vegetables at the supermarket; with a little effort and our simple guide, you can enjoy crisp, delicious pechay right from your own balcony or patio.
The beauty of this method lies in its adaptability. Feel free to experiment with different pot sizes to see what works best for your space and desired yield. Consider companion planting – basil, carrots, and radishes are known to thrive alongside pechay, potentially enhancing its growth and flavor while deterring pests. You can also explore different varieties of pechay, from the classic white stem to the more vibrant green types, to add variety to your harvests. For those in hotter climates, providing afternoon shade can prevent bolting and ensure a longer harvest period. And if you’re feeling adventurous, try succession planting – sowing new seeds every few weeks – to enjoy a continuous supply of fresh pechay throughout the growing season.
The key takeaway here is that growing pechay in a pot is a fantastic way to embrace sustainable living, connect with nature, and enjoy fresh, healthy food. It’s a project that’s both educational and therapeutic, offering a welcome respite from the stresses of daily life. Plus, it’s a great conversation starter! Imagine serving a stir-fry made with pechay you grew yourself – your friends and family will be impressed.
We truly believe that anyone can successfully grow pechay in a pot, even with limited space or gardening experience. The steps are straightforward, the materials are readily available, and the rewards are immeasurable. So, what are you waiting for? Grab a pot, some soil, and some pechay seeds, and get started today!
Don’t forget to document your journey and share your experiences with us! We’d love to see your progress, hear about your successes (and even your challenges), and learn any tips or tricks you discover along the way. Share your photos and stories on social media using #HomegrownPechay or tag us in your posts. Let’s create a community of passionate gardeners, all enjoying the delicious bounty of homegrown pechay. We are confident that you will find that growing **pechay in a pot** is a simple and rewarding experience. Happy gardening!
Frequently Asked Questions (FAQ)
What is the best time of year to plant pechay in a pot?
Pechay thrives in cooler weather, so the best time to plant is during the early spring or late summer/early fall. Avoid planting during the hottest months of summer, as high temperatures can cause the plants to bolt (go to seed prematurely), resulting in bitter-tasting leaves. If you live in a region with mild winters, you may be able to grow pechay year-round. Consider your local climate and adjust your planting schedule accordingly.
What size pot is ideal for growing pechay?
A pot that is at least 6-8 inches deep and 8-10 inches in diameter is generally sufficient for growing one or two pechay plants. If you plan to grow multiple plants in the same pot, choose a larger container to provide adequate space for root development. A rectangular planter box can also be a good option for growing several pechay plants in a row. Ensure the pot has drainage holes to prevent waterlogging.
What type of soil should I use for growing pechay in a pot?
Pechay prefers well-draining, fertile soil that is rich in organic matter. A good potting mix specifically formulated for vegetables is ideal. You can also amend regular potting soil with compost or well-rotted manure to improve its fertility and drainage. Avoid using garden soil directly in pots, as it can become compacted and may not drain well.
How often should I water my pechay plants?
Pechay needs consistent moisture to thrive, so water your plants regularly, especially during hot or dry weather. Check the soil moisture level daily and water when the top inch of soil feels dry to the touch. Avoid overwatering, as this can lead to root rot. Water deeply, ensuring that the water reaches the roots.
How much sunlight does pechay need?
Pechay prefers partial shade, especially during the hottest part of the day. Aim for at least 4-6 hours of sunlight per day. If you live in a hot climate, provide afternoon shade to prevent the leaves from scorching. A location that receives morning sun and afternoon shade is ideal.
What are some common pests and diseases that affect pechay?
Common pests that can affect pechay include aphids, cabbage worms, and slugs. Regularly inspect your plants for signs of infestation and take appropriate action if necessary. You can use insecticidal soap or neem oil to control aphids and cabbage worms. Handpicking slugs is also an effective method. Diseases that can affect pechay include downy mildew and damping-off. Ensure good air circulation and avoid overwatering to prevent these diseases.
How do I harvest pechay?
You can harvest pechay when the leaves are about 6-8 inches long. You can either harvest the entire plant at once or harvest individual leaves as needed. To harvest the entire plant, simply cut it off at the base. To harvest individual leaves, start with the outer leaves and work your way inwards. Regular harvesting will encourage the plant to produce more leaves.
How long does it take for pechay to mature?
Pechay typically matures in about 45-50 days from planting. However, the exact time will depend on the variety of pechay, the growing conditions, and the time of year. You can start harvesting leaves as soon as they are large enough to eat, even if the plant has not fully matured.
Can I grow pechay indoors?
Yes, you can grow pechay indoors, but you will need to provide adequate light. Place the pot near a sunny window or use grow lights to supplement the natural light. Ensure that the plants receive at least 6-8 hours of light per day. Also, maintain a consistent temperature and humidity level.
How can I prevent pechay from bolting?
Bolting is when a plant prematurely flowers and goes to seed, often resulting in bitter-tasting leaves. To prevent bolting, avoid planting pechay during the hottest months of summer. Provide afternoon shade to protect the plants from excessive heat. Water regularly to keep the soil consistently moist. Choose bolt-resistant varieties of pechay.
Leave a Comment