

Grow Pechay in Pots? Absolutely! Imagine stepping outside your door and harvesting fresh, crisp pechay for your dinner, all grown with your own two hands. It’s not just a dream; it’s an achievable reality, even if you don’t have a sprawling garden. This DIY guide is your ticket to a bountiful harvest, right on your patio or balcony!
Pechay, also known as Bok Choy, has been a staple in Asian cuisine for centuries, gracing tables with its mild, slightly sweet flavor and nutritional punch. From stir-fries to soups, this leafy green is incredibly versatile. But did you know you can easily cultivate this culinary gem at home, regardless of your gardening experience?
In today’s fast-paced world, knowing where your food comes from is more important than ever. Growing your own pechay in pots not only guarantees fresh, organic produce but also offers a therapeutic escape from the daily grind. Plus, it’s a fantastic way to reduce your carbon footprint and connect with nature. I’m going to show you some simple, effective tricks and hacks that will have you harvesting your own delicious pechay in no time. Let’s get started and grow pechay in pots like a pro!
Grow Your Own Delicious Pechay in Pots: A Beginner’s Guide
Hey there, fellow gardening enthusiasts! I’m so excited to share my experience growing pechay (also known as bok choy) in pots. It’s surprisingly easy, even if you’re a complete beginner like I was. Fresh, homegrown pechay is incredibly rewarding, and trust me, the taste is far superior to anything you’ll find in the supermarket. So, let’s dive in and get our hands dirty!
Choosing the Right Pot and Soil
Before we even think about seeds, we need to set the stage for success. The right pot and soil are crucial for healthy pechay growth.
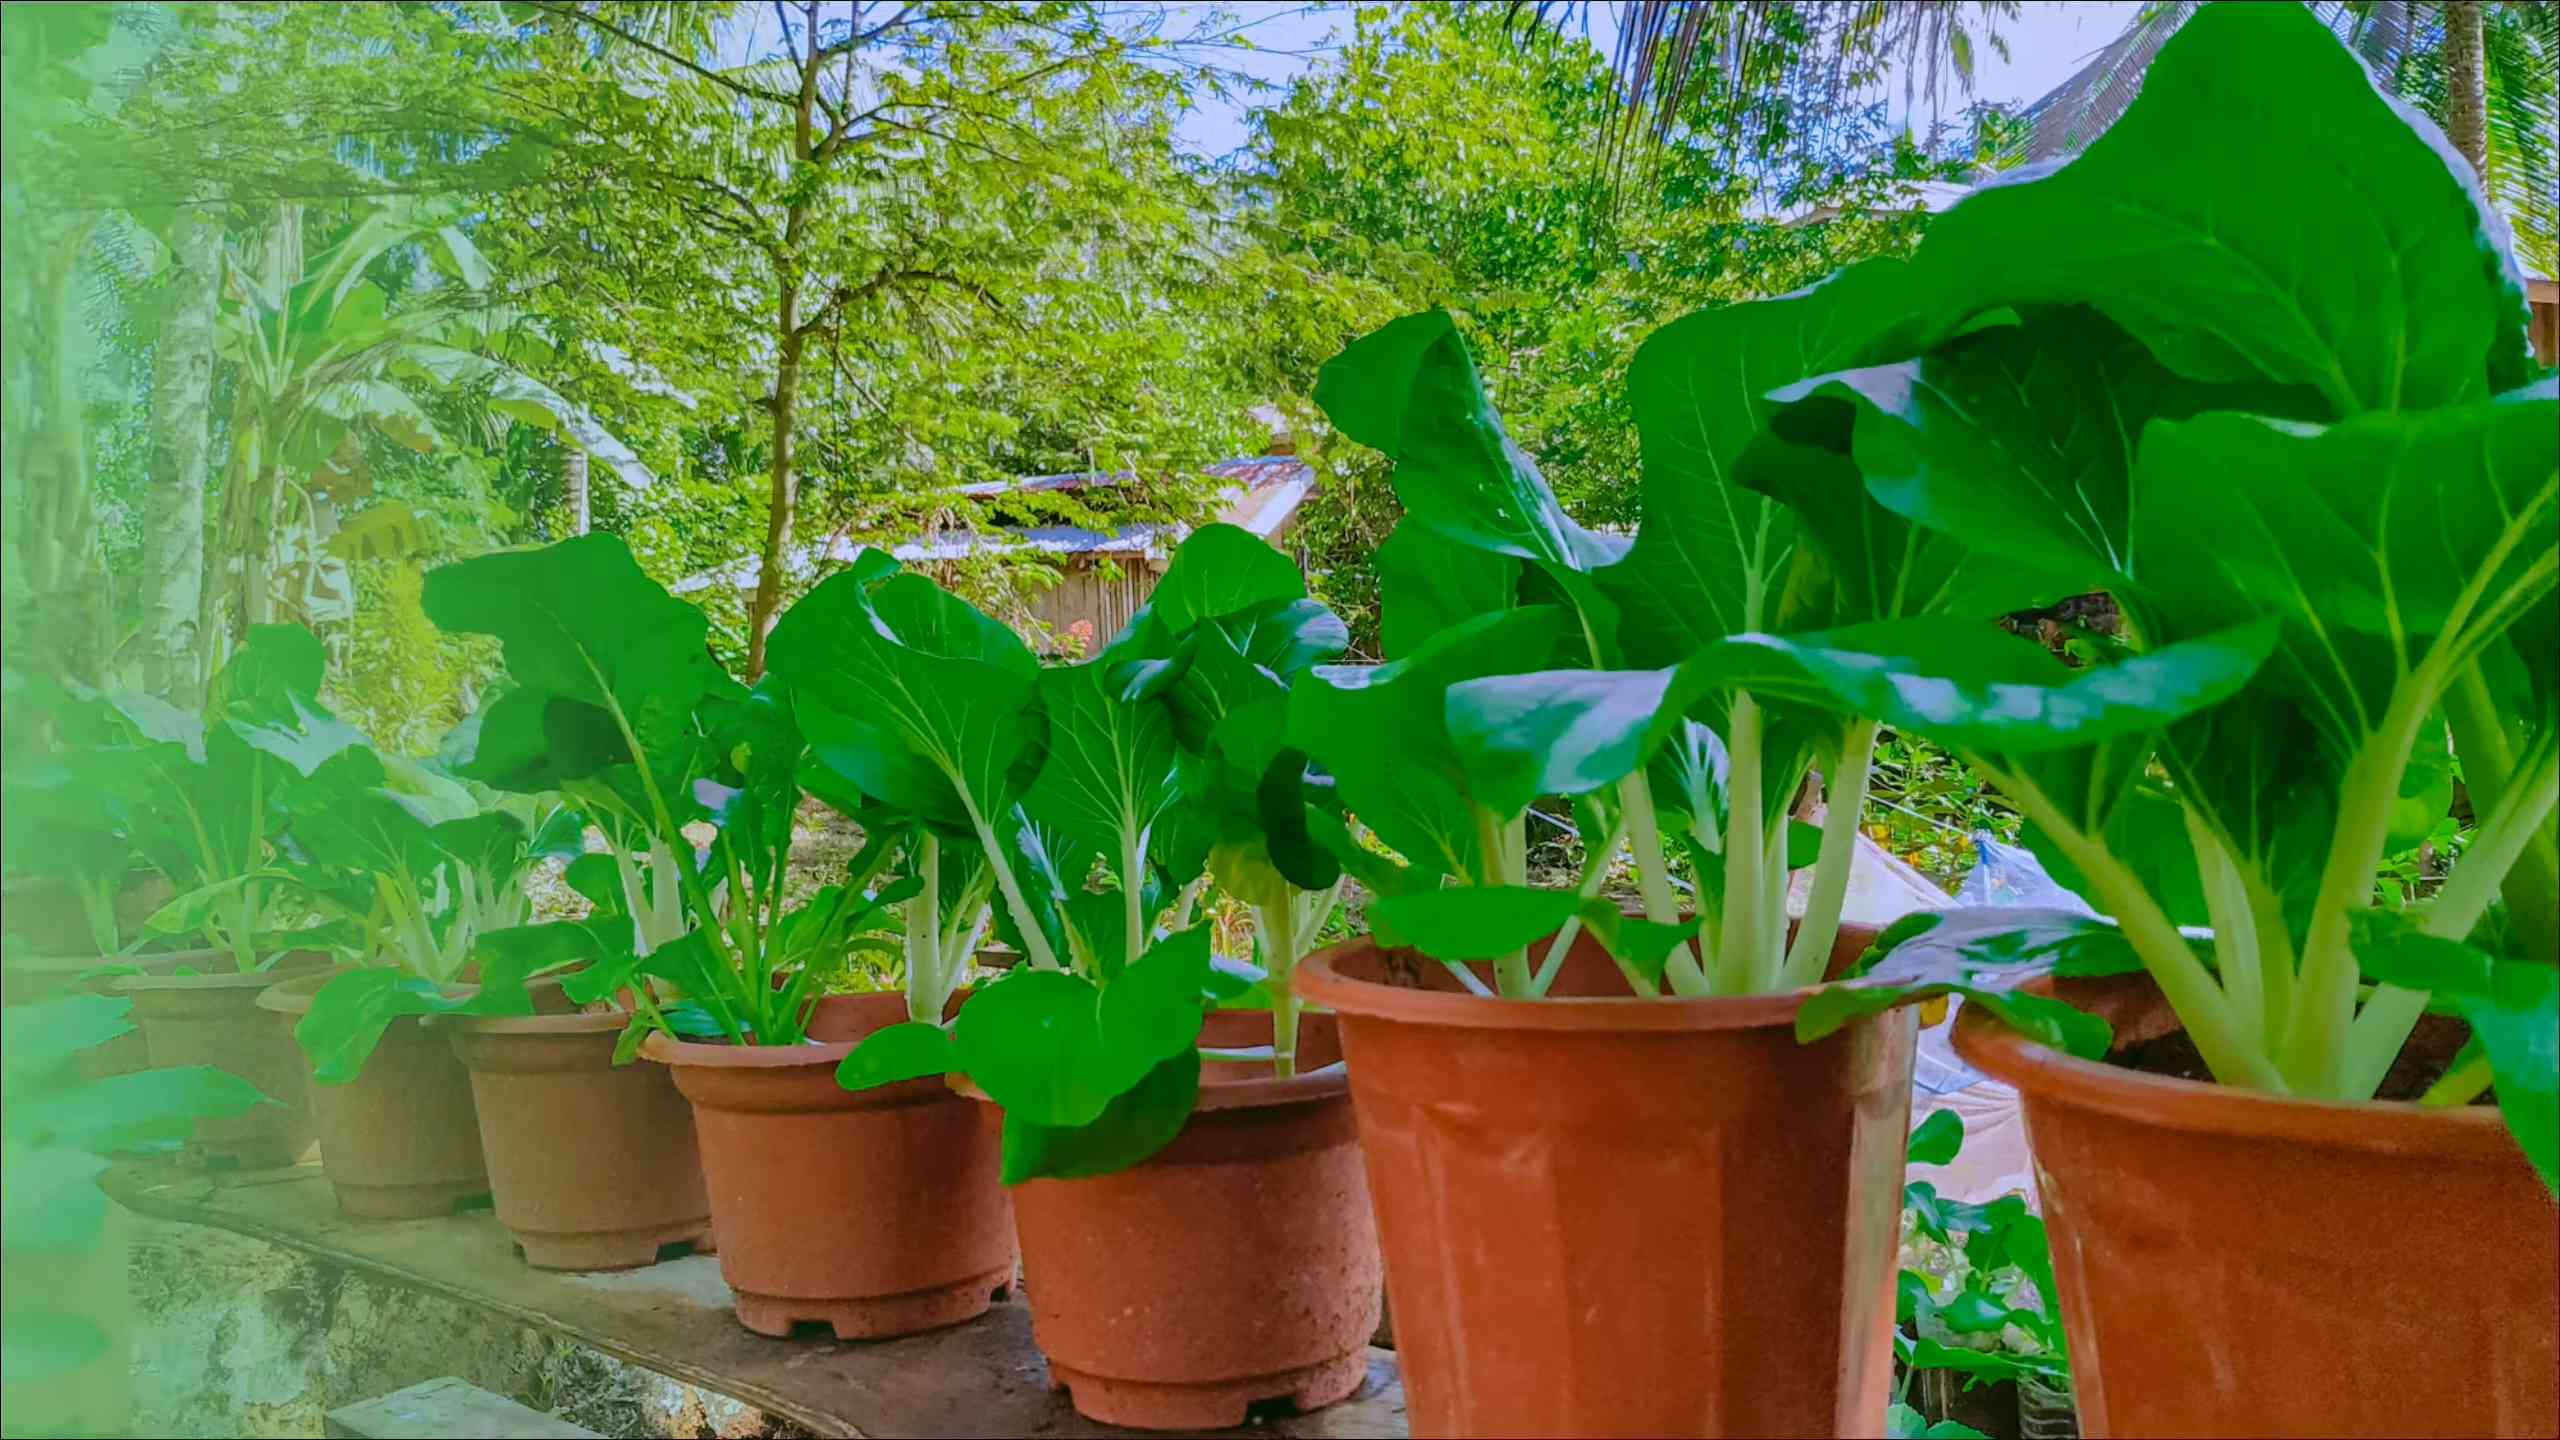
* Pot Size: Pechay doesn’t need a huge pot, but it does need enough space for its roots to develop. I recommend using pots that are at least 6-8 inches deep and 6-8 inches in diameter. You can also use larger containers and plant multiple pechay plants together, spacing them about 6 inches apart.
* Drainage: This is super important! Make sure your pot has drainage holes at the bottom. Pechay hates sitting in soggy soil, which can lead to root rot.
* Soil: Pechay thrives in well-draining, nutrient-rich soil. I’ve had great success with a mix of:
* Potting mix (this provides good drainage)
* Compost (adds nutrients and improves soil structure)
* Perlite or vermiculite (improves drainage and aeration)
You can buy pre-mixed potting soil, but I prefer to make my own so I can control the ingredients. A good ratio is 2 parts potting mix, 1 part compost, and 1 part perlite/vermiculite.
Planting Your Pechay Seeds
Now for the fun part – planting!
1. Prepare the Soil: Fill your pot with your chosen soil mix, leaving about an inch of space at the top. Gently pat the soil down to remove any large air pockets.
2. Sowing the Seeds: Pechay seeds are tiny, so be careful not to plant them too deep. I usually sow them about ¼ inch deep. You can either sprinkle a few seeds over the surface of the soil or plant them individually. If you’re planting multiple seeds in one pot, space them about an inch apart.
3. Cover the Seeds: Lightly cover the seeds with soil.
4. Water Gently: Use a watering can with a gentle rose attachment or a spray bottle to water the soil. You want to moisten the soil without disturbing the seeds.
5. Placement: Place your pot in a location that receives at least 4-6 hours of sunlight per day. Pechay loves sunshine!
6. Keep it Moist: Keep the soil consistently moist, but not waterlogged. Check the soil moisture daily and water when the top inch feels dry.
Caring for Your Growing Pechay
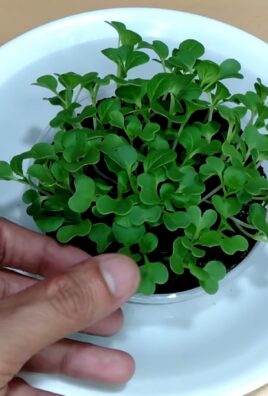
Once your seeds have sprouted (usually within 5-7 days), it’s time to provide them with the care they need to flourish.
1. Thinning: If you planted multiple seeds in one pot, you’ll need to thin them out once they have a few true leaves (the leaves that look like miniature pechay leaves). Choose the strongest seedlings and gently remove the weaker ones. This will give the remaining plants enough space to grow.
2. Watering: Continue to water your pechay regularly, keeping the soil consistently moist. Avoid overwatering, as this can lead to root rot. I usually water in the morning so the leaves have time to dry before nightfall.
3. Fertilizing: Pechay is a leafy green, so it benefits from regular fertilization. I like to use a liquid fertilizer that’s high in nitrogen. You can also use compost tea or fish emulsion. Follow the instructions on the fertilizer packaging for application rates. I usually fertilize every 2-3 weeks.
4. Pest Control: Keep an eye out for pests like aphids, slugs, and snails. These little critters can munch on your pechay leaves.
* Aphids: A strong spray of water can often dislodge aphids. You can also use insecticidal soap.
* Slugs and Snails: Handpicking them off your plants is the most effective method. You can also use slug bait or create barriers around your pots using copper tape or diatomaceous earth.
5. Weed Control: Keep your pots free of weeds. Weeds compete with your pechay for nutrients and water. Hand-pulling weeds is the easiest way to get rid of them.
6. Sunlight: Ensure your pechay continues to receive adequate sunlight. If you live in a very hot climate, you may need to provide some afternoon shade to prevent the leaves from scorching.
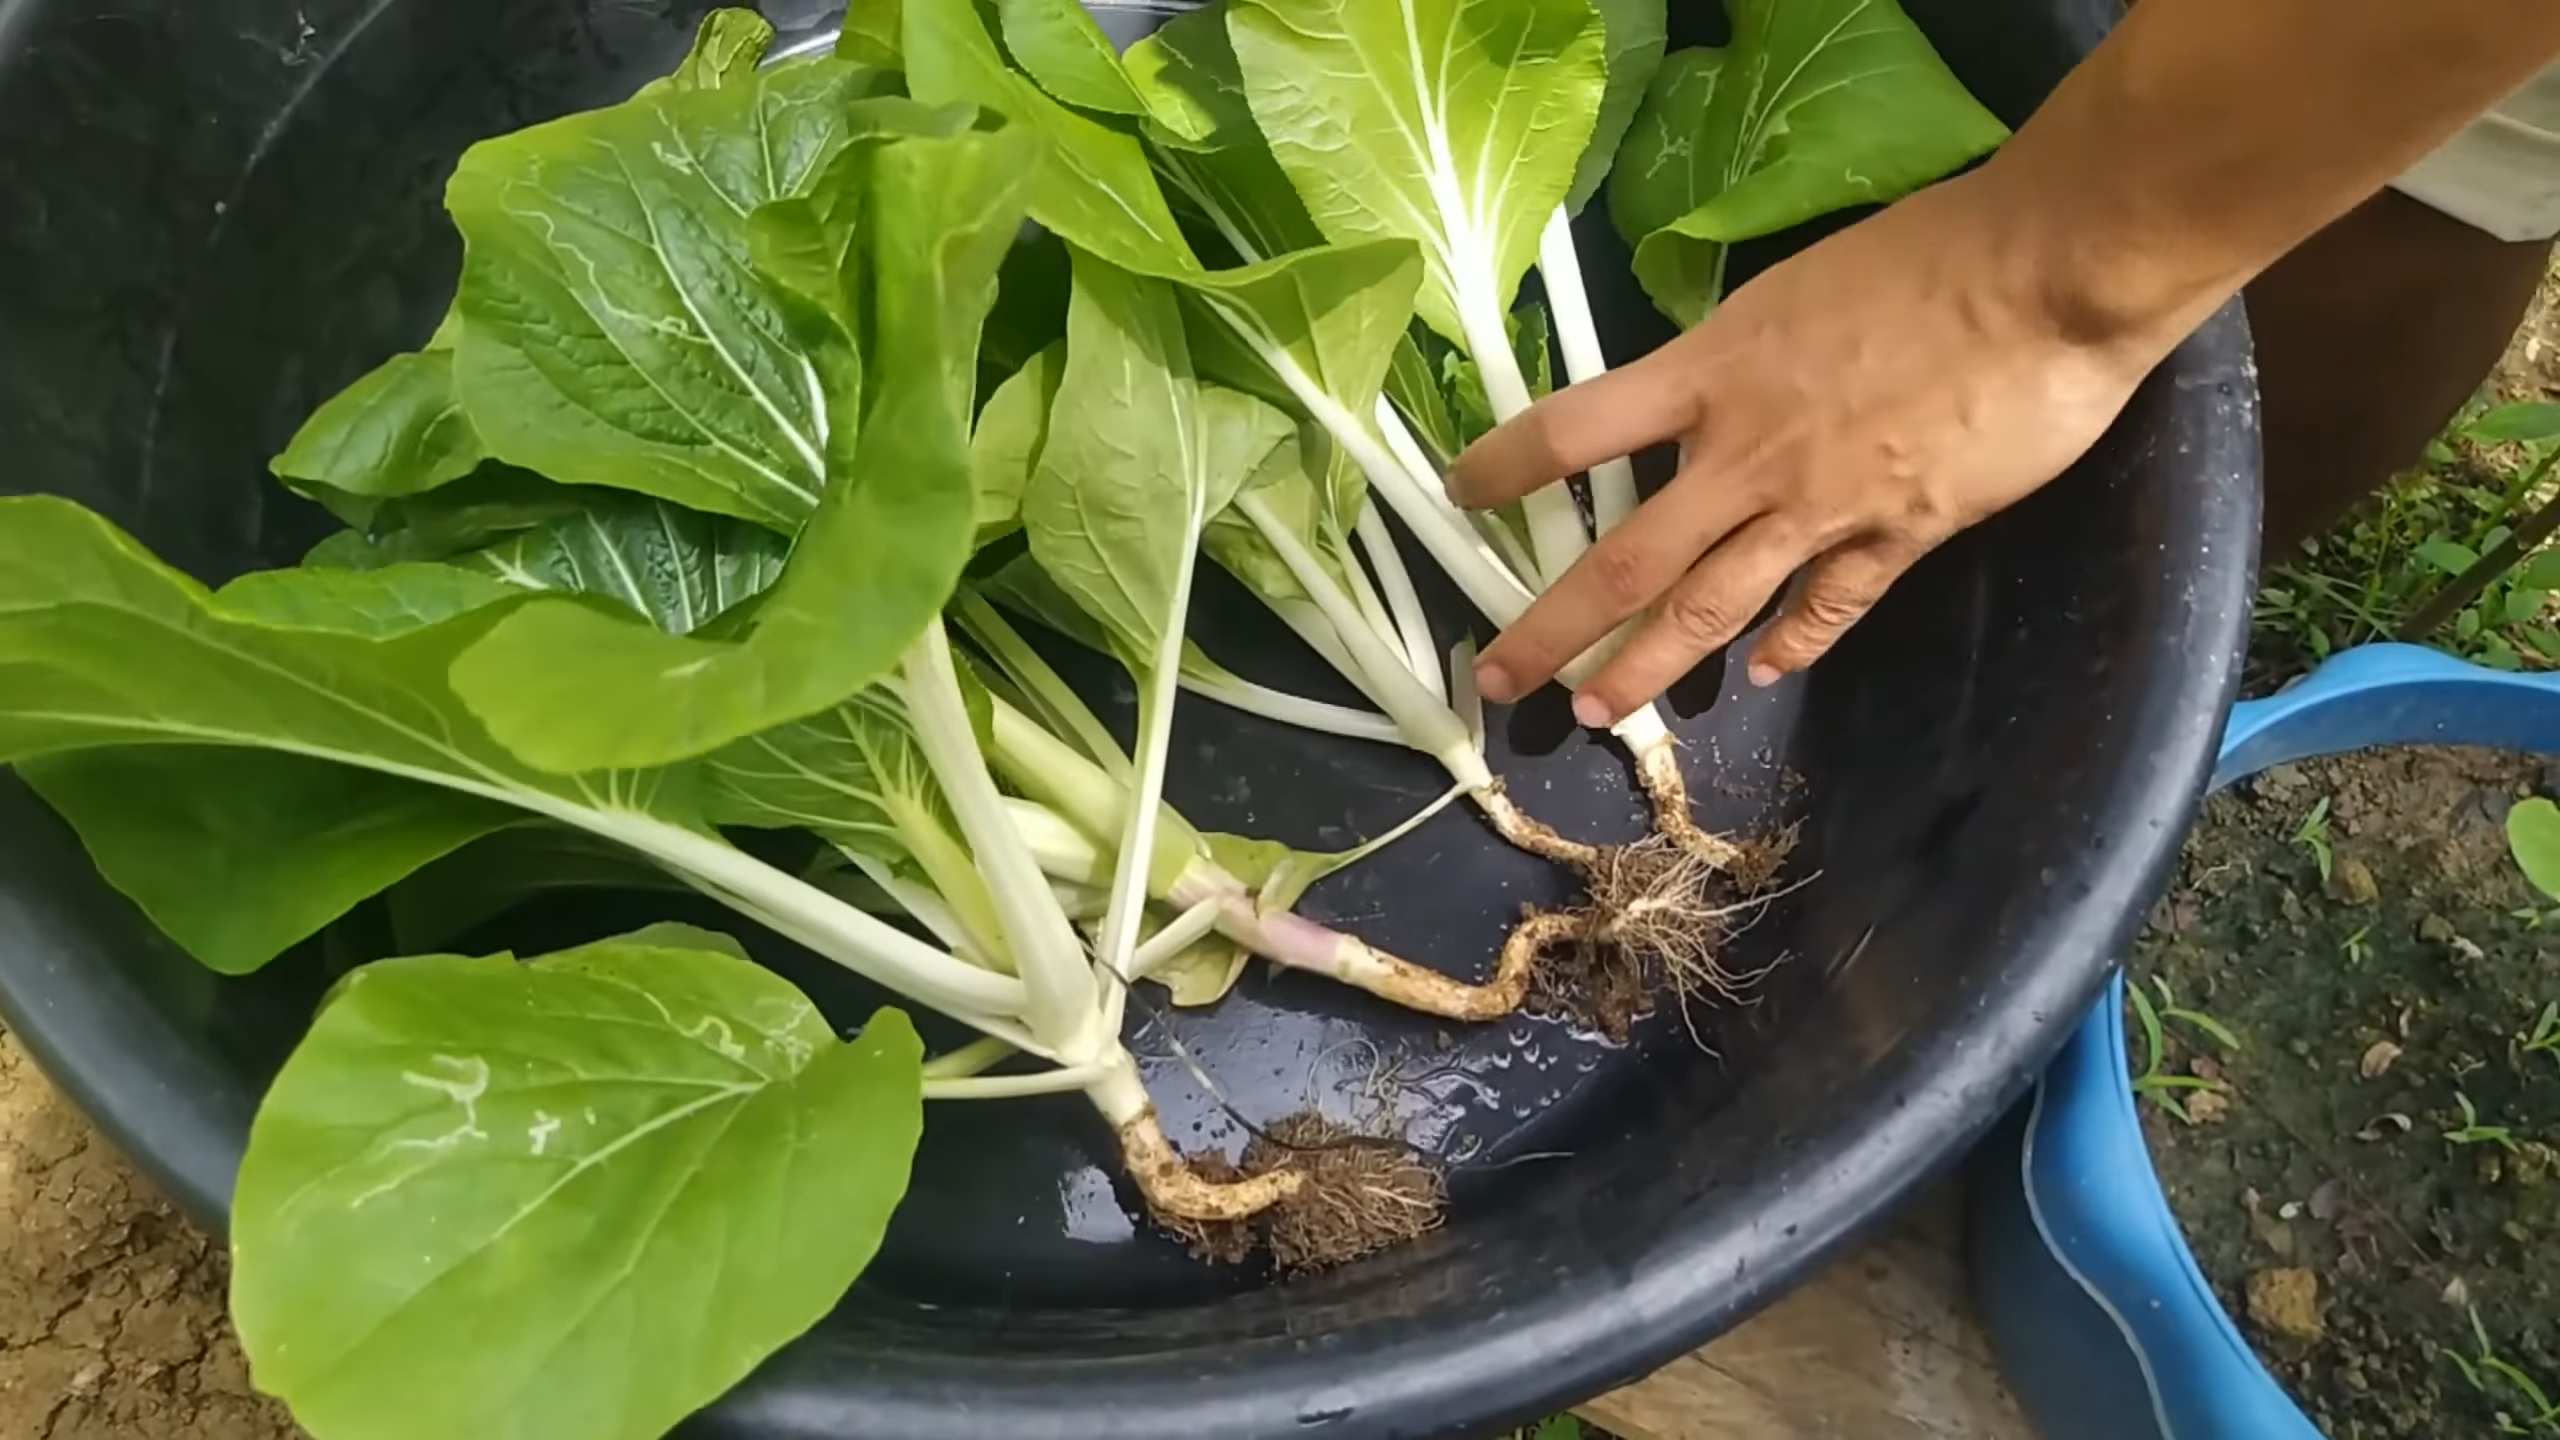
Harvesting Your Pechay
The best part! You can start harvesting your pechay when the leaves are about 6-8 inches long. This usually takes about 45-60 days from planting.
1. Harvesting Individual Leaves: You can harvest individual leaves as needed, starting with the outer leaves. This allows the inner leaves to continue growing.
2. Harvesting the Whole Plant: If you want to harvest the entire plant, simply cut it off at the base.
3. Timing: Harvest in the morning when the leaves are crisp and fresh.
4. Storage: Store your harvested pechay in the refrigerator in a plastic bag. It will keep for several days.
Troubleshooting Common Problems
Even with the best care, you might encounter a few problems along the way. Here are some common issues and how to address them:
* Yellowing Leaves: This can be caused by overwatering, underwatering, nutrient deficiencies, or pests. Check the soil moisture, fertilize your plants, and inspect them for pests.
* Stunted Growth: This can be caused by poor soil, lack of sunlight, or pests. Make sure your soil is well-draining and nutrient-rich, provide adequate sunlight, and control pests.
* Bolting: Bolting is when the plant prematurely flowers. This is usually caused by hot weather or stress. If your pechay starts to bolt, harvest it immediately, as the leaves will become bitter. To prevent bolting, try to grow pechay in cooler weather or provide some afternoon shade.
* Root Rot: This is caused by overwatering and poor drainage. Make sure your pot has drainage holes and avoid overwatering. If you suspect root rot, you can try transplanting your pechay into fresh soil.
Choosing Pechay Varieties
There are several different varieties of pechay to choose from. Here are a few popular options:
* Shanghai Green: This variety has light green stems and leaves. It’s known for its mild flavor and tender texture.
* Mei Qing Choi: This variety has spoon-shaped leaves and a slightly sweeter flavor.
* Joi Choi: This variety is a hybrid that’s known for its fast growth and resistance to bolting.
* White Stem Bok Choy: This is the most common type, with dark green leaves and white stems.
I personally love Shanghai Green for its delicate flavor, but feel free to experiment and find your favorite!
Extending Your Harvest
Want to enjoy fresh pechay for longer? Here are a few tips:
* Succession Planting: Sow new seeds every 2-3 weeks to ensure a continuous harvest.
* Cold Frames: Use a cold frame to protect your pechay from frost in the fall and winter.
* Indoor Growing: Grow pechay indoors under grow lights during the winter months.
Final Thoughts
Growing pechay in pots is a fun and rewarding experience. With a little bit of care and attention, you can enjoy fresh, homegrown pechay all season long. Don’t be afraid to experiment and try different varieties. Happy gardening! I hope this guide helps you on your pechay-growing journey. Let me know if you have any questions!
Conclusion
So, there you have it! Growing your own pechay in pots is not only achievable, but it’s also incredibly rewarding. We’ve walked you through the simple steps, from selecting the right pot and soil to nurturing your pechay plants until they’re ready for harvest. But why should you bother with this DIY project?
Firstly, the taste! Freshly harvested pechay from your own garden is simply unmatched. The vibrant, slightly peppery flavor is far superior to anything you’ll find in the supermarket. Imagine adding that burst of freshness to your stir-fries, soups, or salads. You’ll be amazed at the difference.
Secondly, it’s a fantastic way to connect with nature, even if you only have a small balcony or patio. Tending to your pechay plants can be a therapeutic and calming experience, offering a welcome break from the hustle and bustle of daily life. Plus, you’ll have the satisfaction of knowing exactly where your food comes from and that it’s free from harmful pesticides.
Thirdly, growing pechay in pots is incredibly space-efficient. Even if you live in an apartment with limited outdoor space, you can still enjoy the benefits of homegrown vegetables. A few well-placed pots can provide you with a steady supply of fresh pechay throughout the growing season.
This DIY pechay growing method is a must-try for anyone looking to add fresh, healthy greens to their diet, connect with nature, and enjoy the satisfaction of growing their own food.
Now, let’s talk about variations. While we’ve focused on the basic method, there are plenty of ways to customize your pechay growing experience. For example, you could experiment with different varieties of pechay, such as the white stem or green stem varieties, to see which one you prefer. You could also try companion planting, growing herbs like basil or mint alongside your pechay to deter pests and enhance flavor. Another option is to use different types of fertilizer, such as compost tea or fish emulsion, to provide your plants with the nutrients they need to thrive.
Don’t be afraid to experiment and find what works best for you. The beauty of gardening is that there’s always something new to learn and discover.
We’re confident that you’ll find growing pechay in pots to be a fun, rewarding, and delicious experience. So, grab your pots, soil, and seeds, and get started today! And once you’ve harvested your first crop, be sure to share your experience with us in the comments below. We’d love to hear your tips, tricks, and success stories. Happy gardening!
Frequently Asked Questions (FAQs)
What is the best type of pot to use for growing pechay?
The ideal pot for growing pechay should be at least 6-8 inches deep and wide. This provides enough space for the roots to develop properly. Terracotta pots are a good option because they allow for good drainage and aeration. Plastic pots are also suitable, but make sure they have drainage holes to prevent waterlogging. Fabric pots are another excellent choice, as they promote healthy root growth and prevent the roots from becoming root-bound. Ultimately, the best pot is one that fits your space and budget while providing adequate drainage and room for the pechay to grow.
What kind of soil should I use for growing pechay in pots?
Pechay thrives in well-draining, fertile soil that is rich in organic matter. A good potting mix specifically formulated for vegetables is an excellent choice. You can also create your own mix by combining equal parts of garden soil, compost, and perlite or vermiculite. The compost will provide essential nutrients, while the perlite or vermiculite will improve drainage and aeration. Avoid using heavy clay soil, as it can become waterlogged and suffocate the roots. Before planting, amend the soil with a slow-release fertilizer to provide a steady supply of nutrients throughout the growing season.
How often should I water my pechay plants?
Pechay plants need consistent moisture to thrive, but they don’t like to be waterlogged. Water your plants deeply whenever the top inch of soil feels dry to the touch. The frequency of watering will depend on the weather conditions, the type of pot you’re using, and the size of your plants. In hot, dry weather, you may need to water daily, while in cooler, wetter weather, you may only need to water every few days. Check the soil moisture regularly and adjust your watering schedule accordingly. Avoid watering the leaves directly, as this can promote fungal diseases. Instead, water at the base of the plant.
How much sunlight do pechay plants need?
Pechay plants need at least 4-6 hours of direct sunlight per day to grow well. However, they can also tolerate partial shade, especially in hot climates. If you live in an area with intense sunlight, consider providing some afternoon shade to prevent the leaves from scorching. If you’re growing pechay indoors, place the pots near a sunny window or use grow lights to supplement the natural light. Insufficient sunlight can result in leggy growth and reduced yields.
What are some common pests and diseases that affect pechay plants?
Pechay plants can be susceptible to various pests and diseases, including aphids, cabbage worms, slugs, snails, and fungal diseases like downy mildew and powdery mildew. To prevent pest and disease problems, inspect your plants regularly and take action at the first sign of trouble. You can control aphids and cabbage worms by handpicking them off the plants or spraying them with insecticidal soap or neem oil. Slugs and snails can be controlled by setting out beer traps or using slug pellets. To prevent fungal diseases, ensure good air circulation around the plants and avoid overwatering. If you notice any signs of disease, remove the affected leaves immediately and treat the plants with a fungicide.
How long does it take for pechay to mature?
Pechay is a fast-growing vegetable that typically matures in 45-50 days from planting. However, the exact time will depend on the variety of pechay you’re growing, the growing conditions, and the size of the plants you want to harvest. You can start harvesting the outer leaves when the plants are about 6 inches tall, or you can wait until the entire plant is mature. To harvest, simply cut the leaves at the base of the plant with a sharp knife.
Can I grow pechay indoors?
Yes, you can grow pechay indoors, provided you can provide adequate light and ventilation. Place the pots near a sunny window or use grow lights to supplement the natural light. Ensure good air circulation around the plants to prevent fungal diseases. Water regularly and fertilize as needed. Growing pechay indoors can be a great way to enjoy fresh greens year-round, especially in areas with cold winters.
What are some good companion plants for pechay?
Companion planting can be a great way to improve the health and yield of your pechay plants. Some good companion plants for pechay include basil, mint, rosemary, thyme, and marigolds. Basil and mint can help deter pests, while rosemary and thyme can improve the flavor of the pechay. Marigolds are known for their pest-repelling properties and can also add a splash of color to your garden. Avoid planting pechay near members of the cabbage family, such as broccoli and cauliflower, as they can attract the same pests and diseases.
How do I harvest pechay?
You can harvest pechay by either cutting the entire plant at the base or by harvesting individual outer leaves as needed. If you harvest the entire plant, cut it just above the soil line. If you harvest individual leaves, start with the outer leaves and work your way inwards. This will allow the plant to continue producing new leaves. Harvest pechay in the morning when the leaves are crisp and fresh.
How do I store harvested pechay?
To store harvested pechay, wash the leaves thoroughly and pat them dry. Wrap the leaves in a damp paper towel and place them in a plastic bag or container. Store the pechay in the refrigerator for up to a week. Use the pechay as soon as possible for the best flavor and texture.

Leave a Comment